Viewing entries in
Bread

Grape Focaccia (vegan)

Comment

Grape Focaccia (vegan)

What could be better than a mattress of focaccia painted with glistening peppery olive oil, the occasional crunch of salt crystals, and a soft, pillowy interior that creates an insatiable appetite for more?

Almost nothing, apart from simply another version of a focaccia – this time with a layer of succulent grapes folded into the centre of the dough. Grapes, which burst in your mouth as you bite through the focaccia.

It’s perhaps even more beautiful than the OG focaccia, and tastes sublime on its own, or paired with pecorino and a glass of Vin Santo.

Comment

Cherry & Candied Orange Stollen

Comment

Cherry & Candied Orange Stollen

This recipe is delivered with a warning: this stollen, despite its understated, simple, appearance, is highly addictive. I ate almost an entire stollen in one day and felt quite sorry for myself afterwards (guilt streaked sugar-overload), so arm yourself with friends or a freezer before making it

Comment

Spelt Poppy Seed Bloomer

Comment

Spelt Poppy Seed Bloomer

This bad boy is incredibly tender, with a lovely tanned, crunchy crust. You don’t have to put much effort in to reap the reward, and after one bite you’ll be lusting after the rest of the loaf. Please don’t be put off by the numerous stages – all you need is a patience and time.

Comment

Fluffy Milk Bread

Comment

Fluffy Milk Bread

This is basically a brioche without the effort – all you do is mix everything together, knead a little bit (great for taking out tension), punch it (great for relieving stress), let it rise, then bake and devour.

Comment

Sea Salt & Rosemary Focaccia (vegan)

Comment

Sea Salt & Rosemary Focaccia (vegan)

Vegan Rosemary Sea Salt Focaccia

Here is a recipe for a focaccia that is not a futon i.e. mean, hard and thin. It’s the emperor of mattresses: the dimples are deep, the texture is soft yet springy, and there is no scratchy dryness that a futon focaccia may have but, rather, a balmy olive oil-enriched crumb.

Vegan Rosemary Sea Salt Focaccia

Having had a few scarring experiences with the brittle, mouth-desiccating, hard mats that parade as focacce (even in their Italian heartlands), this recipe is not only sublime but a protest against my negative experiences.

Vegan Rosemary Sea Salt Focaccia

And while I’m singing its virtues, I have to stress that it’s ridiculously easy to make. Bread-making has such a bad press in terms of time, effort and skill required, but it is all a conspiracy to get you to buy the overpriced, chemical–laden, factory produced supermarket types. All you need to do is hang around a bit and the yeast does all the work for you. Total contact time with focaccia is only about 15minutes - the rest of the time is just a matter of rising or baking (or eating).

Vegan Rosemary Sea Salt Focaccia

I make this with spelt which lowers the GI and adds a little nuttiness. You can play around with the toppings: rosemary is traditional, but you can add caramelised onion, parmesan, olives, sun-dried tomatoes, sage…whatever you wish.

I like to make a lot in one go and freeze the loaves sliced, so you can dip into them when you please. But if you want to make fewer, just halve or third the ingredients.

Vegan Rosemary Sea Salt Focaccia

Recipe  - makes 3 loaves (or mattresses)

Ingredients

14g dried active yeast (2 sachets) or 25g fresh yeast

2 tbsp sugar

675ml lukewarm water

4 tbsp olive oil, for the dough + 3 tbsp for topping

1kg white spelt flour (or plain, if not available)

2 ½ tsp normal salt

1 tbsp coarse sea salt

4 sprigs of rosemary


3 x 25cm square cake/bread tins (or tins with the equivalent area), greased with olive oil


Method

1)    If using fresh yeast, cream it together in a large bowl with the sugar until it turns to liquid. Then, stir in the water and oil. If using dried active yeast, mix it with the sugar and water, and let it sit in a warm place for five minutes to activate. Then, stir in the oil.

2)    Into the wet ingredients, stir in the flour and salt –it should form a sticky, craggy mass. If you have a stand mixer, fit it with the dough hook and knead the dough for five minutes. If you are making the bread by hand, pour the dough on to a lightly floured board and knead until smooth and springy, so that it bounces back when pressed.  I like to use the dough hook for most of the kneading, take it out when it's almost done and finish by hand. 

3)    Place dough in a lightly oiled bowl, cover with cling film and allow to rise for about 1 to 1 ½ hours until doubled in size.

4)    Punch down the dough (so. much. fun.) and divide it into three. Stretch each piece of dough in its tin so that it is even in depth and reaches the sides (you may need to do a bit of pummeling to do this). Then, sprinkle over the rosemary and olive oil and dimple the dough with your fingers, pressing almost to the bottom of the tin. Allow to rise for a further 45 minutes to an hour until almost doubled in size. 

5)    Preheat the oven to 200C.  Then, sprinkle the breads with coarse sea salt, and place in the oven to bake for 12-15 minutes, or until deep golden in colour and crunchy on top. Remove from the oven and place on a baking rack to cool. Best eaten on day of baking (which is usually inevitable as testament to their deliciousness). Or place in an air-tight box and freeze for up to 3 months.

Vegan Rosemary Sea Salt Focaccia

HUNGRY FOR MORE?

Comment

Vegan Sesame Jerusalem Bagels

Comment

Vegan Sesame Jerusalem Bagels

fullsizeoutput_2c0f.jpeg
fullsizeoutput_2c2e.jpeg

Do your ears hang low? Well, attached or unattached, furry or fuzzy, chunky or petite, this recipe is an ode to the earlobe.

Specifically, it is a celebration of stretched earlobes, whether those of an 85-year-old glamazon who refuses to compromise on opulence in pursuit of practicality or pain avoidance, and has transformed the once-small piercing pin pricks into gaping chasms by the weight of her bejewelled, solid gold hoops. Or the nonchalant indie who has plugged and gouged and strained their lobes to form human wind tunnels.

fullsizeoutput_2c5e.jpeg
fullsizeoutput_2c52.jpeg

Like stretched lobes, these sesame studded bagels are not your standard chewy round.

They are a rare sight in the UK, only occasionally vaguely mimicked by the odd fougasse dangling in the windows of French bakeries. Though related to those that are more common sighted, Jerusalem bagels are elegantly elongated, less chewy, more fluffy, yet with a crusty exterior (I’m on the topic of bread now, not lobes).  And the Jerusalem bagel is in no way a lesser version – being a rarer breed and a much more fun shape to nibble (yes, still on bagels), I actually prefer them. They are also easier to bake: the absence of the boiling stage means less room for error, and no witch-hunting of wet doughy rounds, bobbing up and down and falling apart in vats of boiling water.

fullsizeoutput_2c42.jpeg
fullsizeoutput_2c35.jpeg
fullsizeoutput_2c21.jpeg

 If you are intimidated by bread-baking, do not be.

These are extremely simple, and though the process from flour to end-product takes a while, they are very undemanding in terms of action – the sesame seed dipping is, in fact, rather satisfying from a pre-school art class perspective.  Feel free to halve the mixture if you want fewer bagels, though they are so delicious and addictive it’s probably not worth it.... Also, do have a play around with ingredients: you could try poppy, flax, sunflower, or nigella seeds, as well as sprinkling the bagels with cheddar cheese or parmesan if you aren’t vegan.

fullsizeoutput_2c02.jpeg
fullsizeoutput_2bf1.jpeg

Makes 20

Ingredients

750ml warmed, unsweetened almond milk (can substitute with oat, or another neutral-flavoured, unsweetened plant-based milk)

21g active dry instant yeast (3 sachets)

60g caster sugar

500g strong white flour (+ extra flour for dusting surfaces)

500g white spelt flour

4 tsp salt

2 tsp baking powder

1 tbsp olive oil


100g white sesame seeds

15g black sesame seeds

4 tbsp boiling water

2 tbsp pomegranate molasses

1 tbsp agave syrup (or honey if you’re not vegan)


3 baking trays lined with baking parchment


Method

1)    In the bowl of a mixer fitted with a dough hook, or in a large stand-alone bowl, stir together warmed milk, yeast and sugar. Pour in all the flour (apart from that to be used for dusting the surface), salt and baking powder and stir to combine into dough.  

2)    If using a mixer, knead the dough for about five minutes on a low speed with a dough hook. If making by hand, pour the dough onto a lightly floured surface, and knead by hand until soft, smooth and springy. It may be slightly sticky, but try to avoid adding too much flour as this will make the bagels dry and tough. Even if I use the dough hook, I take the dough out to knead by hand for the last minute. 

3)    Coat the inside of a bowl with the olive oil, place the dough inside and cover with cling film or a tea towel. Allow to rise in a warm place for about an hour, or until it has doubled in size.

4)    When the dough has risen, punch it down and turn it on to a lightly floured surface. Divide the dough into 20 pieces. You can approximate this by quartering the dough and dividing each quarter into five pieces. Or you can weigh it: each piece should be about 85g. Then gently roll each into a ball. To make the Jerusalem bagel shape, take each ball of dough and press your thumb through the centre to create a hole. Whilst keeping the dough even in diameter, gently stretch the hole into an oval so the bagel is about 11 cm long. Place each back on the floured surface and allow to rest and rise for 15 minutes.

5)    Preheat the oven to 200C. Make the topping by mixing the water, pomegranate molasses and agave/honey in a bowl. Then pour the mixture into a small tray or large flat-based bowl. On another tray, mix together the black and white sesame seeds (or whichever other seeds you are using). Taking each bagel lobe, dip it first (on one side only) into the water molasses mix, then into the sesame, so that one side is coated in sesame seeds. Then place it on the tray lined with baking parchment. If the bagel stretches a bit, that is fine. Repeat with the rest of the bagels, spacing them at least 3 or 4cm apart, and allow them to rest again for a further 10 minutes. 

6)    Place them in the oven to bake for 10-15 minutes until they are deep golden and crusty on the outside. Once baked, transfer the bagels to a baking rack to cool. They are best eaten on the day of baking (and it will be a miracle if they last beyond a day). However, if you want to save them for another time, you can freeze them as soon as they have cooled for up to three months in an airtight container.

fullsizeoutput_2c25.jpeg
fullsizeoutput_2bf7.jpeg

HUNGRY FOR MORE?


Comment

Norwegian Frangipane-Laced Pulla Bread

Comment

Norwegian Frangipane-Laced Pulla Bread

fullsizeoutput_2b67.jpeg

This bread is the love child of a brioche and stollen. The dough is soft, buttery and ridiculously moreish. And the filling is like that marzipan core of stollen except less overpoweringly almondy, lighter and less tooth-achingly sweet (which means you can have more of it, of course). One of my many intolerances is not gluten, nuts or dairy but overpromising. If the title promises a filling, I want that filling, and I want it in abundance. If it says caramel, I want luscious rivers of it; if it’s olives on a pizza, I want at least one for every 2cm squared (NB I am disappointed by this every time - unless I make it myself). And, if it is a frangipane bread, I demand every mouthful to be molten with frangipane.

fullsizeoutput_18ba.jpeg
fullsizeoutput_18a6.jpeg

So, in response, this bread will not fail to meet expectations: not only a show stopper in appearance, it is also ambrosial. I had to make this several times in order to photograph it before it was inhaled by surrounding friends/family.

fullsizeoutput_2b6e.jpeg

If you want to have plain bread, just leave out the frangipane and follow the instructions below. Similarly, if you’re feeling experimental add another filling in place of the frangipanes - think Nutella, marmalade, fruit conserve…

fullsizeoutput_2ba3.jpeg
fullsizeoutput_18b2.jpeg
fullsizeoutput_18aa.jpeg
fullsizeoutput_1894.jpeg
fullsizeoutput_18ad.jpeg


Ingredients (makes 2 loaves)


For the bread 

30g fresh yeast (or 15g dry yeast)

100g caster sugar

250ml lukewarm milk (normal or any non-dairy alternative)

2 large eggs, beaten

1 tsp salt

700g white spelt flour (or plain wheat) + more for kneading

100g unsalted butter, at room temperature


For the frangipane

180g caster sugar

150g unsalted butter, at room temperature

4 eggs

½ tsp salt

250g ground almonds

1 ½ tsp almond extract


2 large baking sheets lined with baking parchment


Method

1)   In the bowl of an electric mixer (or large mixing bowl), cream together fresh yeast and caster sugar until the sugar begins to dissolve and turns the yeast liquid. If using dry yeast, add it into the milk first and allow to sit for five minutes before continuing with step 2.

2)   Pour in lukewarm milk, 3/4 of the beaten eggs (i.e. 1 ½ eggs, keeping the other half aside to paint the bread) and salt, and whisk together. Whisk in 100g grams of the flour to begin to incorporate air.

3)   Add the remaining flour into the mixture and mix together. Once combined, either using a mixer fitted with the dough hook, or on a heavily floured surface knead the dough for about 5 minutes until it is smooth and bounces back when pressed with your thumb. Temperature and humidity can affect the dough texture so you may need to add a touch more flour if it is truly unworkable, though try to keep it to a minimum as too much will make the bread tough and the dough difficult to roll out. I find that using the dough hook initially until combined and then kneading by hand for the last stretch particularly effective. 

4)   Place in a large oiled bowl in a warm spot and cover with a cloth or clingfilm to allow to rise until doubled in size (about 45 minutes to an hour).

5)   At this point, if you wish to make the bread without the frangipane, proceed to step 7a

6)    To make the frangipane, beat together the sugar and butter until light and fluffy. You can do this by hand or in a mixer fitted with the paddle attachment. Beat in the eggs (don’t worry if it looks slightly curdled at this point), then stir in salt, ground almonds and almond extract. It should be a smooth almondy paste. 

7)   Once the dough has risen, punch back down, turn it onto a heavily floured surface 

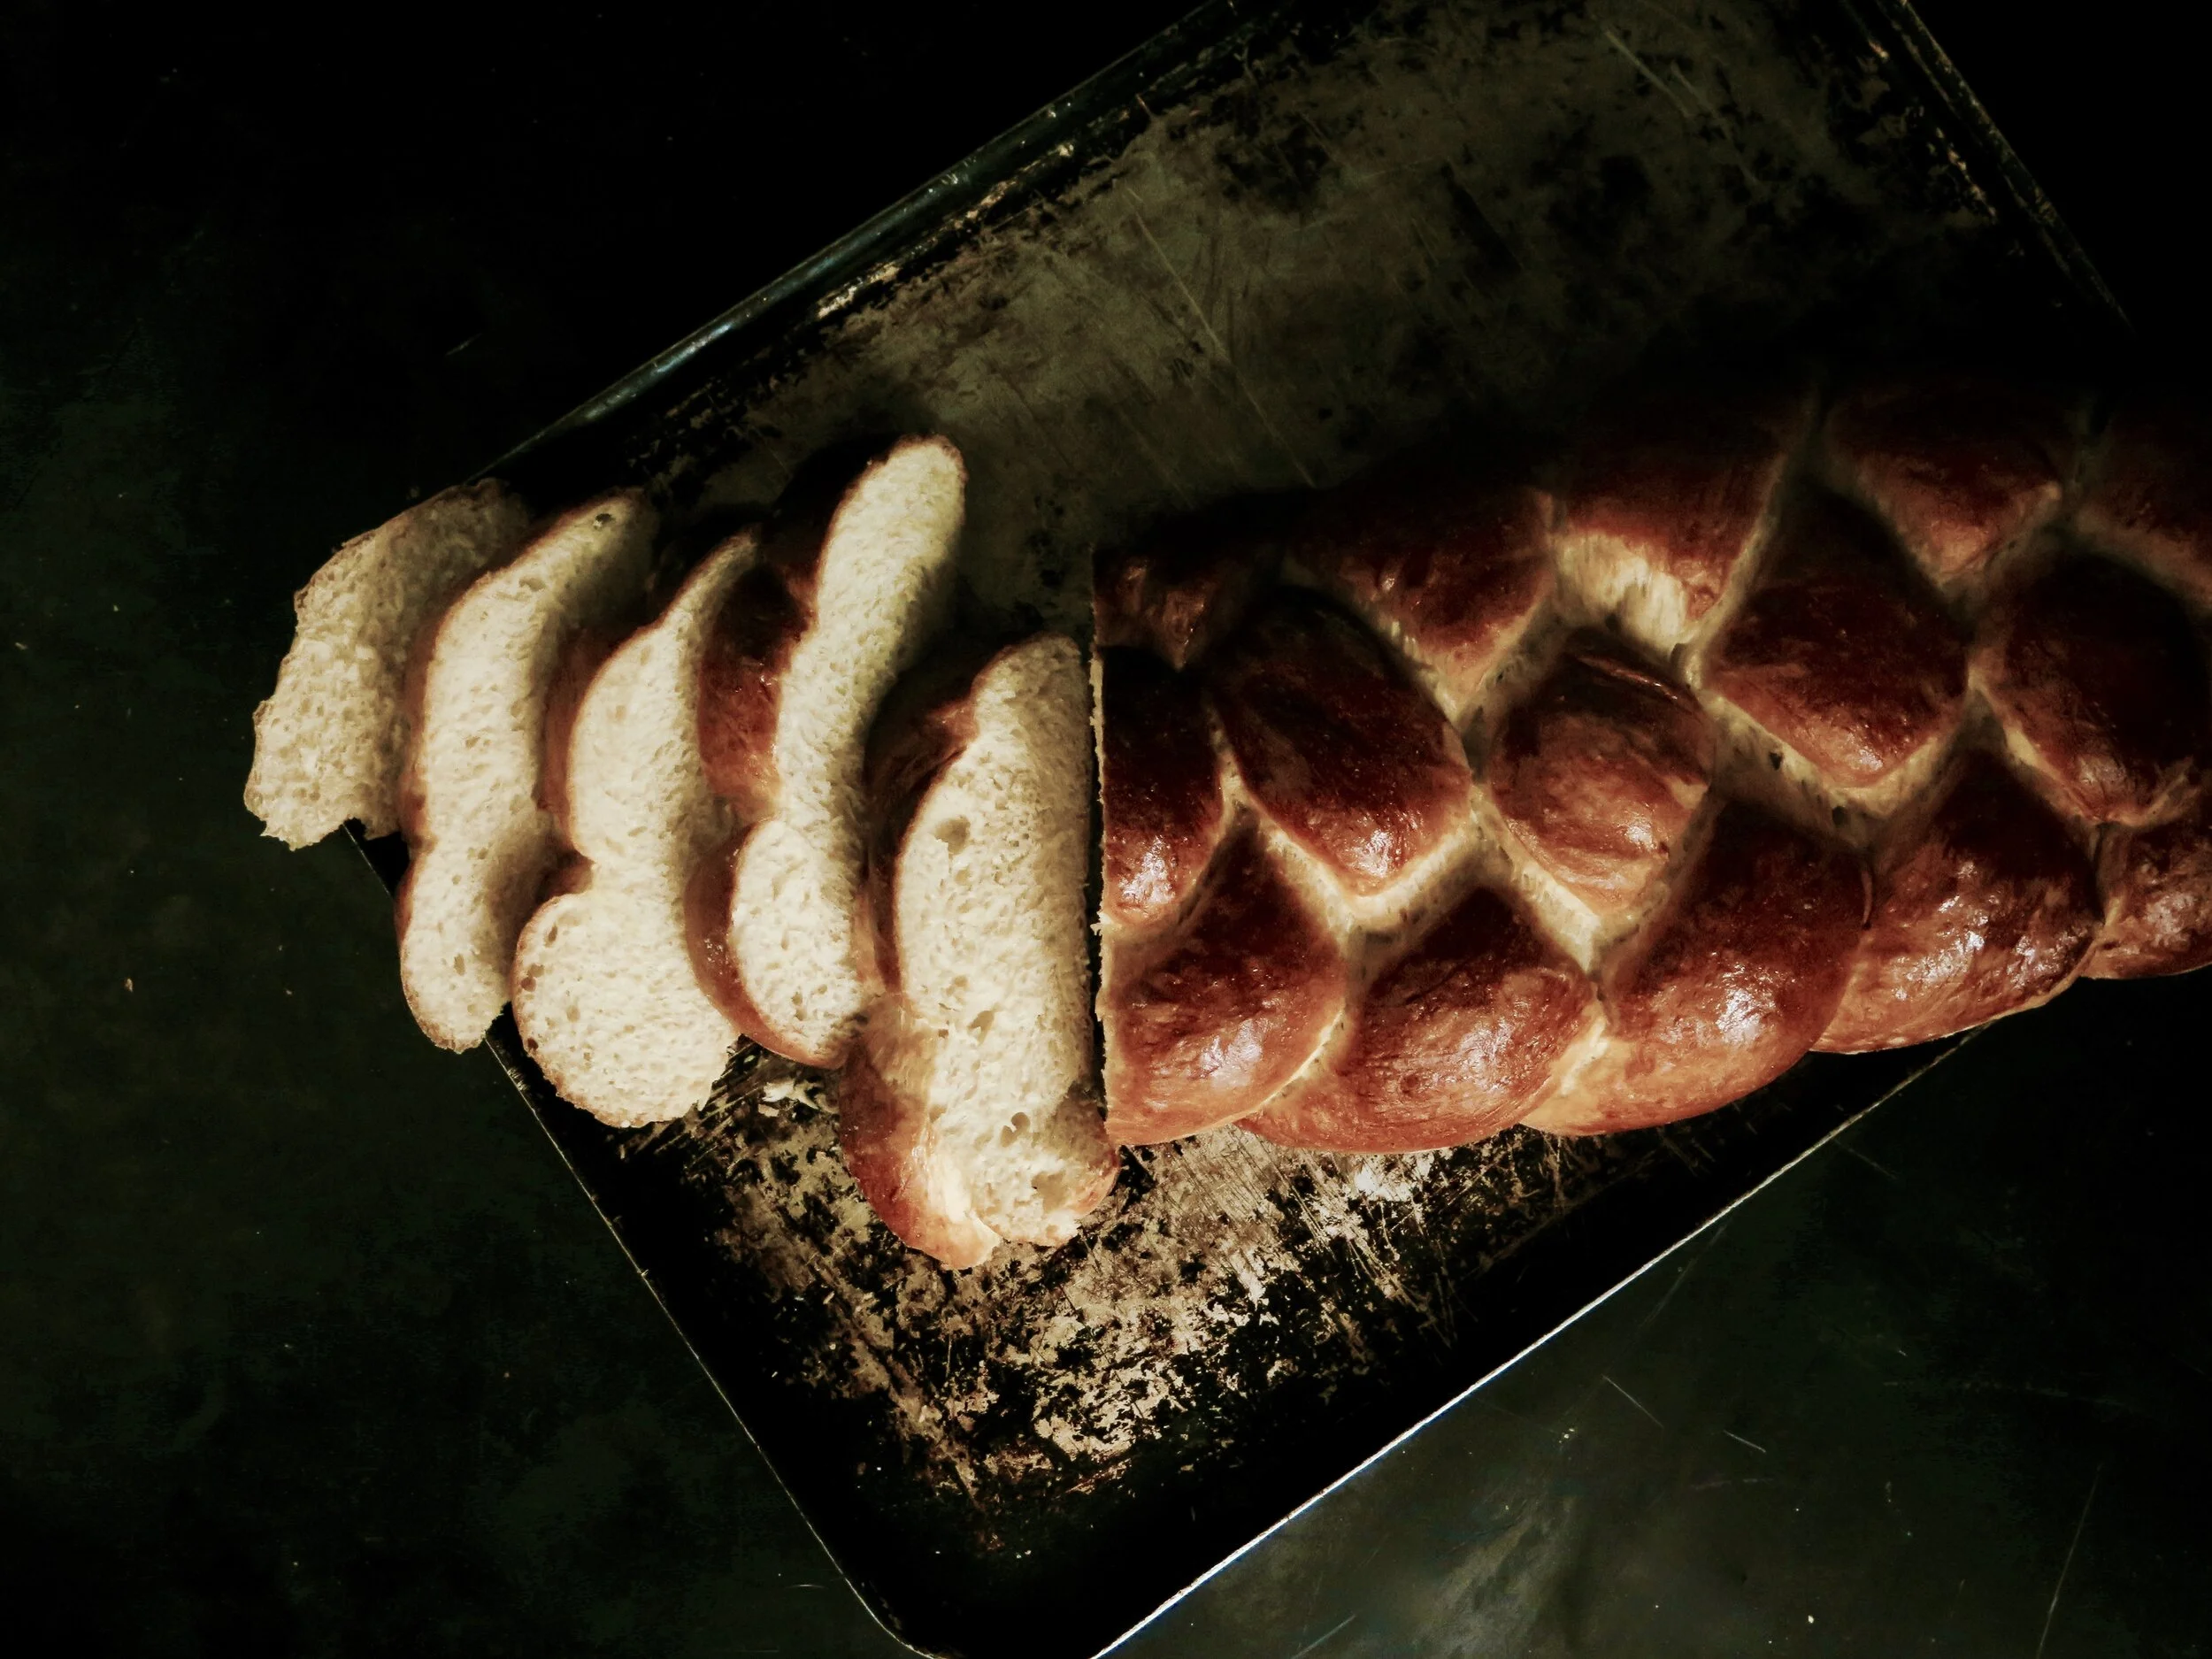
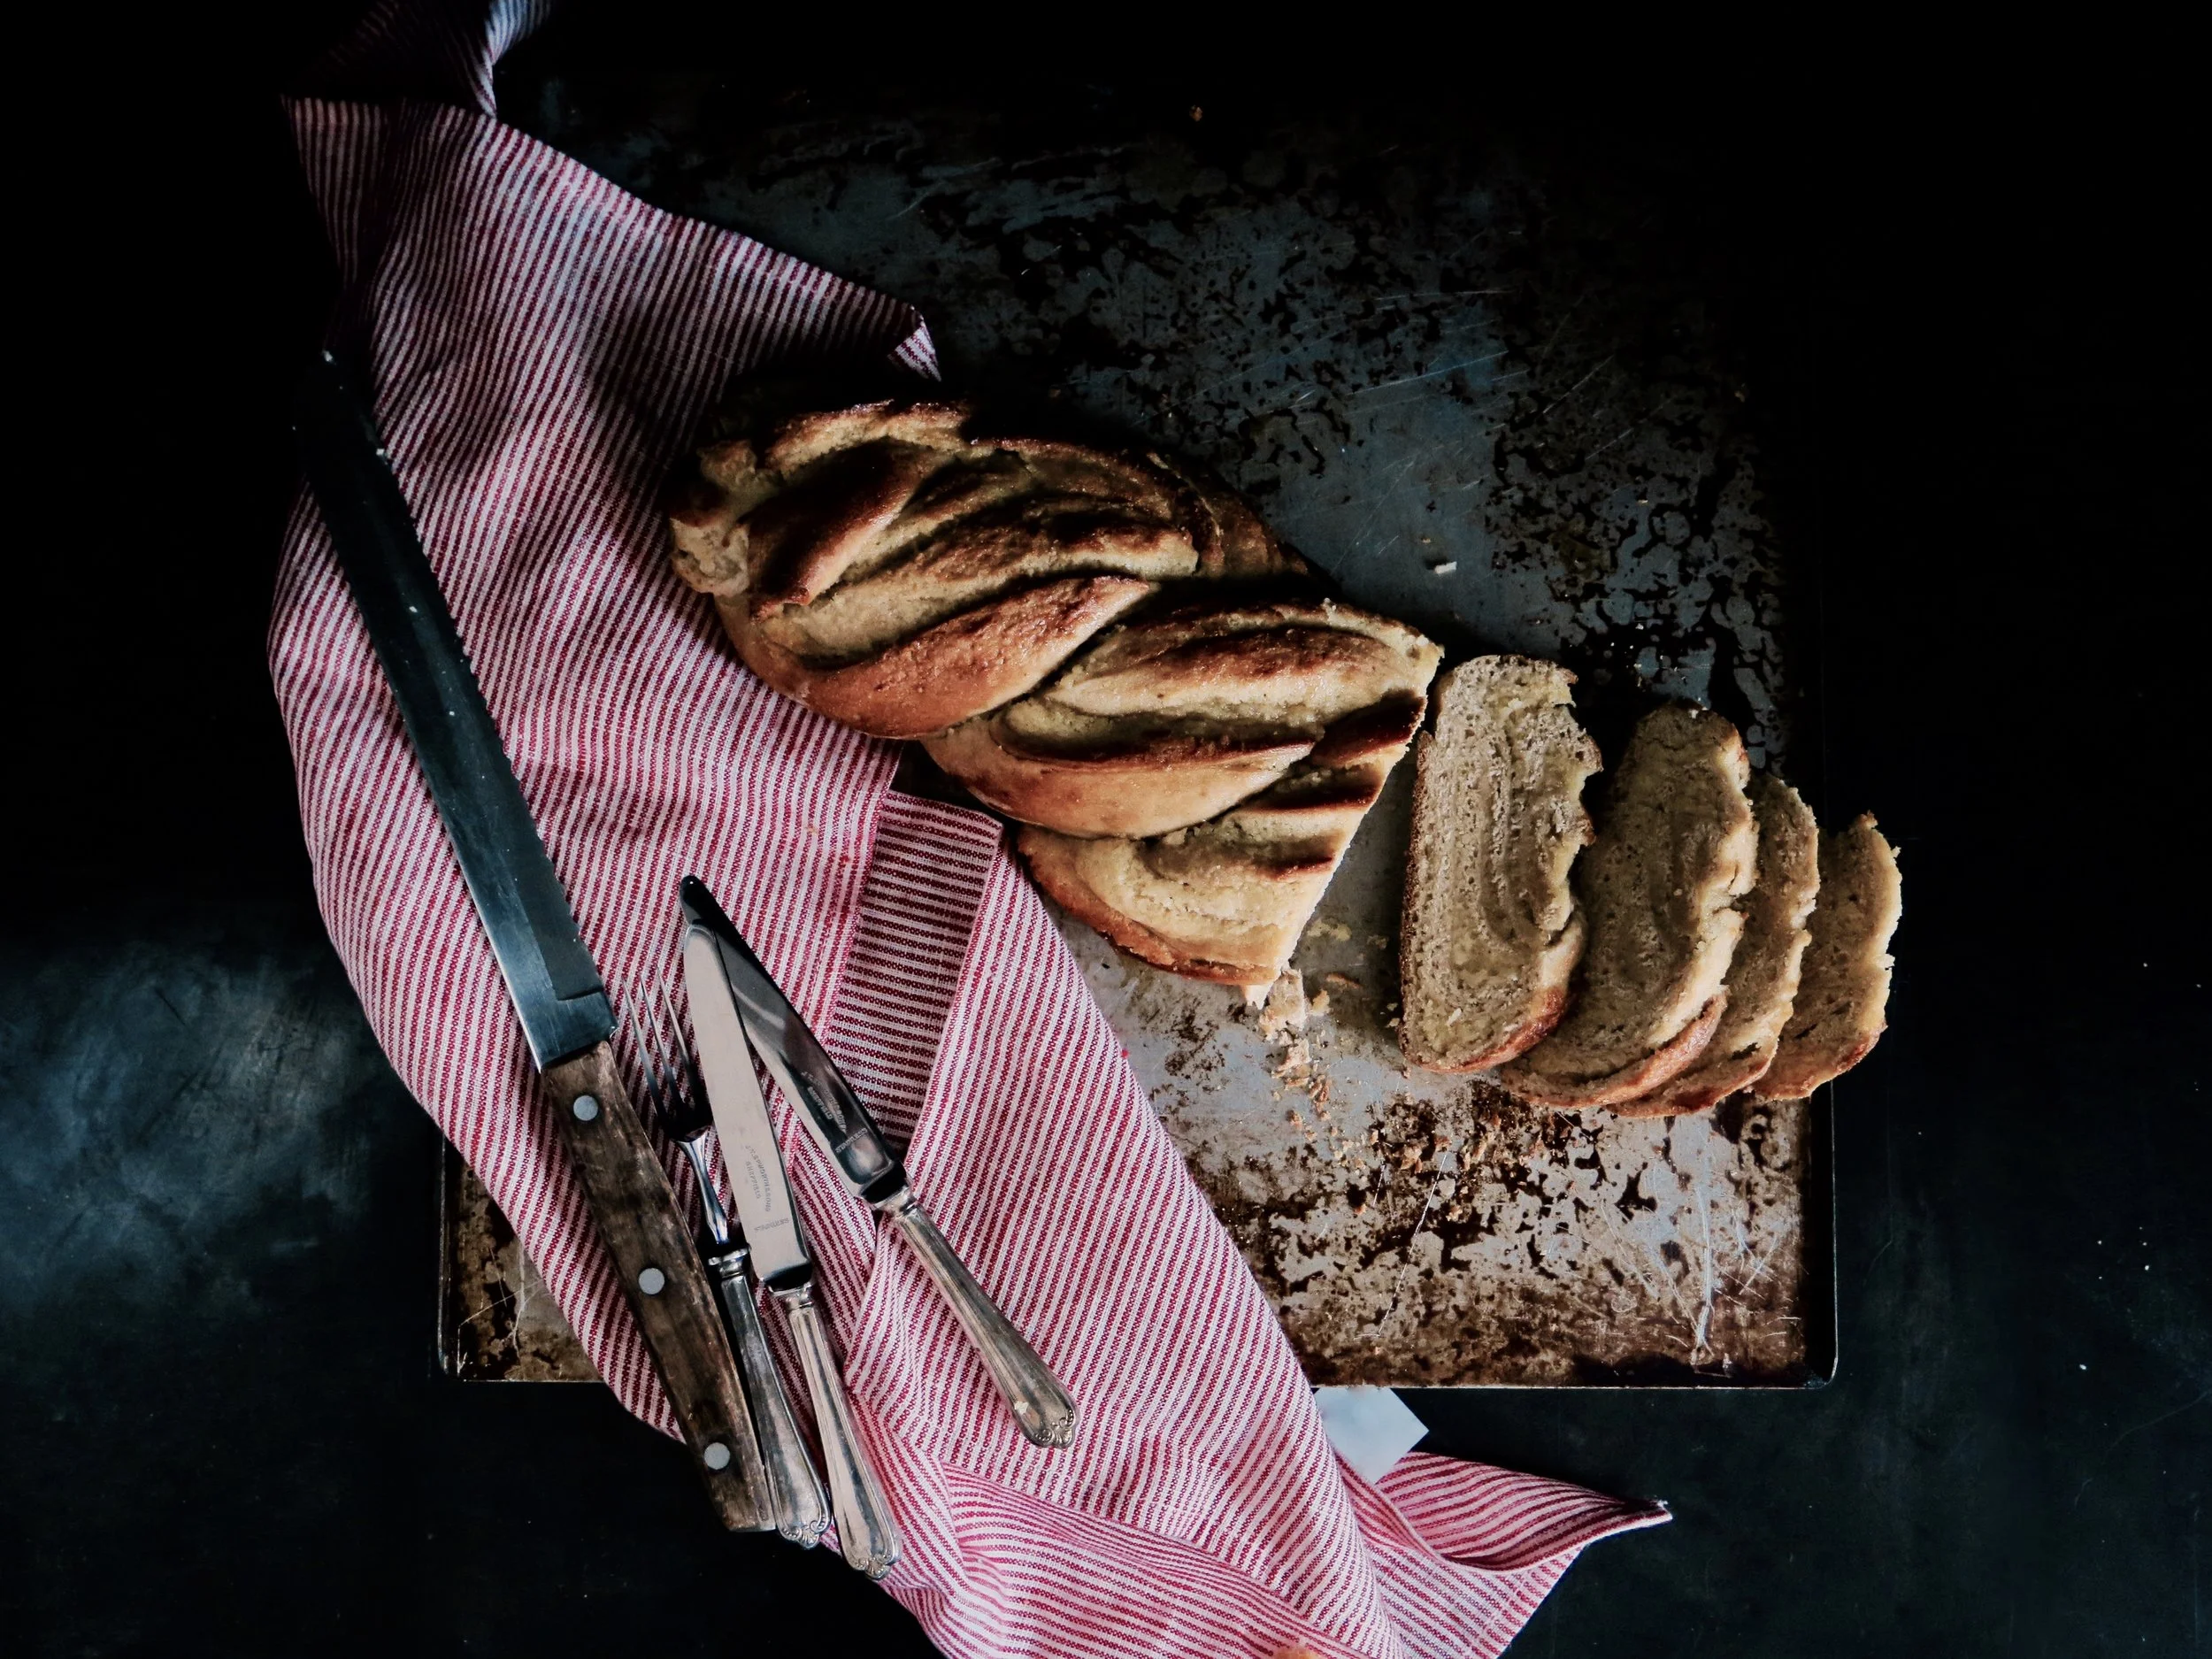
a.    For bread without filling: divide dough into two (to make two loaves). Shape as desired, but if you favour a plaited loaf, as I do, taking one of the dough halves, divide it into three or four pieces (depending on whether you prefer a three- way or four-way plait.) Roll each piece into a long, even strand of about 3cm in diameter. Then pinch the ends together and plait as normal. When you reach the end of the plait, pinch the strands together and tuck under. Repeat for the second loaf, place on a baking tray and cover. Leave to rise for about half an hour. 

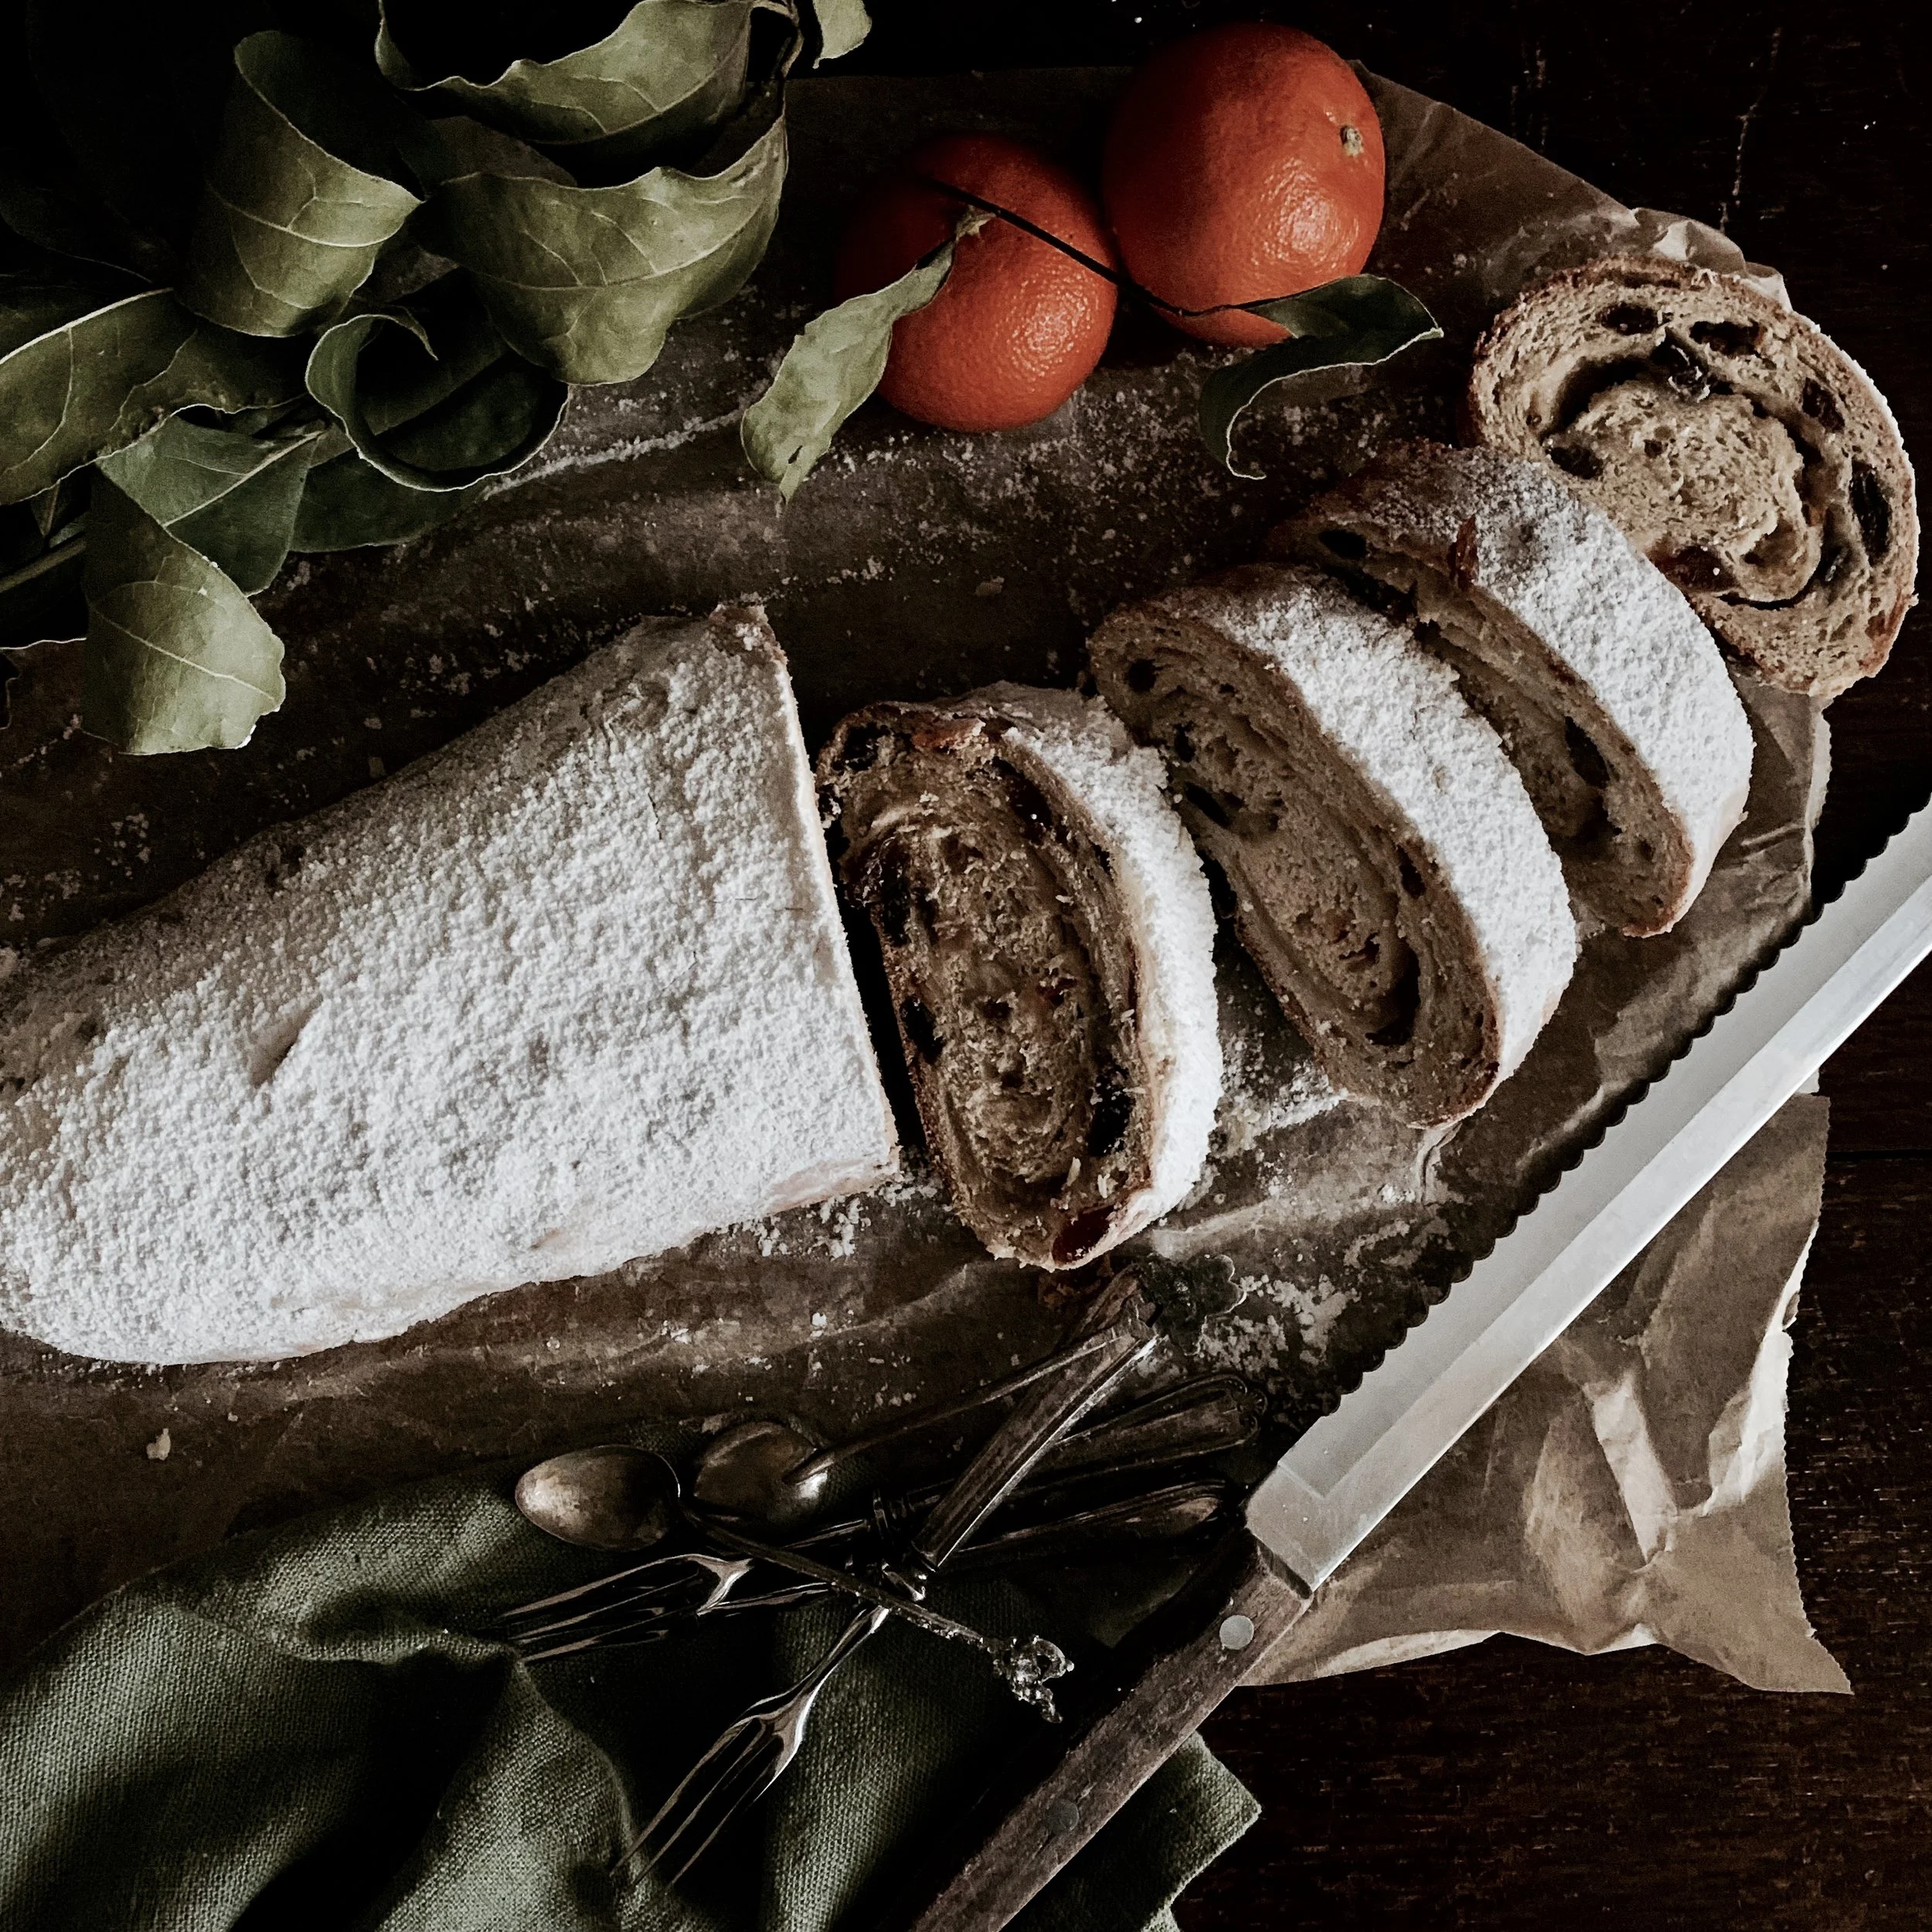
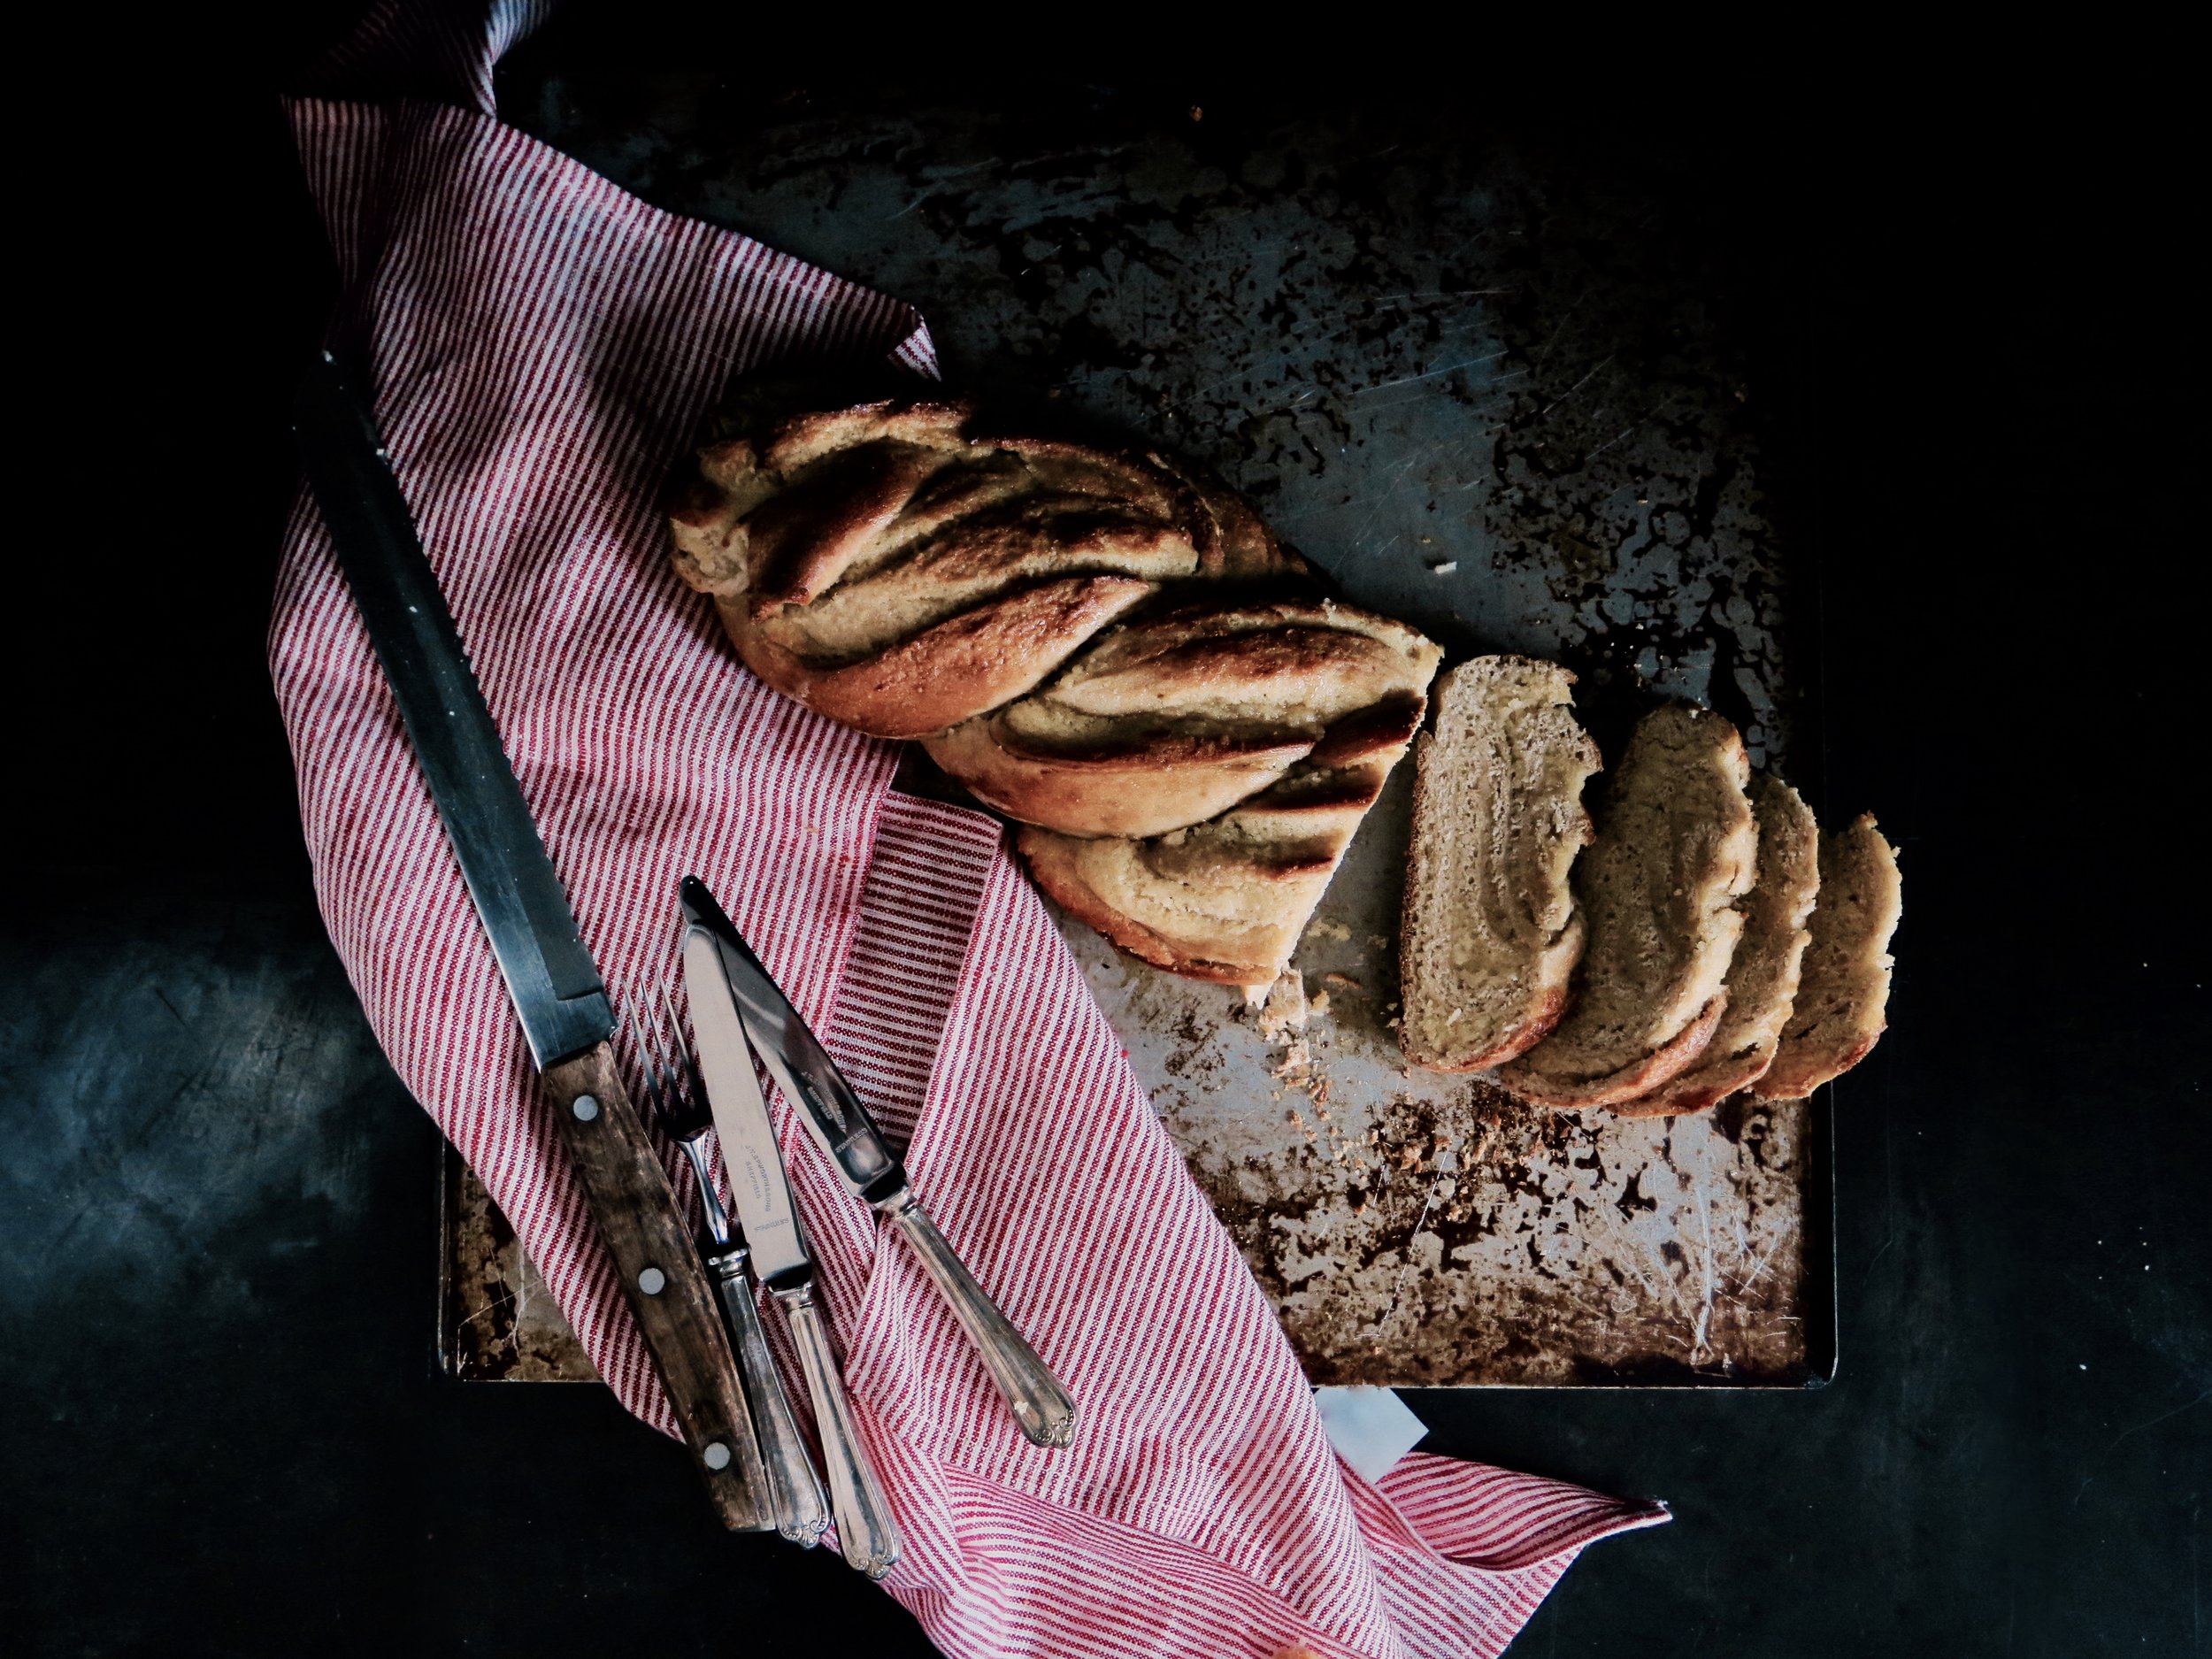
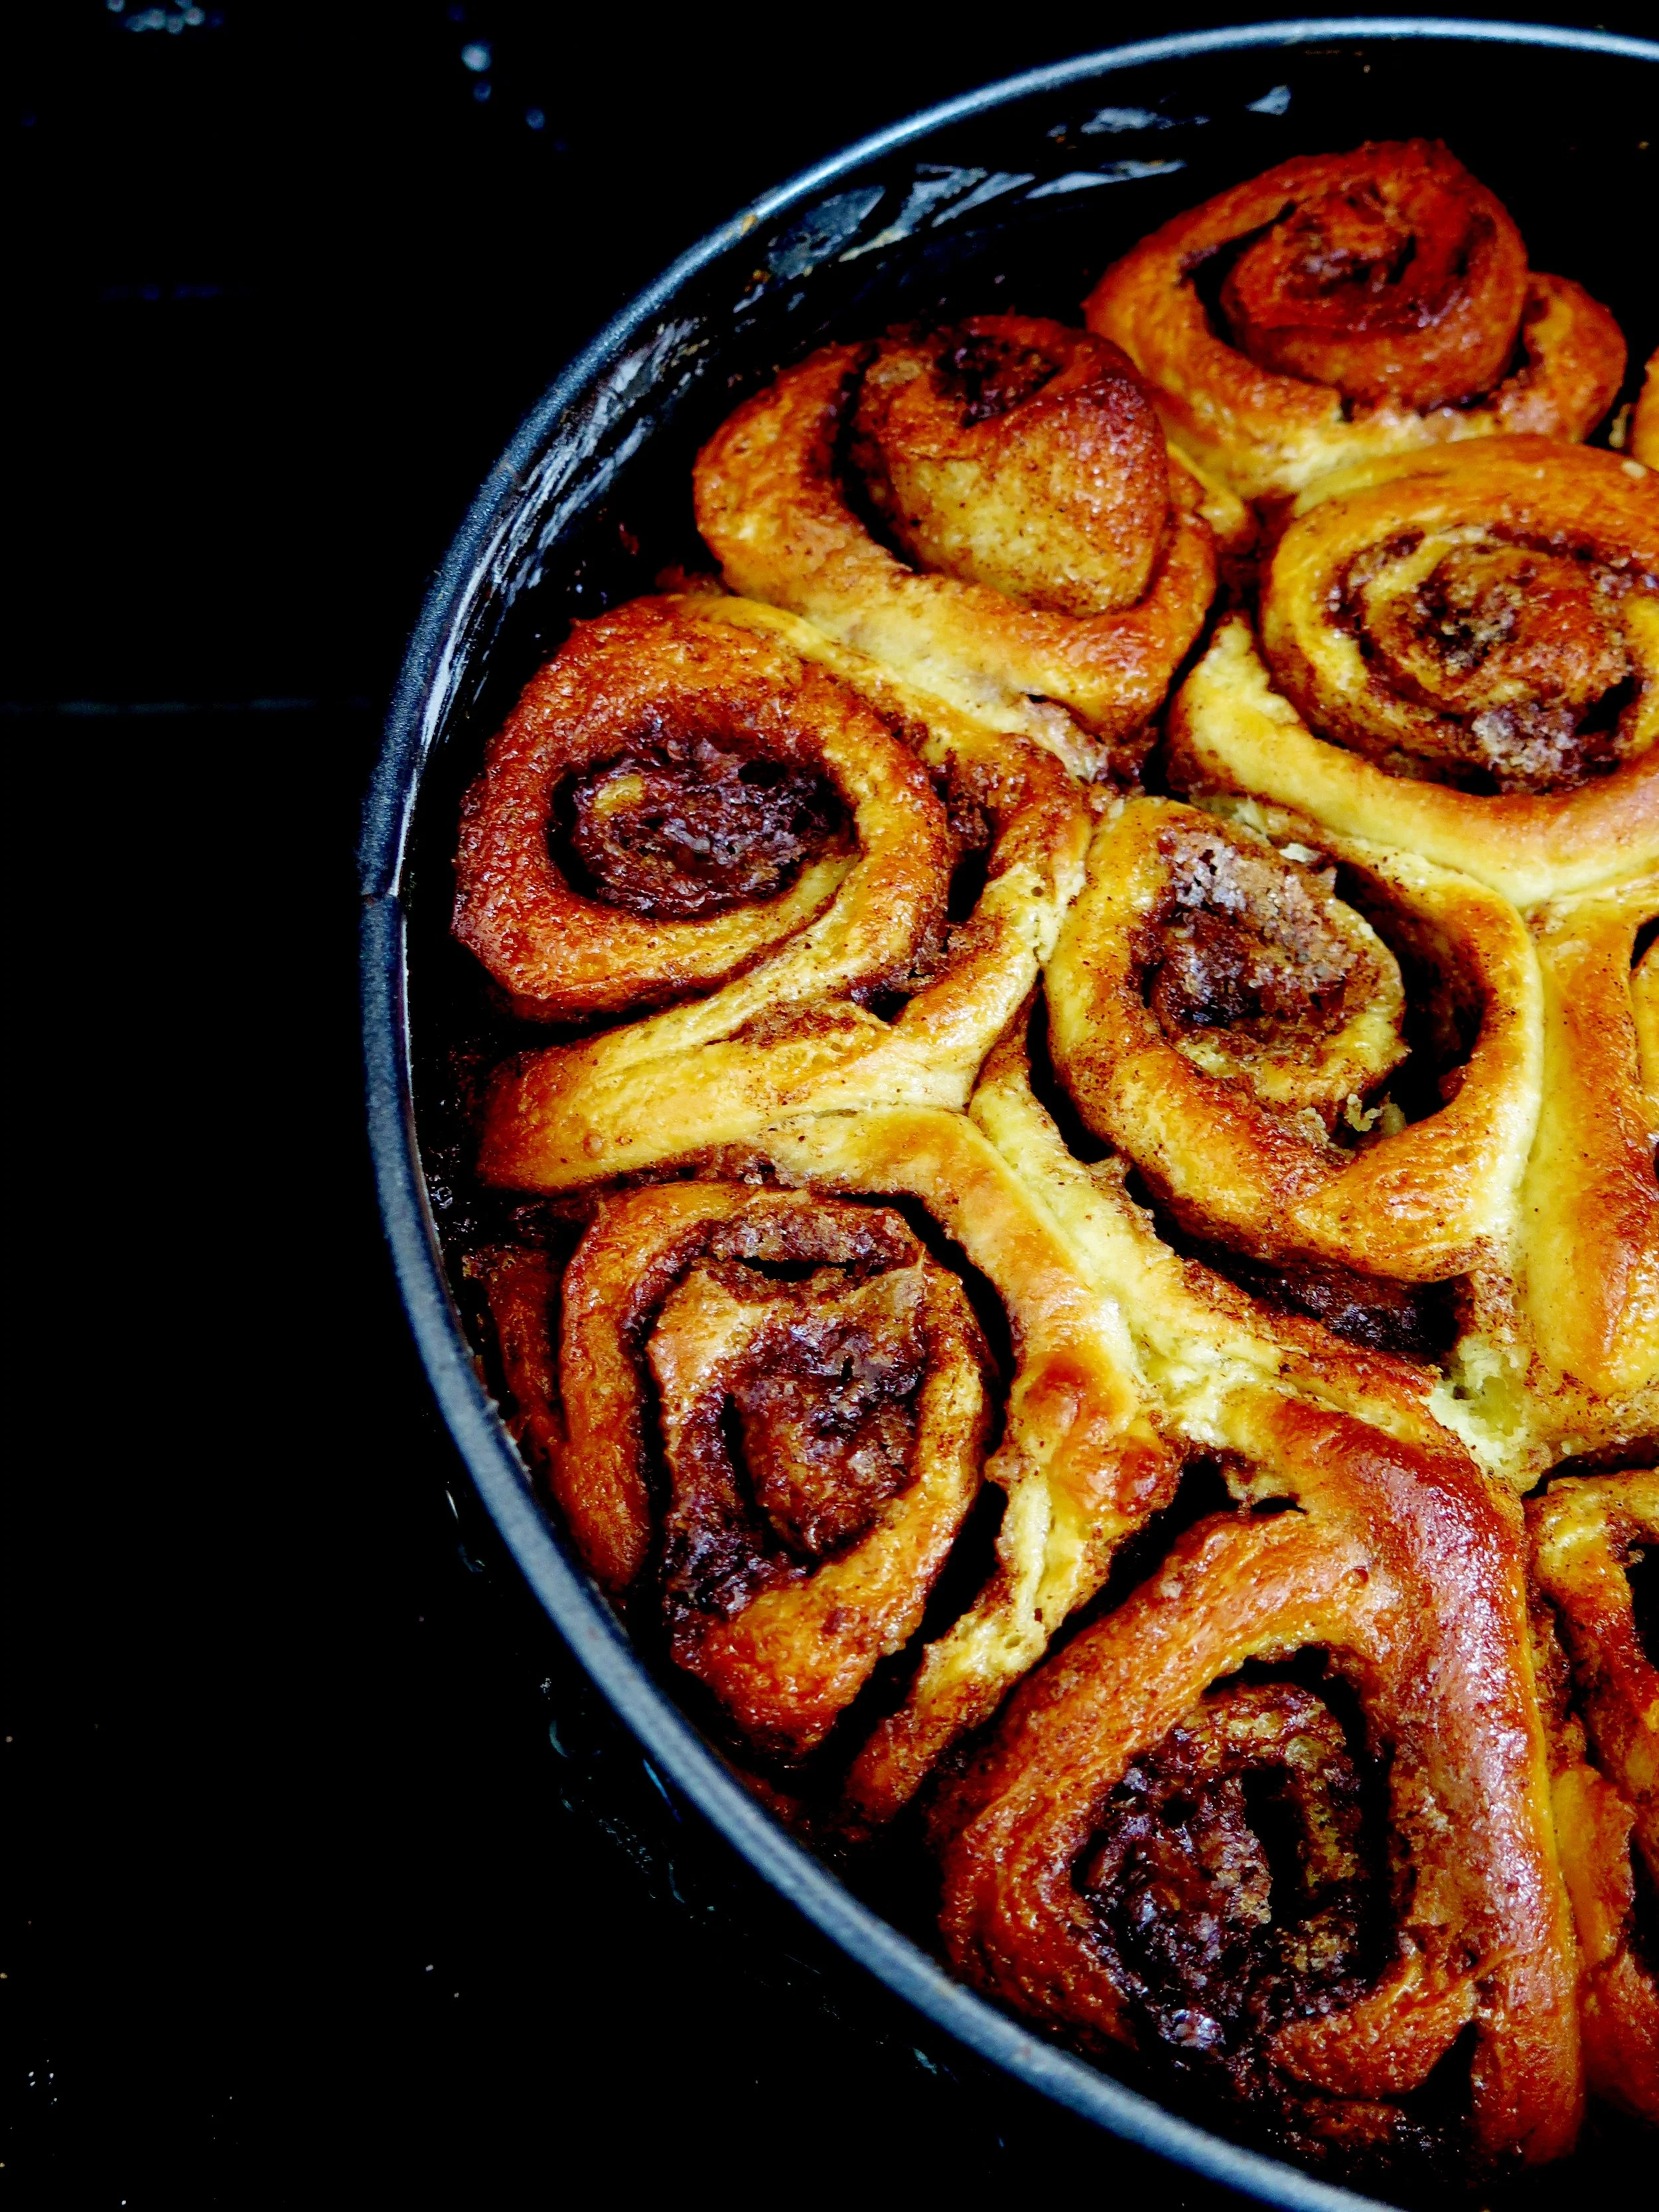
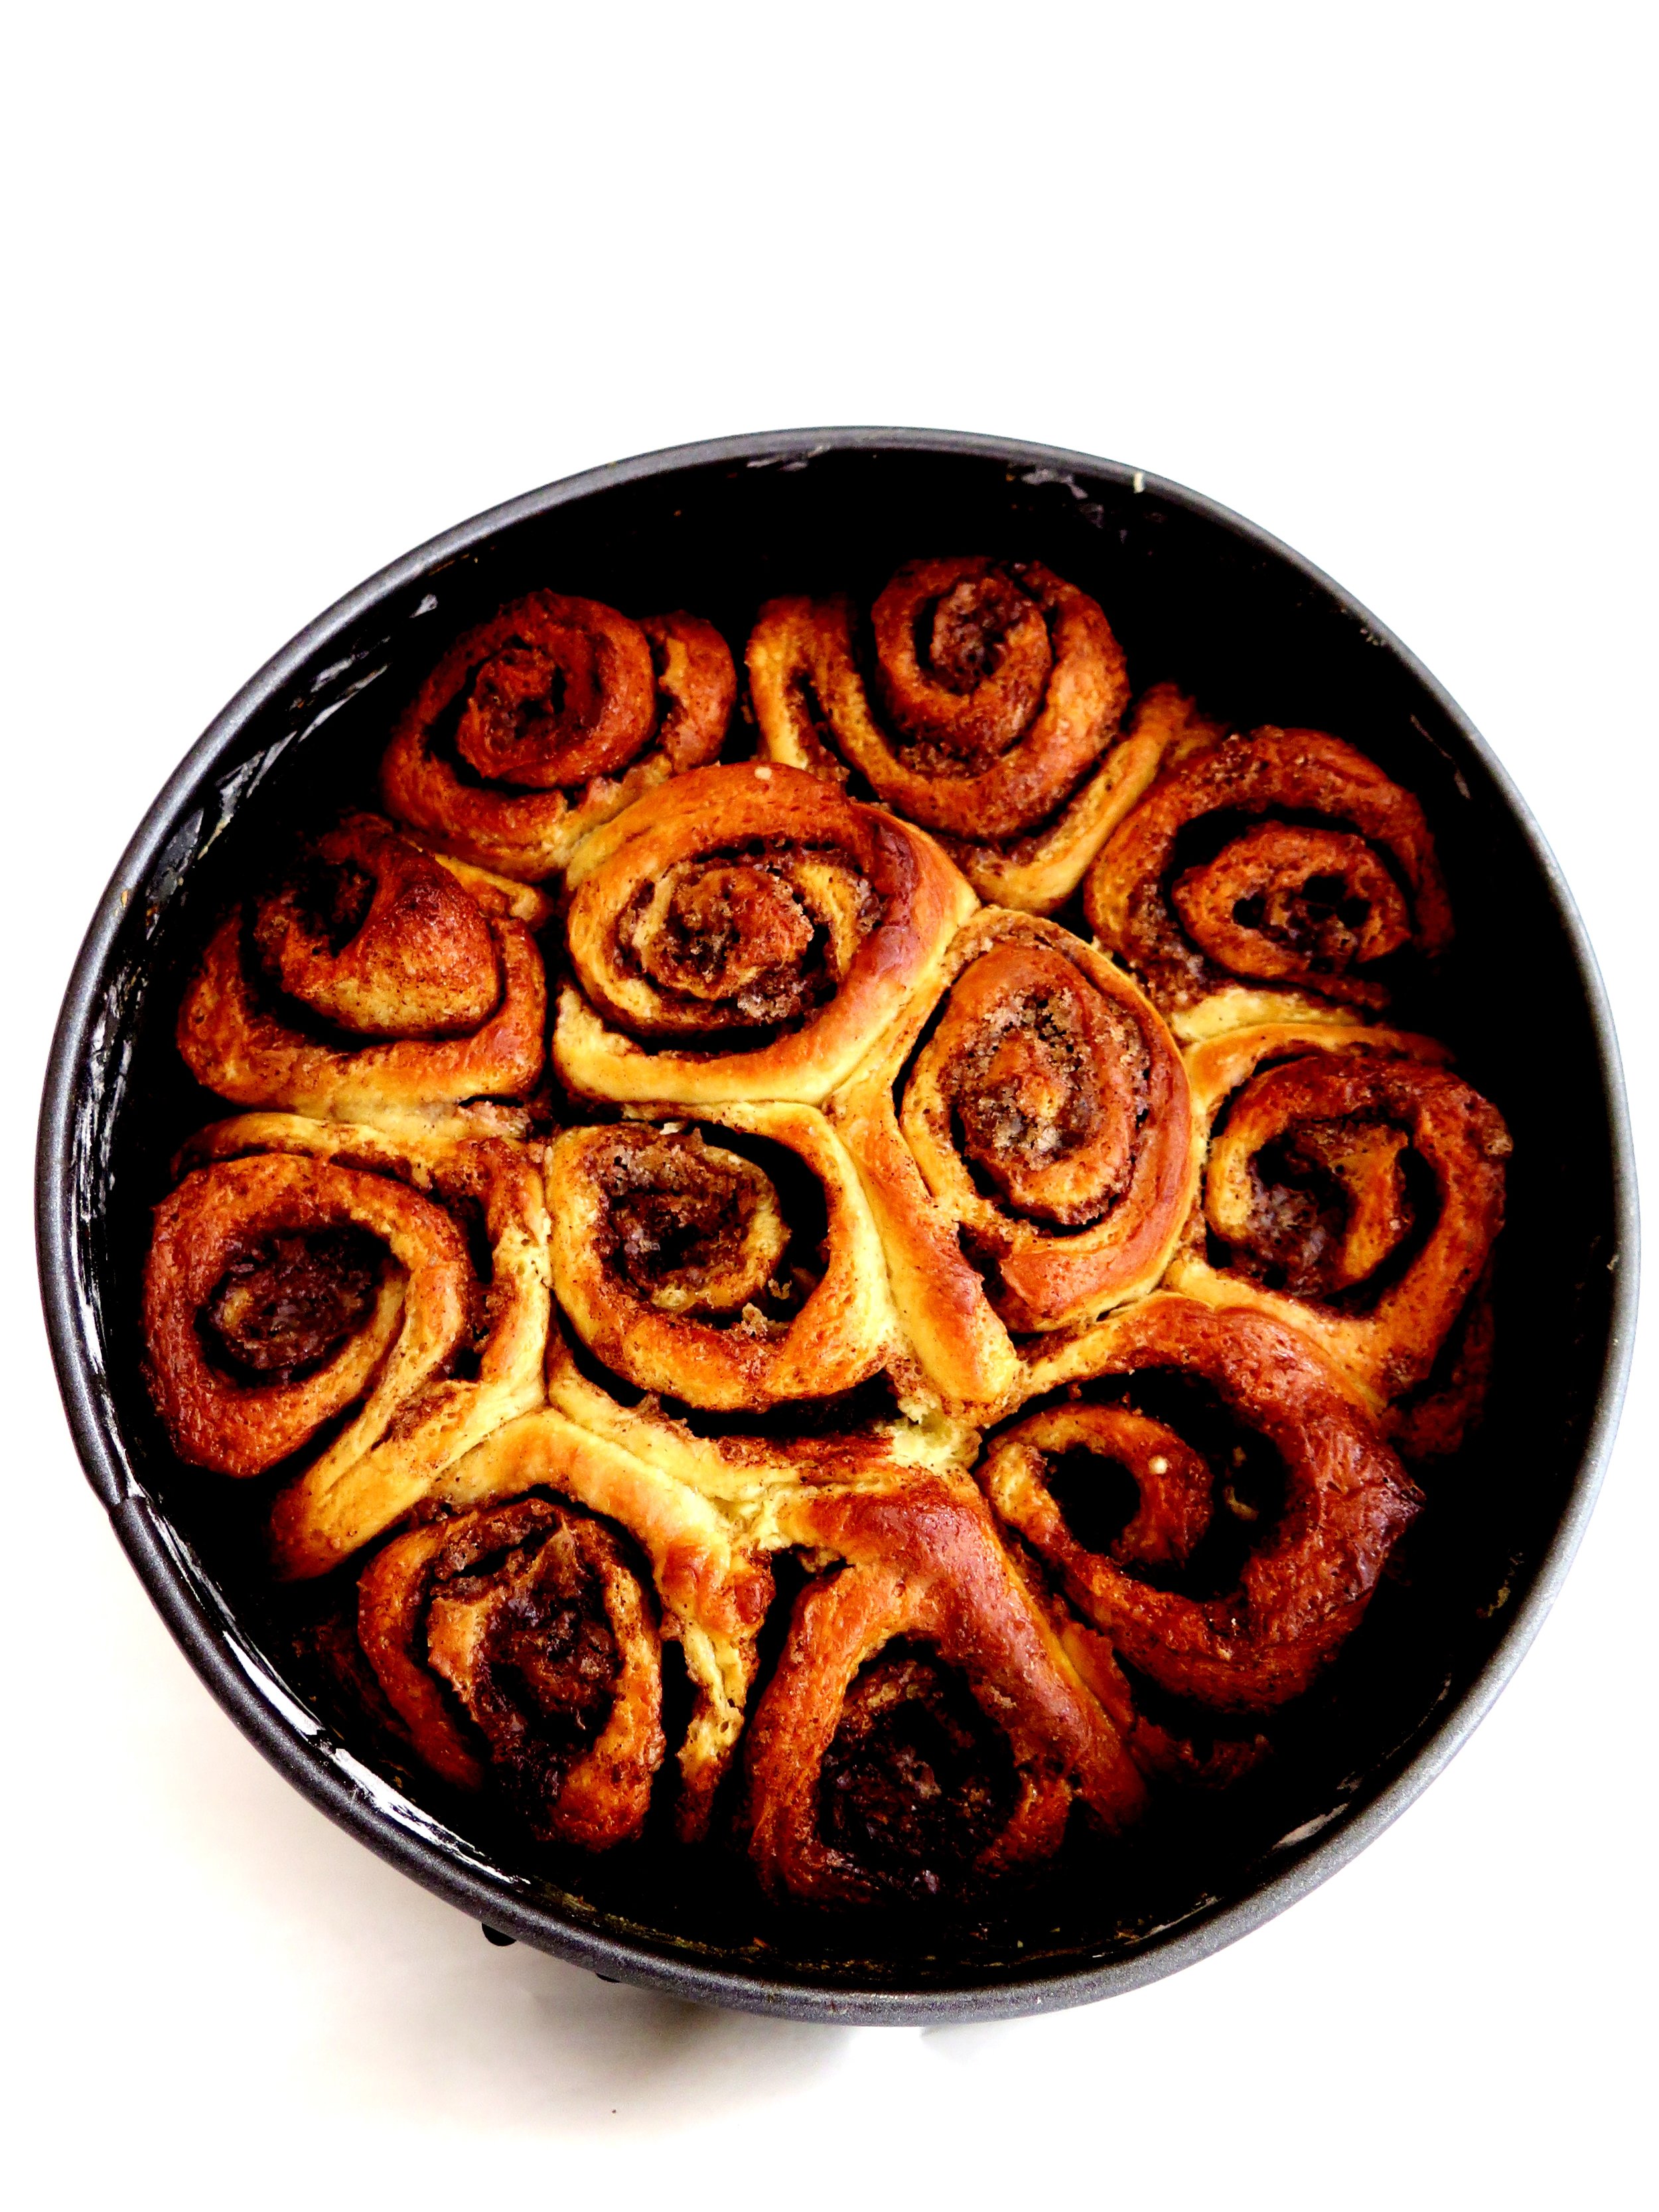
b.    For bread laced with frangipane: place the dough on a large, flat, heavily floured surface and roll it to a rectangle of about 60 x 30cm and about ¾ cm thick. Tip the frangipane mixture into the centre of the dough, and spread it out evenly with a spatula right up to the edges. Then, from the long side, roll the dough to make a long tight coil. Finish with the seal at the base of the roll. Then slice the roll into two (in order to make two loaves). Take one long roll and holding the knife directly above the roll, with the blade parallel to the length of the roll, bisect it running the knife through the centre along the its length. Once split, with the open halves separate, pinch them at the top and then cross one over the other repeatedly in a kind of two string plait. Pinch at the end and tuck it under then place on baking tray. Repeat with the other half. 

8)   Cover both breads with a cloth, and allow to rise in a warm place for 45 minutes. Preheat the oven to 200 °C.

9)   With the remaining beaten egg, brush the tops of the breads. Place the breads in the oven to bake for 10 minutes. Then reduce the oven temperature to 180 °C and allow to bake for a further 10-15 minutes. Ovens can be temperamental, so check every 5-10 minutes to ensure that the bread doesn’t burn. If it looks like it is beginning to catch, cover with aluminium foil and continue to bake. Remove from the oven when the outside is a deep golden colour. Place on a cooling rack and allow to reach room temperature, then devour. Best eaten on day of baking, but the bread can be frozen in a sealed air tight container for up to 3 months.

fullsizeoutput_1891.jpeg
fullsizeoutput_2bac.jpeg

HUNGRY FOR MORE?

Comment

Mini Feta & Cheddar Spelt Scones

Comment

Mini Feta & Cheddar Spelt Scones

fullsizeoutput_9c0.jpeg

I feel immense joy when I see canapés floating along the horizon of a wine-soaked room. Salty, crunchy, flavour-filled bites to pop into your mouth and stave off hunger. But in reality, the canapés path is far more obstacle- laden. Here are a few of the typical scenarios that I have endured, or have watched others enduring:

fullsizeoutput_9cf.jpeg
  • The hidden two- biter: where you hesitate over whether to put the whole thing in your mouth, decide to go for it and then have to find a way to swivel the thing around inside your cheeks until it becomes vaguely chewable, all while trying to hold down a conversation
fullsizeoutput_9c4.jpeg

  • The crumbler – this one disintegrates before it even reaches your mouth. This doesn’t necessarily result in interrupted conversation, but ends up being problematic when you shake hands with someone and end up leaving a stick, flaky deposit in their palm
fullsizeoutput_9bb.jpeg

  • The burner – you were warned about the heat but went for it anyway. If you were alone you would probably spit it out, but in the interests of politeness and retaining friends, you endure a scorched oesophagus 
fullsizeoutput_9ed.jpeg

  • The stringer – this is reserved for molten- cheese filled croquetas.  Delicious, yes, but they leave the unsuspecting devourer s with frills around their lips reminiscent of Futurama’s Zoiburg.
fullsizeoutput_9b6.jpeg

The following will help you steer clear of the above pitfalls: small, savoury and succulent, these are the perfect canapés.  Indeed, they are suitable for consumption at any time. They are crisp on the outside and soft and light inside, flecked with molted feta and cheddar, and with a hint of the more exotic nigella seeds. This recipe makes 18 but I would urge you to double it as they are so addictive.  They are also ridiculously easy and quick to conjure up.

NB. these can be made gluten-free by simply substituting spelt flour with gluten-free)

Mini Feta & Cheddar Spelt Scones (makes 18)


Ingredients

100g sour cream

2 tbsp milk

80g mature cheddar cheese, grated

80g feta, roughly diced into 0.5cm cubes

50g unsalted butter, cold and roughly diced into ¾ cm cubes

200g white spelt flour (can substitute with plain flour or gluten-free)

¼ tsp baking powder

¼ tsp salt

½ tsp nigella seeds

[optional: ½ tsp cayenne pepper]

1 egg, beaten, to glaze

1 large baking tray lined with greaseproof paper


Method

1)    Preheat oven to 200°C. In a large bowl by hand, or in a food mixer fitted with a paddle, briefly mix together the sour cream, milk, cheddar, feta and butter. Pour in the flour, baking powder, salt and nigella seeds (and cayenne if using), and mix until just combined into a dough. You may need to knead the dough by hand very slightly for it to come together.

2)    Place dough onto a floured surface, pat into a square and roll it out to roughly 2.5cm thickness. Slice the dough into nine squares, like a noughts and crosses board, and then slice the squares diagonally to form 18 triangles.

3)    Arrange the triangles on the baking tray, leaving at least 3cm between them. Brush them lightly with the beaten egg and place in the oven to bake for 15-20 minutes until golden on the outside. They are best devoured immediately or on the day of baking. 

Adapted from Honey & Co's "Food From the Middle East" recipe for Bouikos


fullsizeoutput_9b8.jpeg

HUNGRY FOR MORE?

Comment

Quick Asparagus & Parmesan Pizza

2 Comments

Quick Asparagus & Parmesan Pizza

IMG_2242.jpg

Quick Asparagus & Parmesan Pizza Pizza is in his DNA.  Five generations of golden, thin, crispiness. One recipe.

Quick Asparagus & Parmesan Pizza

The pizza oven is raging, rapidly devouring its feed of dry wood and spitting out sweet nutty smoke.

Quick Asparagus & Parmesan Pizza


He comes every summer in his Ape brimming with plump mushrooms of dough.

Quick Asparagus & Parmesan Pizza

A light sprinkle of flour on a wooden board, and he gets to work.

Quick Asparagus & Parmesan Pizza

With wrist flicks and little rotations the round becomes a disc, airborne momentarily to ensure evenness.

Quick Asparagus & Parmesan Pizza

A careful spiral of passata with the back of a spoon,

Quick Asparagus & Parmesan Pizza

a shower of mozzarella,

Quick Asparagus & Parmesan Pizza

and a scattering of whatever’s in the garden: fiori di zucchini, melanzane, pepperoncini…

Quick Asparagus & Parmesan Pizza

The flurry of flour continues into the night.

Quick Asparagus & Parmesan Pizza

The dinner table is a moderation-free zone.

Quick Asparagus & Parmesan Pizza

He only stops when even the strictest of eaters has lost count of the number of pizzas (not slices) he/she has consumed, and physical incapacity is the only limitation.

Quick Asparagus & Parmesan Pizza

He doesn’t even really stop there: a couple more are sent to the table per domani.

Quick Asparagus & Parmesan Pizza

A pizza “hangover” ensues along with the inevitable promises of “never again” “not for another year”.

Quick Asparagus & Parmesan Pizza

But as soon as I hit London soil again I want to relieve that pizza-lover’s fantasy and so I make these.

Quick Asparagus & Parmesan Pizza

They’re crisp, thin, verdant, and fresh.

Quick Asparagus & Parmesan Pizza

I don’t believe in barren crusts or meanness so the ingredients are abundant and go right up to and beyond the edge of the base.

Quick Asparagus & Parmesan Pizza

I use spelt instead of plain flour (as usual) to reduce the GI level and add a nuttier more complex flavour to the dough.

Quick Asparagus & Parmesan Pizza

The added bonus of this recipe is that it is ridiculously quick.  Kneading is kept to a minimum (5 minutes) and the rising time is the shortest you’ll ever find for pizza dough – ½ hour.

Quick Asparagus & Parmesan Pizza

The balsamic-maple reduction is optional but I include it to add extra caramelised sweetness, extra tang and a touch of drama.

Quick Asparagus & Parmesan Pizza

Quick Asparagus & Parmesan Pizza

Quick Asparagus & Parmesan Pizza


Ingredients – makes 4 pizzas

Base

250ml warm water

3 tsp dried yeast (fast active yeast)

500g white spelt flour

1 ½ tsp salt

1 tbsp olive oil


Topping

750g asparagus

30g garlic cloves, peeled and crushed

1 tbsp olive oil

1 1/4 tsp salt

Grated zest of ½ lemon

A few grinds of Pepper

400g mozzarella (4 balls), chopped finely into cubes

100g parmesan, grated

3 spring onions, thinly sliced

Small bunch of chives, finely chopped

2 red chillies (optional), finely sliced


2 large baking trays or 4 medium baking trays, greased and dusted with flour


Maple Balsamic Reduction (optional)

120ml balsamic vinegar

2 tsp maple syrup


Method

  1. Heat oven to 120˚C for 5 minutes then switch it off.
  2. In the bowl of a mixer (or large bowl if making by hand) pour in warm water and sprinkle yeast over it. Allow to stand for 5 minutes for the yeast to activate.
  3. Stir in flour, salt and oil. Knead by hand for 5 minutes on a lightly floured surface, or in a machine fitted with a dough hook for 5 minutes until the dough is smooth and when you press your thumb into it, it bounces back up.
  4. Divide dough into two and place each half in a lightly oiled bowl. Cover with cling film and place in warmed oven.  Allow to rise for 30 minutes or until doubled, then remove from oven and preheat it to its highest temperature, usually 250˚C.
  5. While the dough is rising, use a vegetable peeler to shave the asparagus: place the asparagus flat on a surface, and holding it at the woody end, shave it from above the woody end to the top of the spear. I sometimes use the ends to make a stock for asparagus risotto.
  6. Place the ribbons in a bowl and mix with garlic, oil, salt, lemon zest and pepper.
  7. Once risen, divide each half into two and roll out each quarter into a 0.5cm thick disc. Place on tray and scatter each disc with mozzarella, parmesan, and shaved asparagus.  Bake in oven for 15-20 minutes until golden and bubbling.
  8. Once baked, scatter with spring onions, chives, and chillies, if using. Drizzle with balsamic reduction, if desired, and serve immediately.


Maple Balsamic reduction

  1. Boil balsamic and maple syrup together over a high heat for about 5 minutes until it thickens slightly to consistency more like that of pure maple syrup. Allow to cool for 1 minute, and drizzle over pizzas.

Quick Asparagus & Parmesan Pizza

Adapted from The Smitten Kitchen Cookbook

2 Comments

Brown Butter Brioche Cinnamon Buns

2 Comments

Brown Butter Brioche Cinnamon Buns

IMG_0348.jpg

Brown Butter Brioche Cinnamon Buns

When I was six I experienced peak cinnamon bun.  In the middle of a farmers’ market in Toronto I was handed a parcel wrapped in brown paper.  Inside was a glistening golden sticky buttery cinnamon swirl - a full face experience, and well worth it.  Ever since then I’ve been looking for one to mirror its spiced perfection, but my quest continues to this day.  To the untrained/inexperienced/non-cinnamon obsessed palate a cinnamon bun is just a cinnamon bun.  Wrong.

Brown Butter Brioche Cinnamon Buns

My gluttonous many-year quest has allowed me to sample the many different types:  there is the American gloopy, slightly under baked, doughy, cream cheese-coated type.  This can be found in a ubiquitous American chain (at particular low points during my degree I used to linger outside the Cambridge branch just to catch the cinnamon perfumed scent).

Brown Butter Brioche Cinnamon Buns


At the opposite end of the scale there’s the more refined flaky and French variety which is unsatisfyingly mild in terms of cinnamon flavour if you’re an obsessive like me.

Brown Butter Brioche Cinnamon Buns


Somewhere in between the two is the Nordic variety, cardamom and cinnamon infused, with a delicate dough (my trip to Norway this summer will be dedicated to experiencing as many of these as possible).

Brown Butter Brioche Cinnamon Buns   My own recipe falls somewhere in the middle of the 3 varieties.  The brioche dough is soft and light on the inside and crisp on the outside, the browning of the butter in the filling adds a nutty richness, and the muscovado sugar makes the bun moister and adds greater depth of flavour than plain caster sugar.  As the buns cook, the sugar cinnamon filling caramelises slightly at the base adding a moreish stickiness.

Brown Butter Brioche Cinnamon BunsAlthough the brioche dough requires starting the evening before, don’t let it stop you from making these.  They are, in fact, incredibly easy and quick to make.  It’s also rather lovely going to bed knowing that a cinnamon bun awaits you the next day…

Brown Butter Brioche Cinnamon Buns


Brown Butter Brioche Cinnamon Buns


Ingredients

Brioche

1 ½ tsp active dried yeast

3 tbsp lukewarm water

285g strong white bread flour

¾ tsp salt

40g caster sugar

3 medium sized eggs + 1 to paint the buns

115g cold unsalted butter

Cinnamon Filling

90g butter

160g light brown muscovado sugar

3 tbsp cinnamon

½ tsp salt


1 round 9 inch tin, greased and dusted with flour


Method

  1. In large bowl stir together yeast and water until the yeast has dissolved. Leave in a warm place for 5-10 minutes until the yeast is activated and the mixture begins to go slightly frothy.
  2. Add in the flour, salt, sugar and eggs and mix until thoroughly combined and the dough is smooth and sticky. If you are using a Kitchen Aid, as I do, fit it with the paddle and mix.
  3. Stirring continuously (or with the machine on a medium-high speed) add in the butter bit by bit, waiting until it is fully combined before adding more. Once the butter is fully combined, keep mixing until the dough is smooth and shiny. This will take about 8-10 minutes.
  4. Placed dough in a lightly greased bowl, cover with cling film, and place in fridge overnight or for minimum 8 hours.
  5. The next day make the cinnamon filling by placing the butter in a pan over a medium heat. Once it has melted, leave it on the heat for another minute until it goes golden in colour and has a rich, nutty aroma. Mix the sugar, salt and cinnamon with the butter to form a paste and set aside to cool.
  6. Remove the dough from the fridge and, on a board dusted with flour, roll it out to a rectangle of roughly 30cm by 38cm and to a 3/4cm thickness. Spread the cinnamon filling evenly over the rectangle.
  7. With long side of the rectangle closest to you (i.e. landscape as opposed to portrait), roll the dough from the long side to the other long side tightly, like a scroll. With the seam side down, slice the roll into 12 even slices. Arrange the slices spiral side up in the prepared tin, cover with a tea towel, and allow to rise for an hour in a warm place.
  8. Preheat the oven to 180˚C. To give the buns a beautiful golden shine, beat the egg and brush a thin layer over them.
  9. Place the tin in the oven and allow to bake for about 20-30 minutes until the surface is a golden brown and a skewer comes out clean. If it looks a little too dark early on in the bake, cover with tin foil. Once cooked, place on a wire rack to cool (or eat immediately).

Brown Butter Brioche Cinnamon Buns

2 Comments

Seeded Spelt Crackers - Recipe

9 Comments

Seeded Spelt Crackers - Recipe

IMG_5199.jpg

Last week I panic baked.  My usually dependable supply of Dr Karg’s seeded spelt and emmental and pumpkin seed crisp breads had run dry. Only a few sad seeds in the corner of the packet remained, which I ate mournfully, before desperation led me to pulling open drawers in search of the emergency packet I had hidden from myself.

IMG_5211
IMG_5211
Seeded Spelt Crackers - Recipe

My hunt was rewarded with absolutely no trophies.  I must have found them some time before.

Seeded Spelt Crackers - Recipe

Necessity mothered invention: I combined some of my favourite ingredients to make my own version of the crisp breads, and they turned out rather well, perhaps even better than the originals. My family had clearly also been struck by panic, as two batches were devoured in ten minutes…

Seeded Spelt Crackers - Recipe

These crisp breads are ridiculously quick to make, healthy (when you don’t eat the whole batch in one sitting – an almost impossible feat), and delicious.  They’re also versatile – the seeds can be eliminated and/or exchanged for other varieties as desired, and they can be served with hummus, red pepper pesto (see my recipe), guacamole etc.  They can also be made dairy-free by eliminating the cheese.

Seeded Spelt Crackers - Recipe

Ingredients

115g white spelt flour

100g wholemeal spelt flour

¾ tsp salt

30g sesame seeds

15g poppy seeds

30g pumpkin seeds

50g cheddar, grated

50g parmesan grated, + 5g for sprinkling

1 tsp cayenne pepper (optional)

125ml water

1 tbsp olive oil

1 baking tray, overturned, greased with oil and dusted with flour

Method

  1. Preheat oven to 220˚C. In a large bowl mix dry ingredients together. Pour in water and oil and stir until mixture clumps together into quite a dry dough.  You may need to knead it slightly with your hands.
  2. Place dough on overturned baking tray and roll it out until it reaches the edges of the tray. It should be about 3mm thick.
  3. Sprinkle with the extra parmesan, prick the dough liberally with a fork, and score it into your preferred geometric shapes. I like 4cm x 10cm rectangles.
  4. Place in oven and bake for 10-15 minutes until golden, and firm to touch. Leave to cool – they will become crisper as they cool.
Seeded Spelt Crackers - Recipe

9 Comments

Wholesome Berry & Oat Breakfast Loaf - Recipe

Comment

Wholesome Berry & Oat Breakfast Loaf - Recipe

Wholesome berry & oat breakfast loaf 
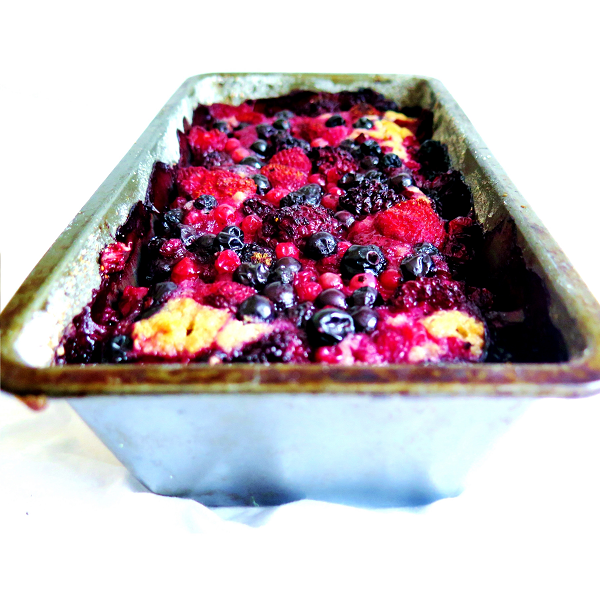
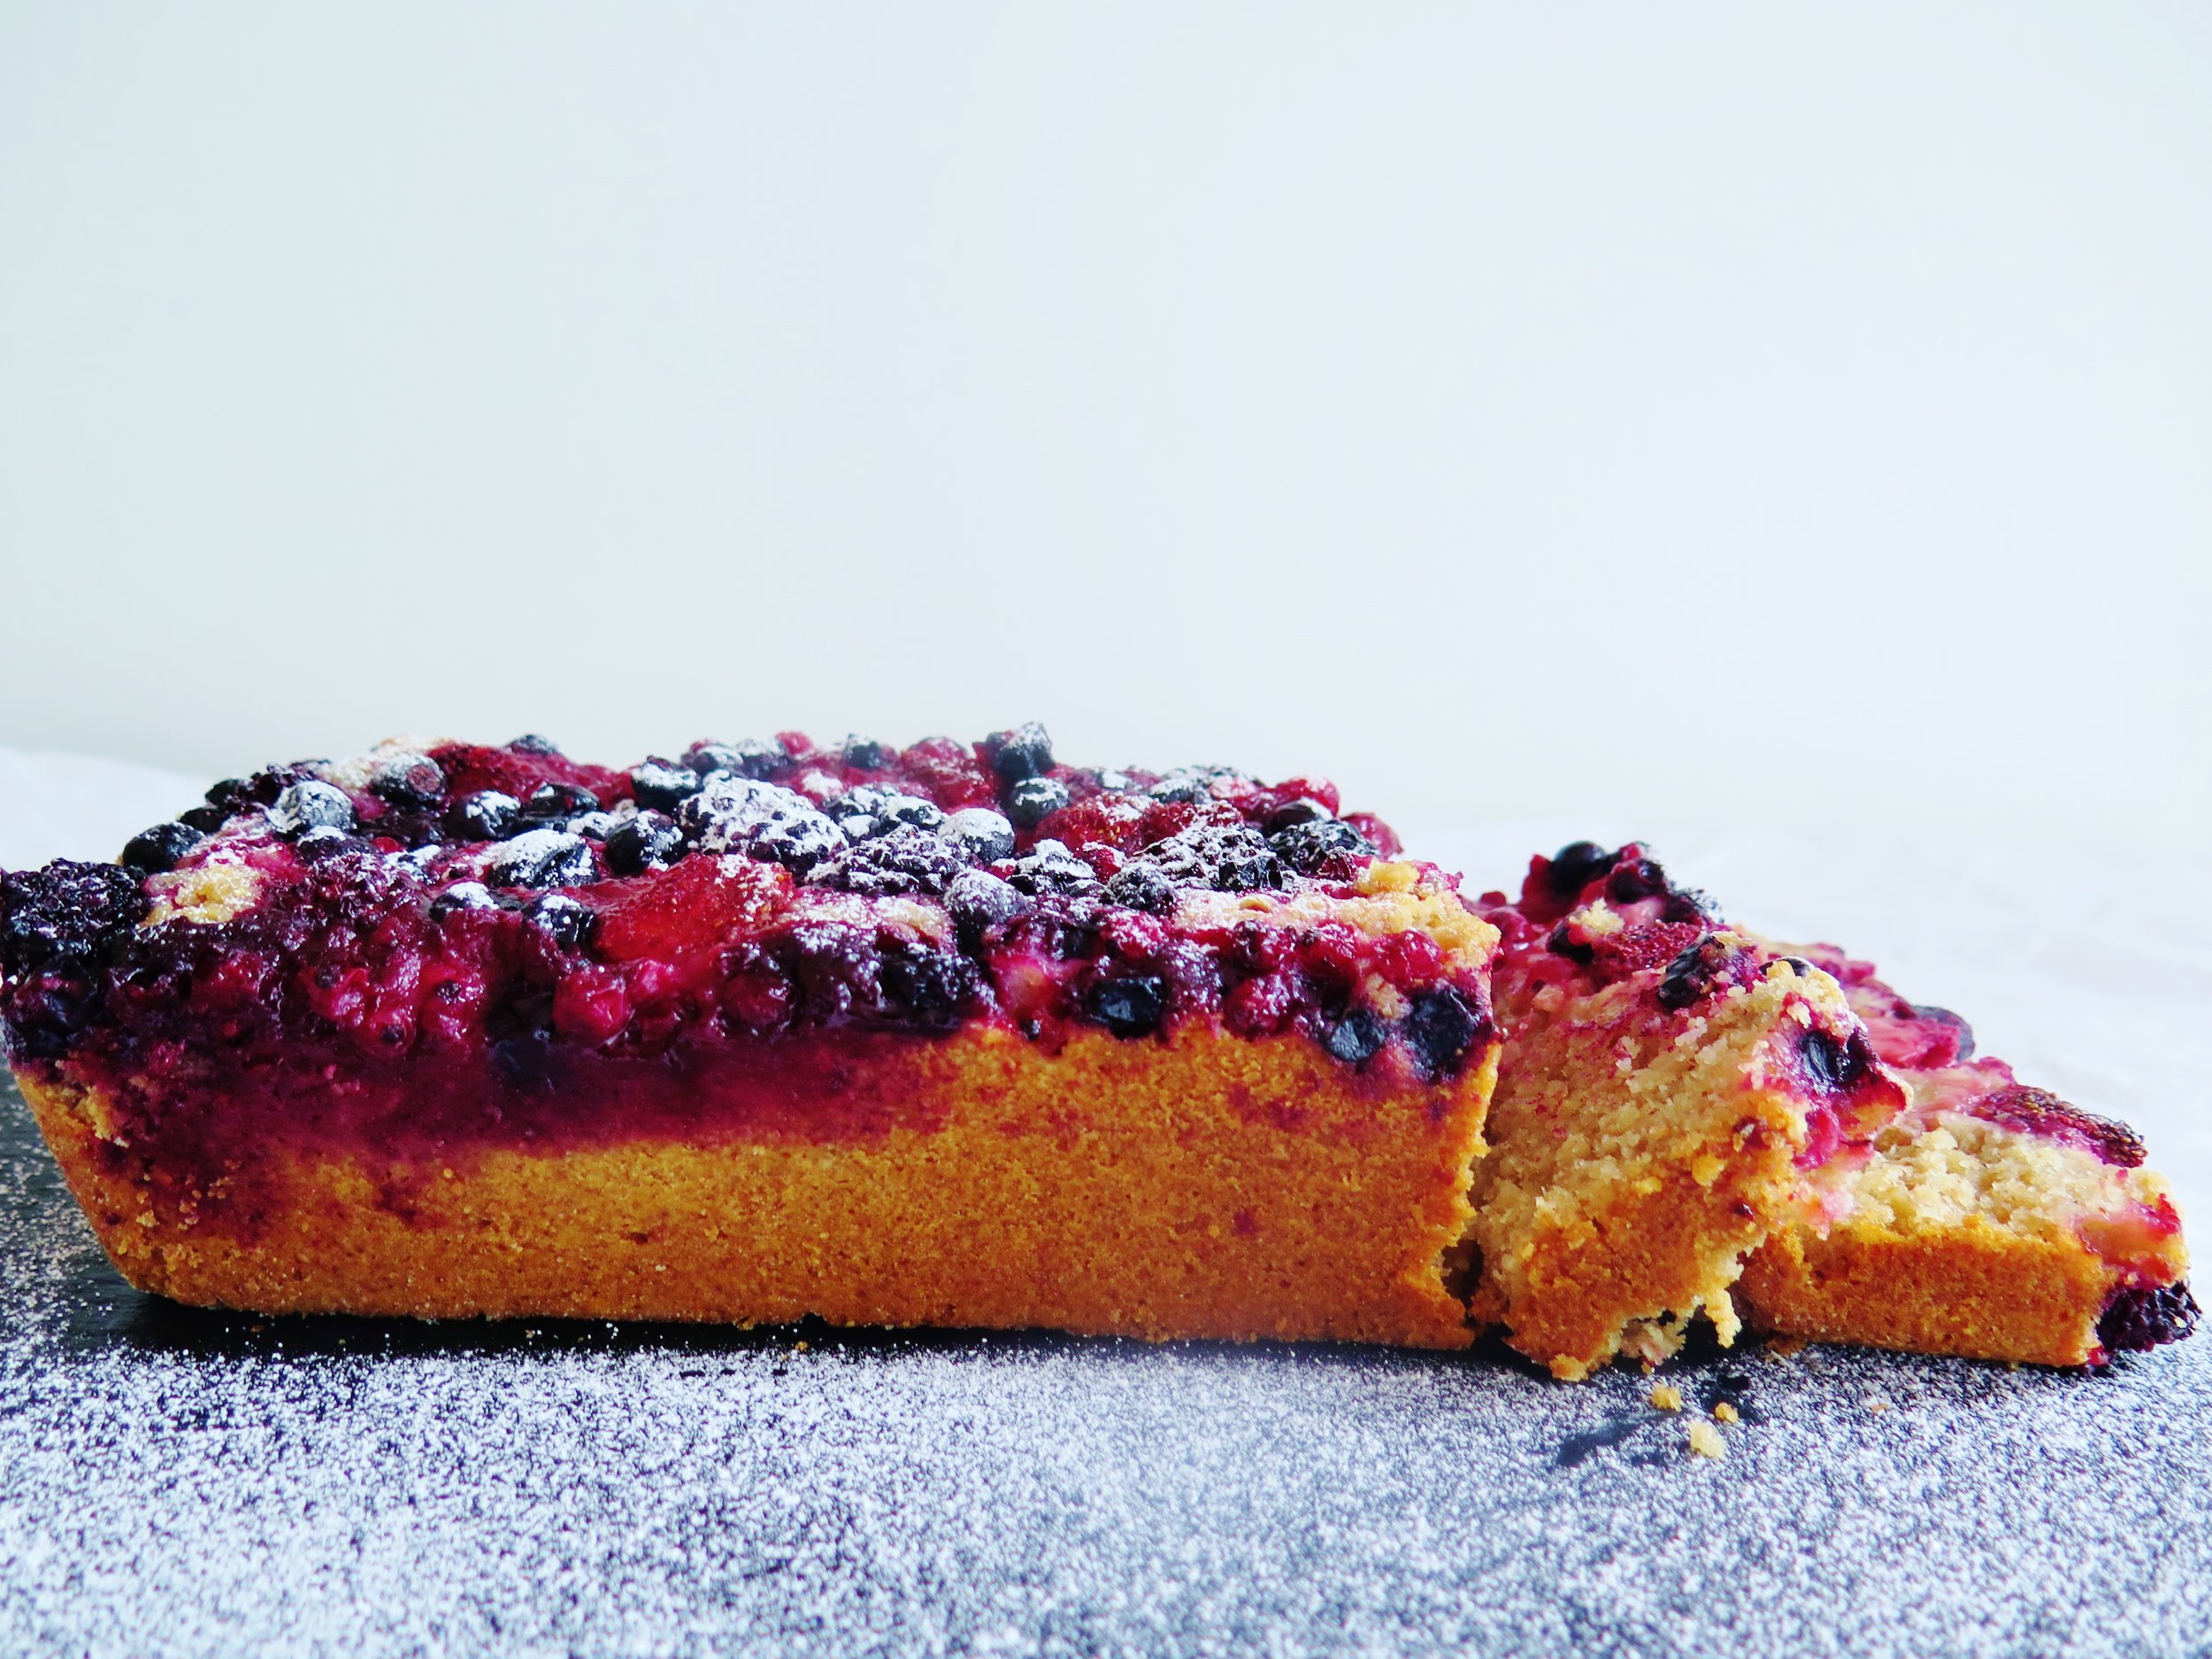
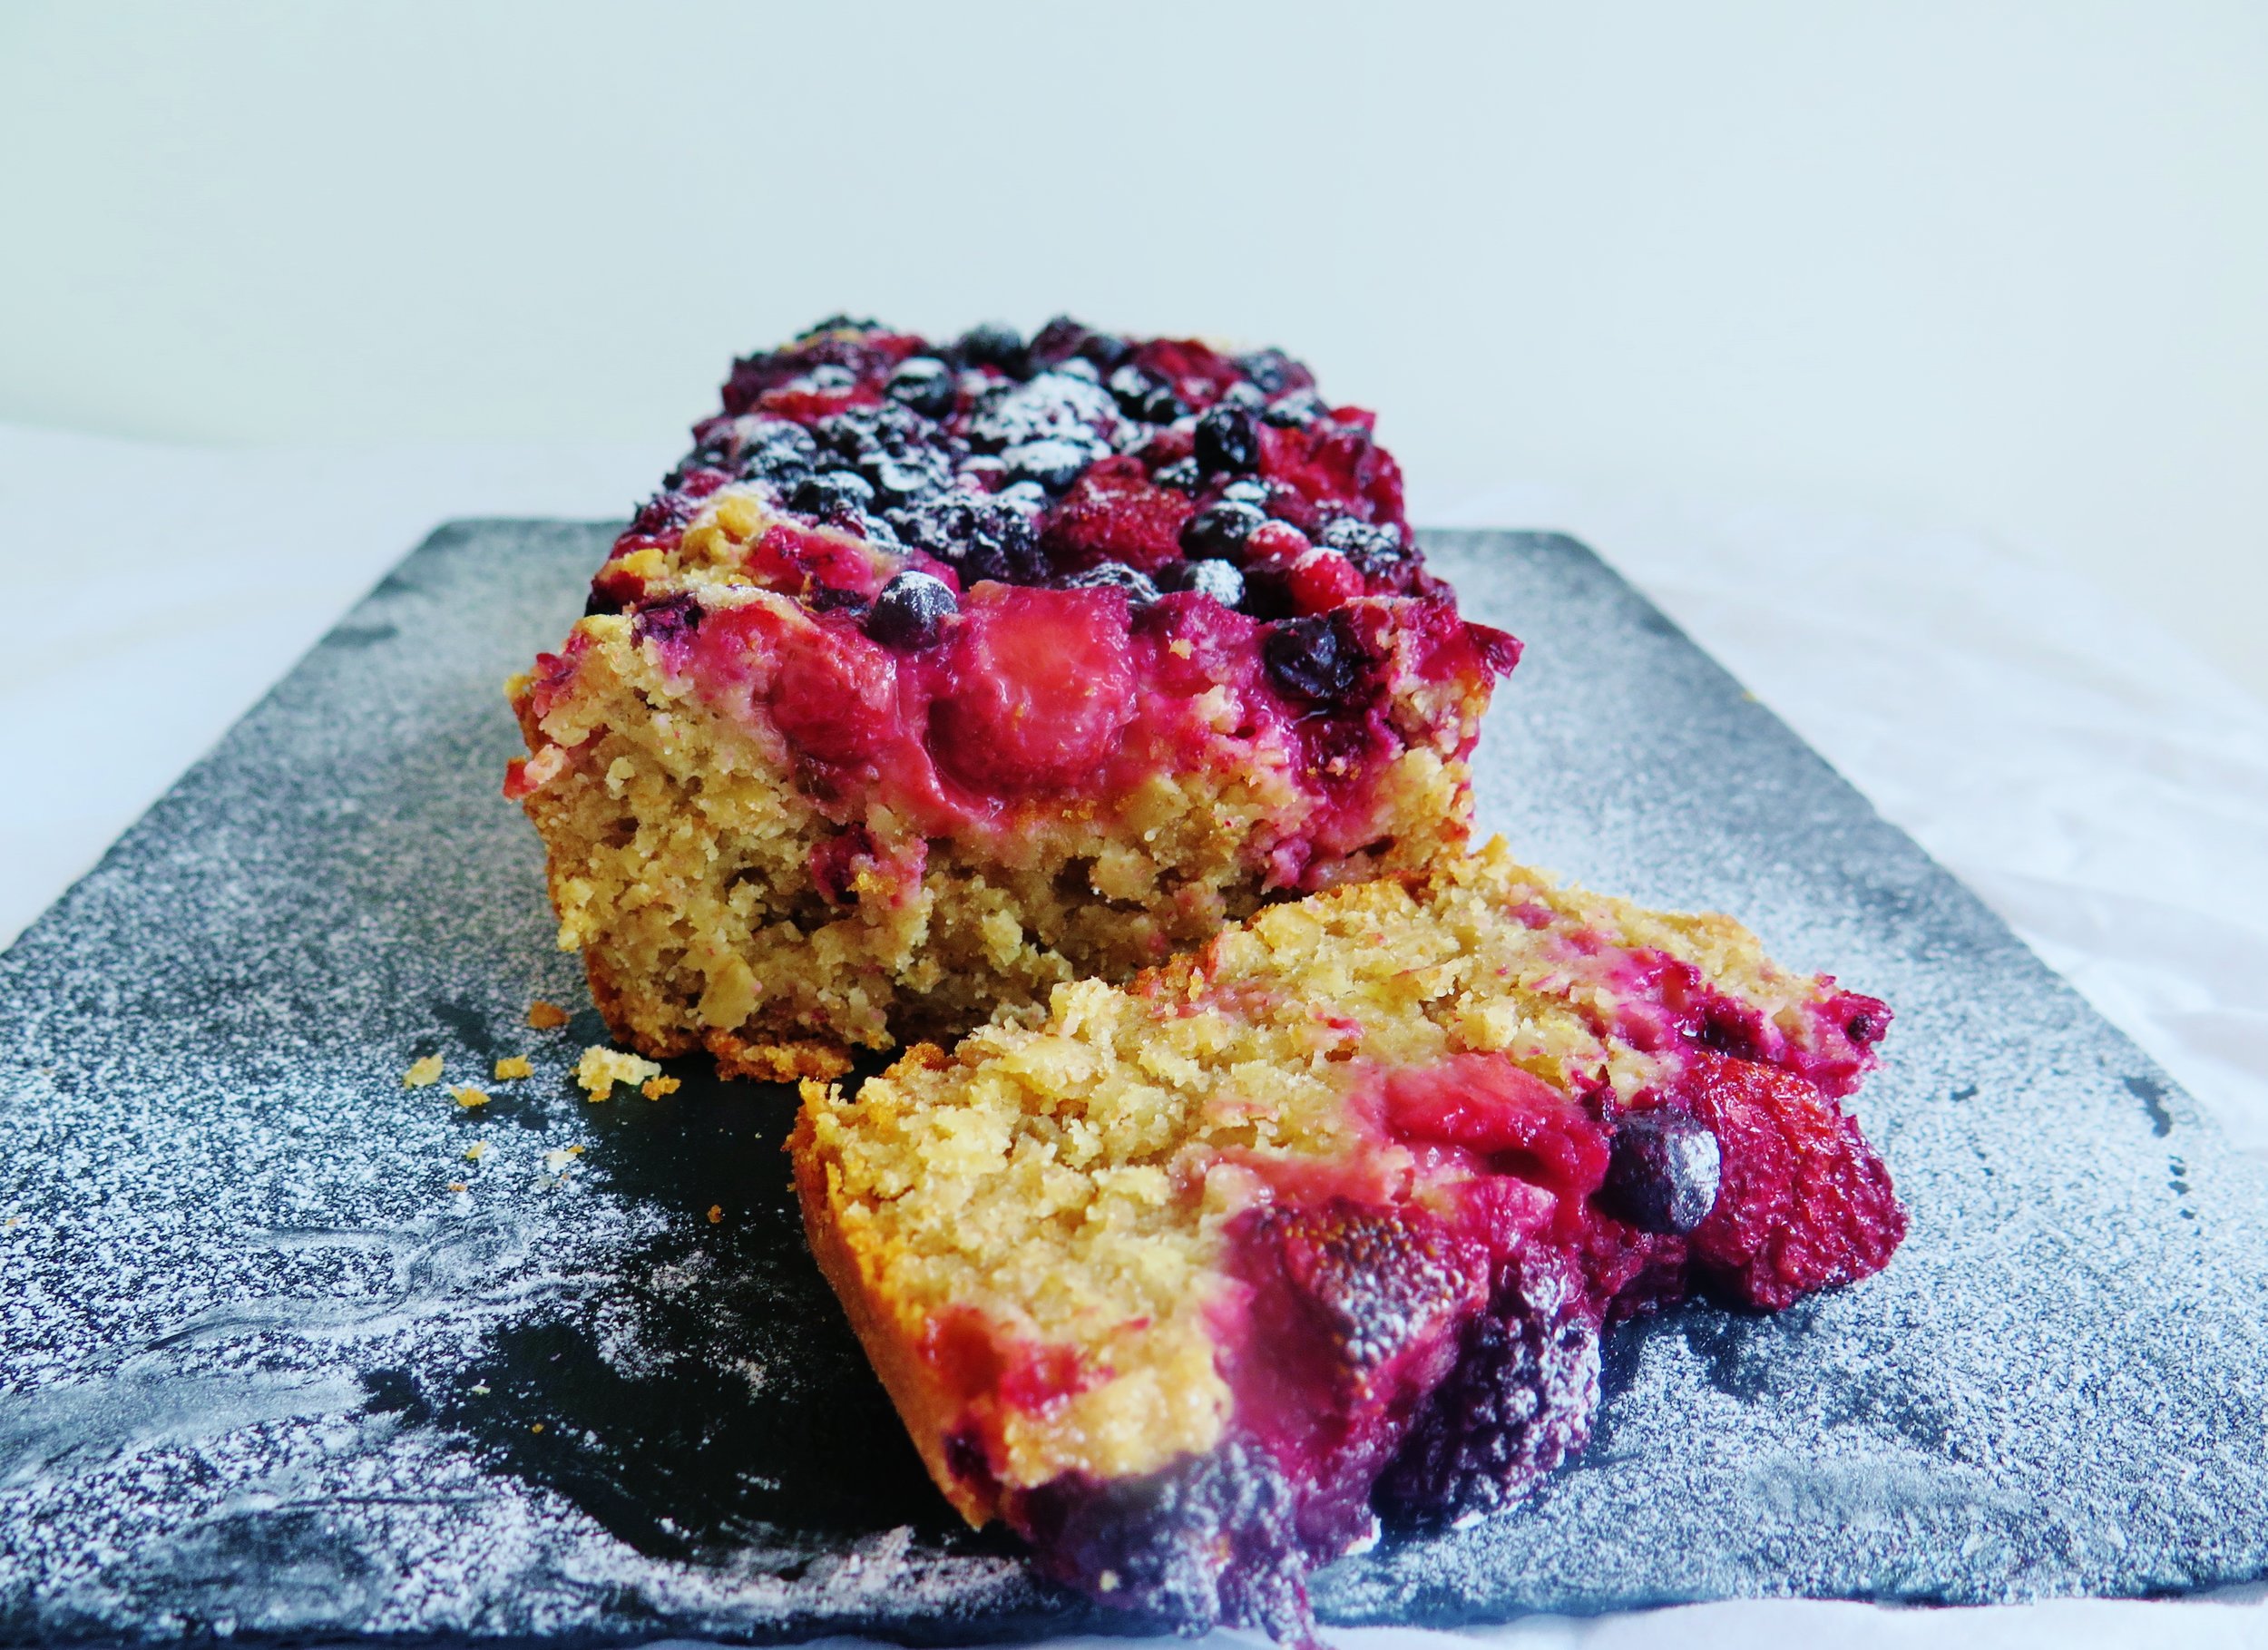
If you’re undecided as to what to have for breakfast, make this: fruit, oatmeal/porridge and pancakes rolled into one.  It’s delicious, quick to make, filling, and just sweet enough to satisfy any sweet craving but also not so sweet that it will send blood glucose levels skyrocketing...

Wholesome berry & oat breakfast loaf


brunch

Wholesome berry & oat breakfast loaf

Wholesome berry & oat breakfast loaf

Wholesome berry & oat breakfast loafWholesome berry & oat breakfast loaf

Wholesome berry & oat breakfast loaf

Wholesome berry & oat breakfast loaf

The almond milk & coconut oil can be substituted for their dairy equivalents, (milk & butter) in the same quantity.

Wholegrain spelt flour can be substituted for white/wholegrain wheat flour, or gluten-free.


Ingredients

110g rolled oats

300ml hot unsweetened almond milk

100g coconut oil

60g caster sugar

50ml honey

1 tsp vanilla extract

1 medium egg

Zest of half a lemon

1 tsp baking powder

140g wholegrain spelt flour

300g frozen mixed berries (or fresh)

11 x 22cm loaf tin (or one of a similar area), greased and dusted with flour

Serves 8


Method

  1. Preheat oven to 180˚C. Mix oats with hot milk and allow to soak.
  2. Beat together oil, sugar, honey, vanilla, egg and lemon zest. Sieve in baking powder and flour and mix until just combined.  The bran in the wholemeal flour won’t sieve so just add it in once you’ve sieved as much as possible.
  3. Using a sieve, drain the excess liquid from the soaked oats , then stir them into the mixture.
  4. Pour into loaf tin and scatter berries on top.
  5. Bake for 40 to 50 minutes, or until a skewer comes out clean. Serve warm or cold.

Wholesom Berry & Oat Breakfast Loaf

Comment

Red Pepper Pesto & The Ultimate Sandwich: Mediterranean style

1 Comment

Red Pepper Pesto & The Ultimate Sandwich: Mediterranean style

focaccia3-2.jpg

focaccia2 (2) It started in exam term in my first year when everyone’s eyes were bloodshot and their eyelids quivering with panic and fear. The cool, white-lit aisles of M&S became a solace – I didn’t even need to buy anything. Drawn inexorably to my oasis, my first trip one day led me to a jar of red pepper pesto. I plunged a spoon into the glistening depths as soon as I made it back to my room, and in the grip of revision lunacy, it made sense to finish the jar - straight, without any interfering bread or cracker-like vehicle, and as fast as possible. It was savoury and creamy, but when the jar was empty and I stopped to analyse what I had just consumed, it was clear to me that the pesto was way too oily. I began to experiment with my own version, and I concluded that adding oil is entirely unnecessary. I think my version tastes fresh, summery, and light, with a hint of smokiness from the char grilled peppers. You can, of course, grill your own, but there are ready-made grilled peppers in jars that are remarkably good. It is incredibly easy to make: just one step, especially if you’re not going to the trouble of grilling your own peppers. It’s also versatile, and can be swirled into soups, couscous, quinoa, salads and pasta, and can be used as a mezze dip.

red pepper pesto The Mediterranean focaccia sandwich is the perfect platform for the red pepper pesto – it expands and rounds out the flavours of the filling ingredients, adding depth to the sandwich.

focacciawhole1 (2)

Of course, freshly baked, homemade bread is a superior breed to most shop-bought equivalents, and really isn’t difficult to make. It’s not even time-consuming as it gets on with its own activities while you get on with yours. A little bit of punching down (of the dough) now and then is really not that onerous, and the smell of baking bread is well-documented.

focacciawhol3 (2)

You can fill it with whatever Mediterranean, or indeed other, ingredients you wish.

focaccia3 (2)

I loaded mine with roasted tomatoes, olives, mozzarella and torn basil, and of course the red pepper pesto. This is not just a sandwich…this is a meal.

IMG_5837

Red pepper pesto

Ingredients

10g garlic (4 cloves) peeled and crushed 40g pine nuts 40g basil (leaves & stalks) 40g parmesan, grated 3 roasted red peppers from a jar (200g) 2 tbsp sun dried tomato paste 1 tsp lemon juice ¼ tsp salt

Method

In a blender, whizz all the pesto ingredients together until combined but there is still some texture.


Focaccia (Adapted from Gail’s Artisan Bakery Cookbook)

Ingredients

Dough:

500g strong white bread flour 330ml room temperature water 50ml extra virgin olive oil 2 tsp salt 1 tsp caster sugar 10g fresh yeast or 5g dried active yeast 45g clear honey Extra oil and flour for greasing and dusting tin

Topping:

150ml olive oil 8 garlic cloves, crushed 3 sprigs fresh rosemary ½ tsp salt

1 tin 5cm x 24cm x 34cm, lined with baking parchment

Method

1. If using fresh yeast, cream it together with caster sugar in a bowl. It should turn creamy. If using dry yeast, add it in with rest of ingredients. 2. Sift flour into bowl of stand mixer fixed with dough hook attachment. Add rest of ingredients including the yeast. 3. Knead on slow speed for approximately 8 minutes, until dough is smooth, soft and springy. 4. Swirl the dough in an oiled bowl until coated. Cover with cling film and leave to rise in a warm place. 5. In the meantime, make the topping by mixing the oil with the salt and garlic, and allow it to steep. 6. After 45 minutes of rising, knock the dough down and cover it again with cling film. 7. Leave for another 45 minutes. Knock down, and leave for another 45 minutes. Knock down again. 8. Leave it to rise for a further 45 minutes, then stretch the dough to fit the tin and make dimples in the dough with your forefinger. Paint the dough with the garlic-infused oil, and sprinkle with rosemary needles. 9. Preheat the oven to 200°C. Leave the dough to rise for 20 minutes. 10. Bake for ten minutes, then reduce the heat to 180°C and bake for a further 10-15 minutes until golden and the bread is soft and springy. Remove the bread from the tin to check that the base of the bread is crisp and golden. If it isn’t, bake for a further five minutes or so. 11. Once the bread is baked, paint it again with the remainder of the garlic-infused olive oil and sprinkle with salt. 12. Place on wire rack to cool, or serve immediately.

IMG_5819

1 Comment