Berner's Tavern

Comment

Berner's Tavern

IMG_33271.jpg

Berner's Tavern  

Over volcanic hills, swinging round vomit-inducing hairpin bends in the gravel tracks, we drove.  Across the timeless, verdant countryside we whipped our car, through countryside which had bubbled up thousands of years ago and stayed the same - until we found the ivy-embraced, craggy little farm which was threatening to crumble into the landscape.  Behind the building, little puffs of white sheep scuttled in the distance.  A bucolic idyll.

Then I opened the car door and stepped out.

The air was noisome, salty, and thickly perfumed with urine, stale sheep’s wool and rain-dampened hay.  Milena waddled out of the house.  She came closest to the embodiment of a Horacian hag I’ve ever witnessed.  She beckoned us over to the farmhouse and to cross the threshold protected from the weather with a muddy flaxen rag. Her rugged face remained humourless.  As we moved closer, the intoxicating stench intensified to migraine-inducing levels.

Berner's Tavern


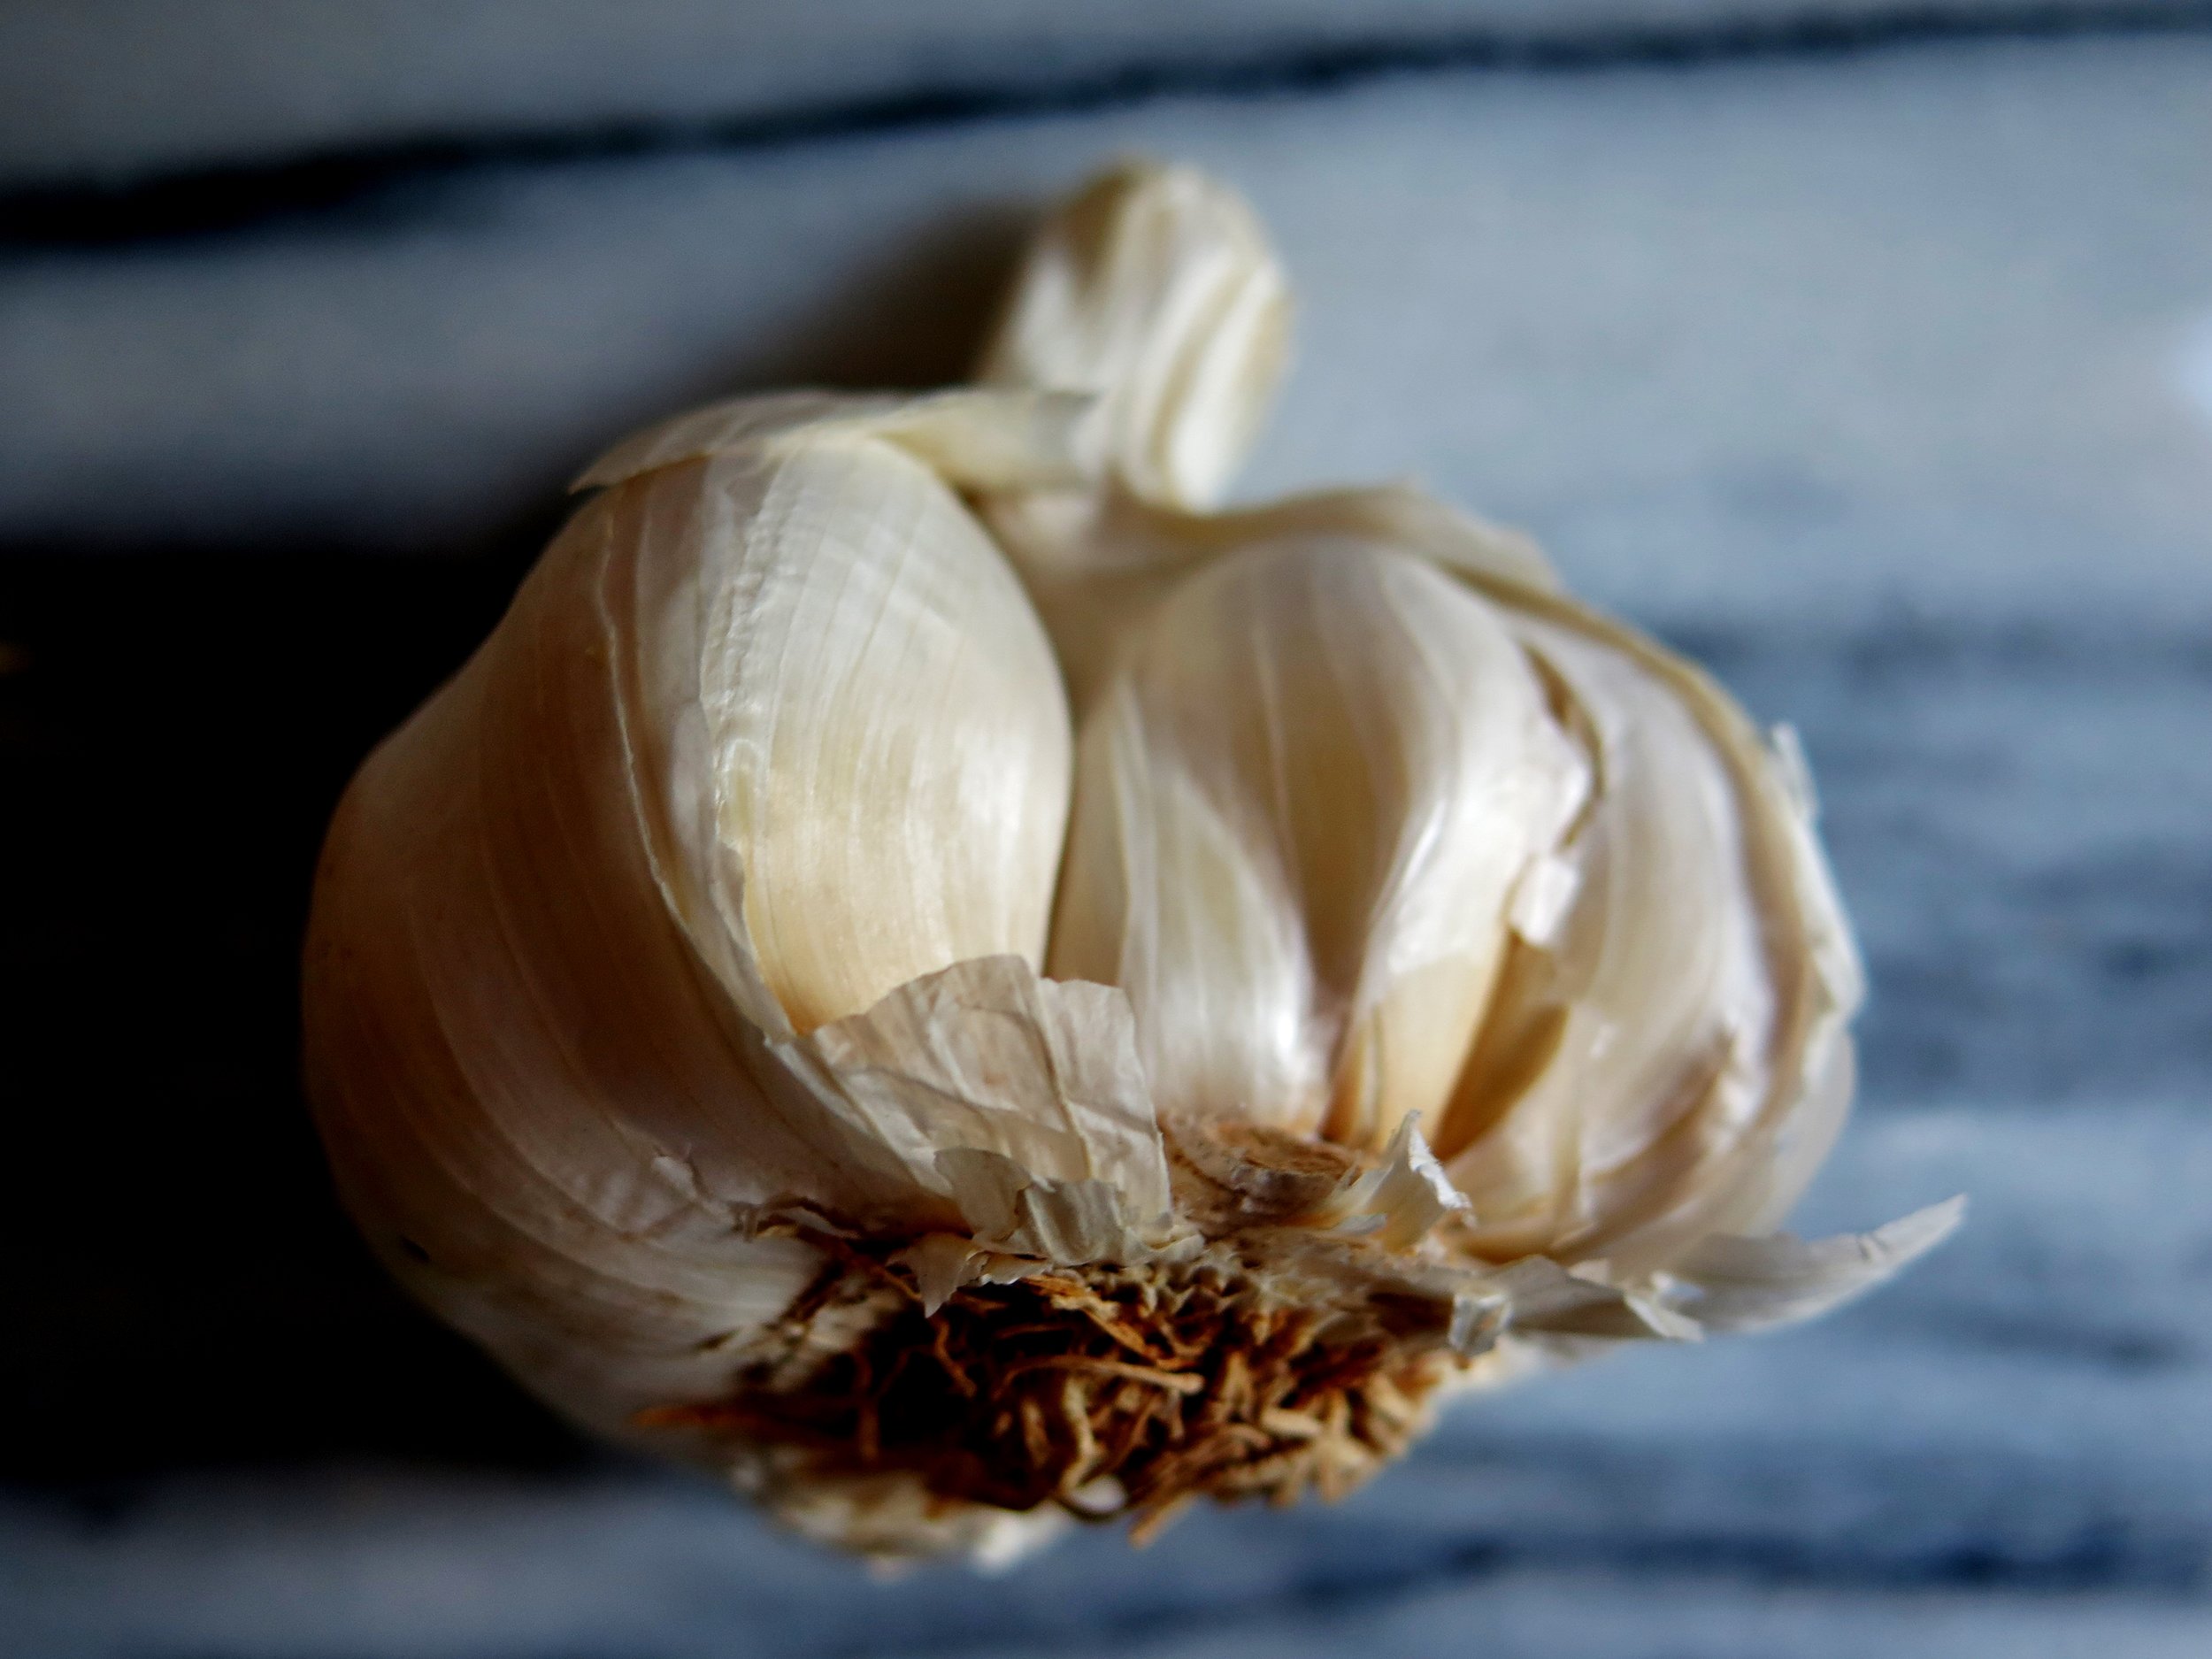
Blinded by the darkness and the stink, it took a while to adjust until.  Eventually we could make out shelves upon shelves supporting waxy rounds in various shades of yellow.  Milena waddled closer to us, now bearing a heaving barrel splashing out sheep’s milk.  It was fresh from that morning – she woke up every day at 6 to milk the ewes.  The curds in the barrel were similar in appearance to something a baby might have regurgitated.  She scooped them up and dolloped them into curved wicker moulds, her hands gnarled, stubby and deeply mottled with purple knotted veins.  In their curved, rib-like shape they had adapted to her craft.  She pressed the curds into white, curdled mulch that wobbled in the moulds. After much squeezing and puffing she tipped the substance out of one of the moulds to produce a quivering and uncertain, nude, white, ricotta peak.  The other, a pecorino-to-be – our future round of pecorino - she set aside to coagulate.

We returned a couple of weeks later to pick up our pecorino, for which Milena extorted a princely sum (and only then did a smile play at her lips).  She instructed us to let it ripen for 4-6 months until it had reached its requisite level of maturity.  And so it rested in our kitchen, weeping oil and dispersing its urinous, hay-like scent: a little, coagulating piece of Tuscany.  It eventually reached vintage state, rock solid, and flavour fortified to the max.  (It was tasted and eaten by me with a sense of obligation rather than pleasure.  It turns out I prefer the pasteurised shop-bought version after all.)

Berner's Tavern

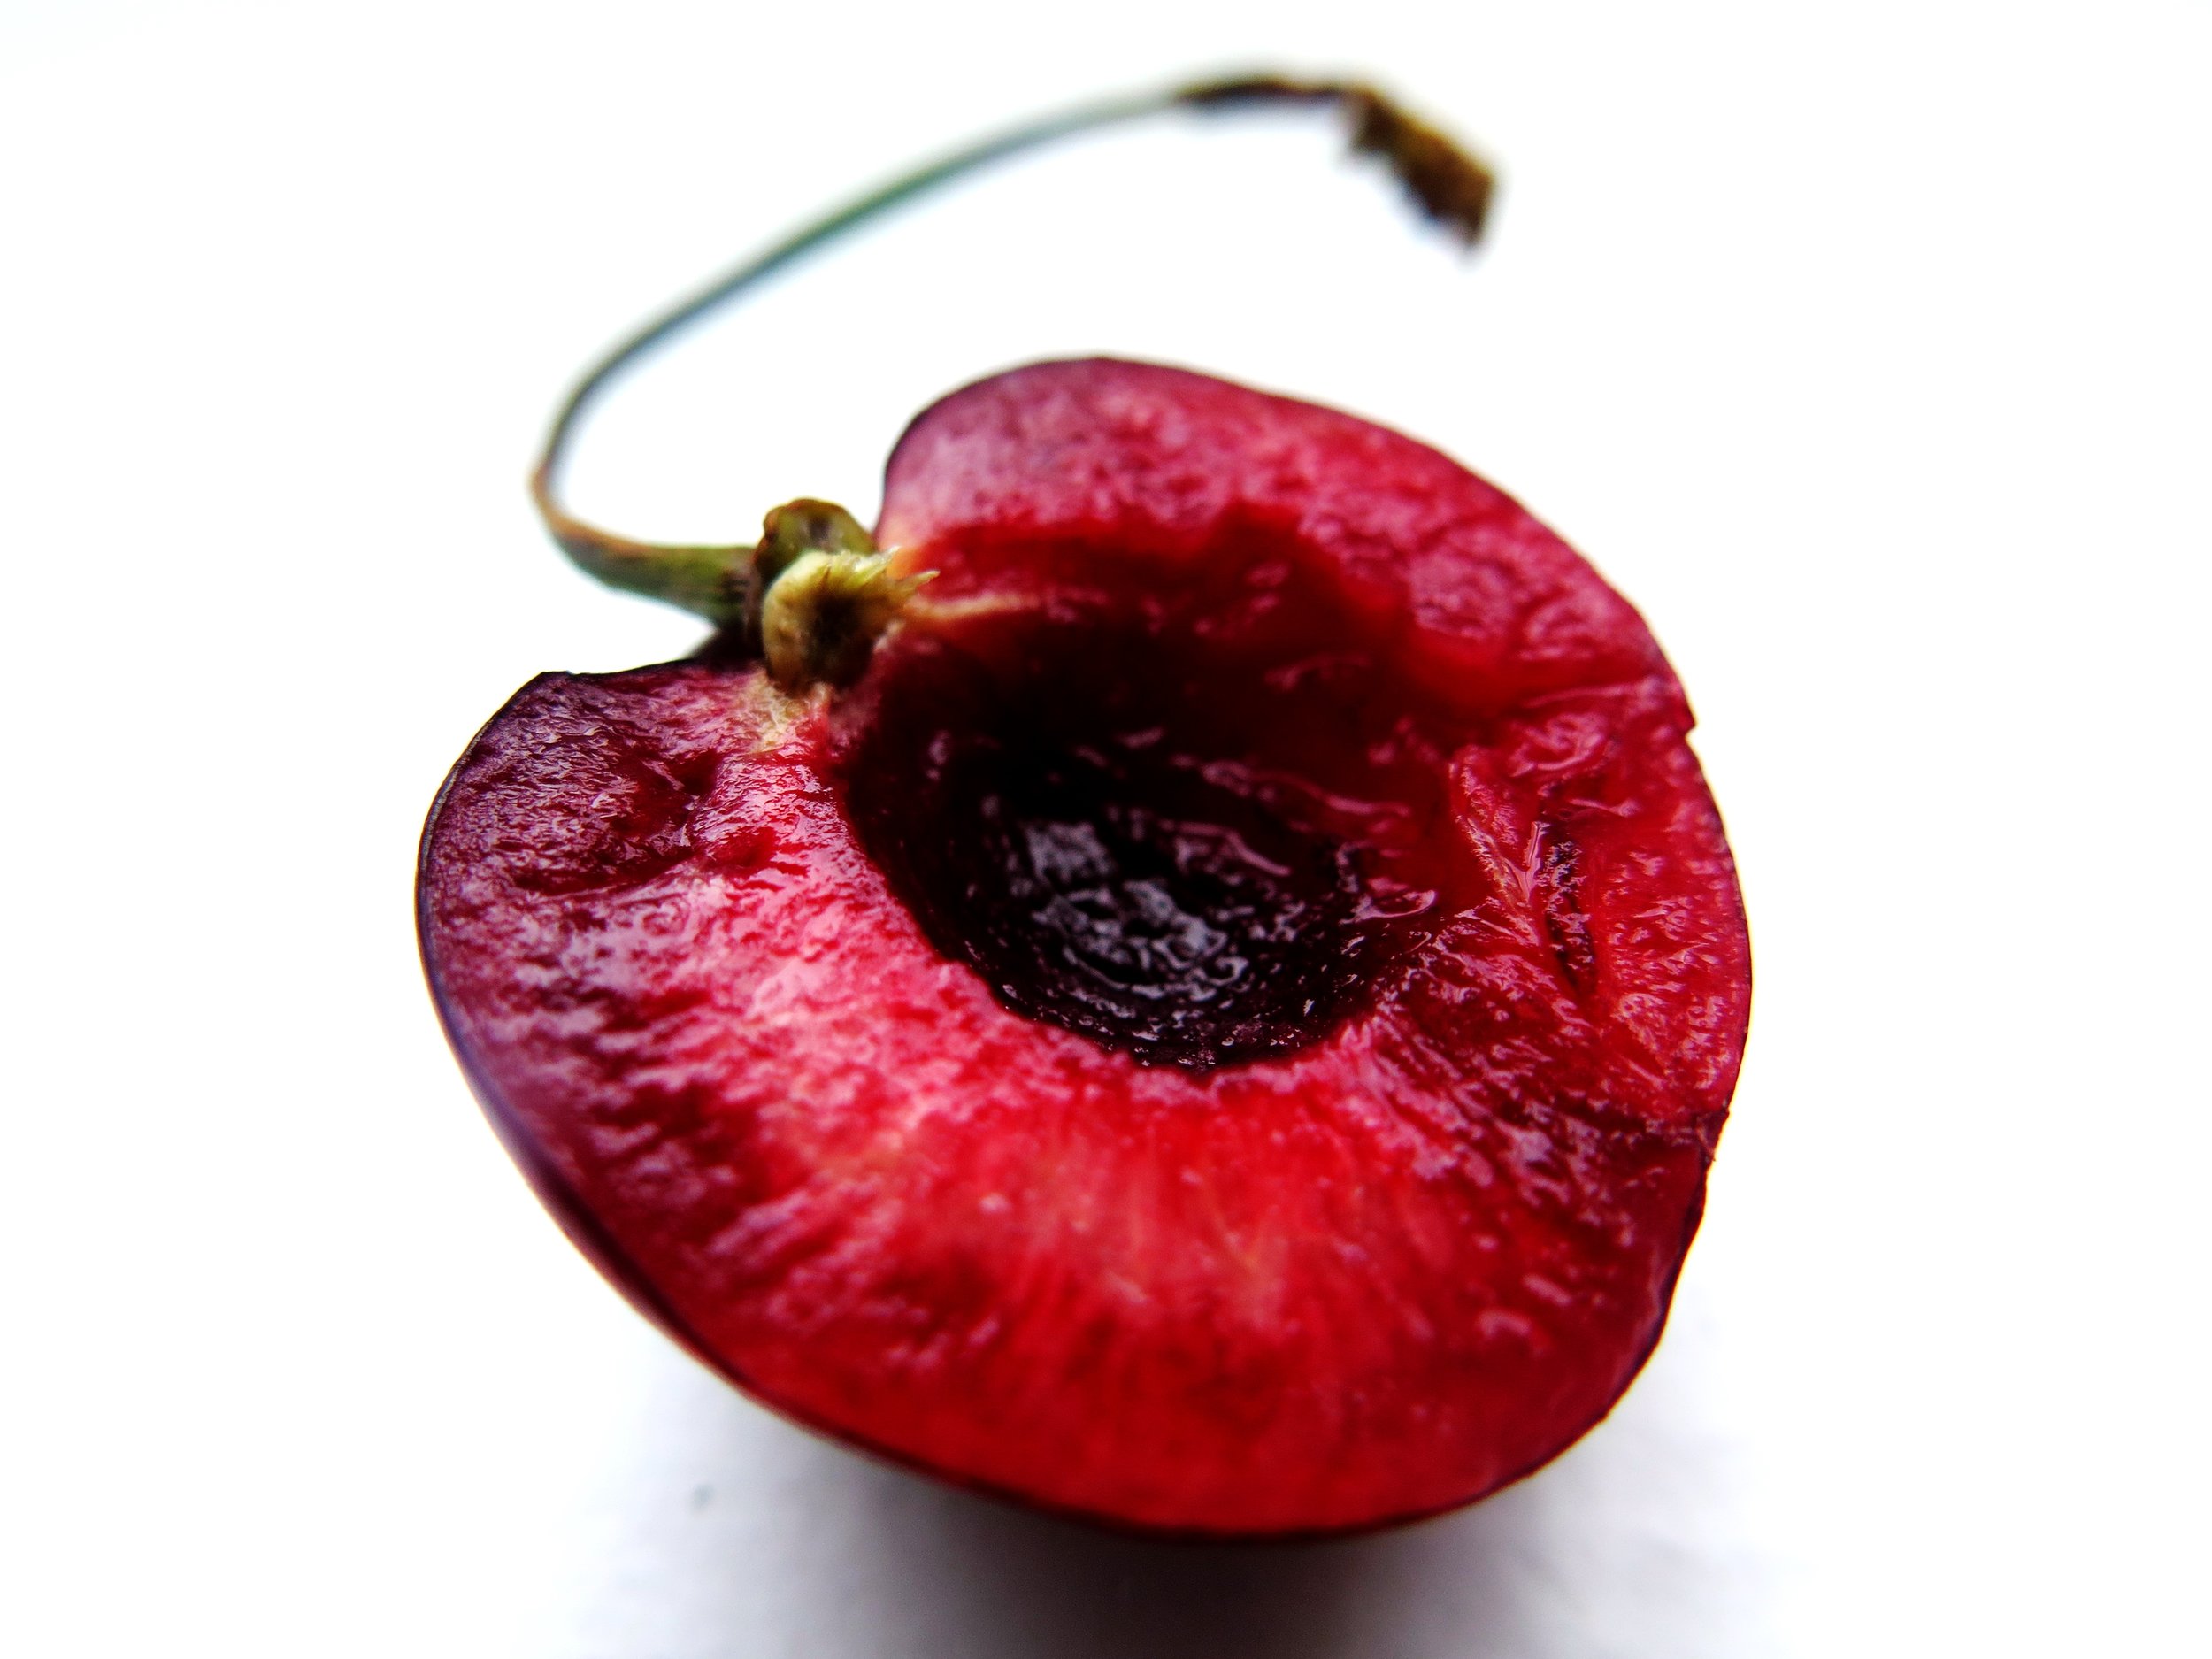
Tenuous as it may seem, when I left Berner’s Tavern a couple of weeks ago, I found my opinions to be rather similar in state to the freshly born pecorino cheese – swirling and raw and mildly uncertain.  So instead of writing about it immediately, I let my thoughts settle and ripen over time until I had something more definite and salacious to carve up to be consumed by the reader.   My experience left me pulled in multiple directions.

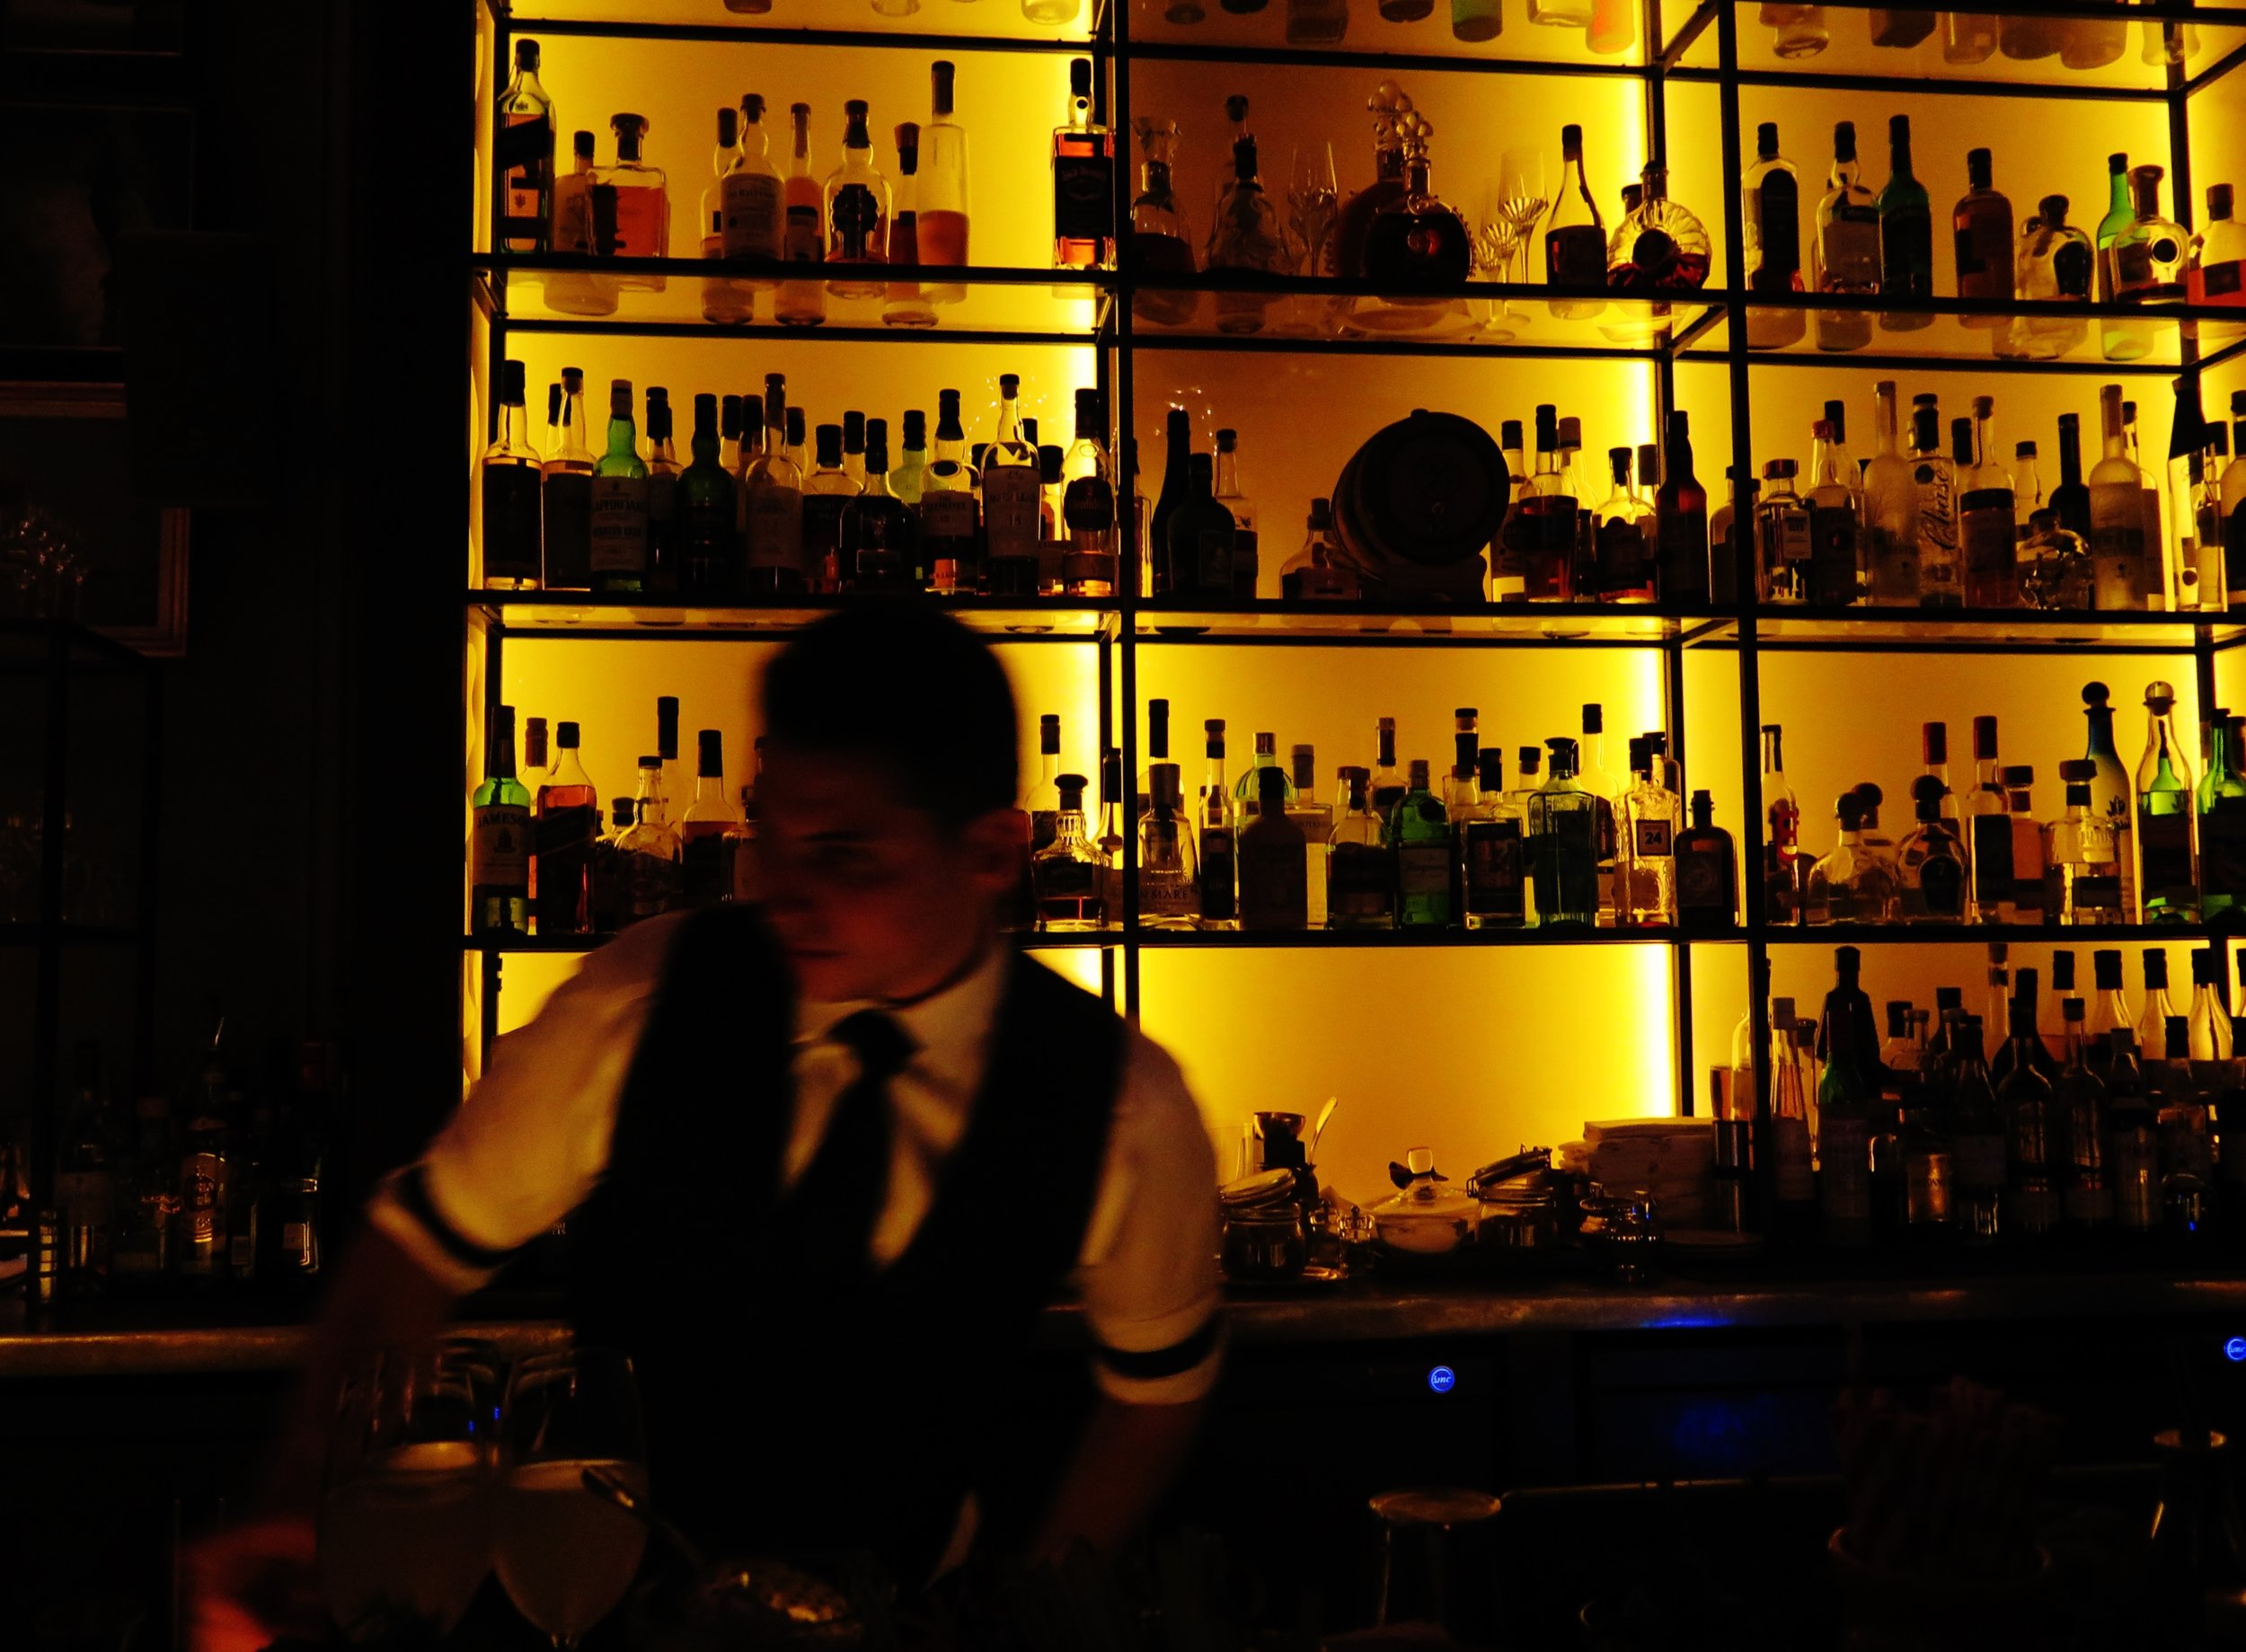
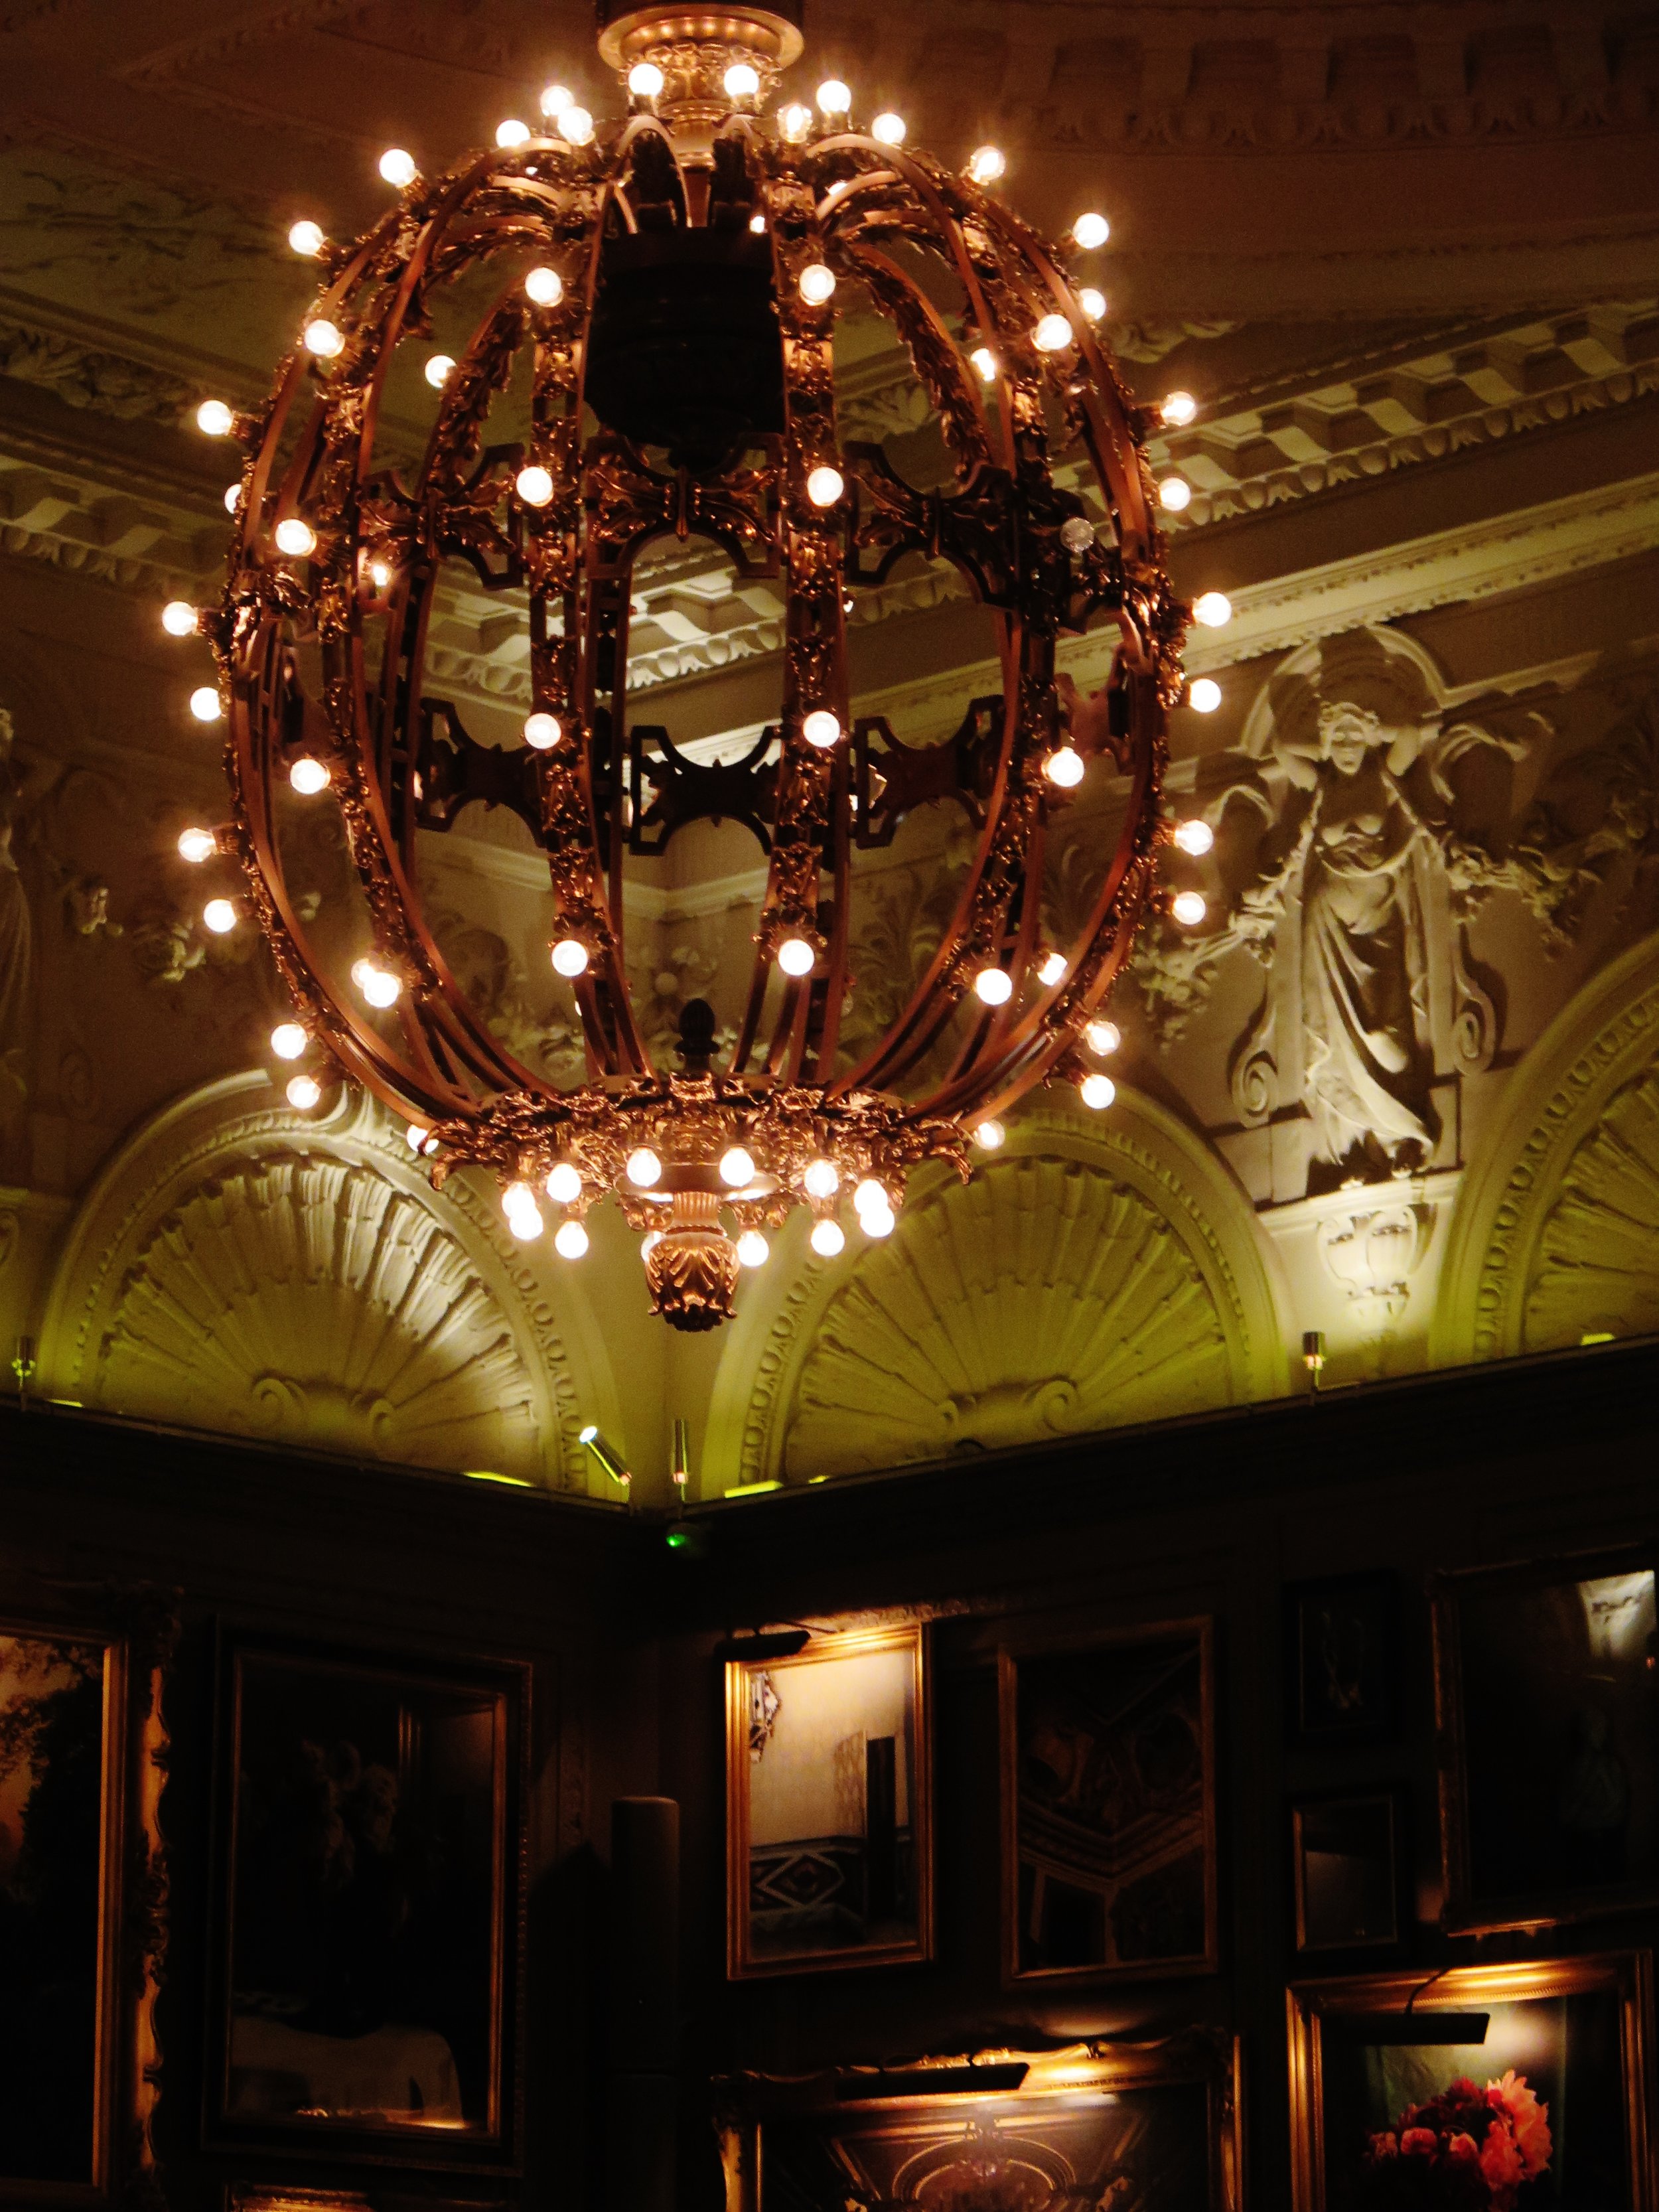
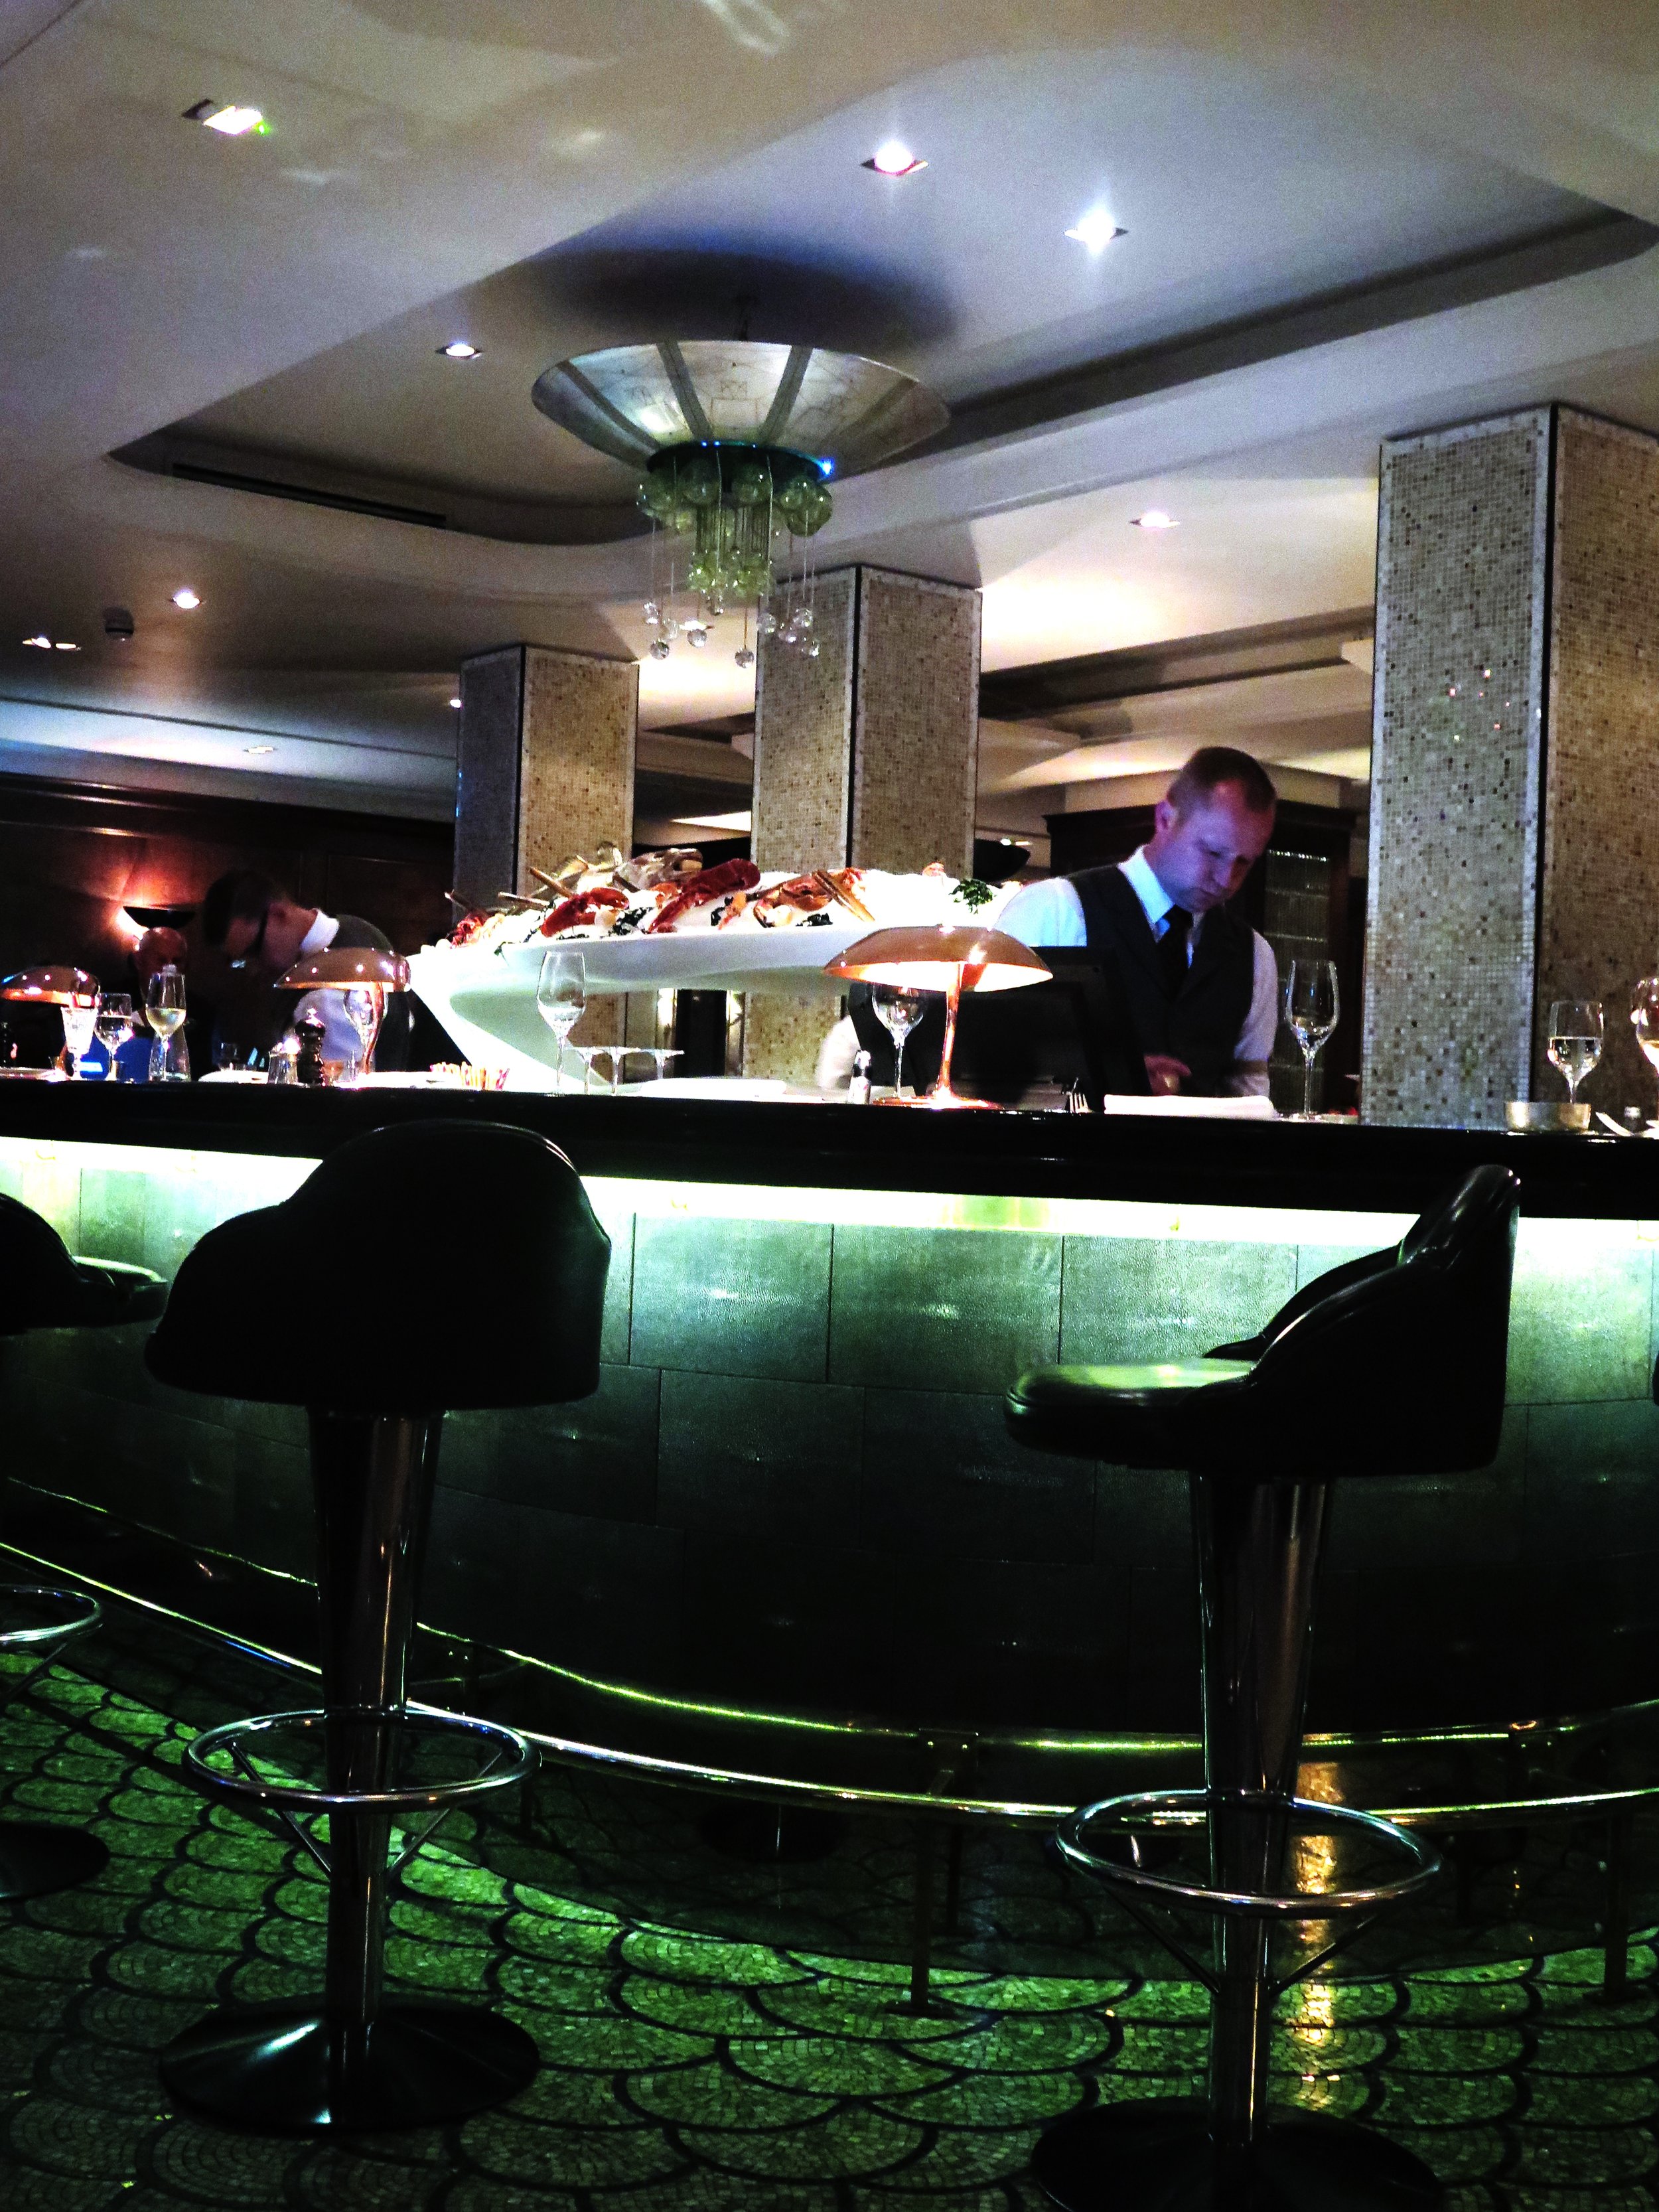
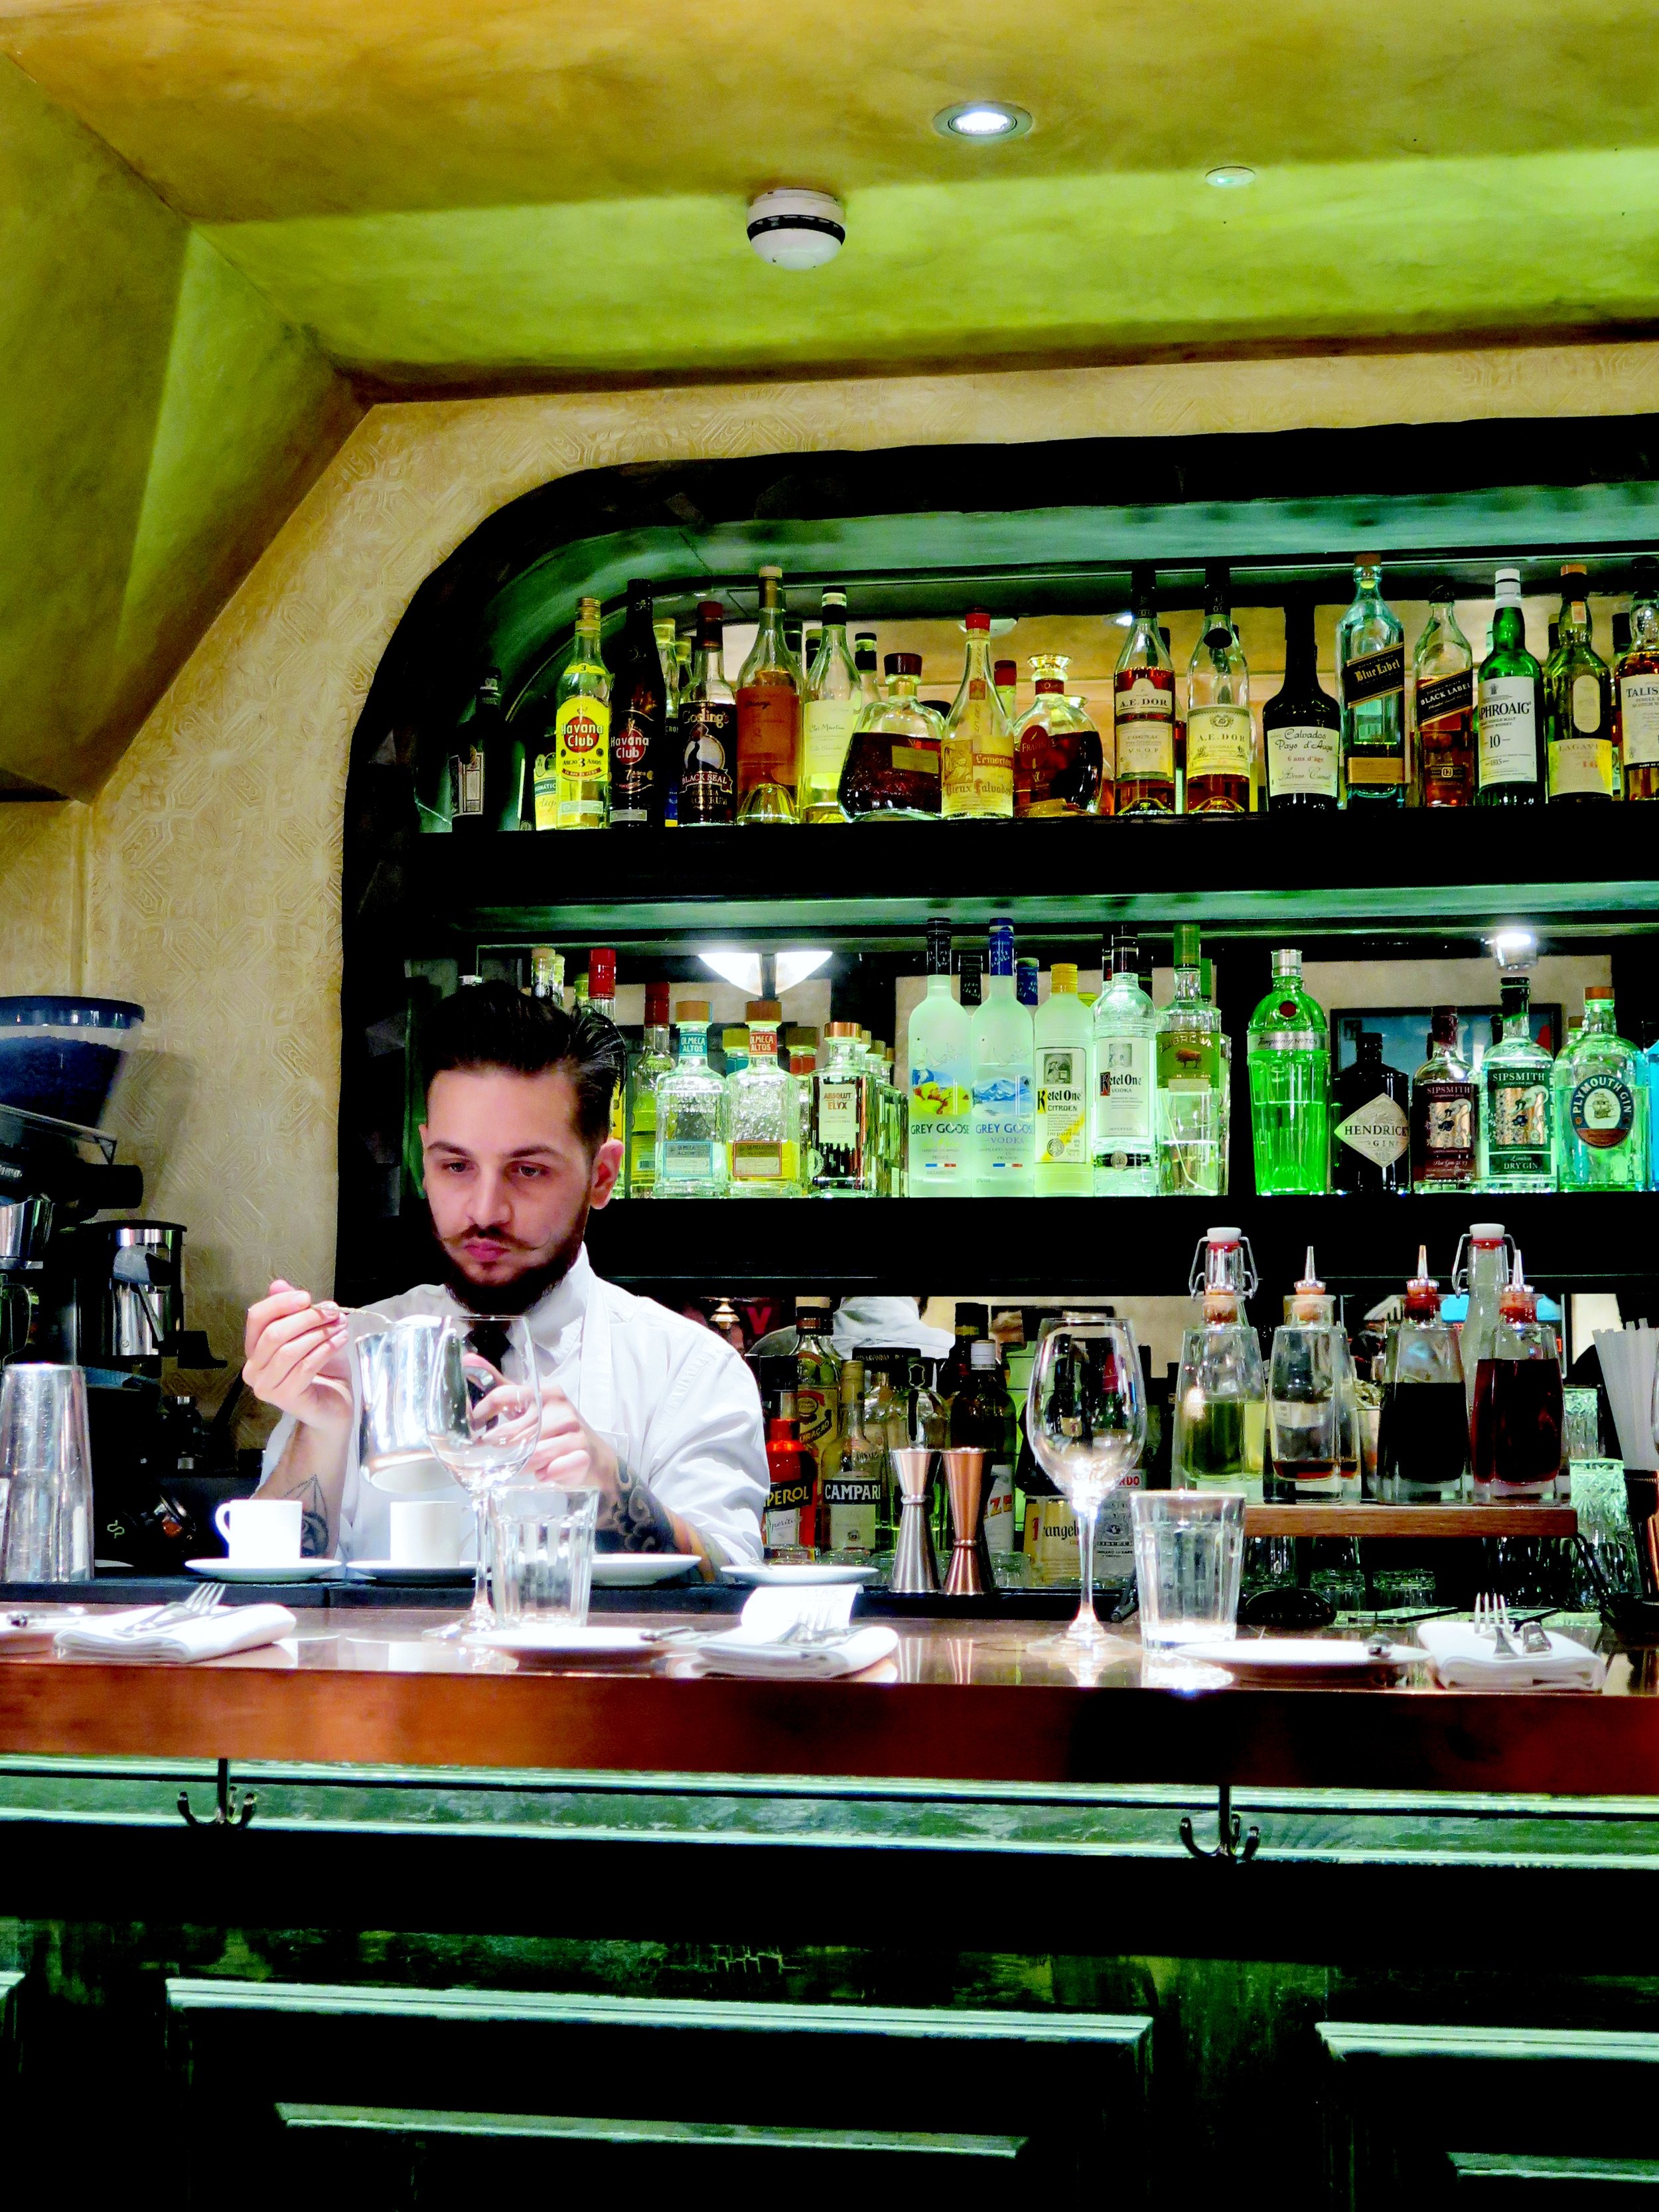
Since we could only get a very late booking for the restaurant, my dining companions and I had booked a table in the Punch Room bar beforehand, located, like Berner’s Tavern, within The Edition Hotel.  We called to warn the bar that we would be about 20 minutes late, only to be notified, upon arrival, by an unsmiling blonde that our table had been given away.  This was vaguely reasonable, except that they were incapable of providing a concrete time for when we might get a table.  An hour later we were led into a bizarrely half-empty bar.  The timing would not have been an issue had a similar situation not occurred at dinner - this time, their fault.  Hypocrisy was in full swing: we made sure to arrive on the dot for our booking at the restaurant.   Alas, the table was not ready – so, like many restaurants who wish to exploit their customers by sending them to the bar, Berner’s Tavern followed suit.  We ordered drinks expecting the table wait to be brief. Alas, it was not.  We waited 45 minutes – an appalling amount of time.  There was no compensation.  And no apology.  The unrepentant manageress seemed to think that the honour of bestowing a “booth” table upon us would mollify us.  Funnily enough, it didn’t – in stark contrast with the paradigm set by Le Caprice where truffles were brought to our blissfully unaware table at the collapsing of a soufflé in the kitchen.  At Berner’s Tavern, however, customer care does not appear to exist.  The charm and grandeur of the painting lined, high-ceilinged cavern is simply not enough.

Berner's Tavern
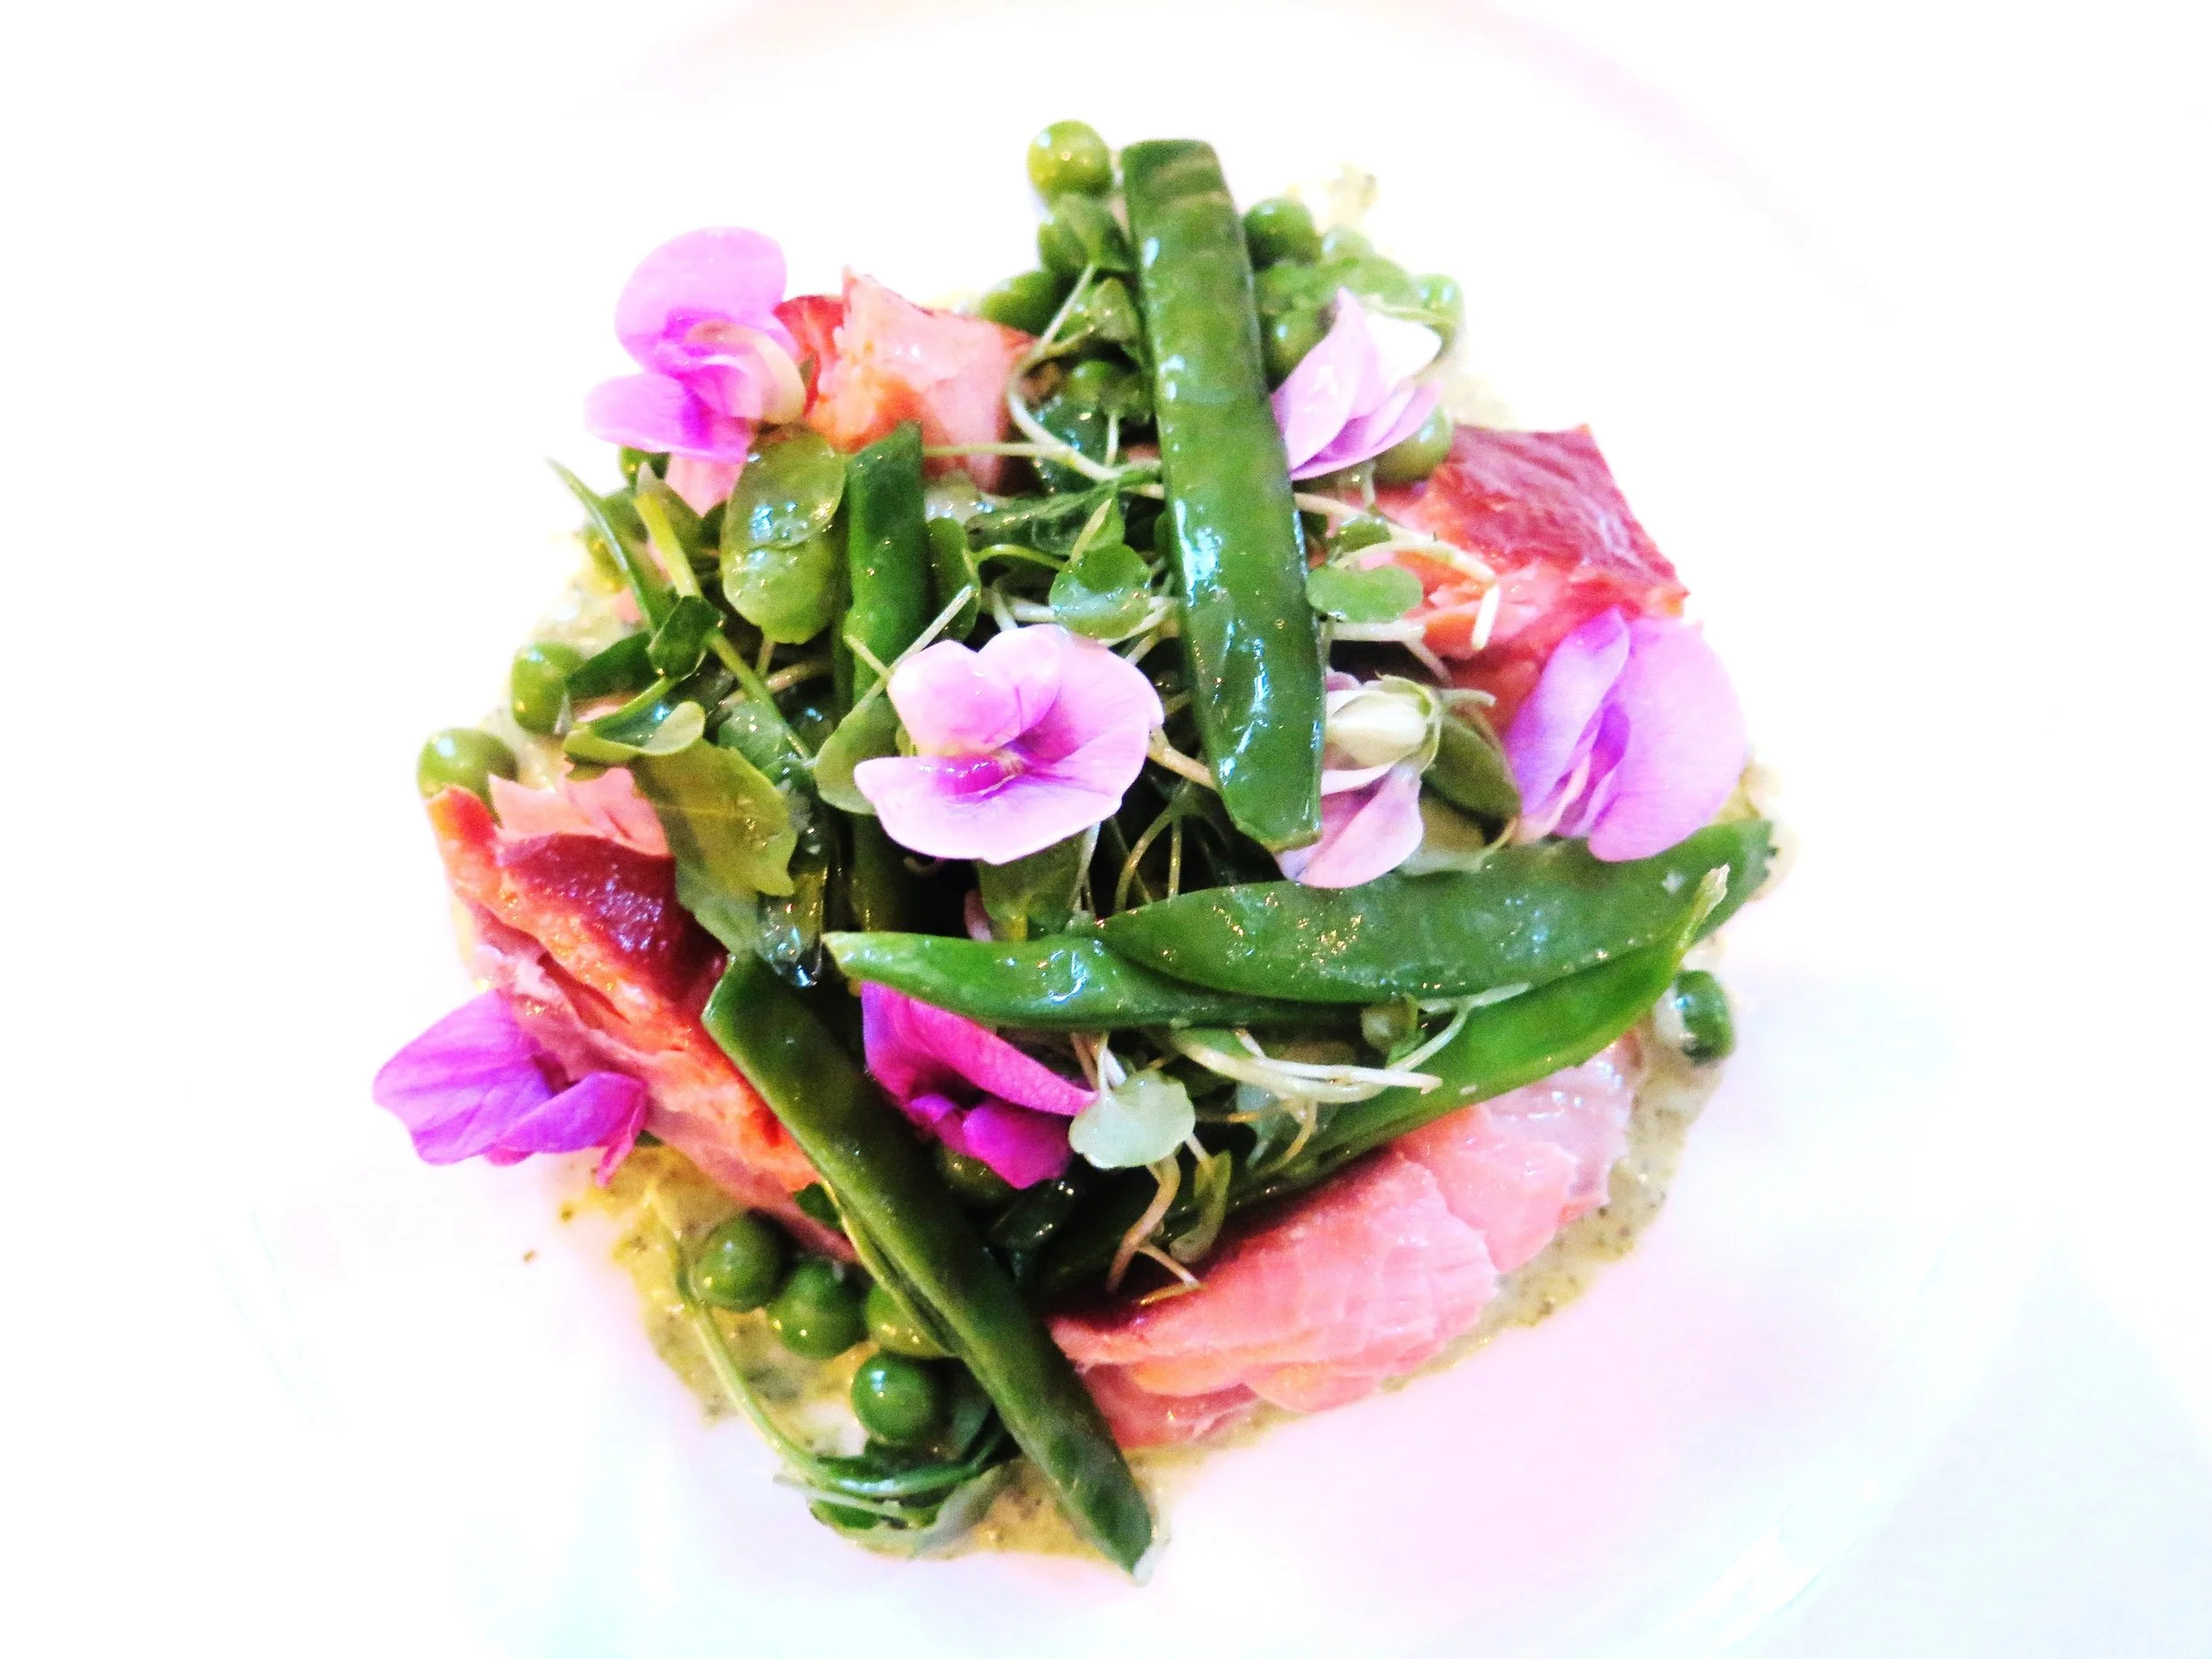
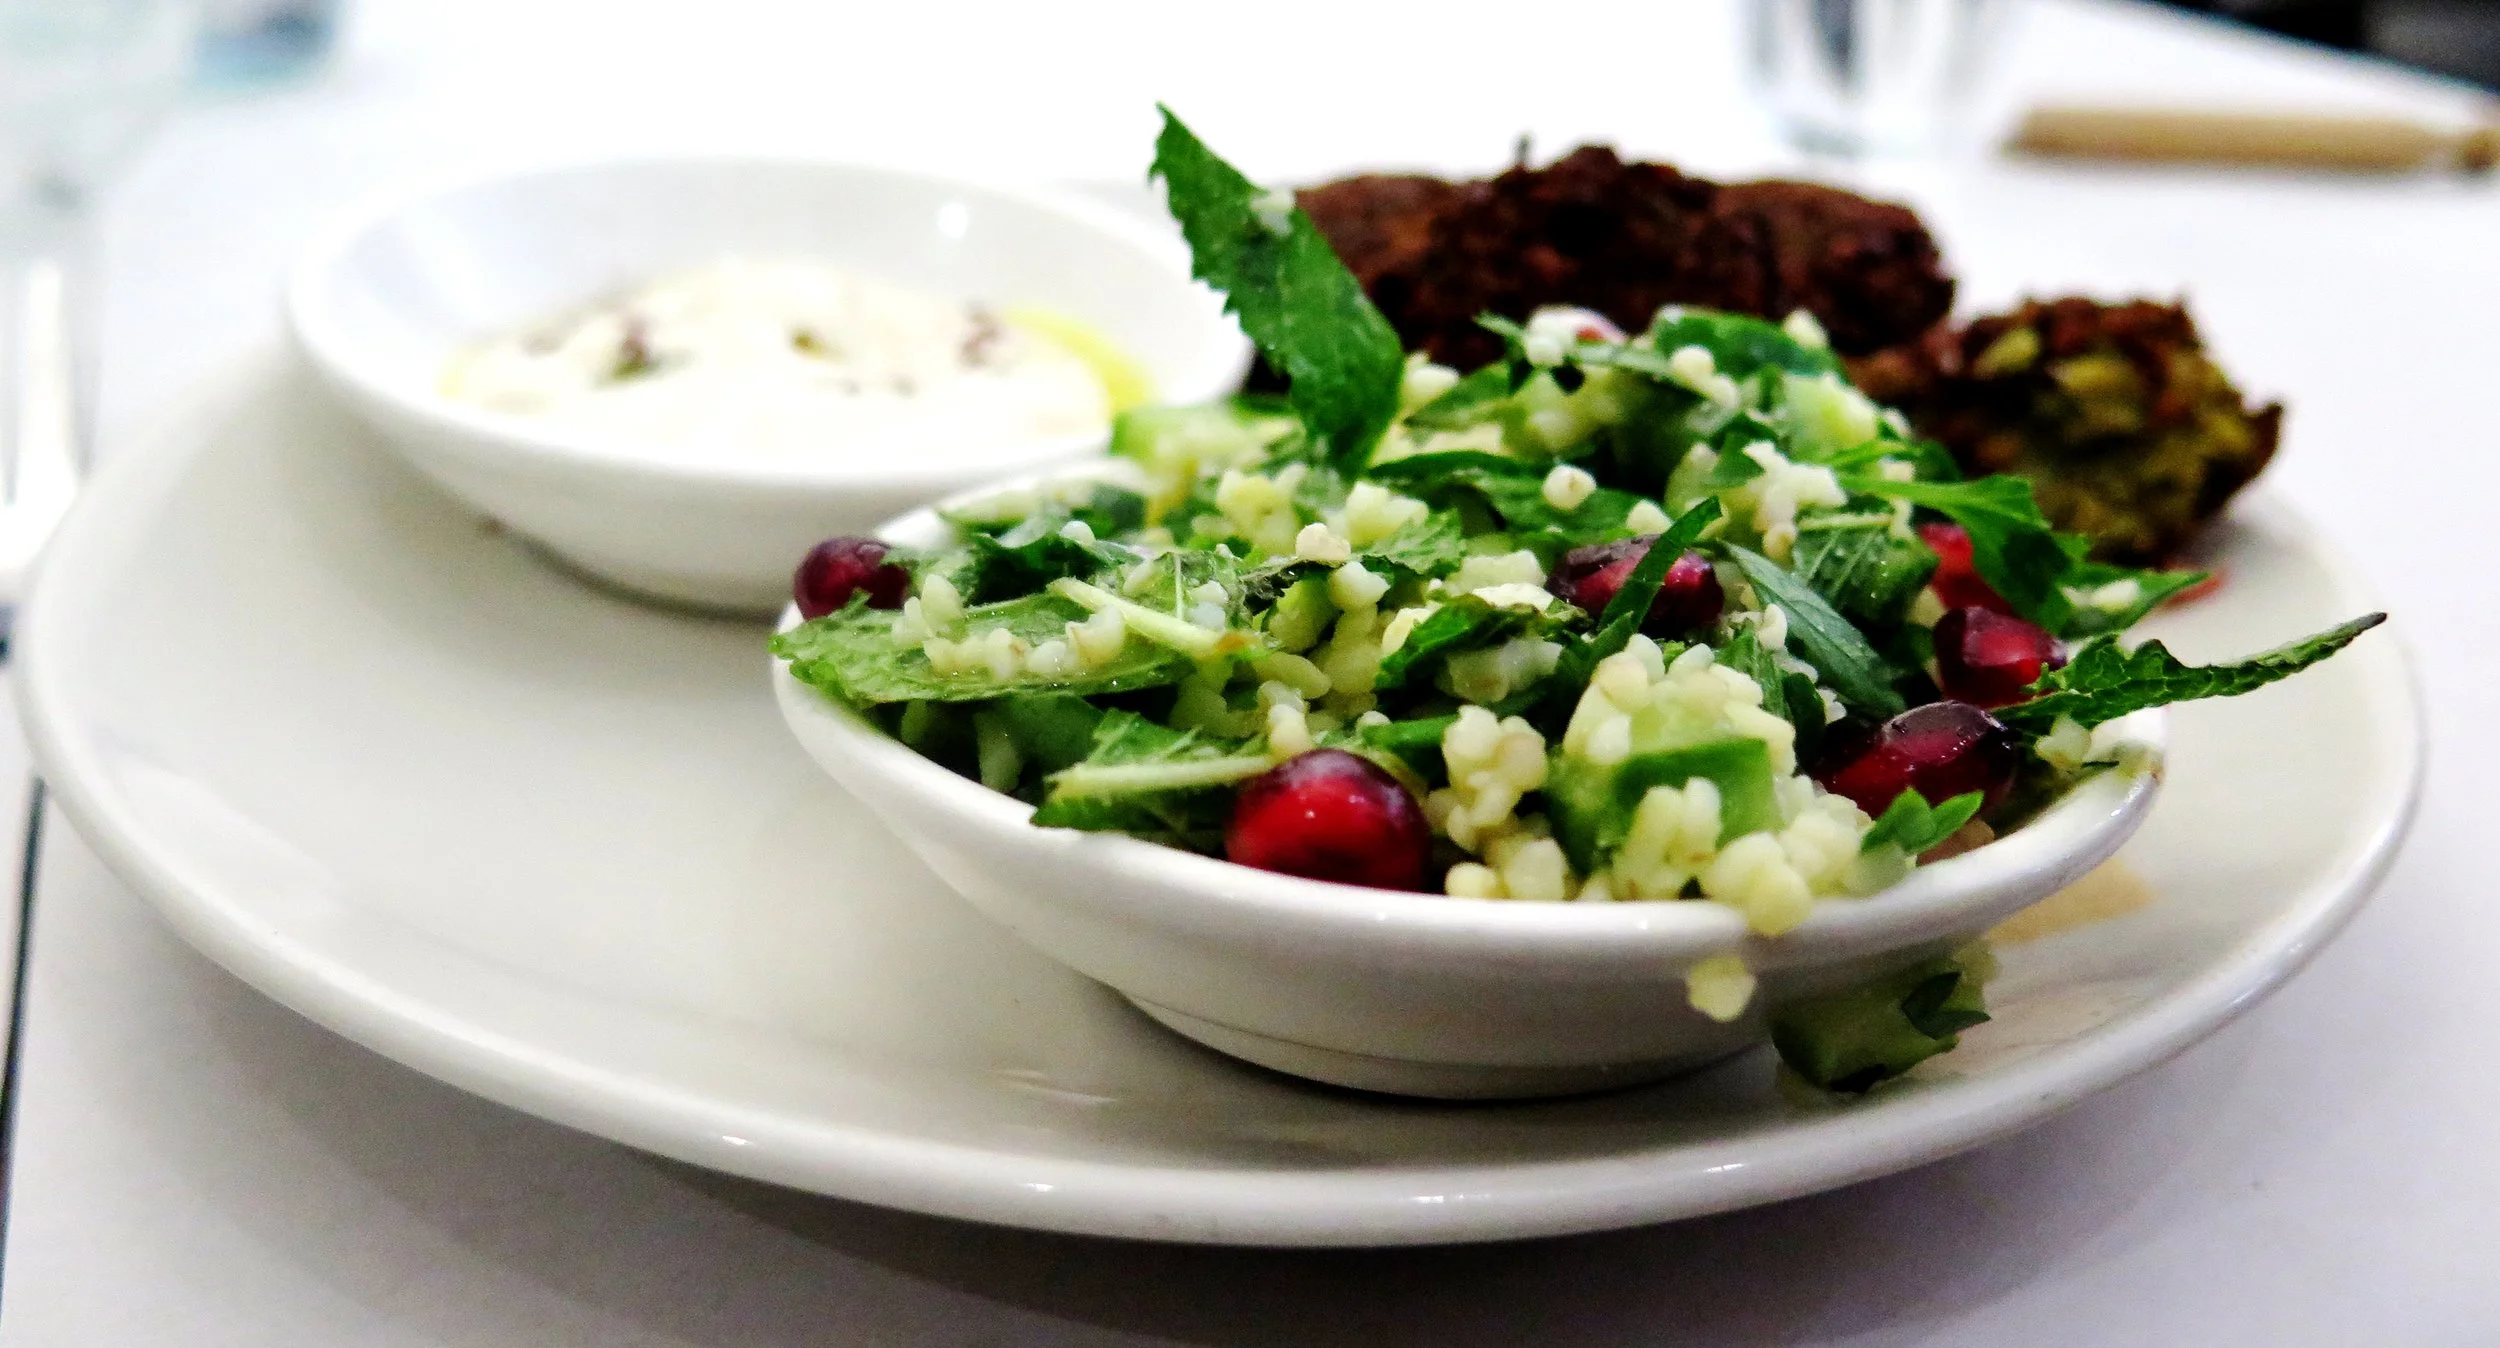
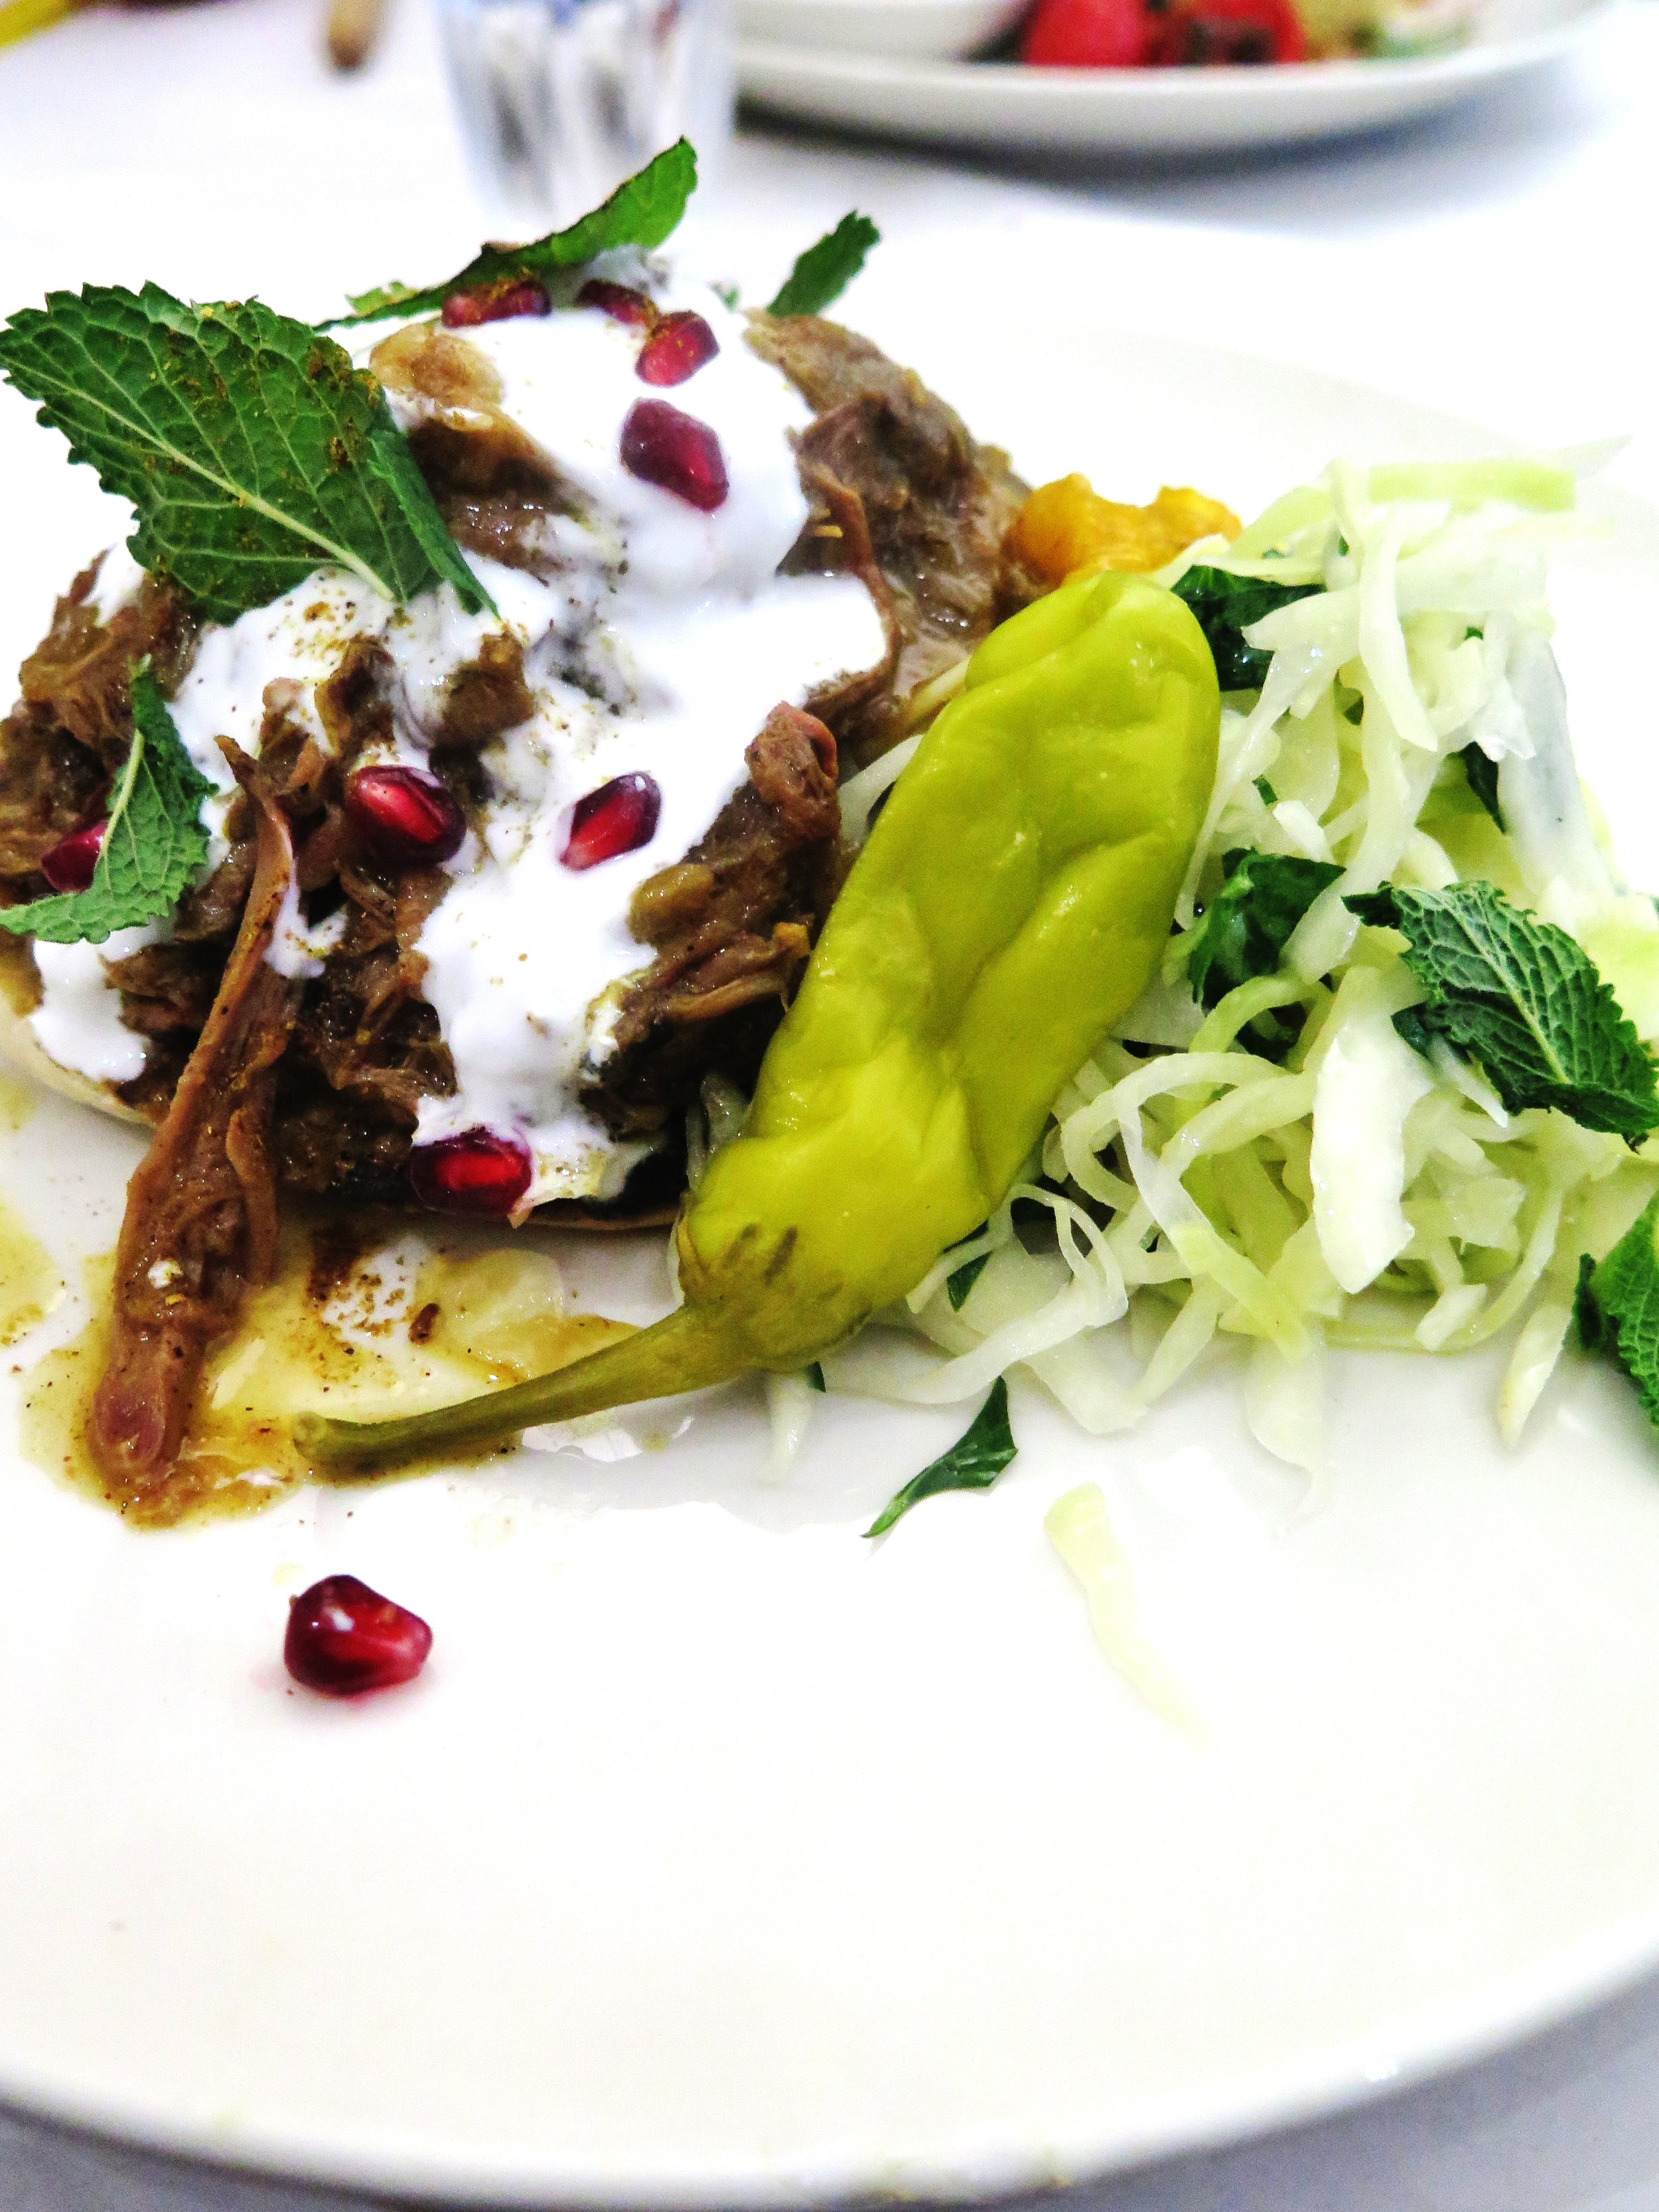
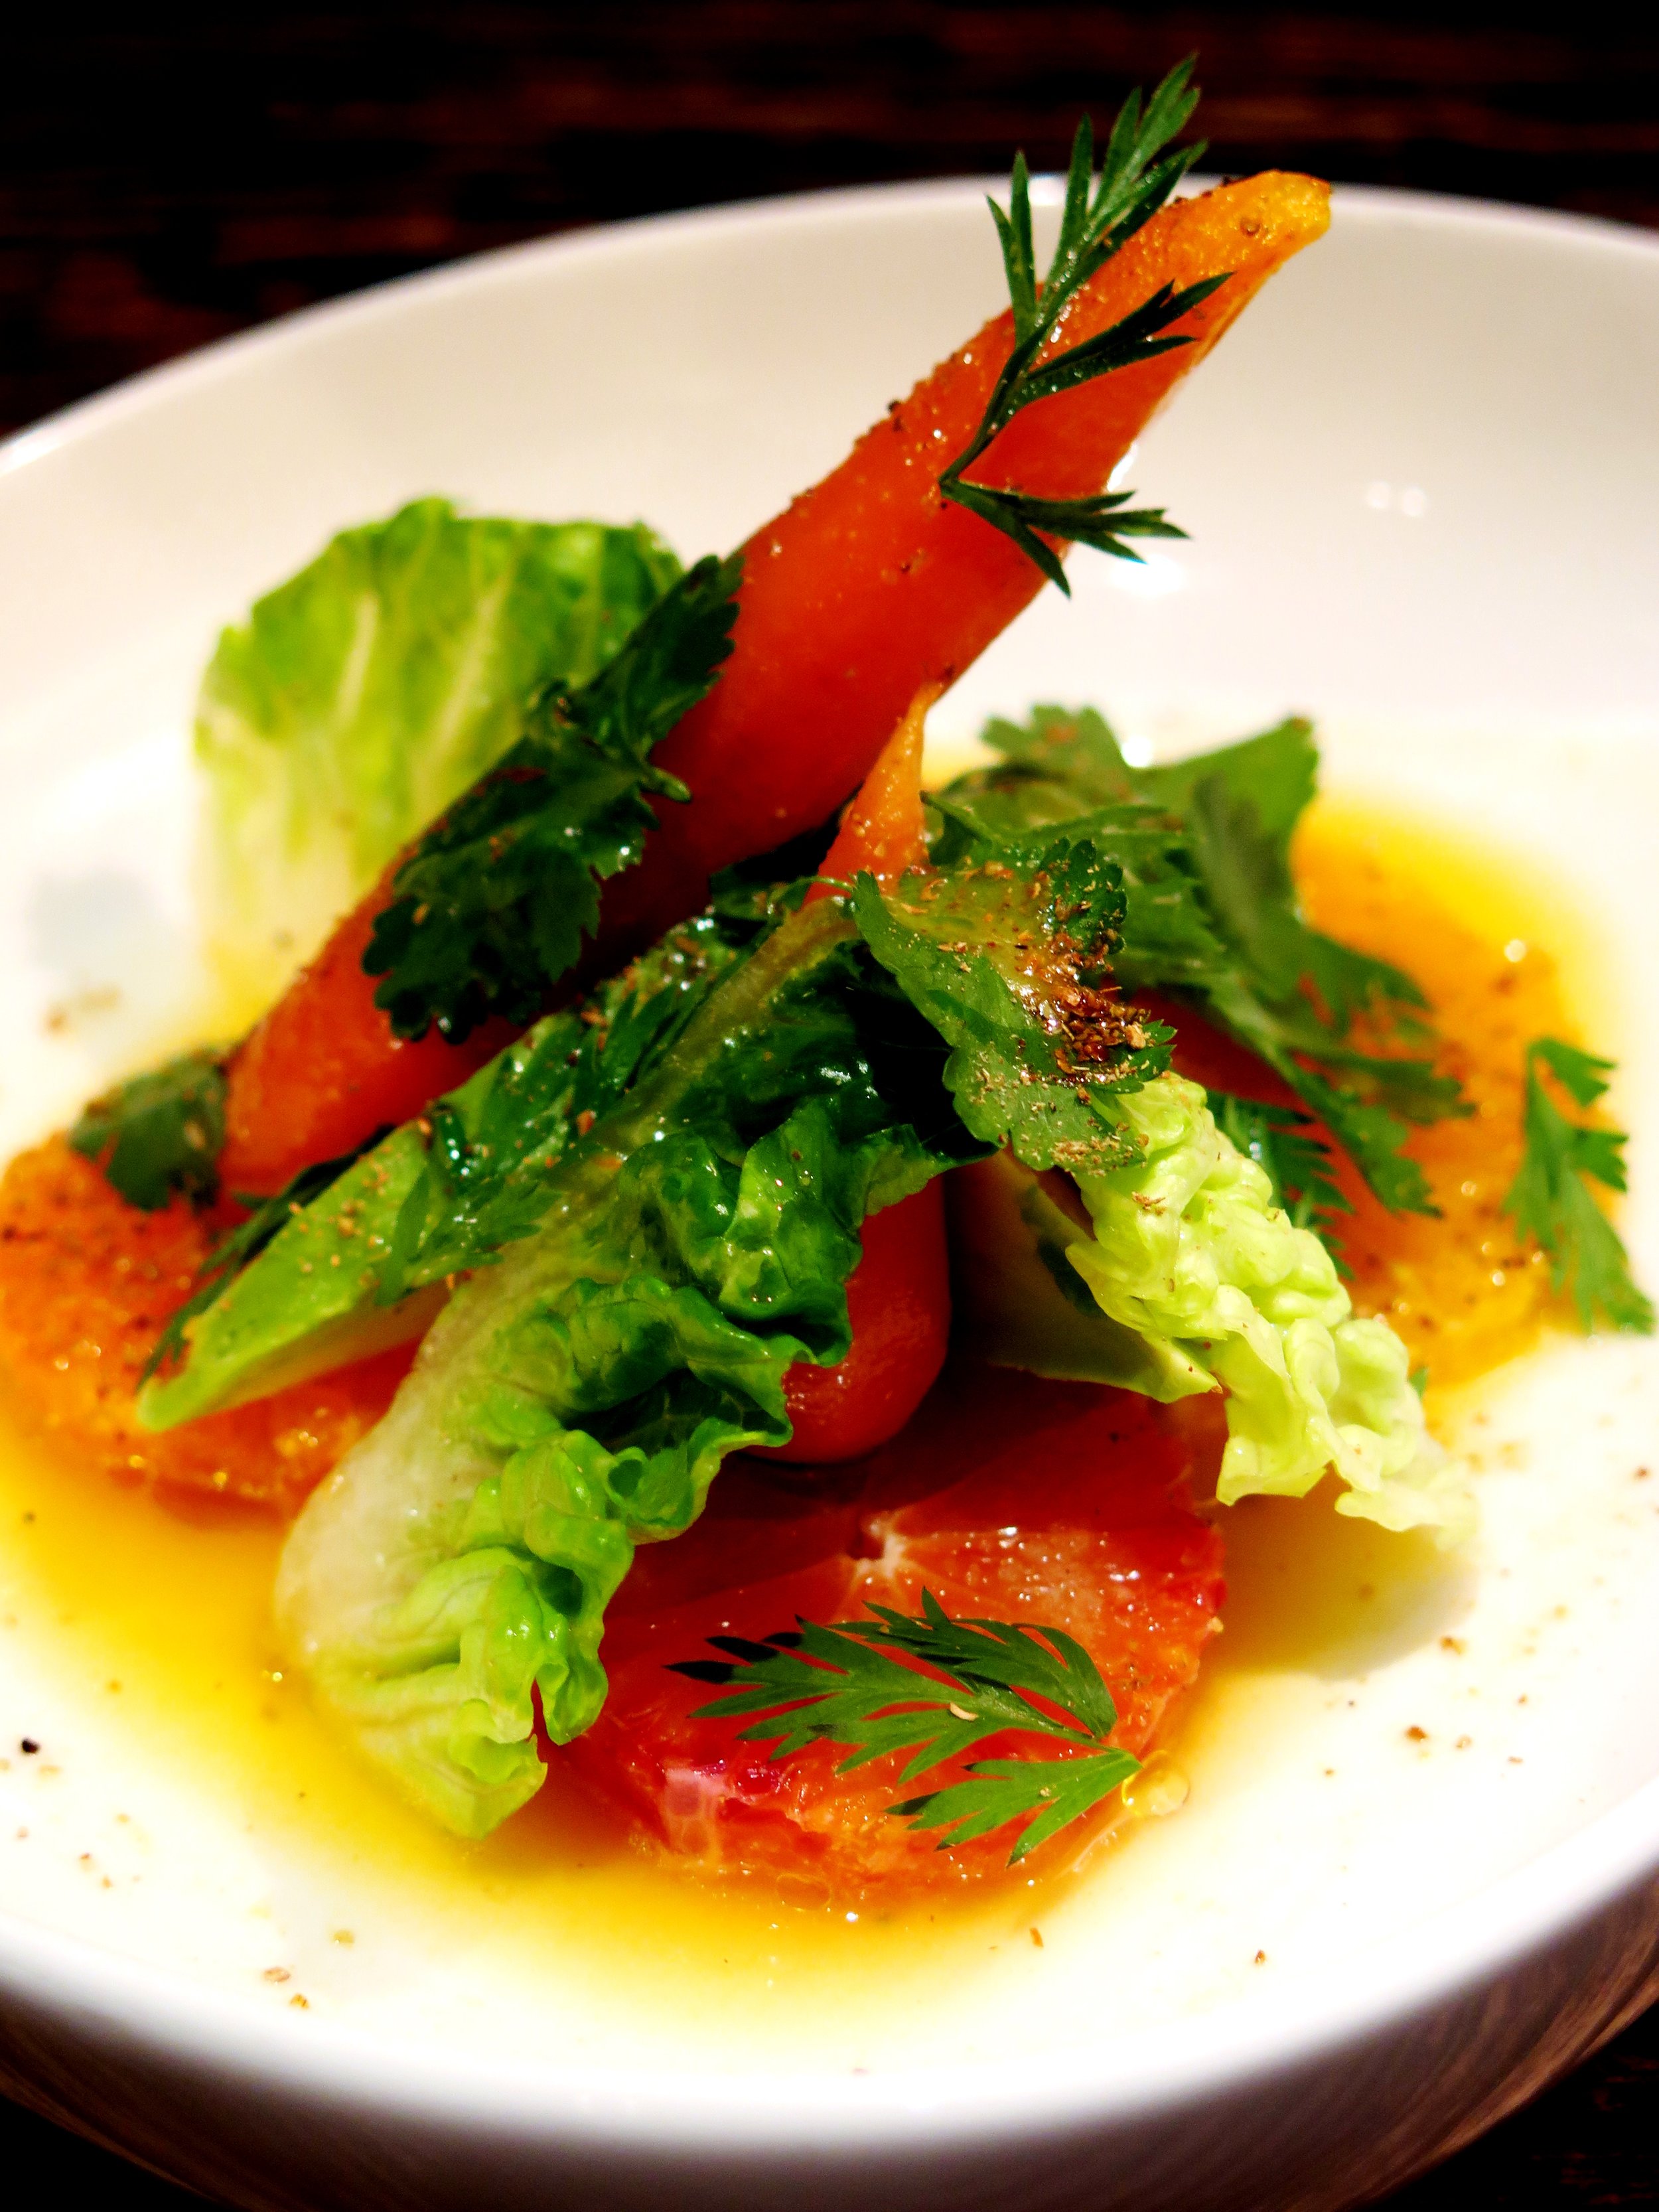
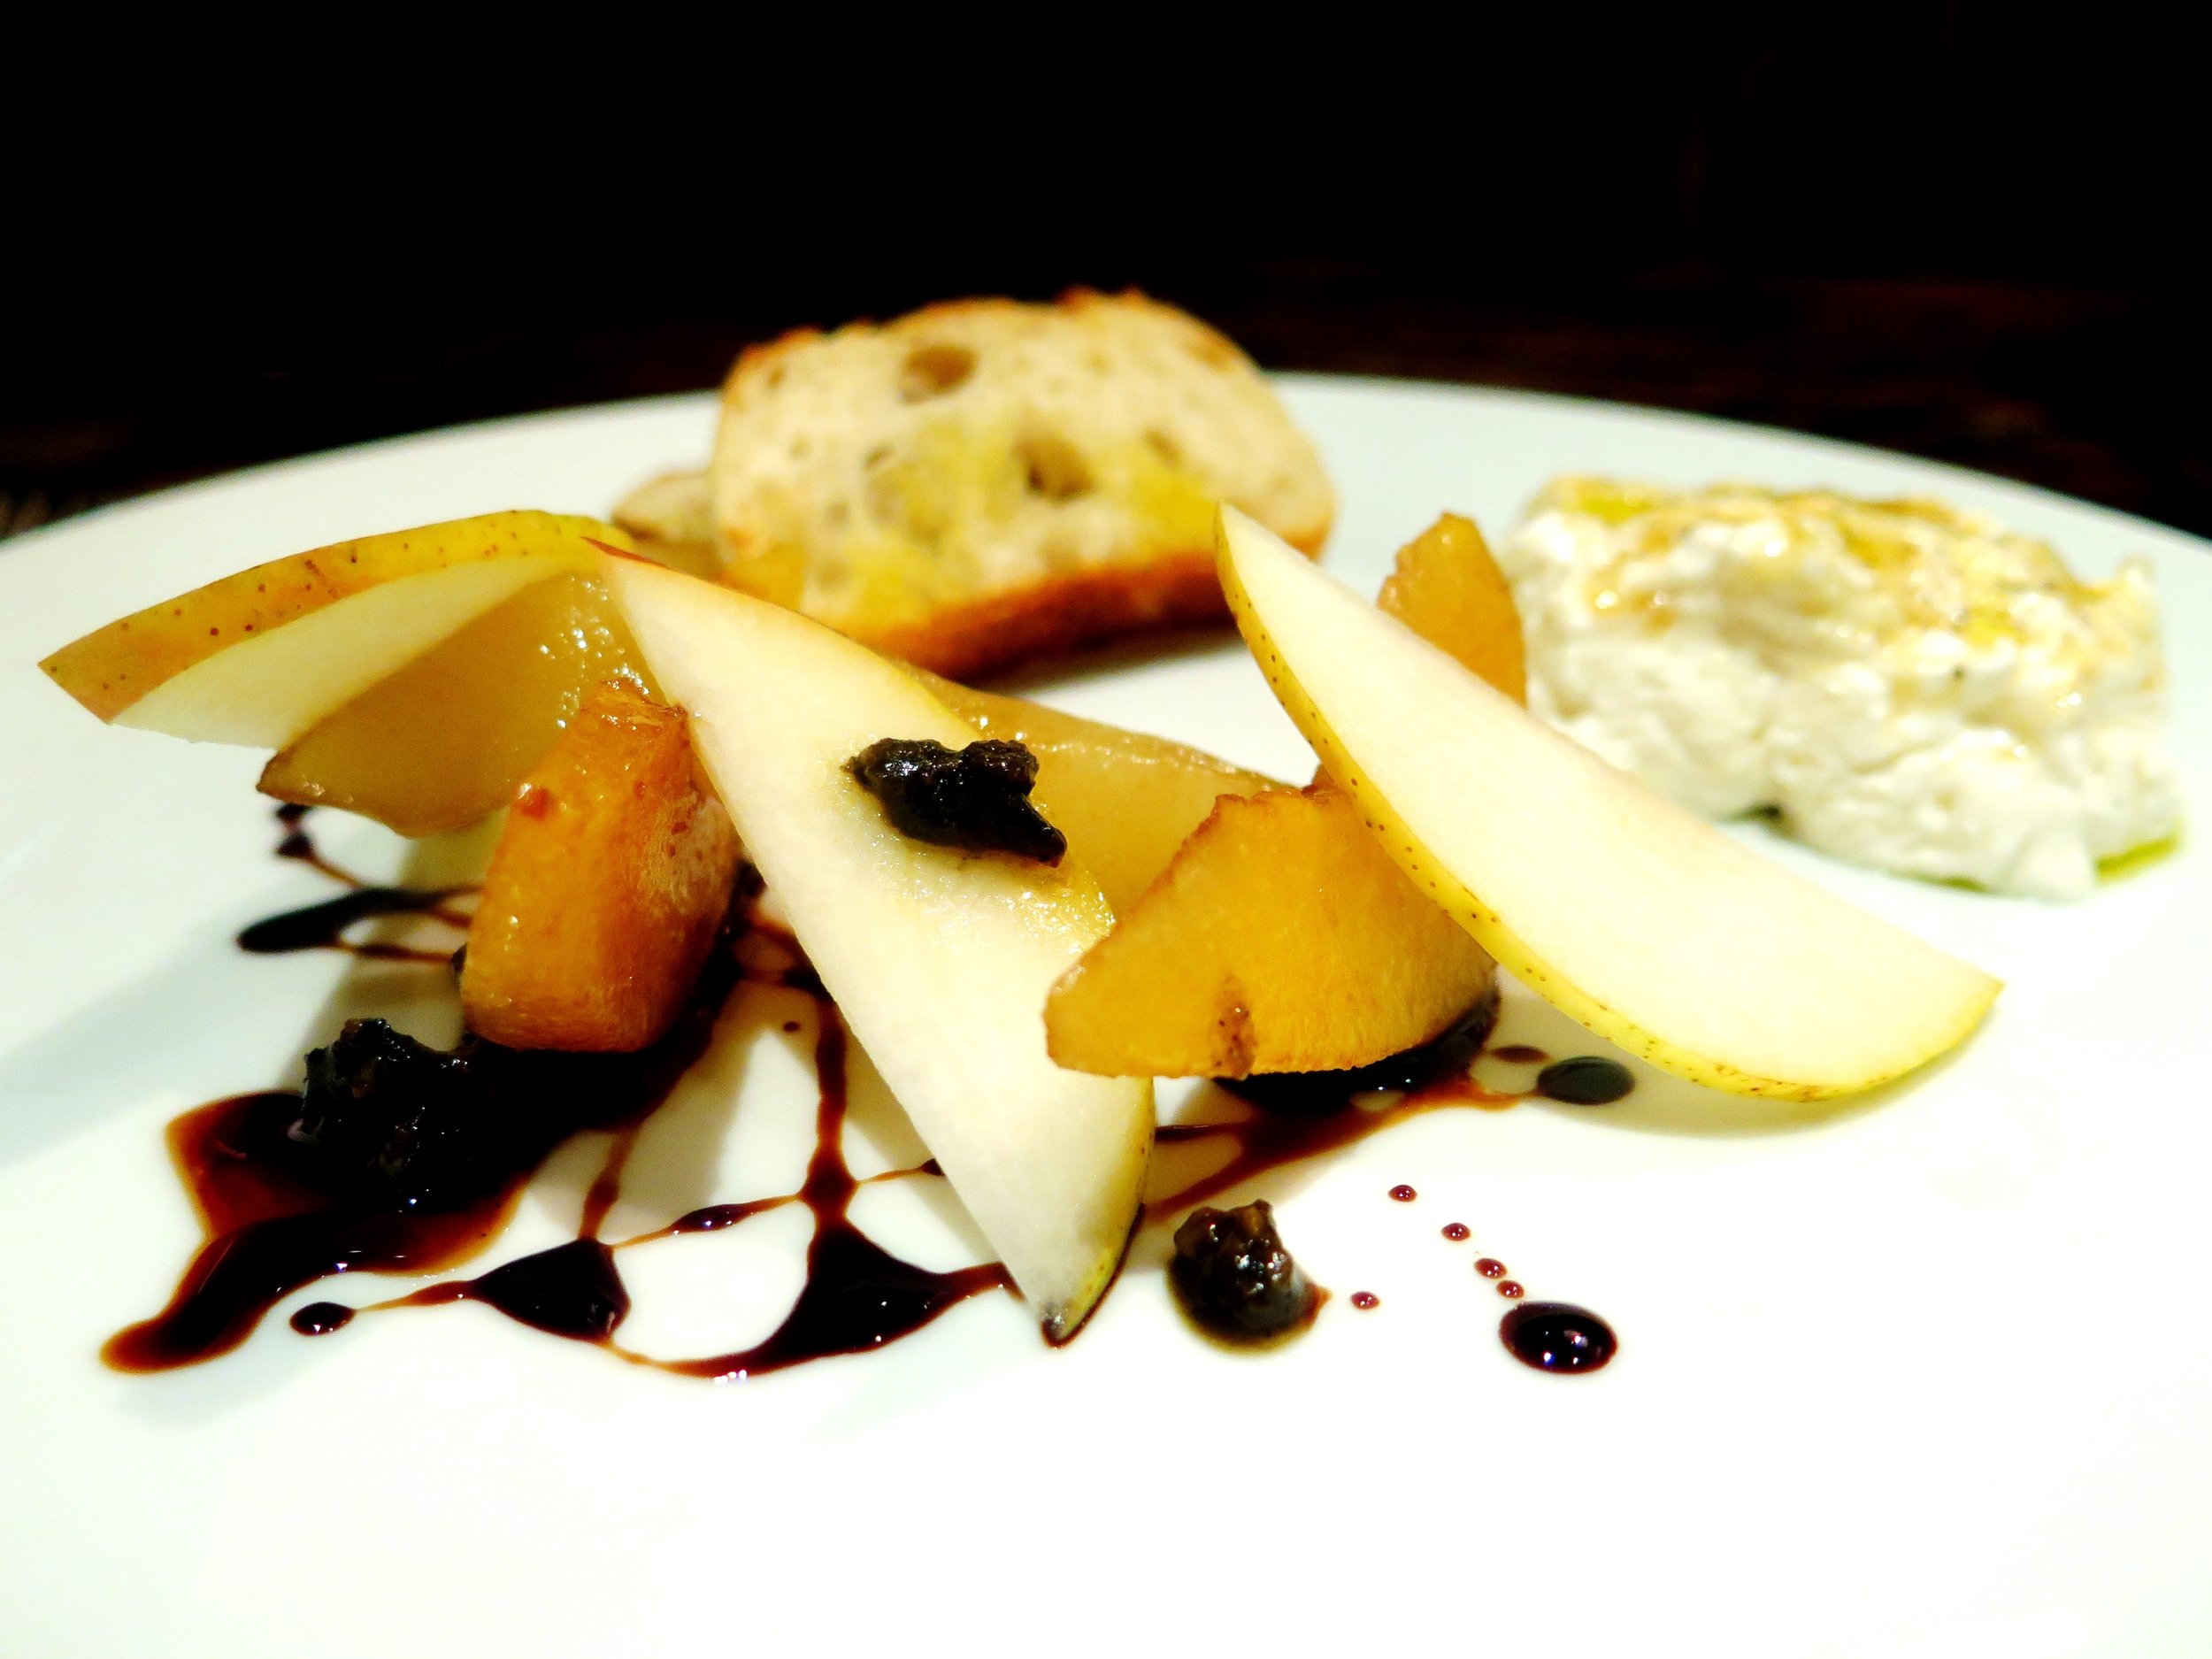
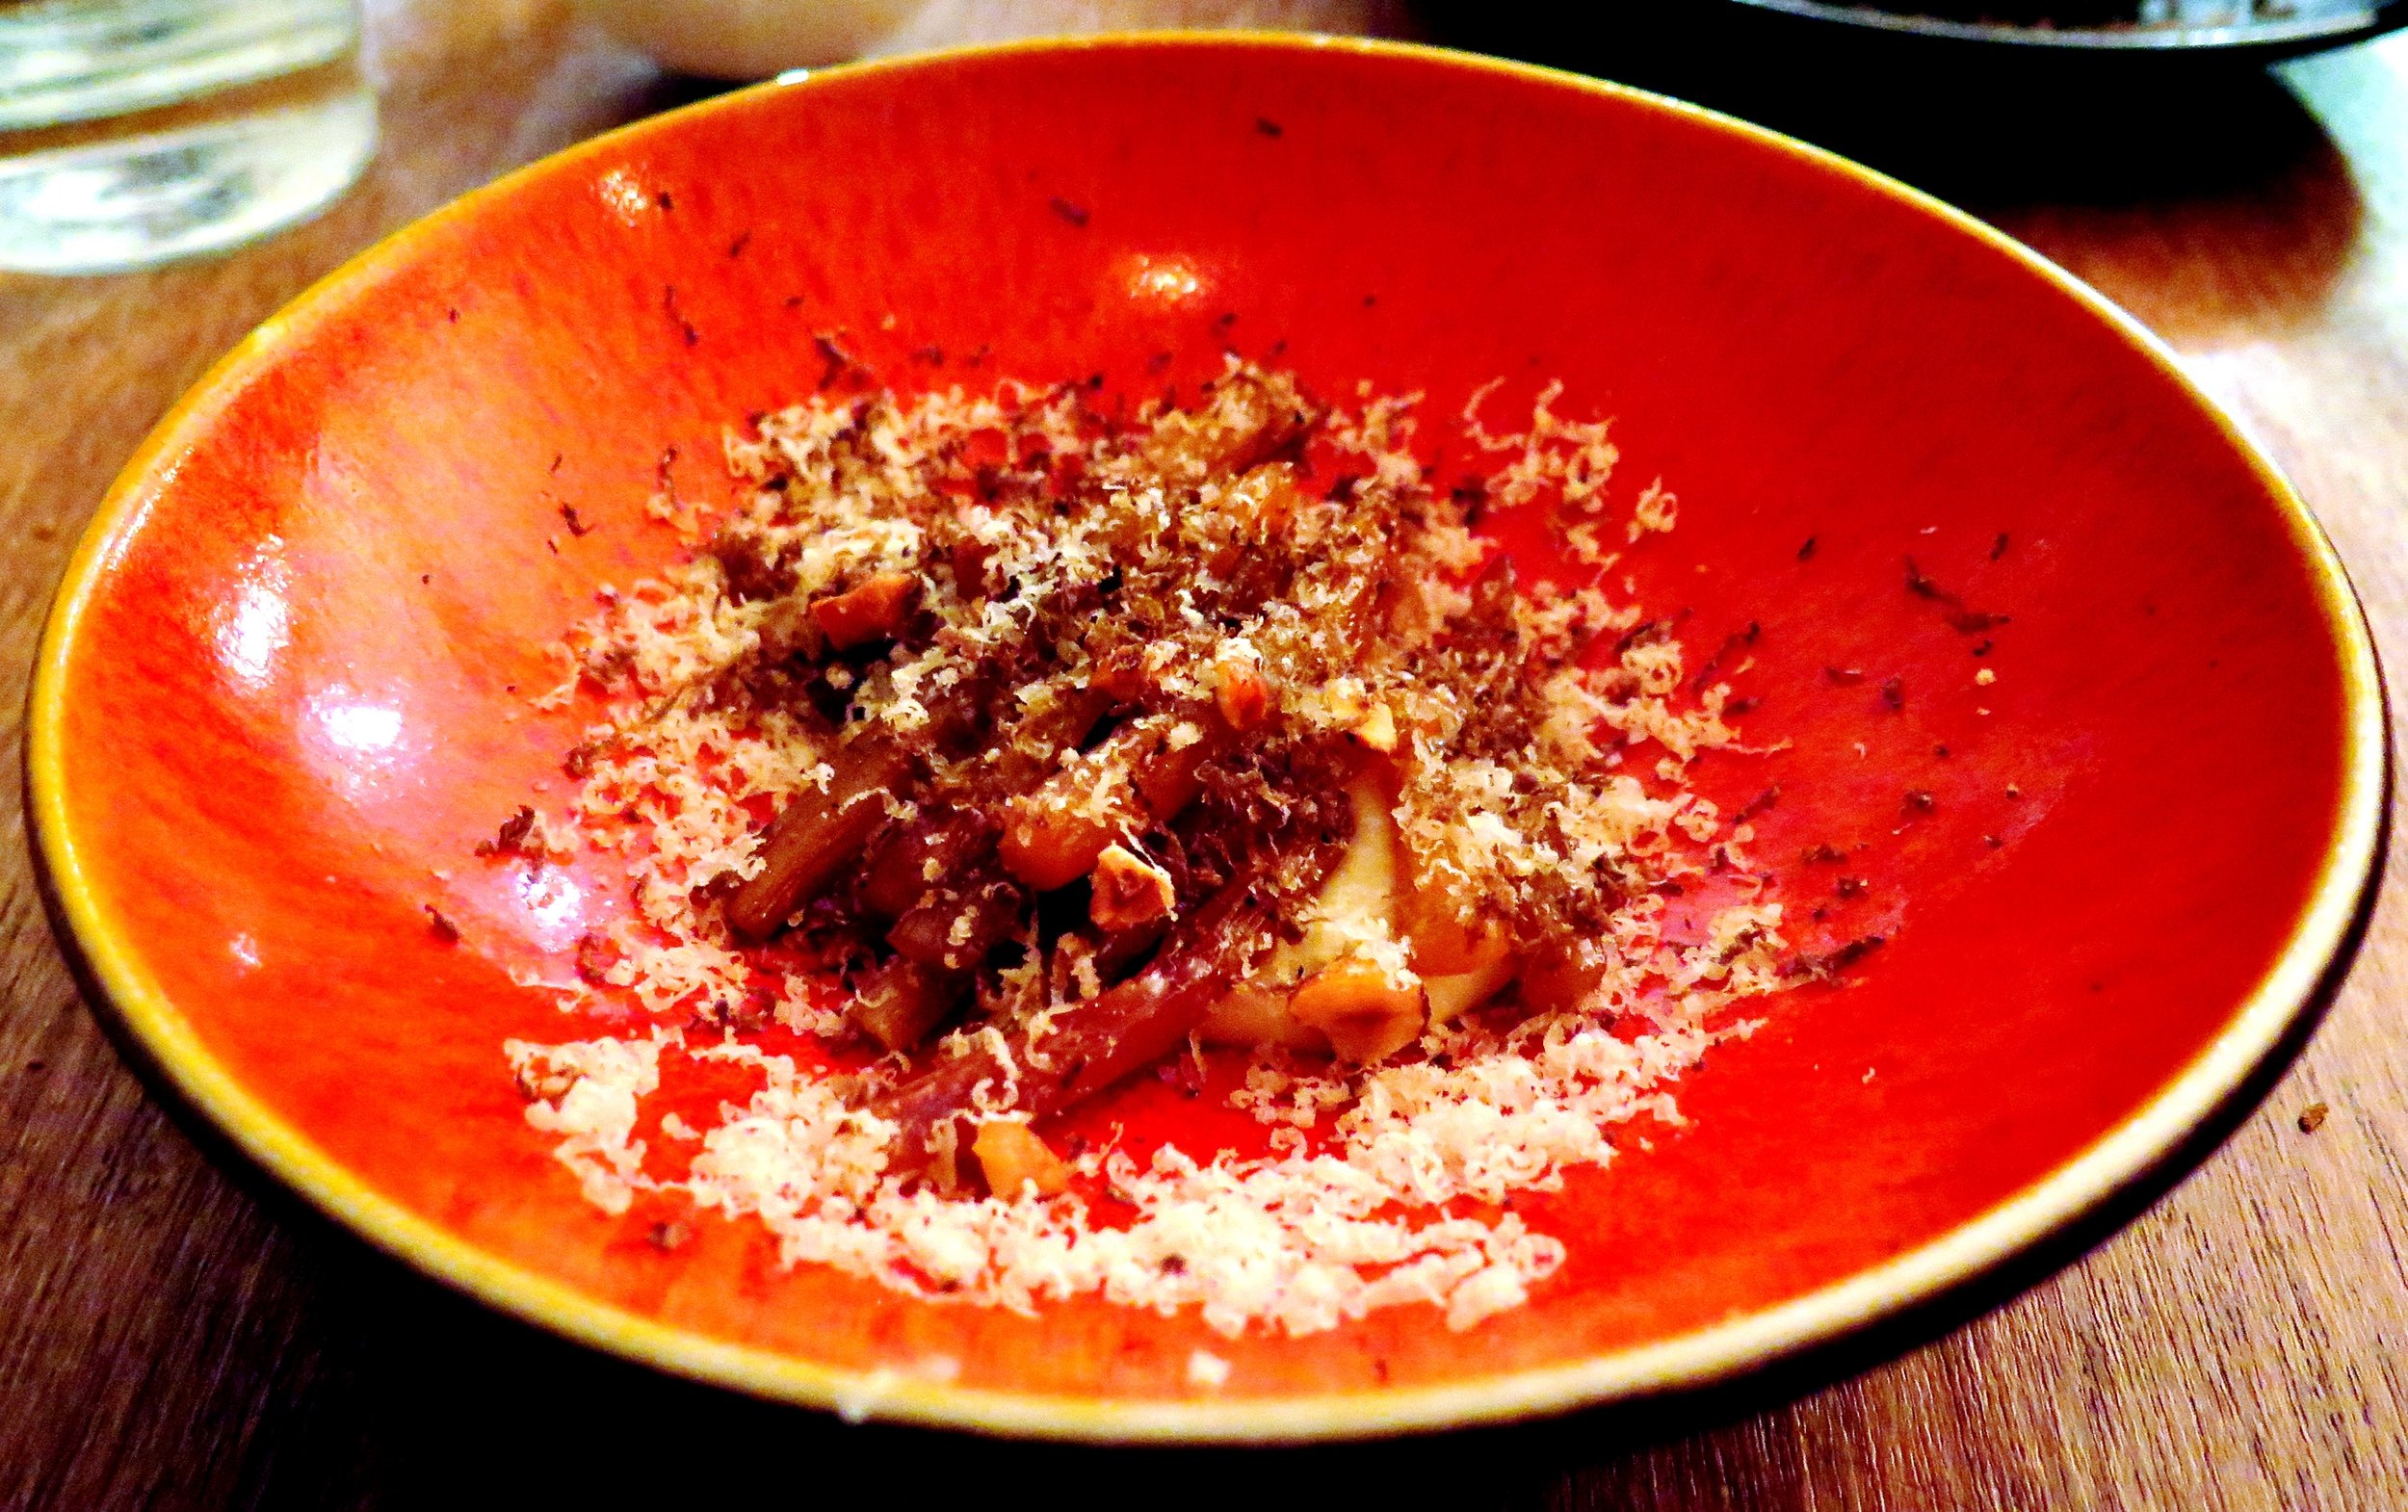
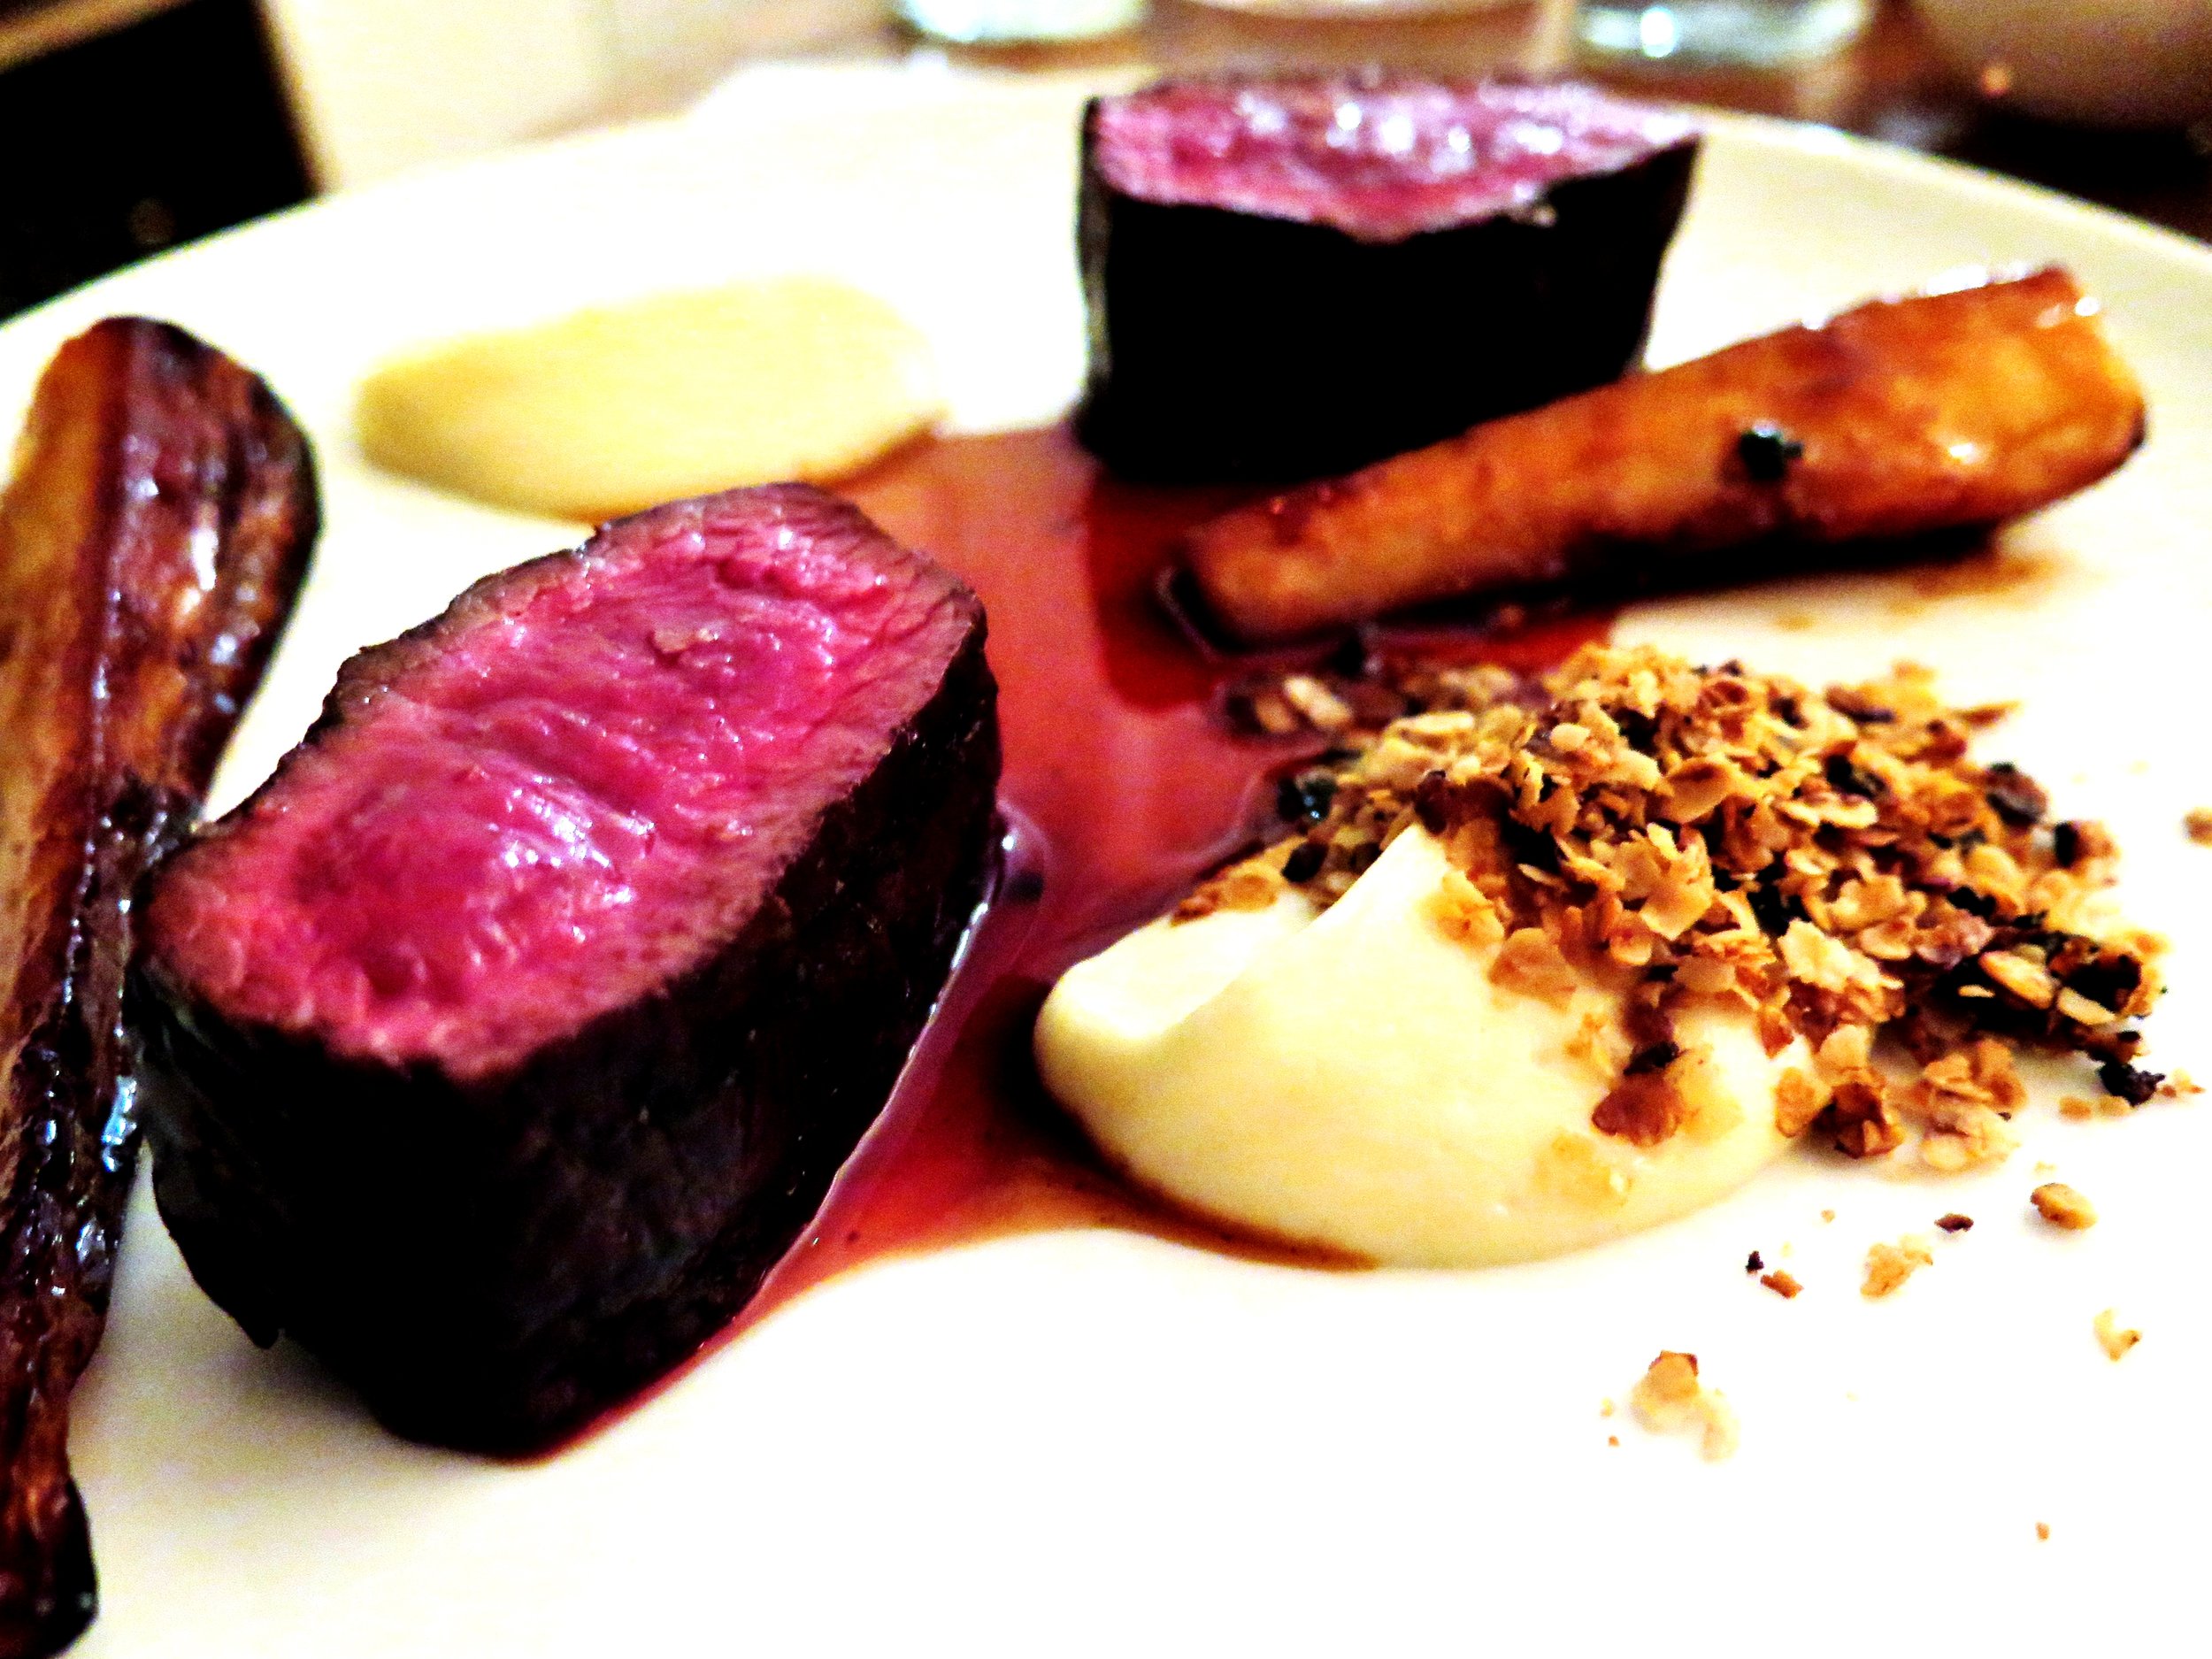
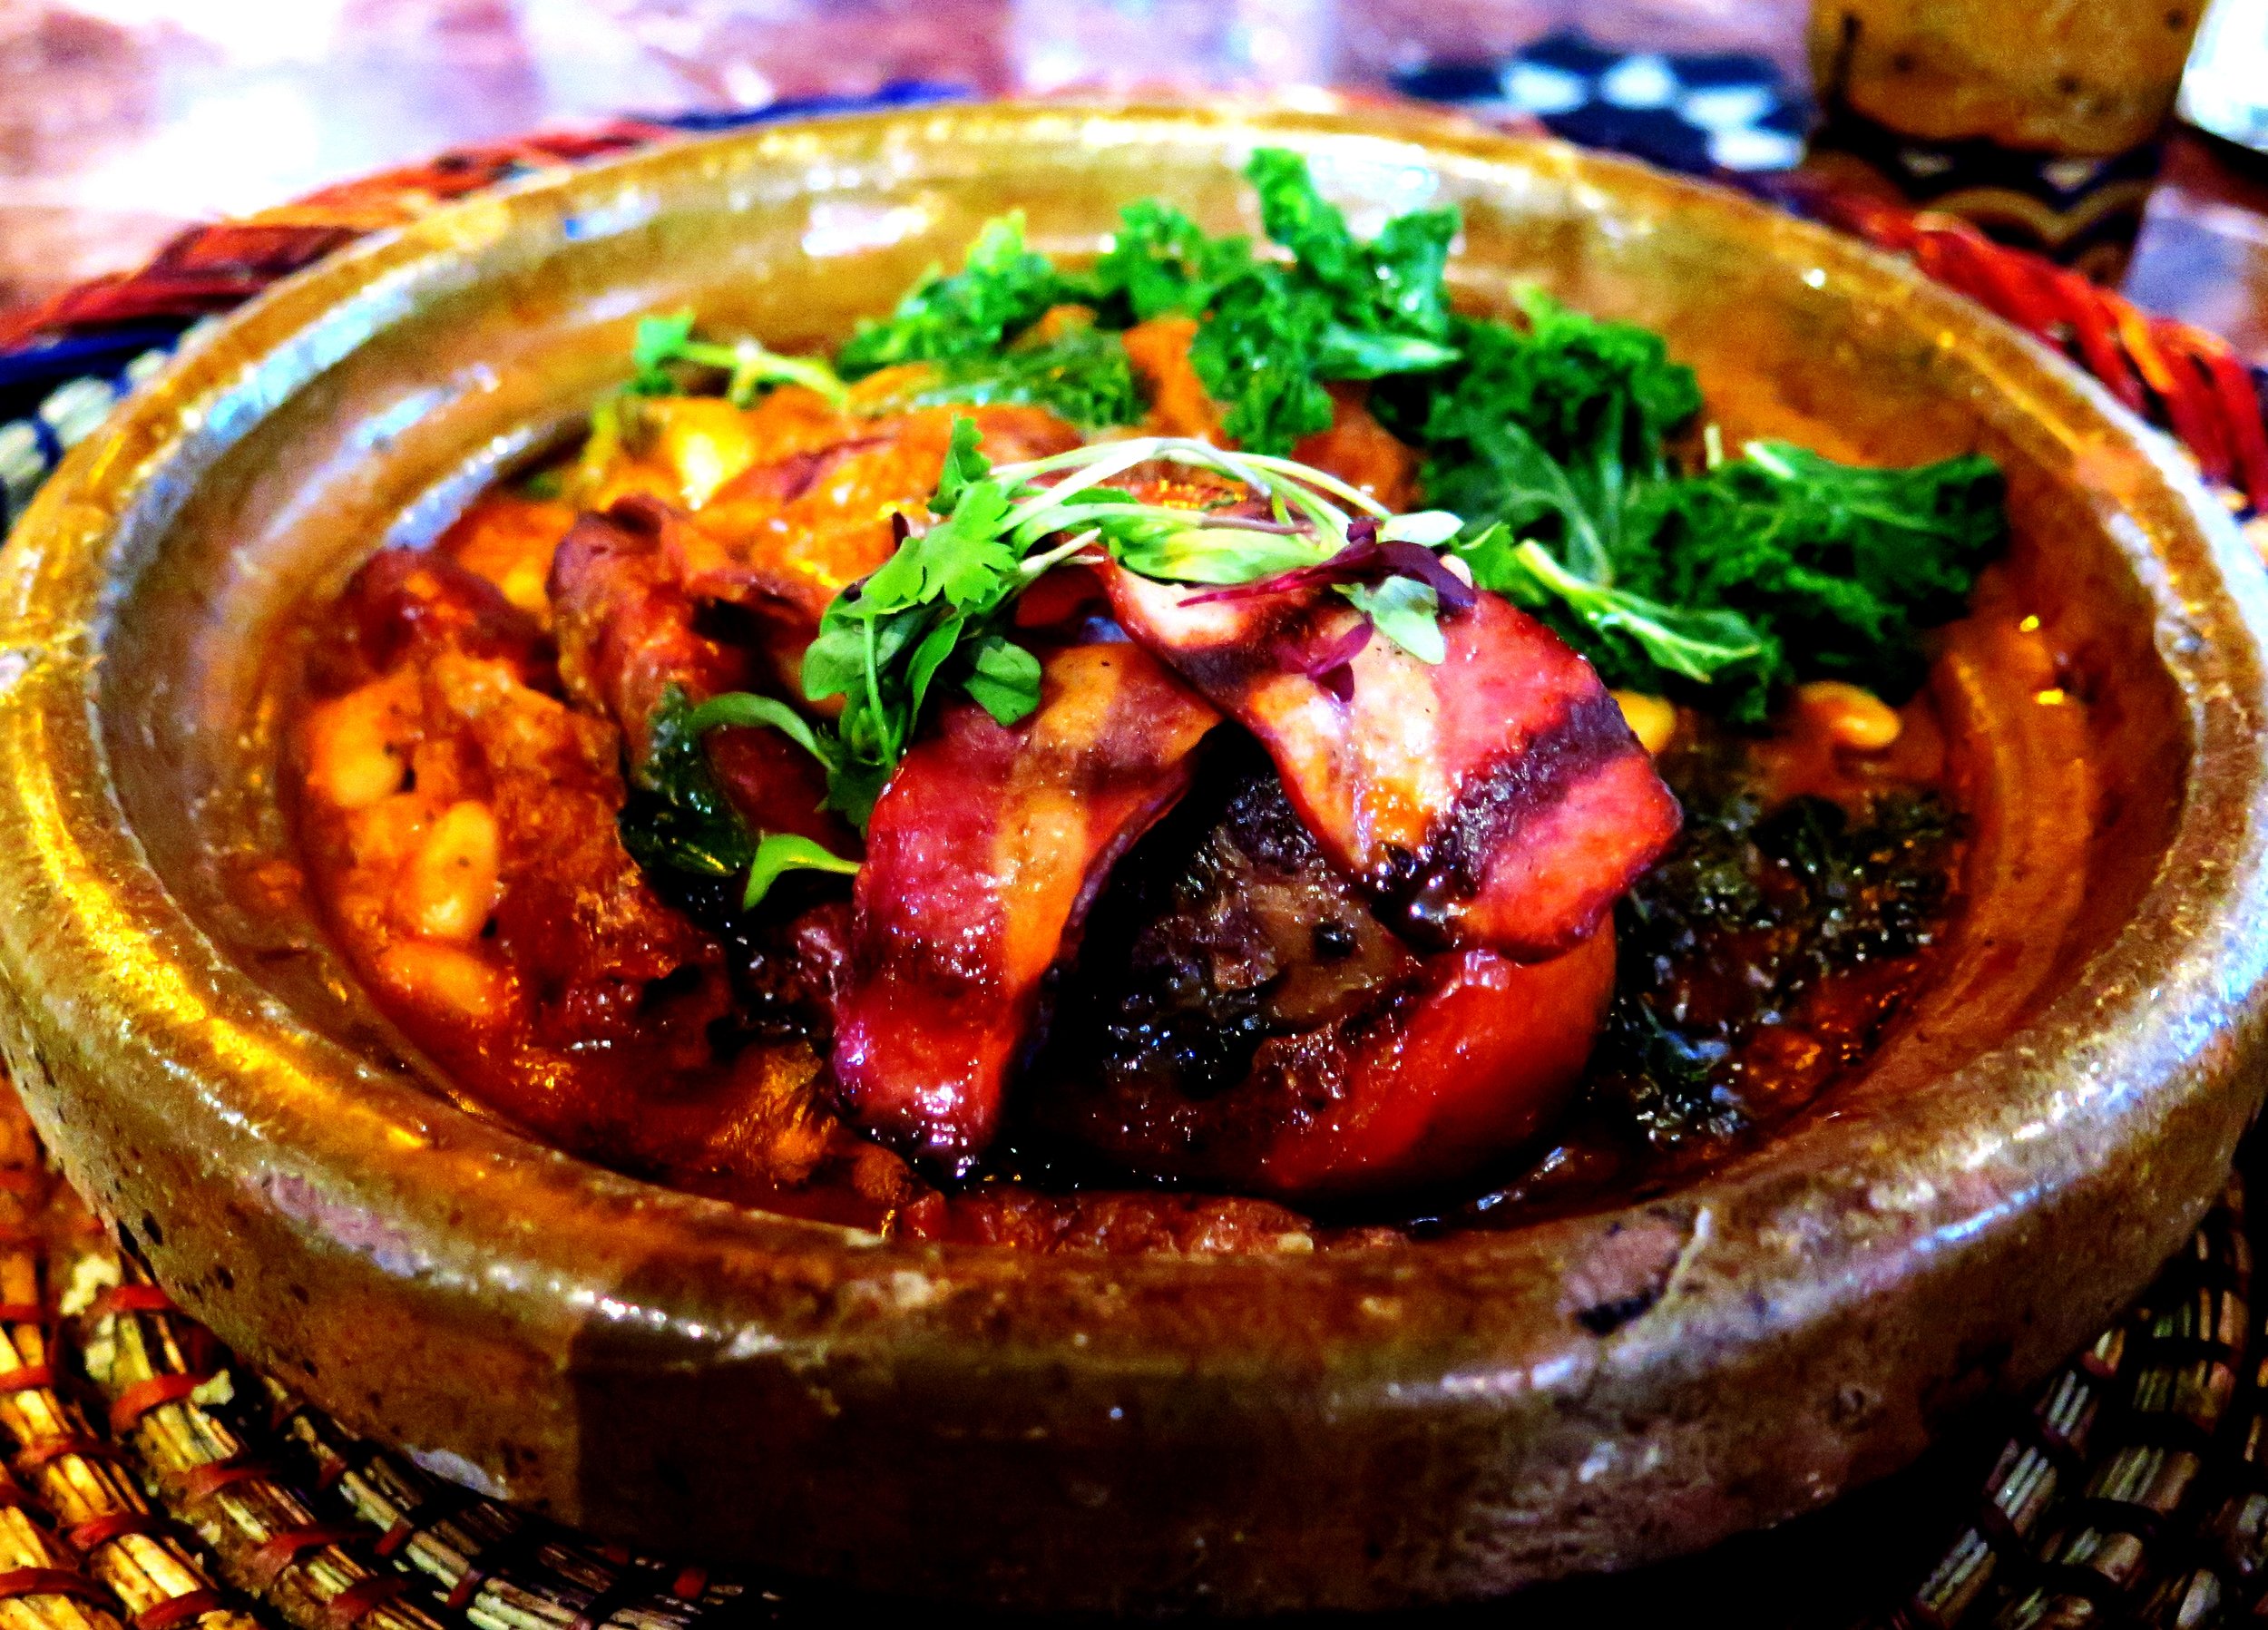
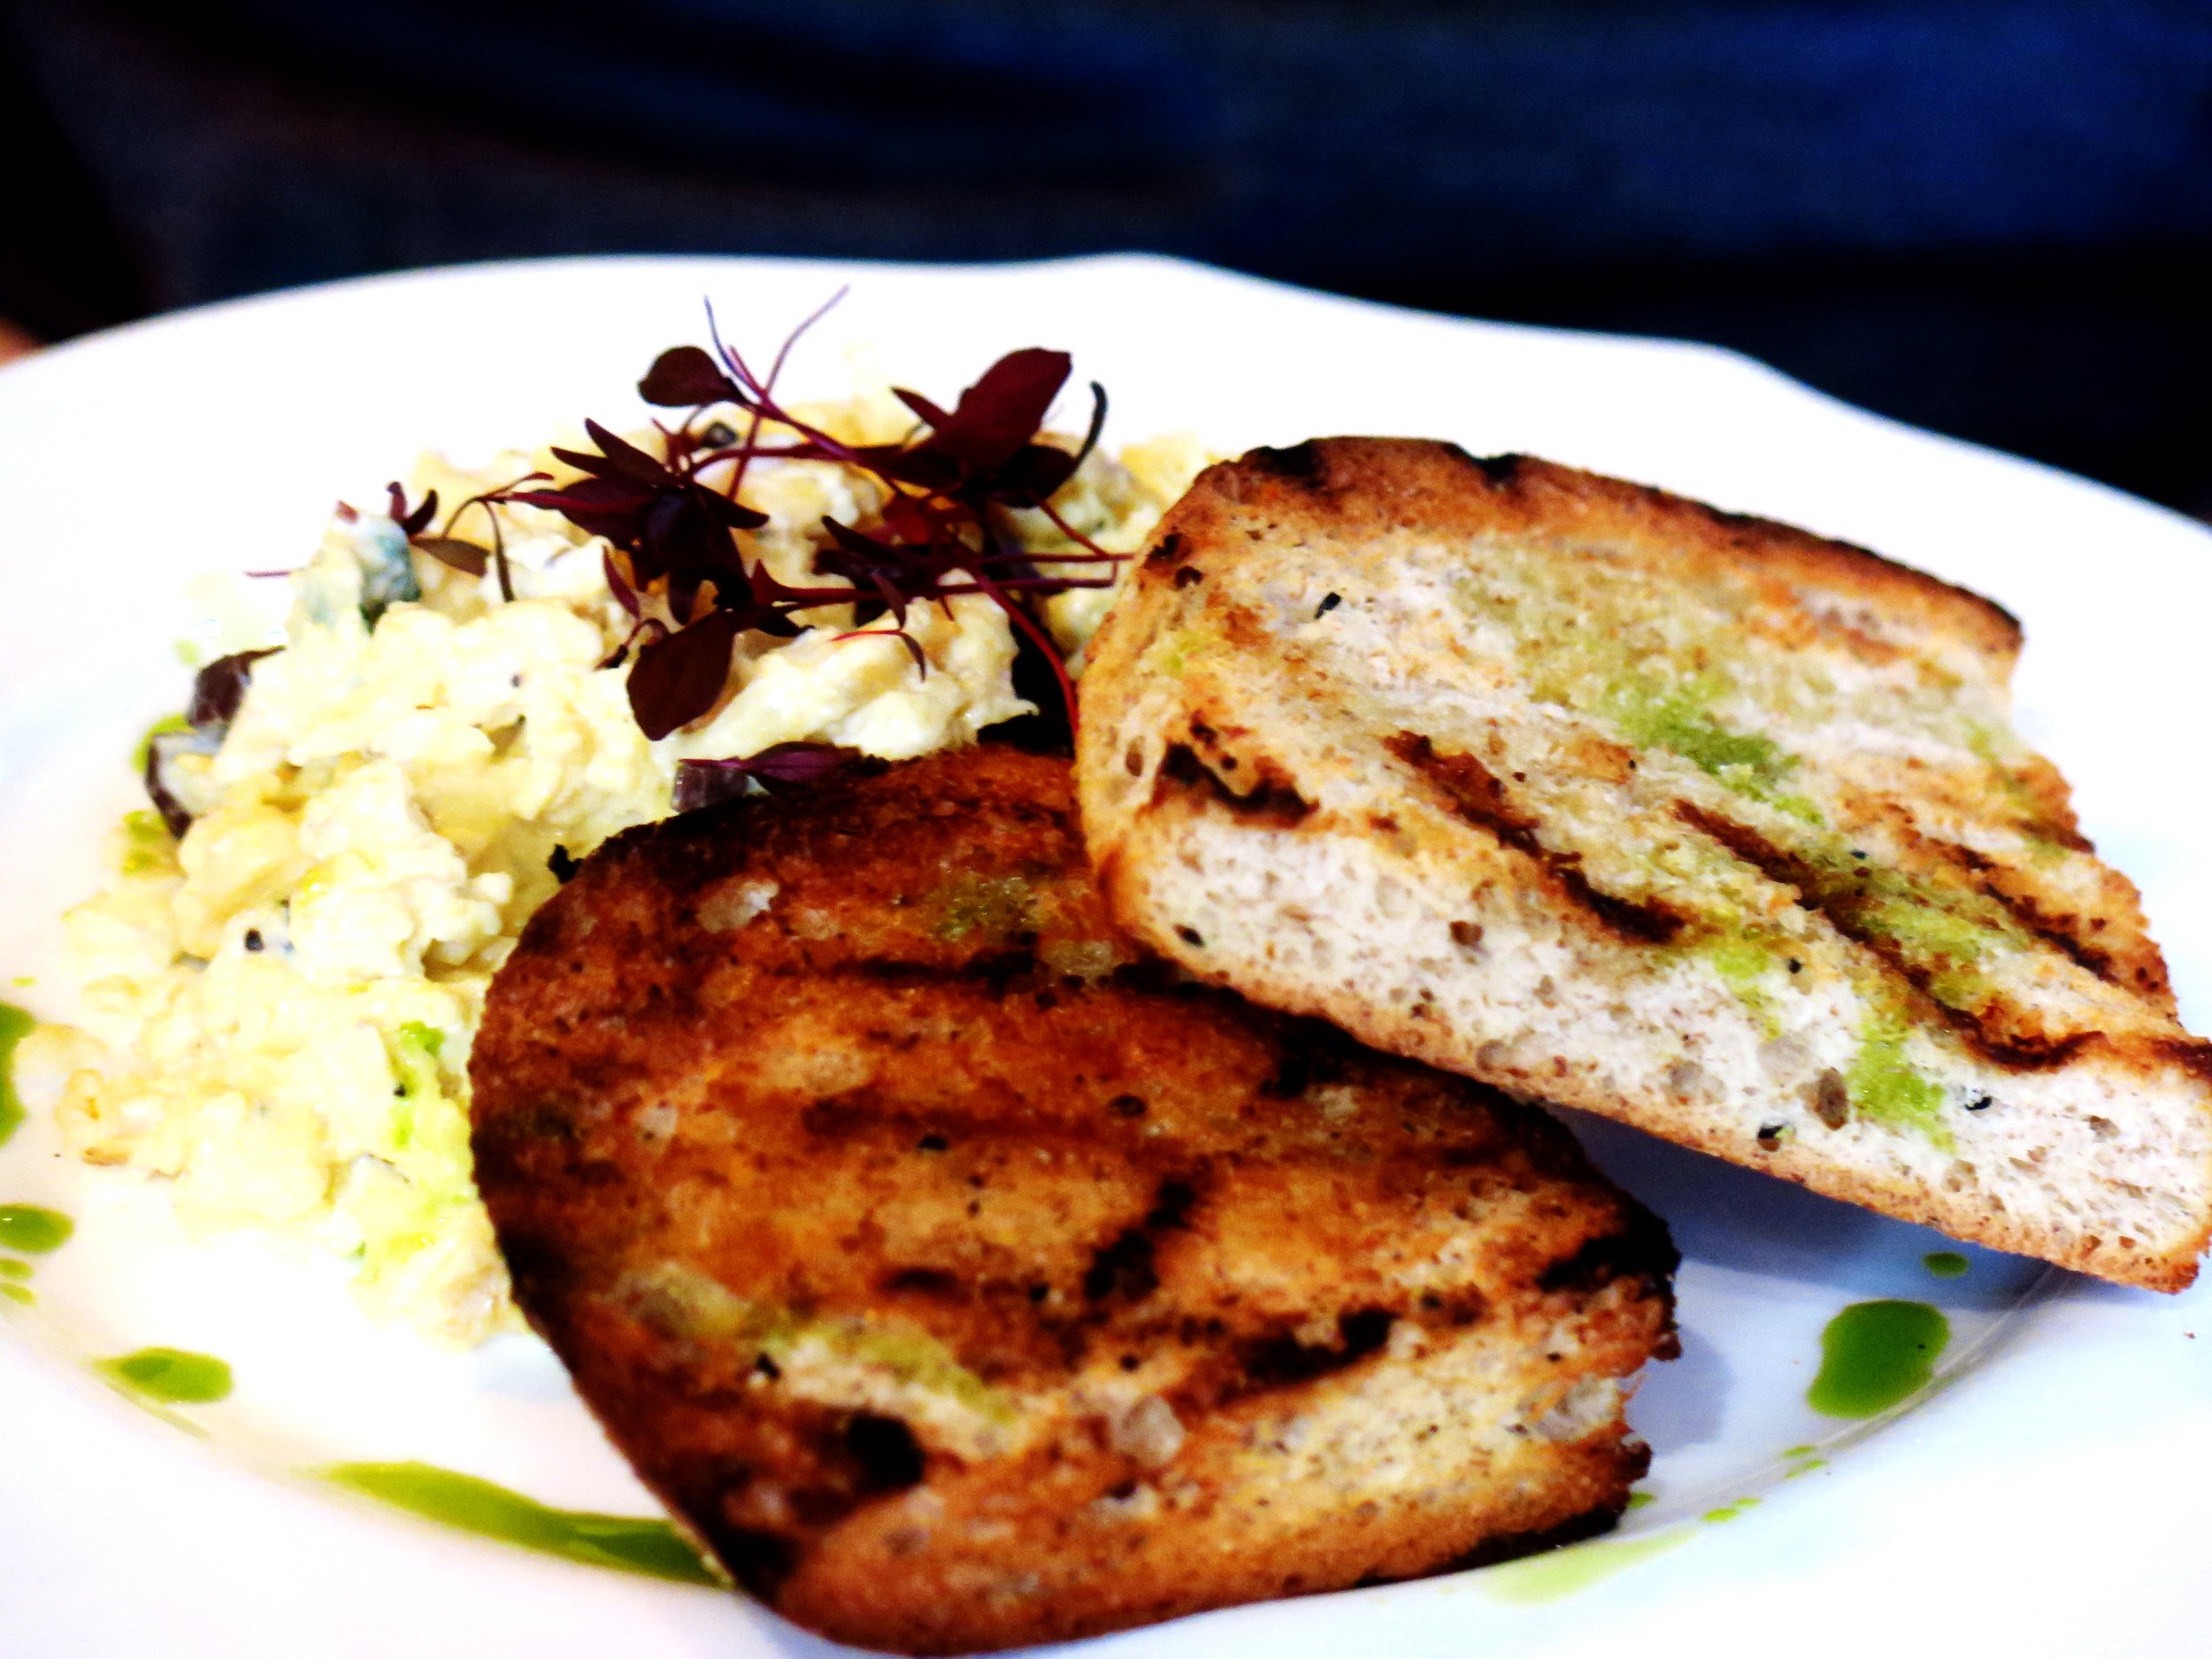
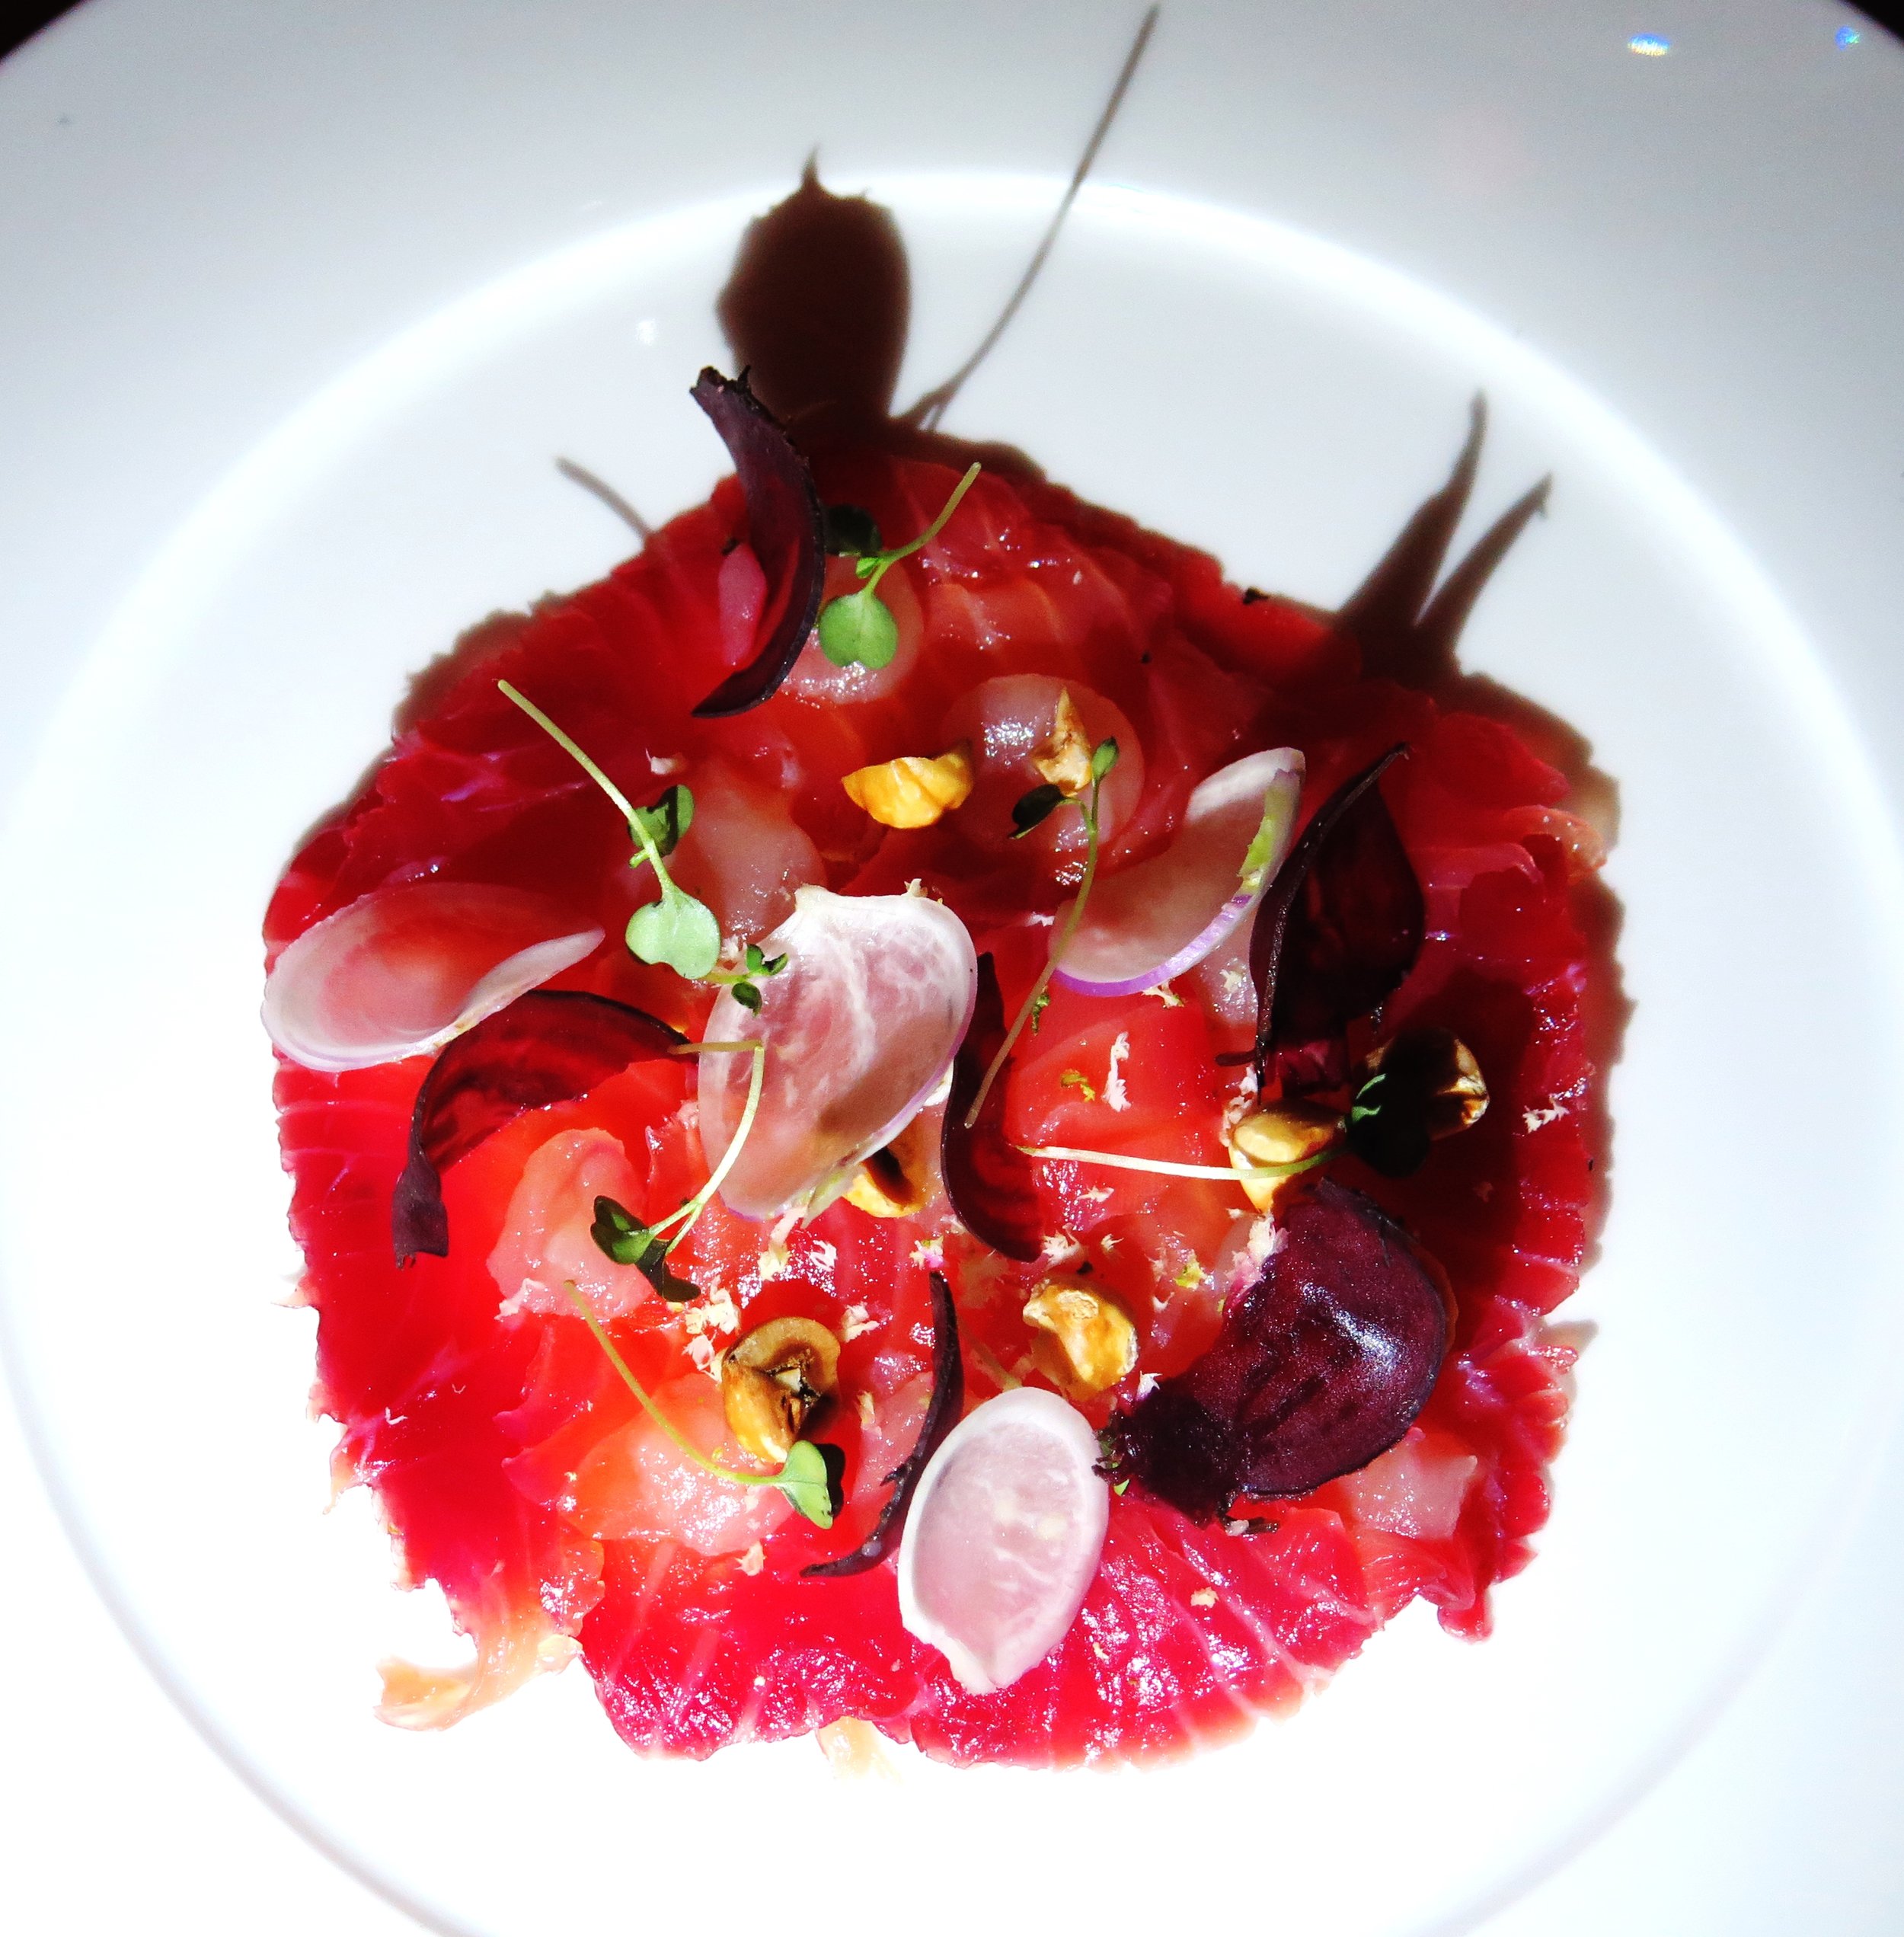
In terms of food (when we eventually got round to it), Berner’s Tavern lacks the precision and care of Atherton’s other venture, Little Social (read review here).  My beetroot- smoked salmon was good, but lacked thought: pretty, thinly sliced, delicately smoked salmon with the crunch of macadamia and radish.  However, much needed acidity was overlooked, and the promised lemon purée failed to make an appearance.  One dining companion was satisfied with his prawn cocktail and the other’s Moroccan lamb was warm and delicately spiced.

Berner's Tavern


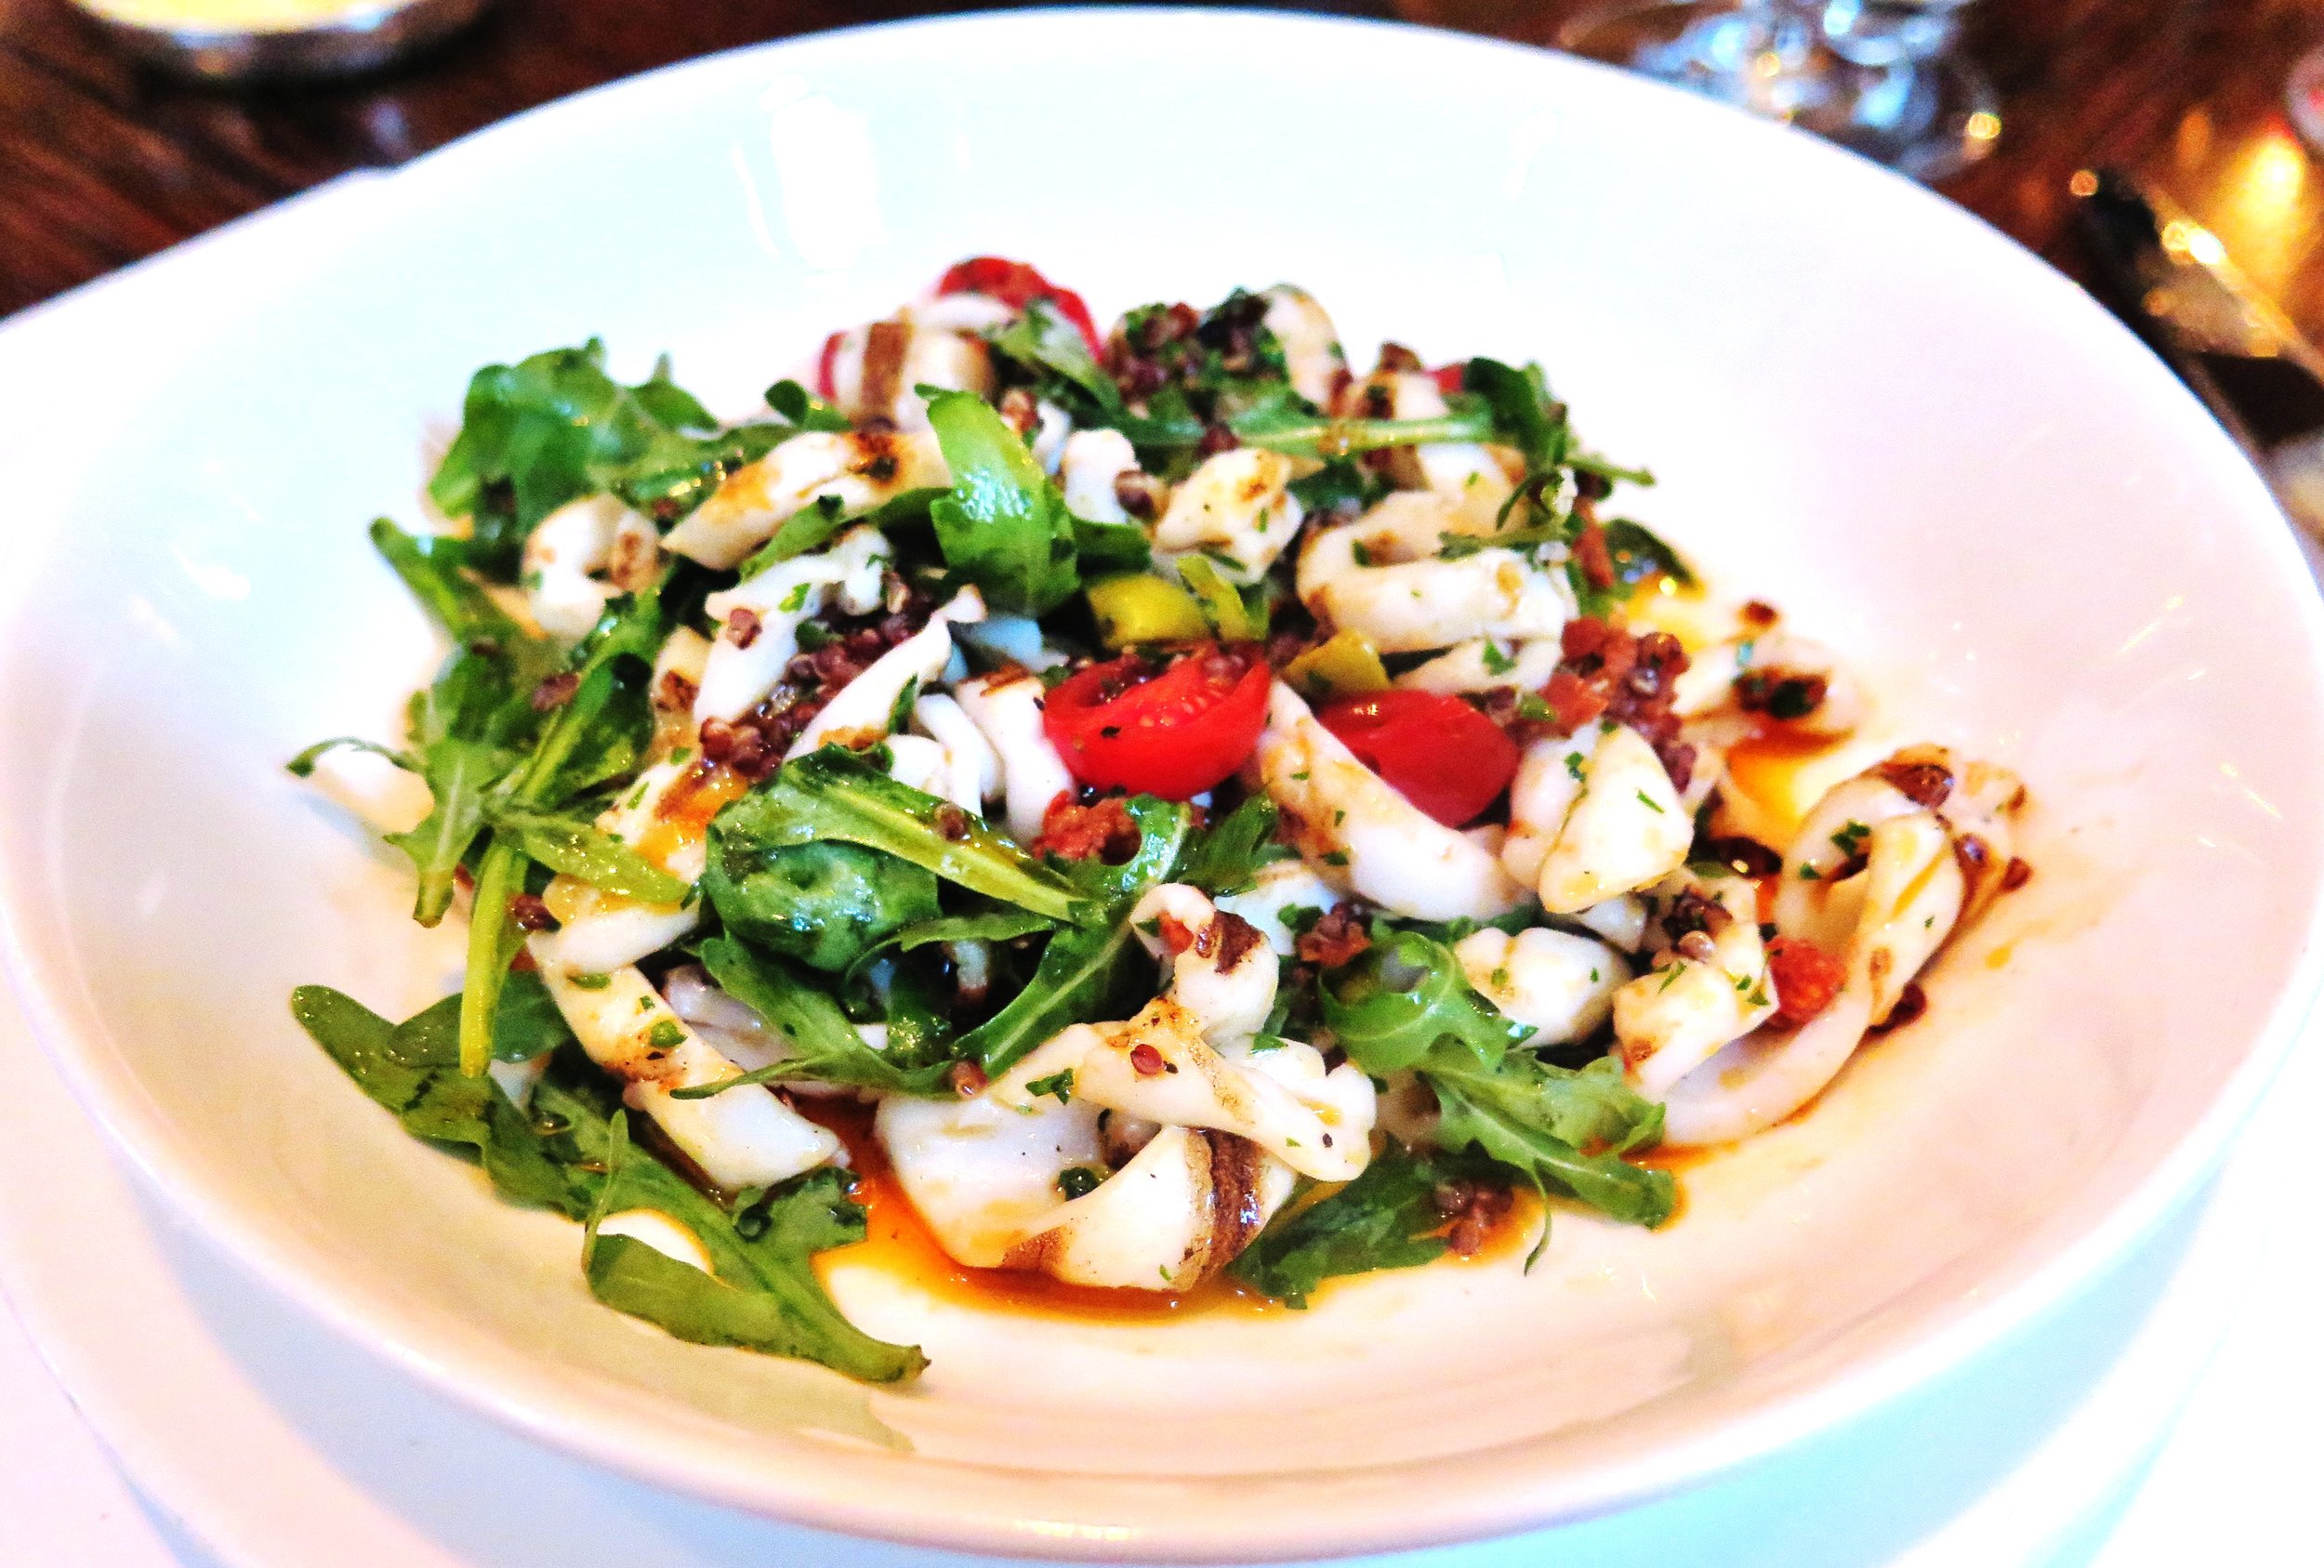
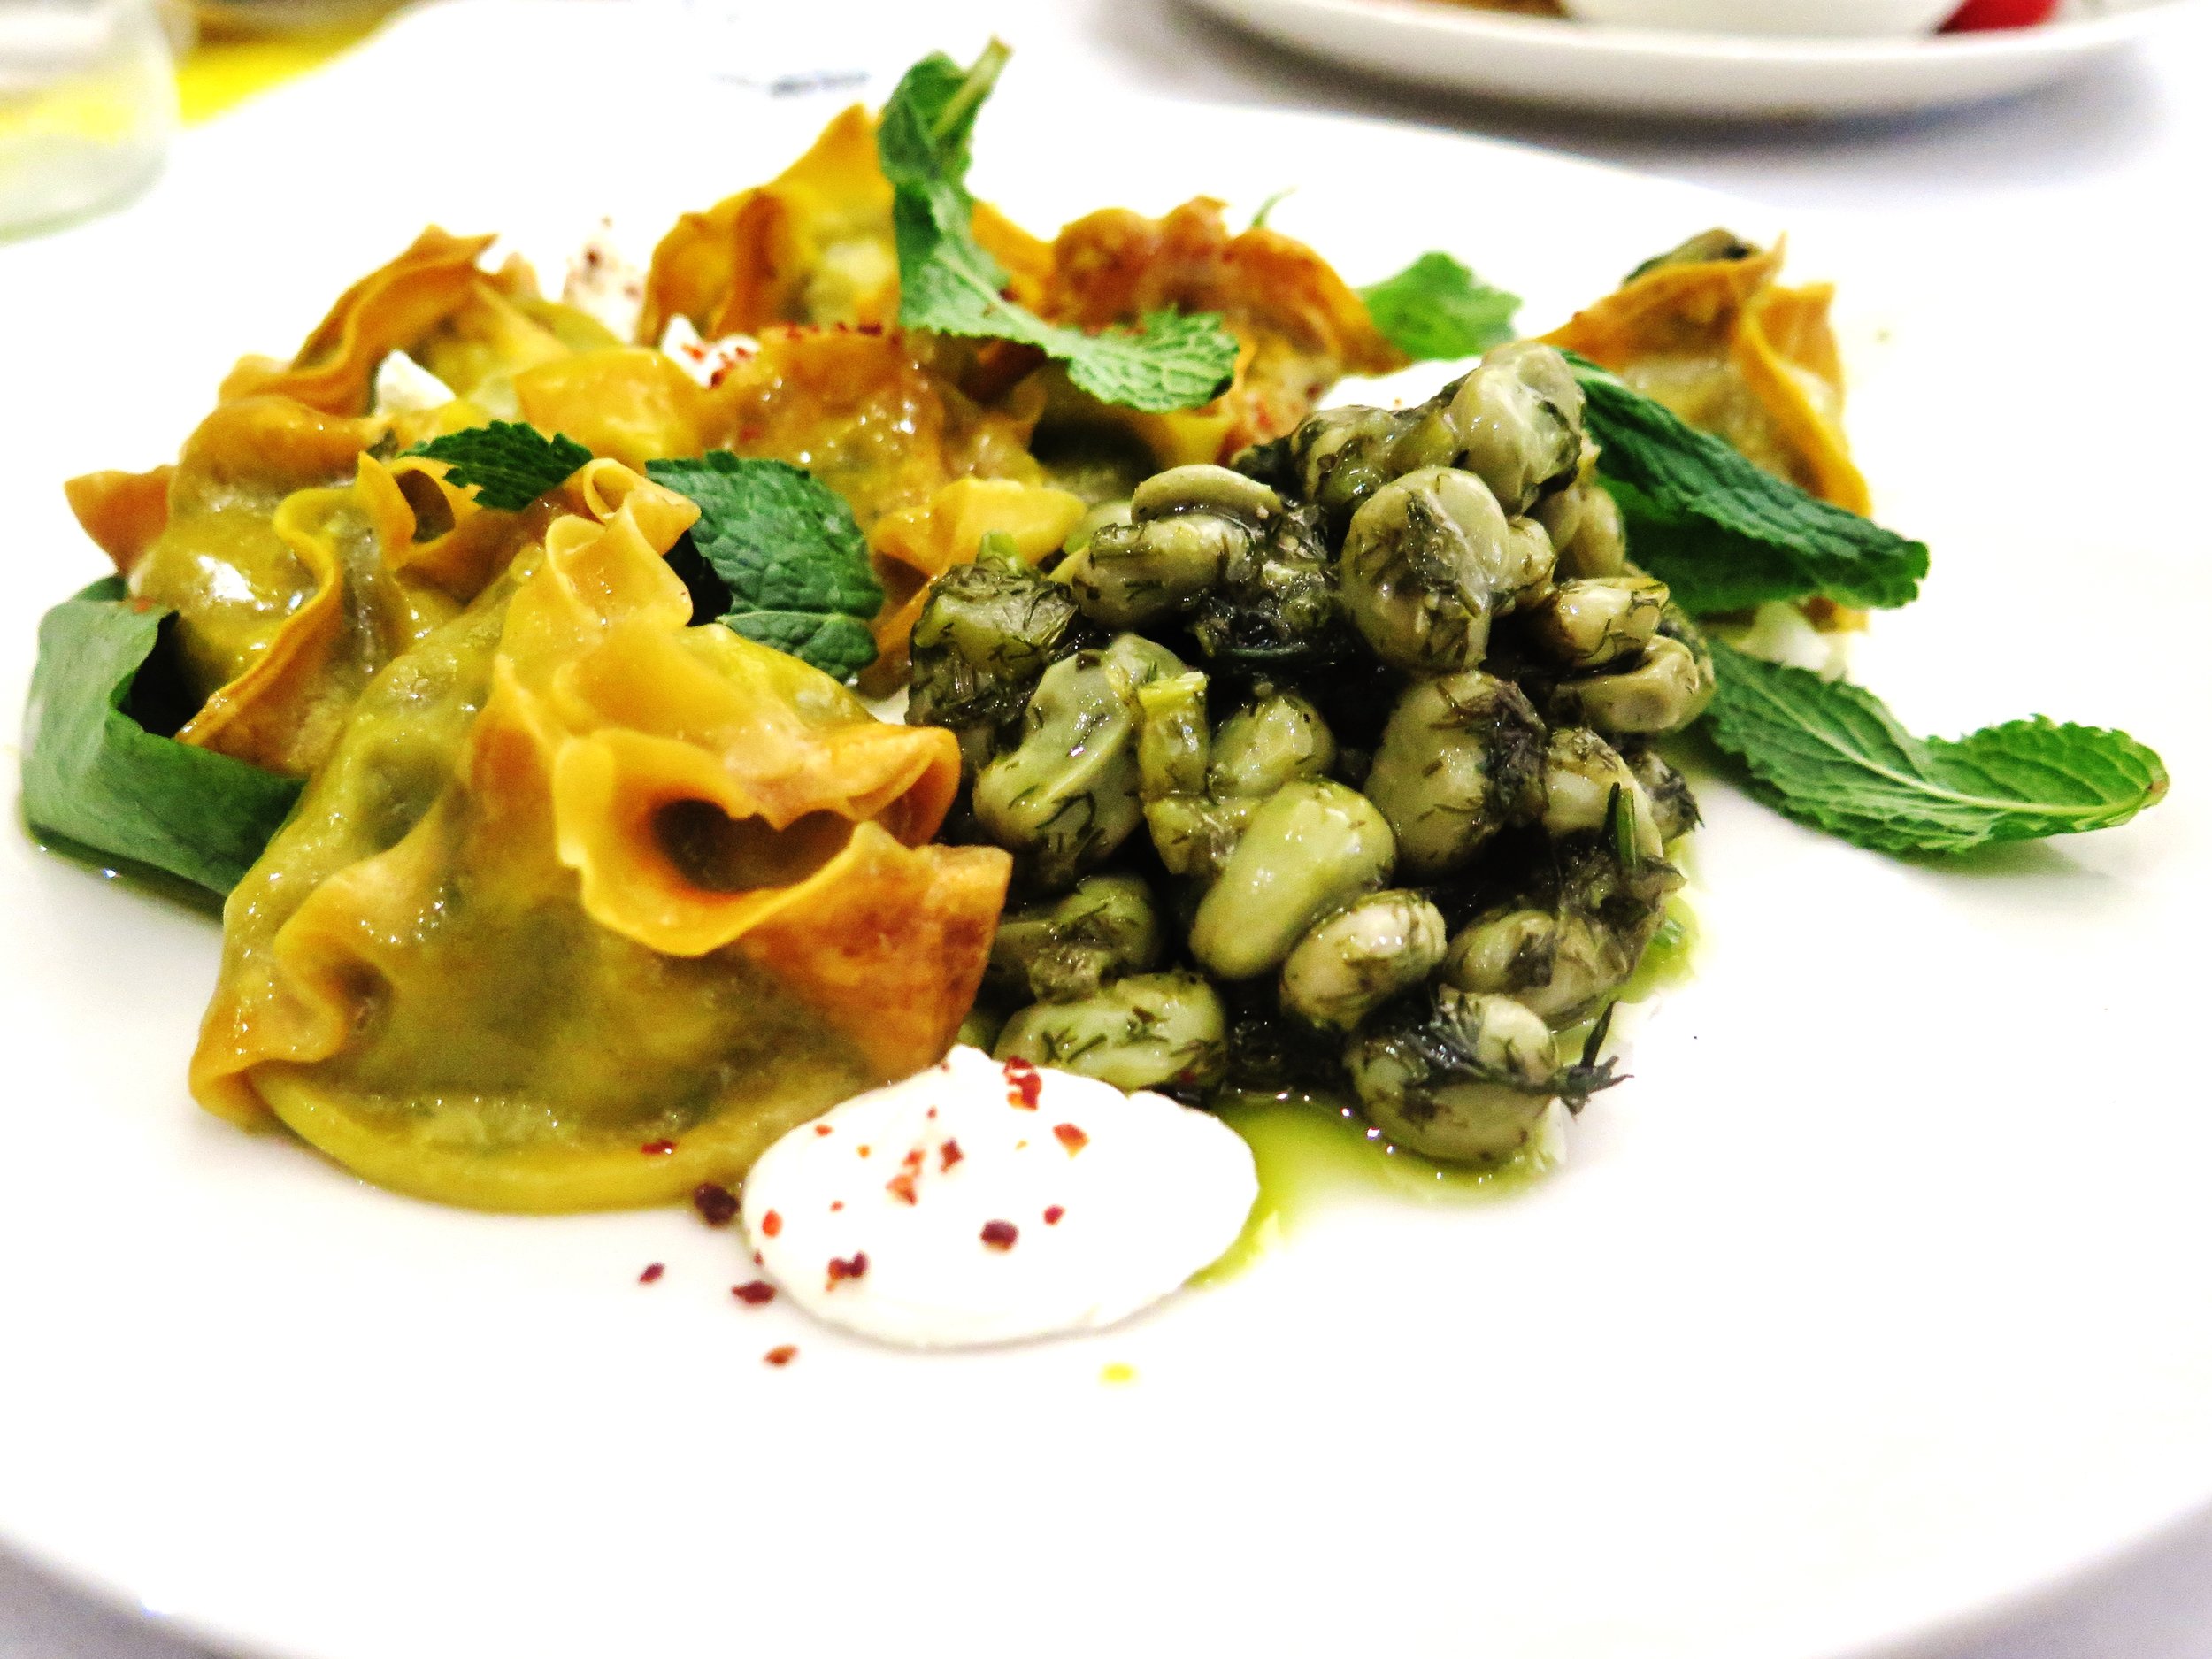
Berner’s Tavern prides itself on its grandeur, celebrity restaurant status, and accomplished chef/restaurateur at its helm.  Thus its pedestalled position makes it open to scrutiny.  Call me a pedant, but pluralising the already pluralised Italian pasta, ‘orecchiette’ to ‘orecchiettes’, is poor.

Berner's Tavern

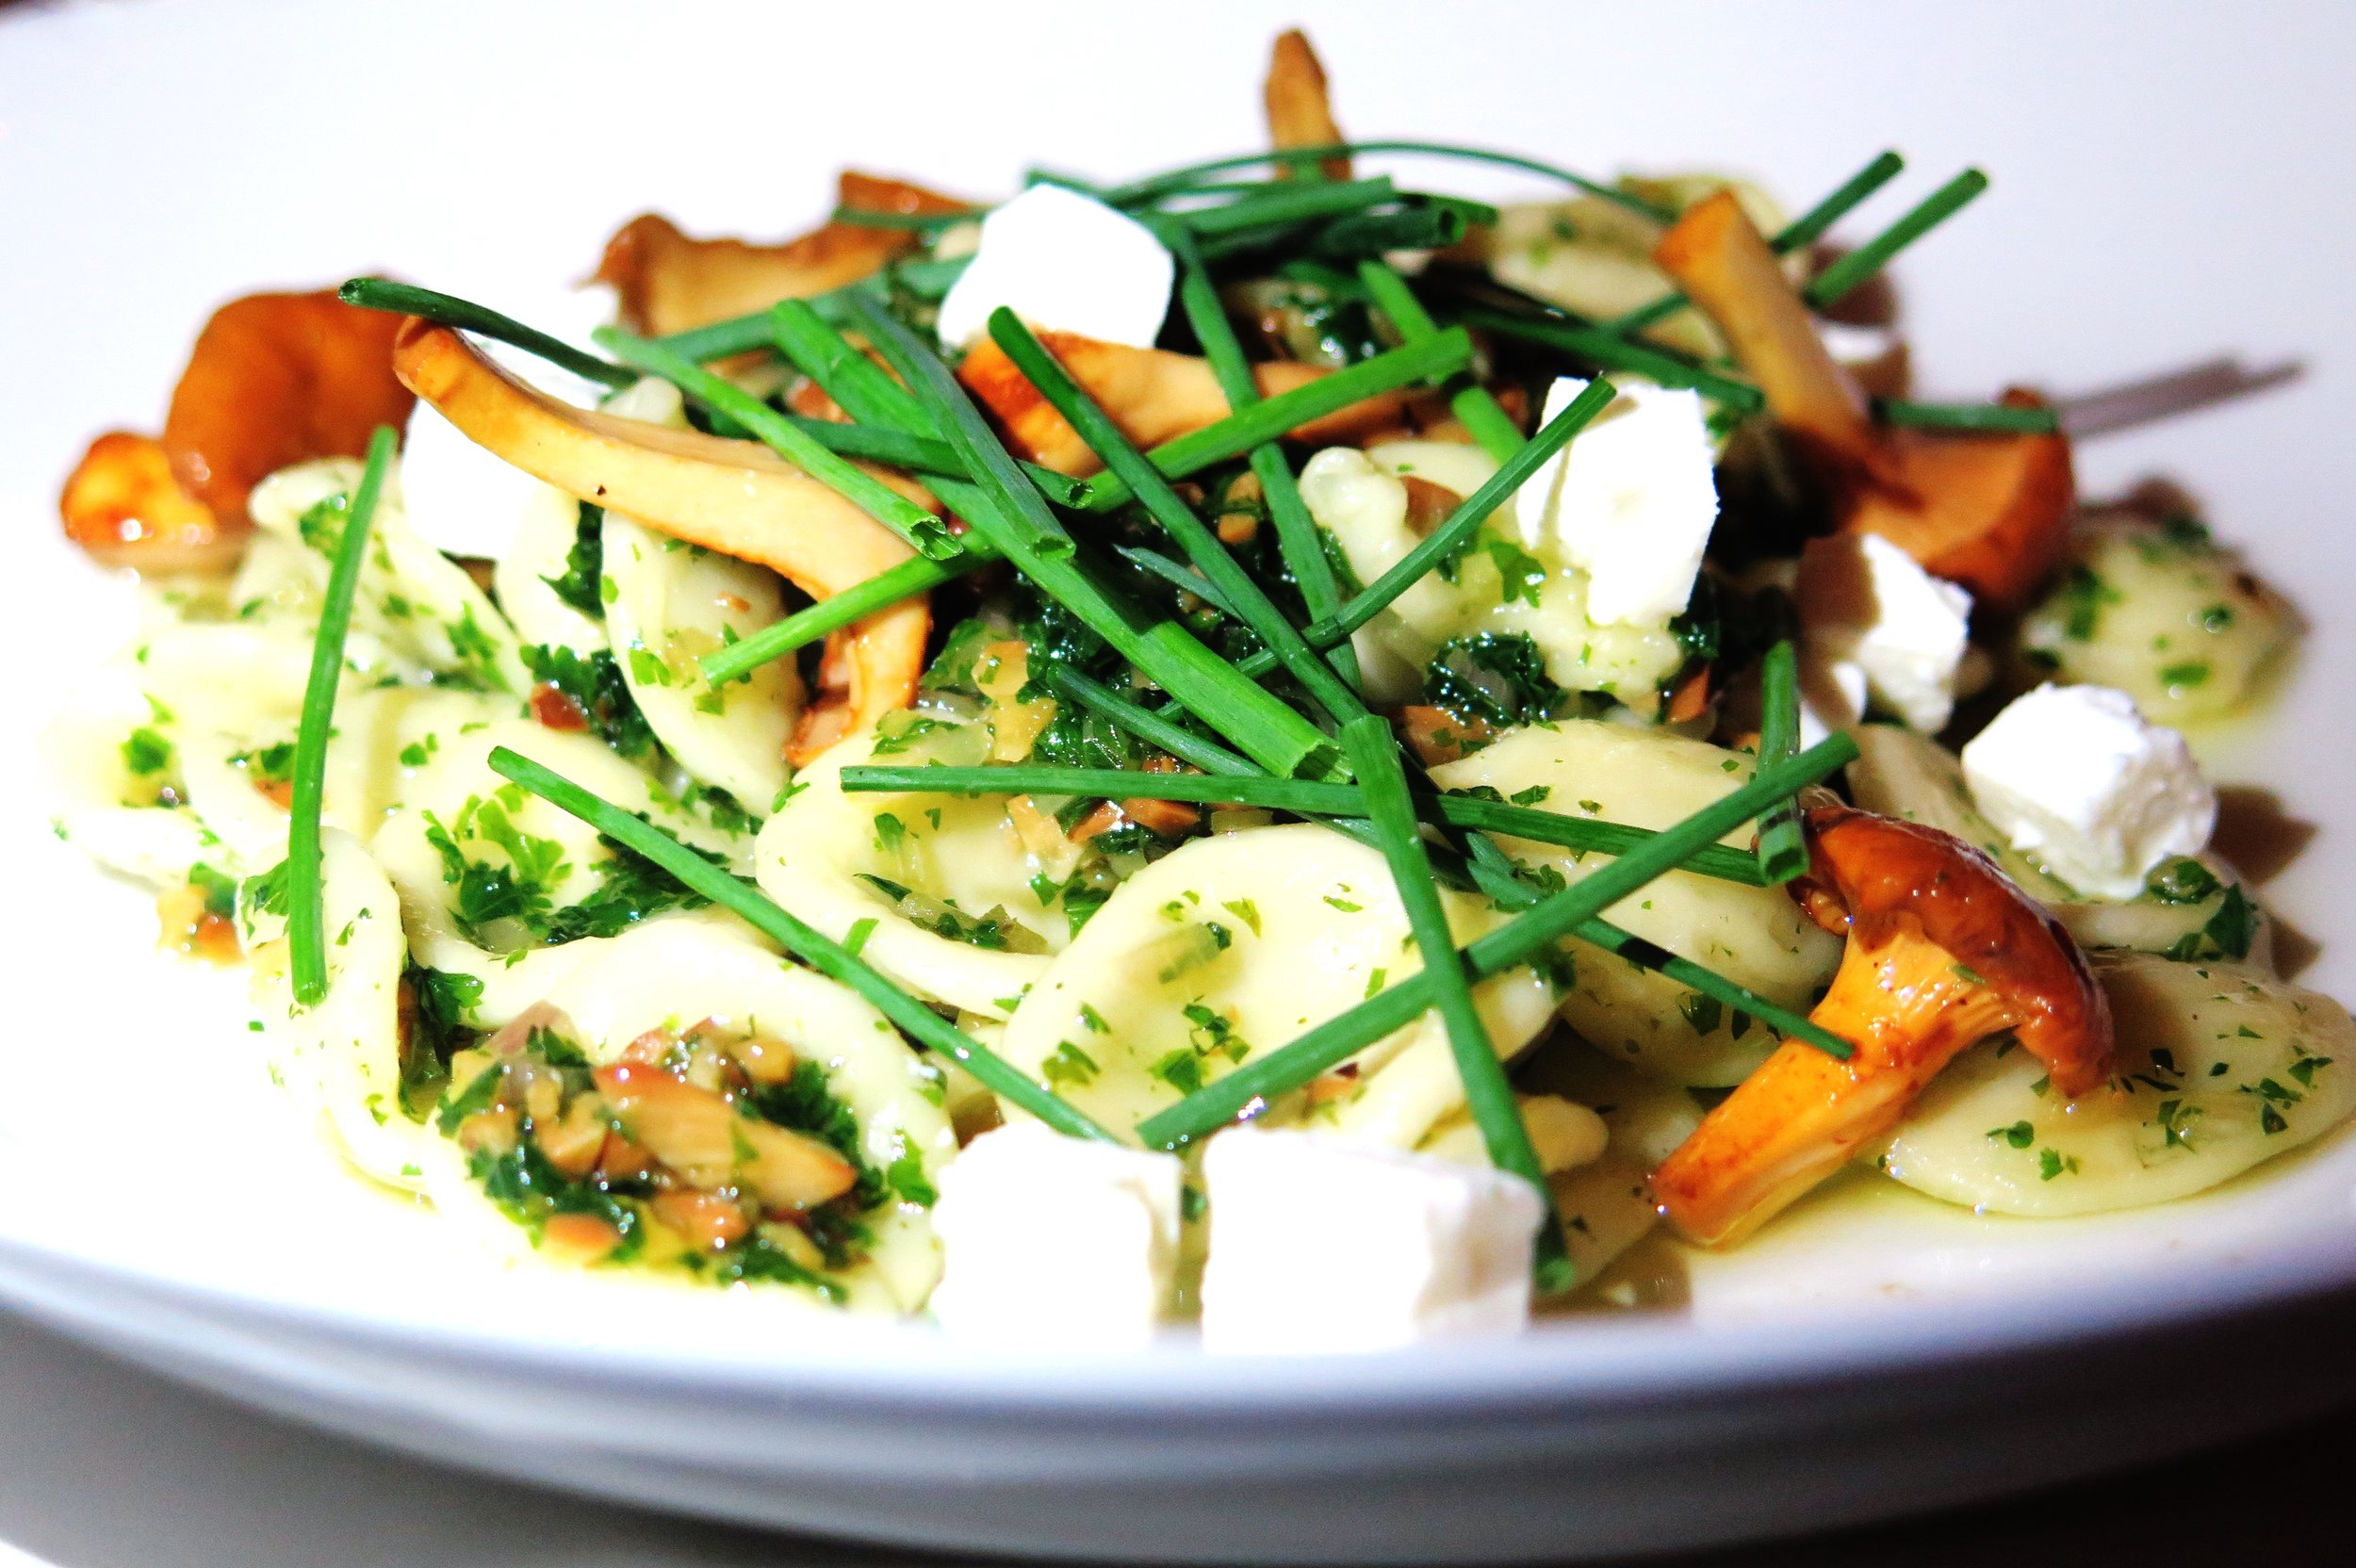
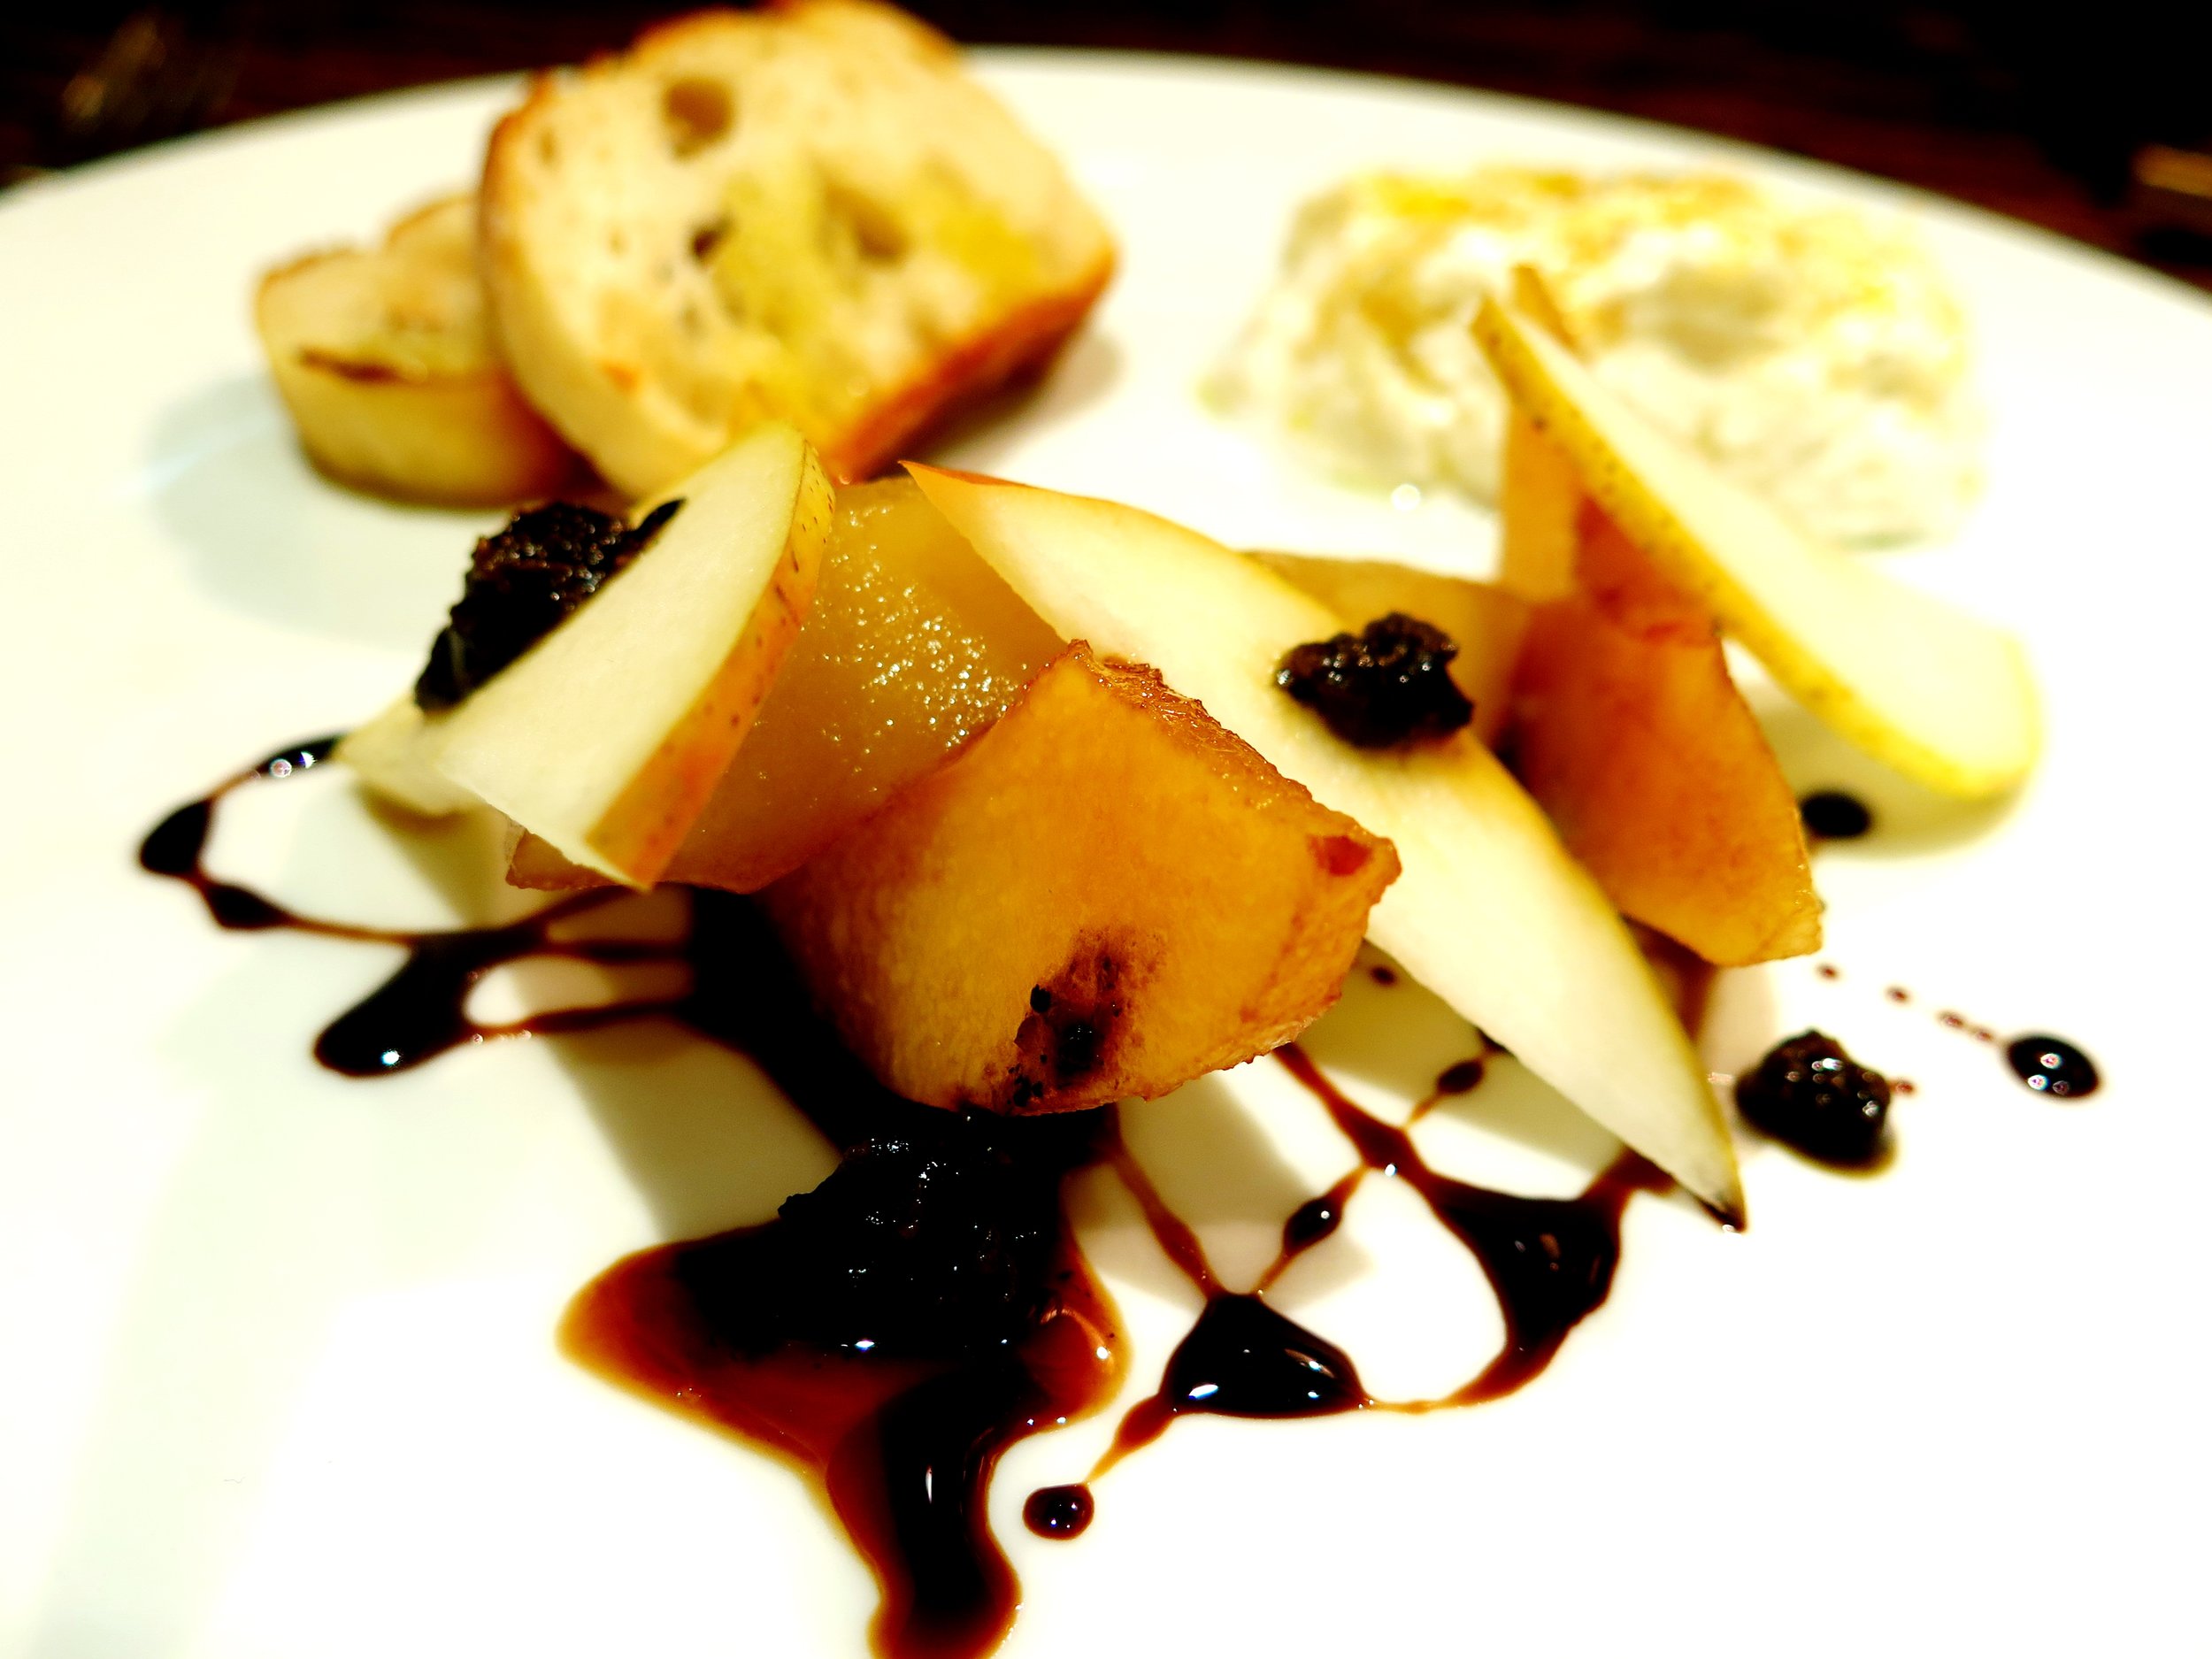
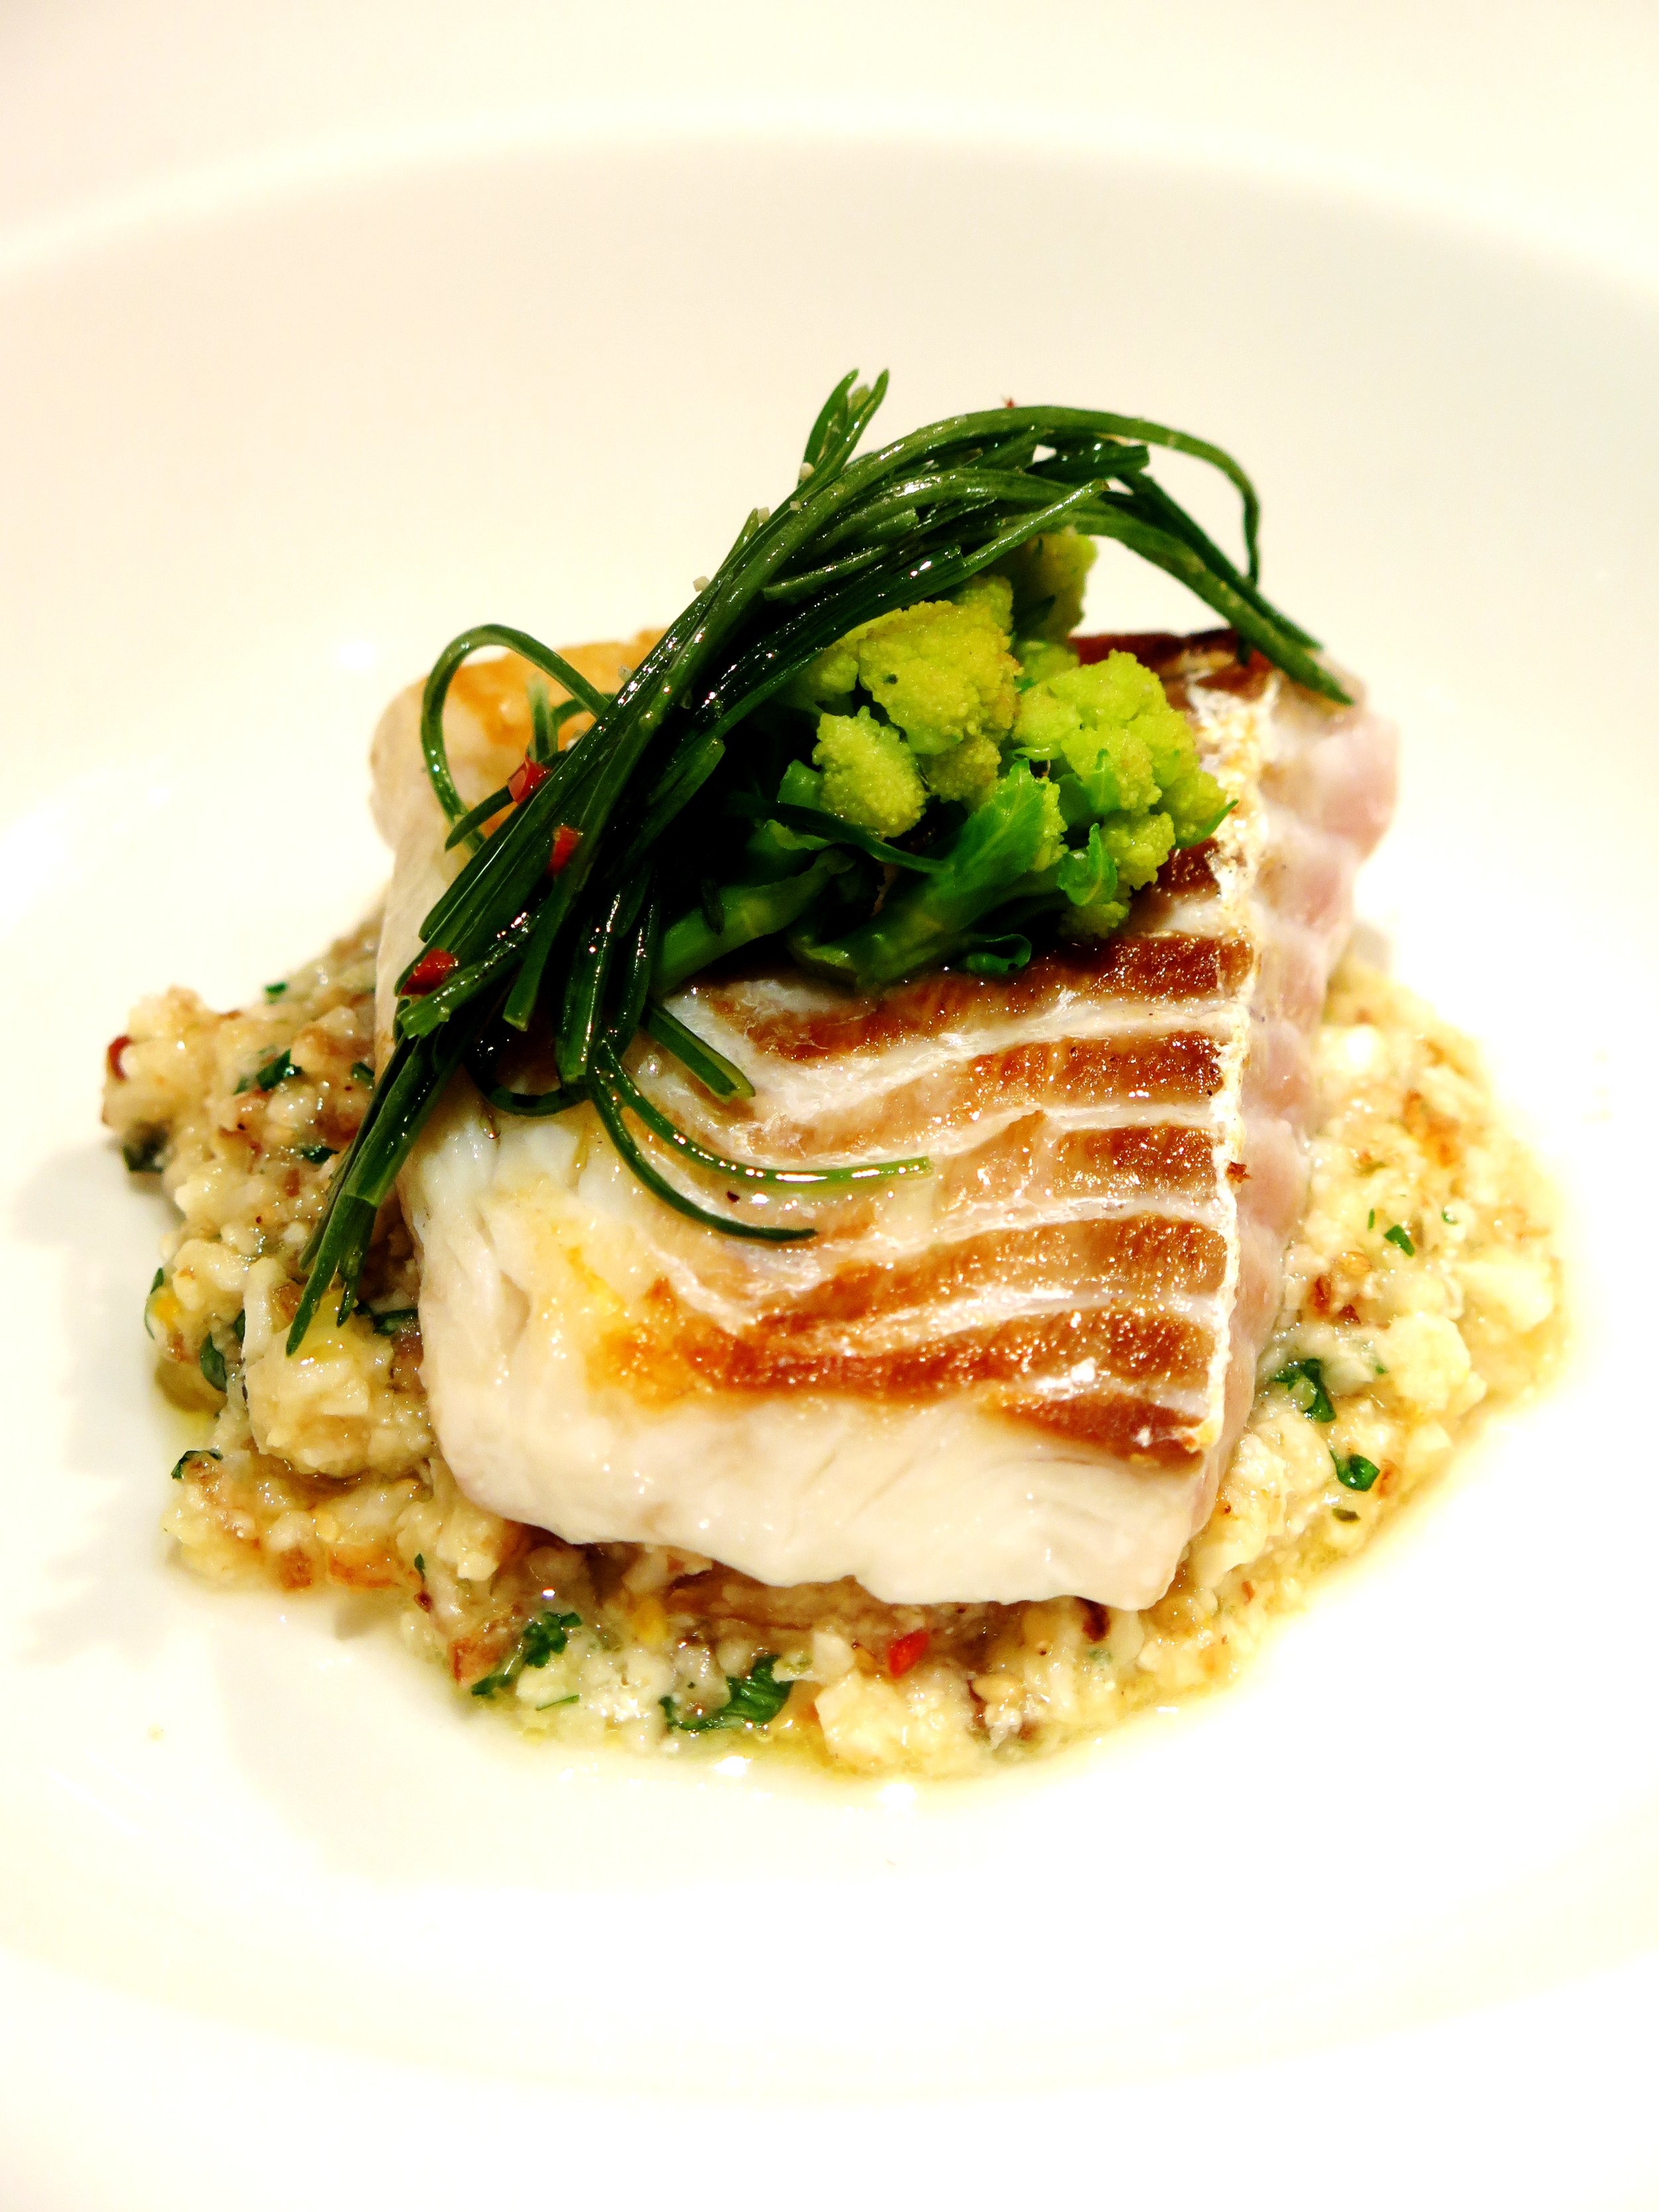
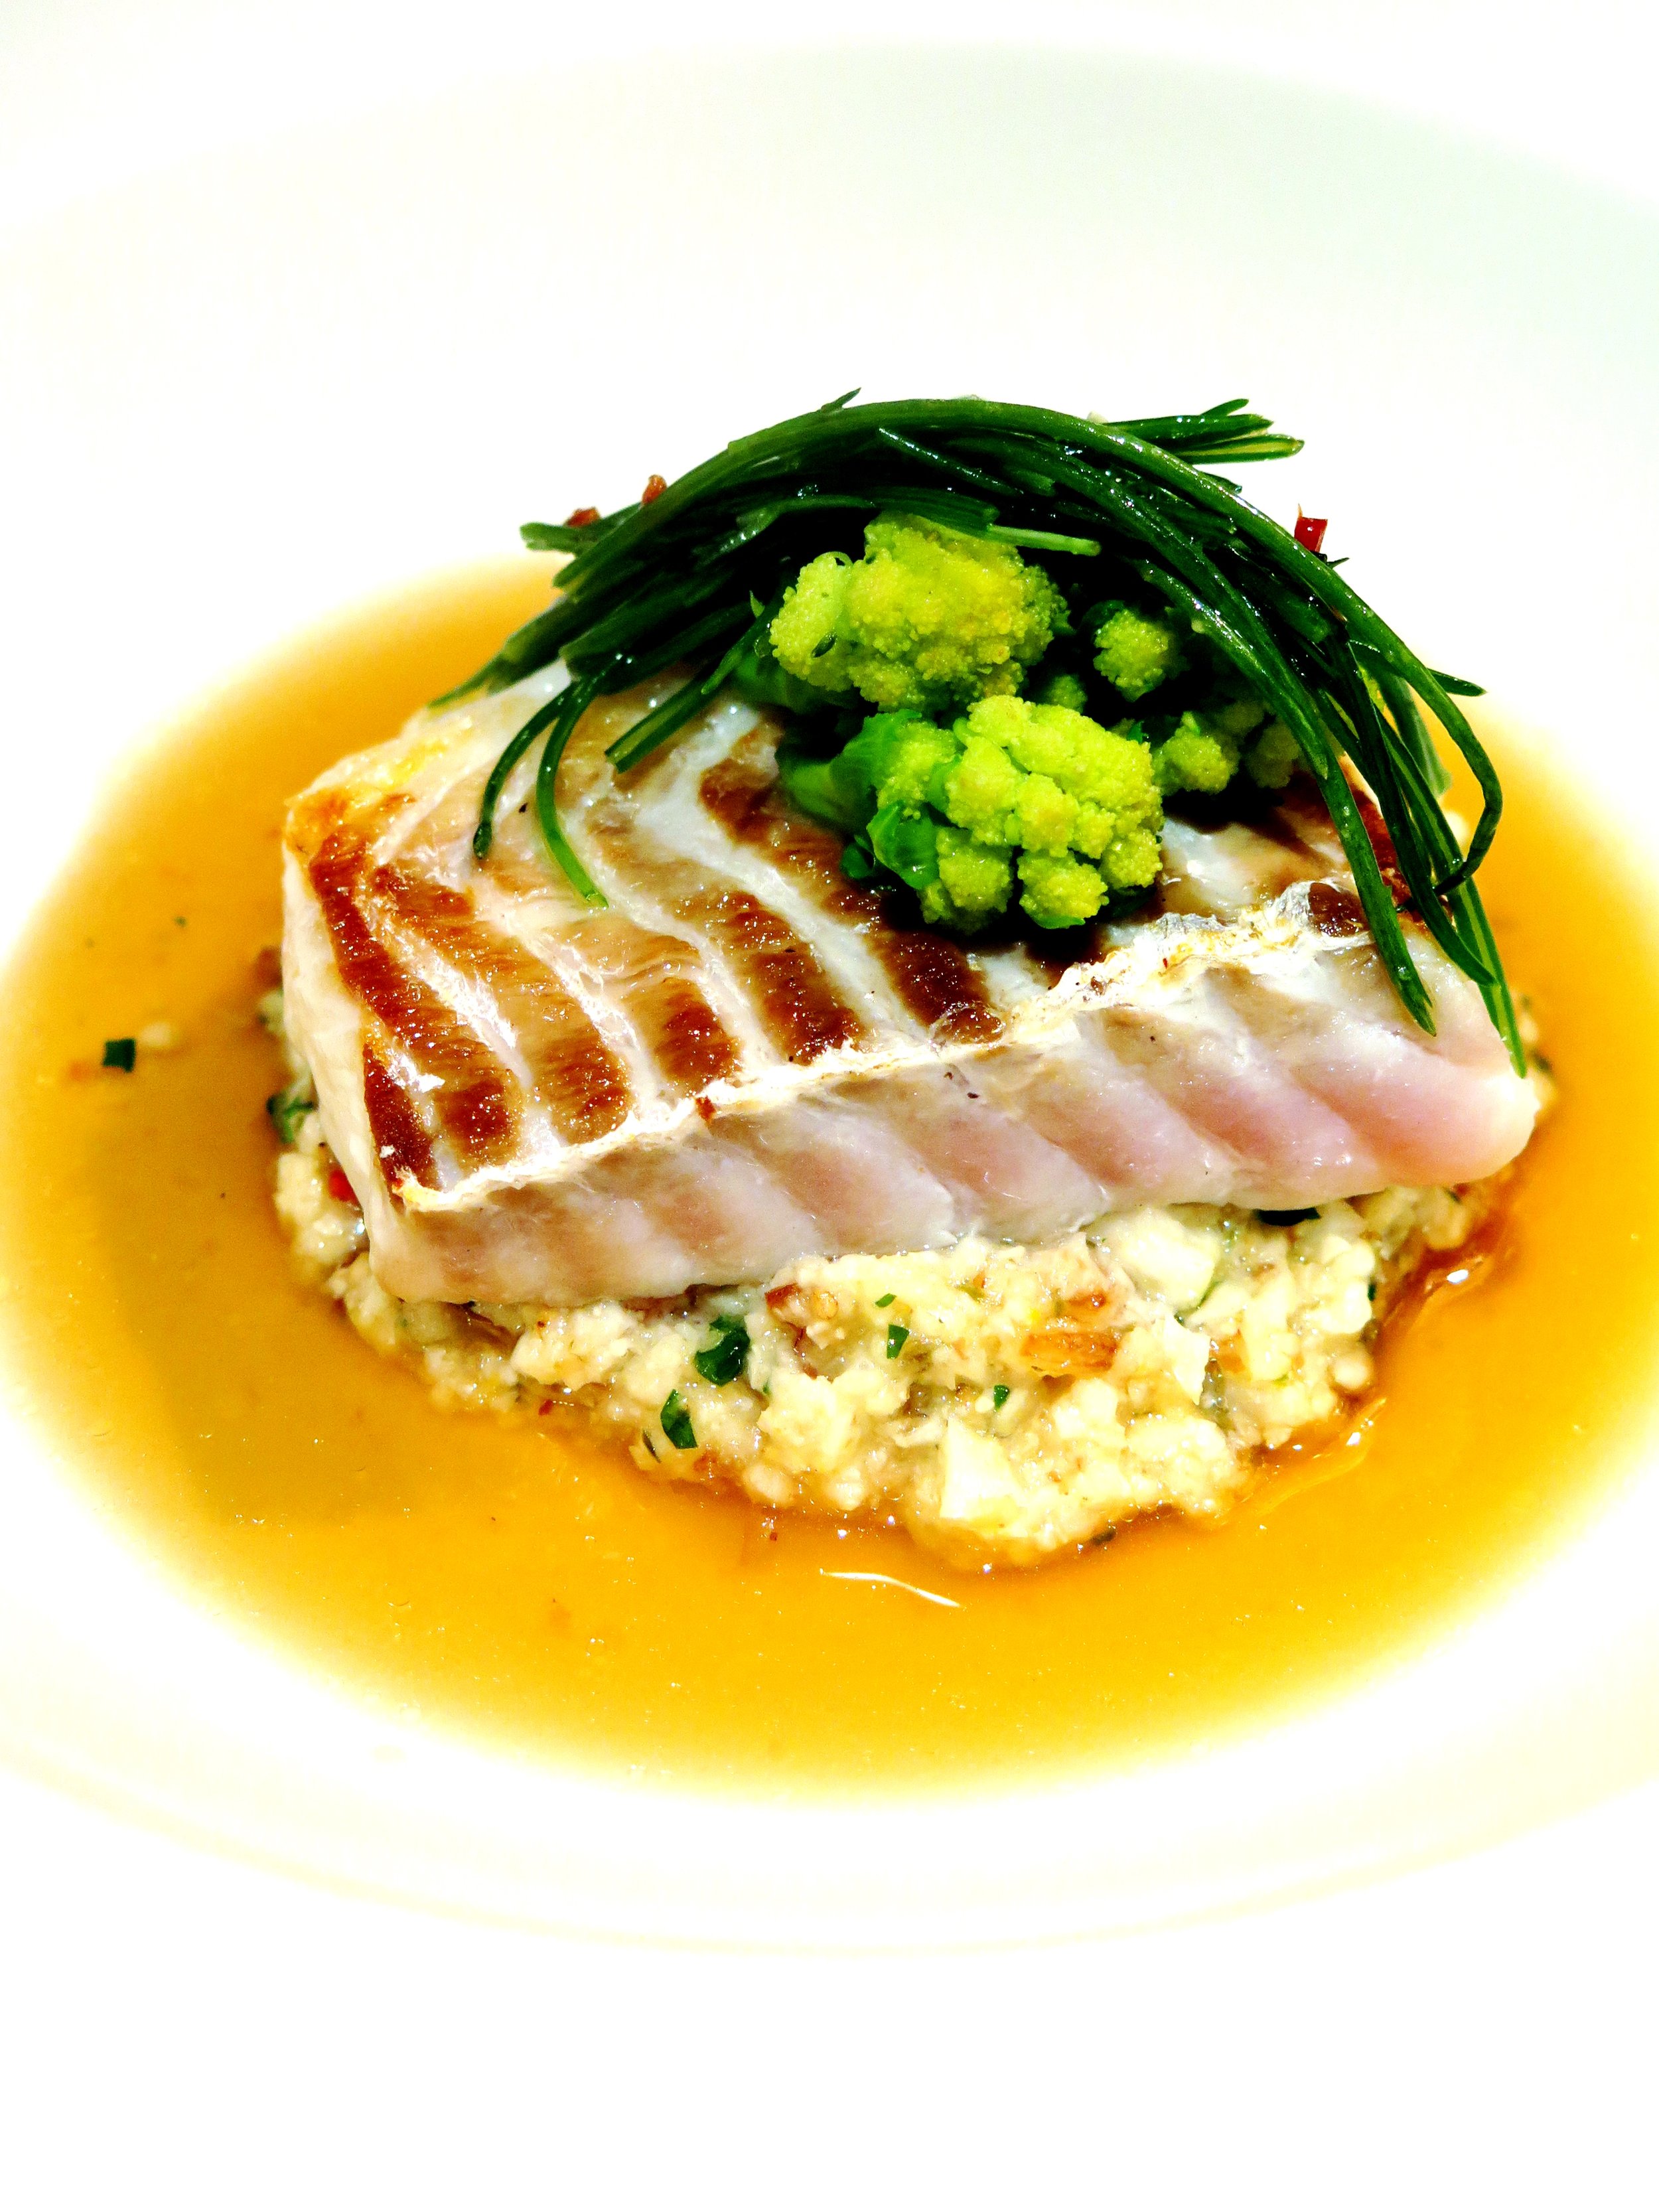
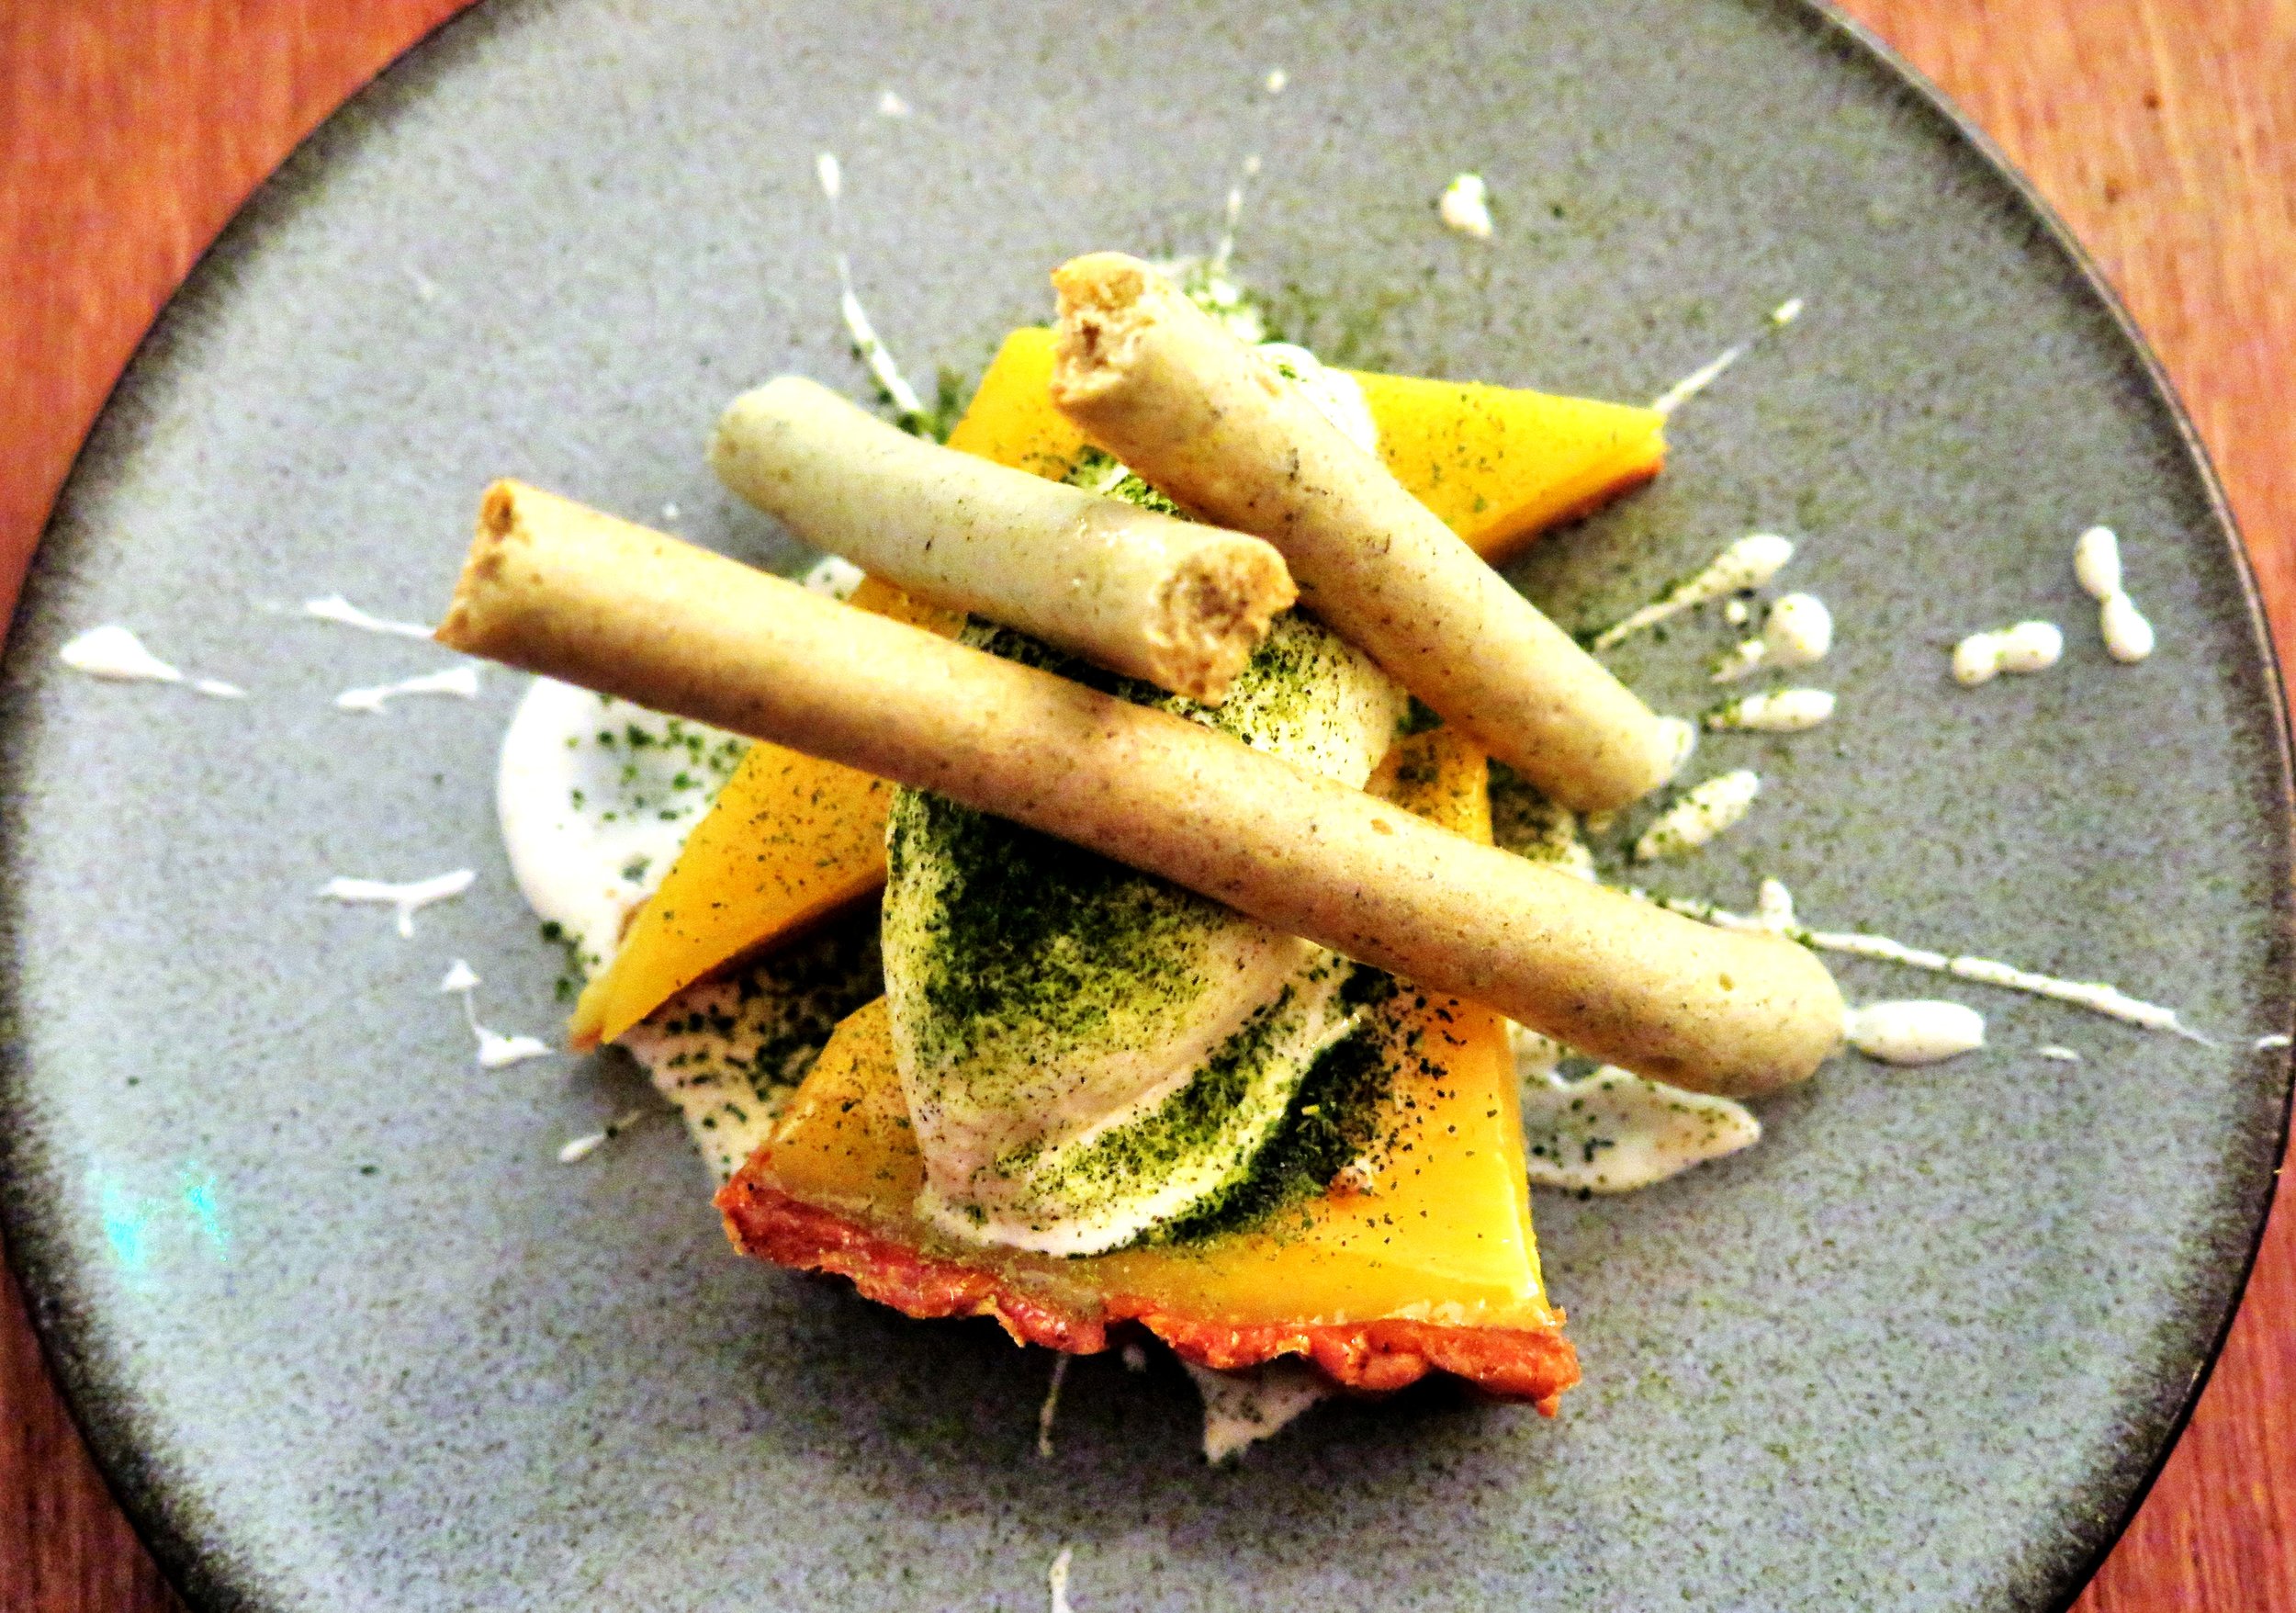
The dish itself wasn‘t bad and the ingredients created a pleasant umami flavour.  However, it needed something extra to tie it together, and it also arrived inexcusably lukewarm.  My friends were satisfied with their dishes, though – the macaroni and cheese with braised ox-cheek and bone marrow and brioche crumble was a particular success.

Berner's Tavern


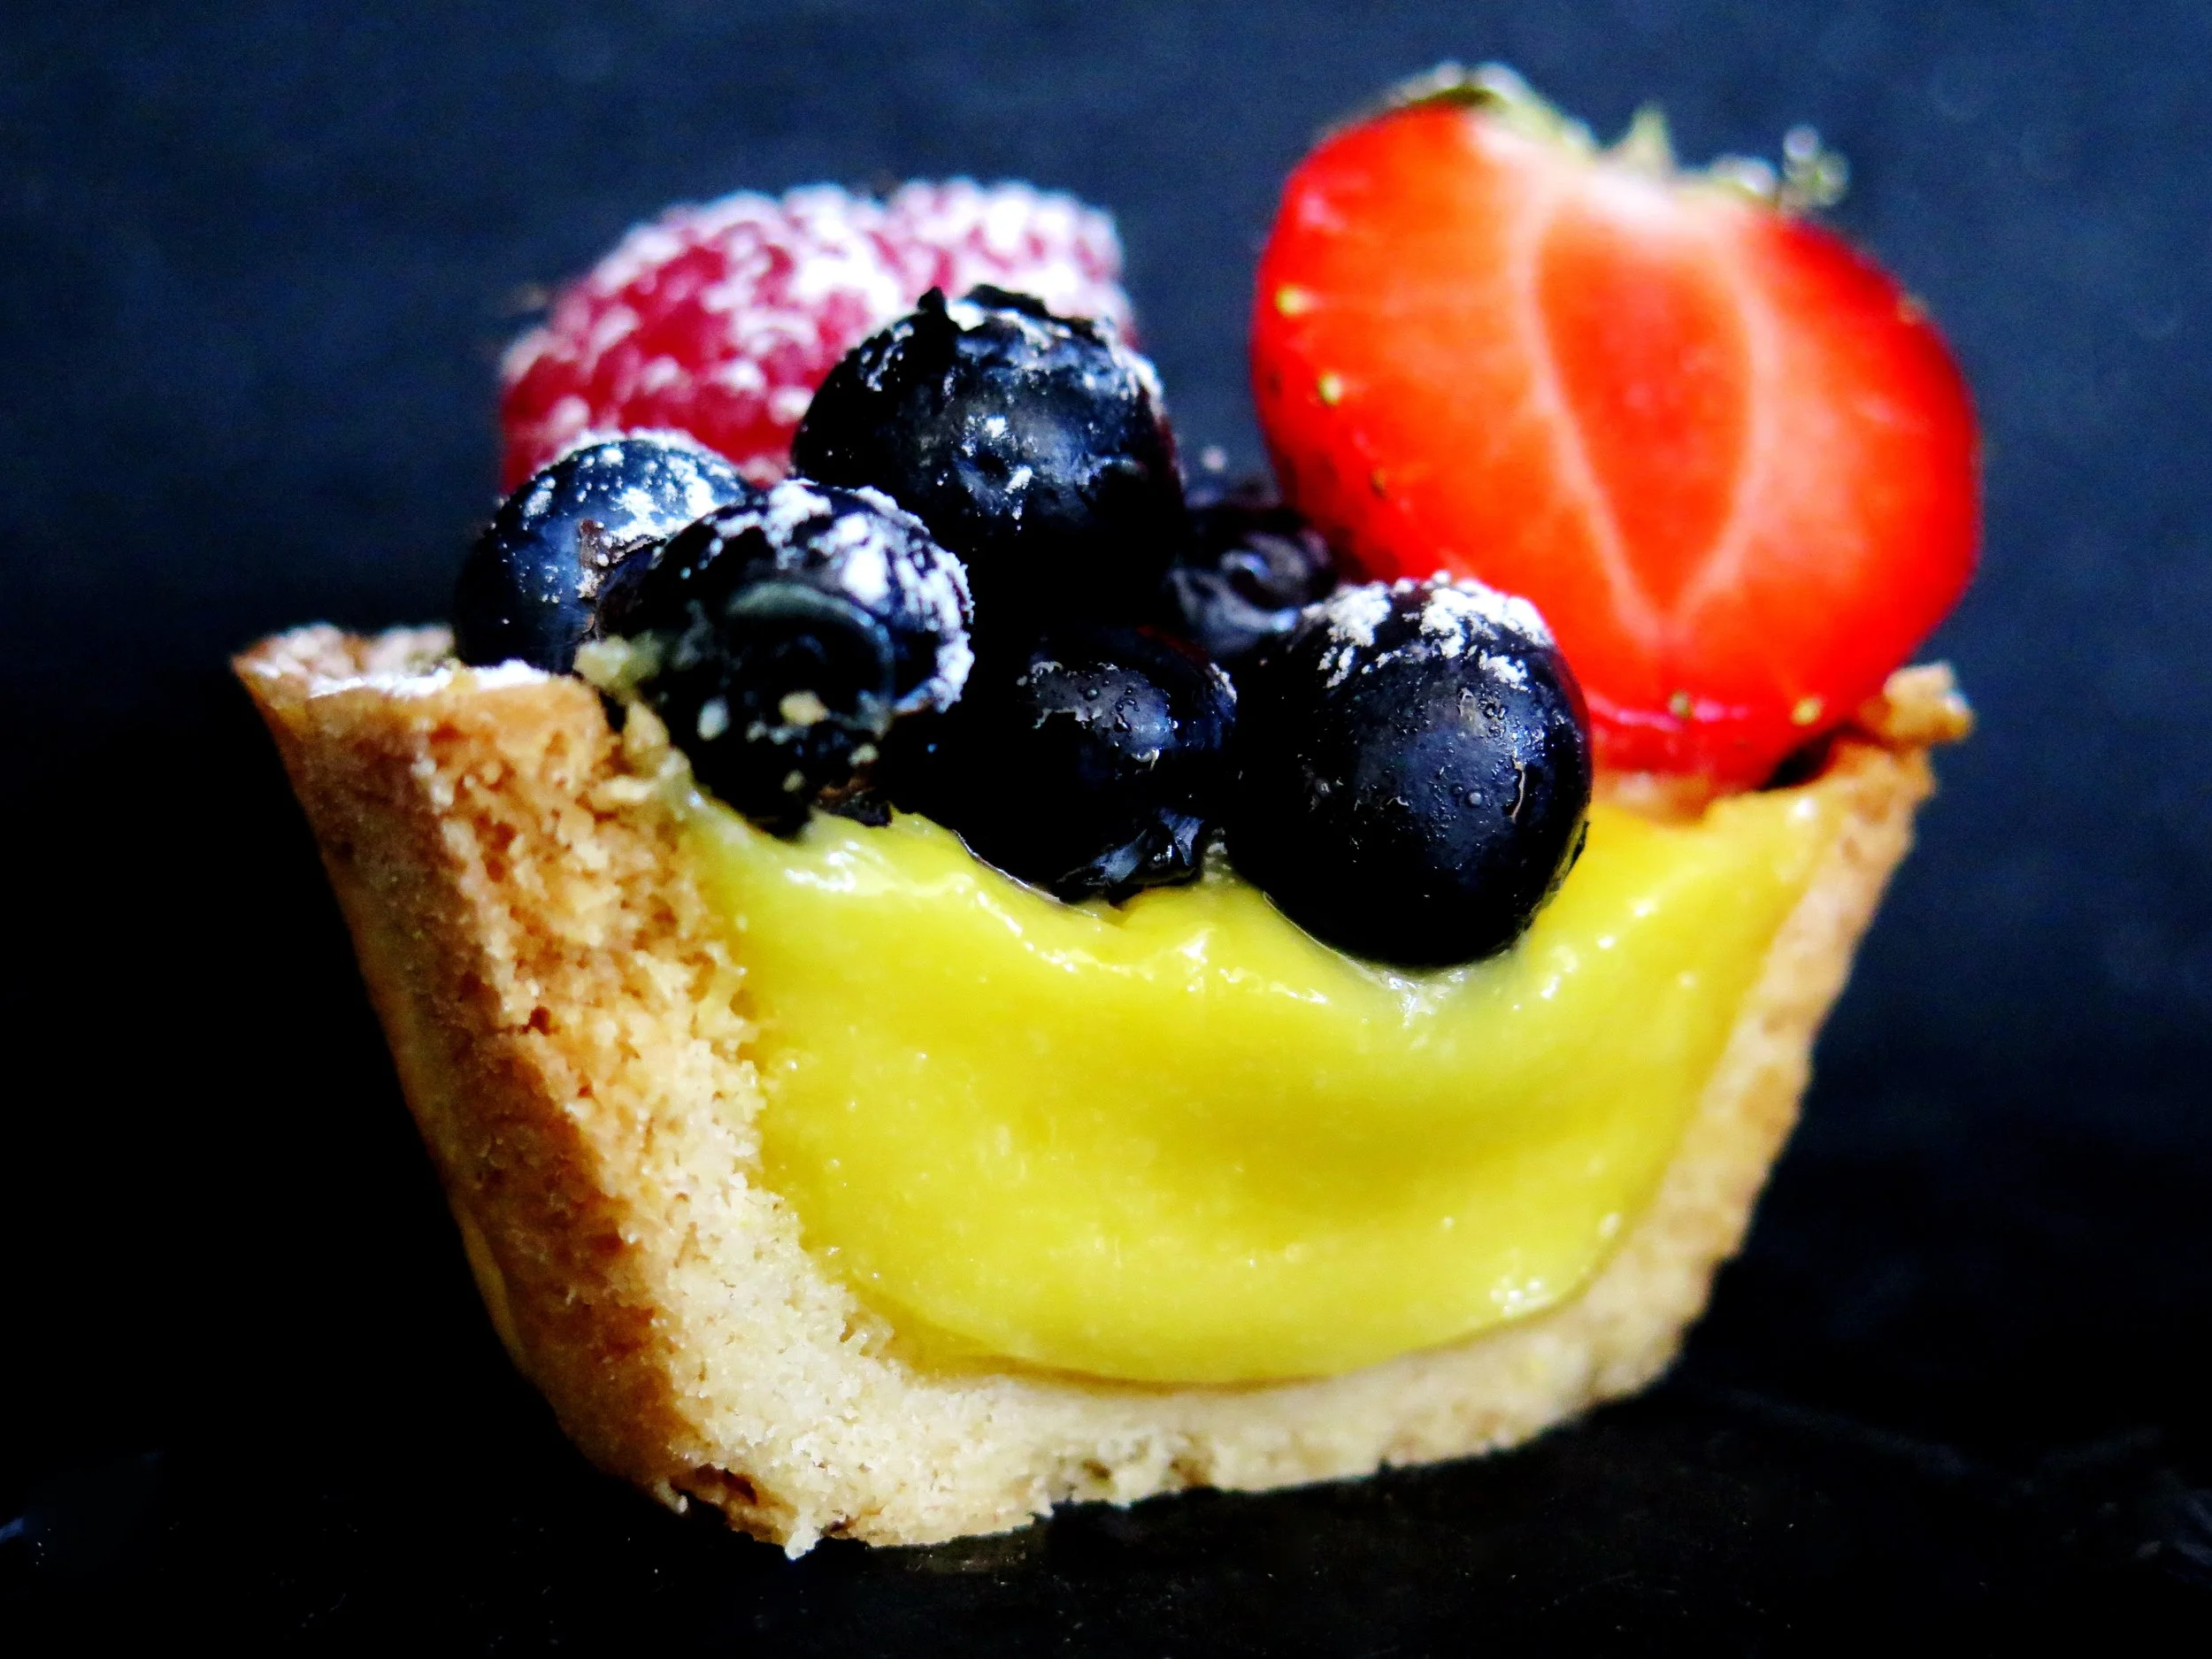
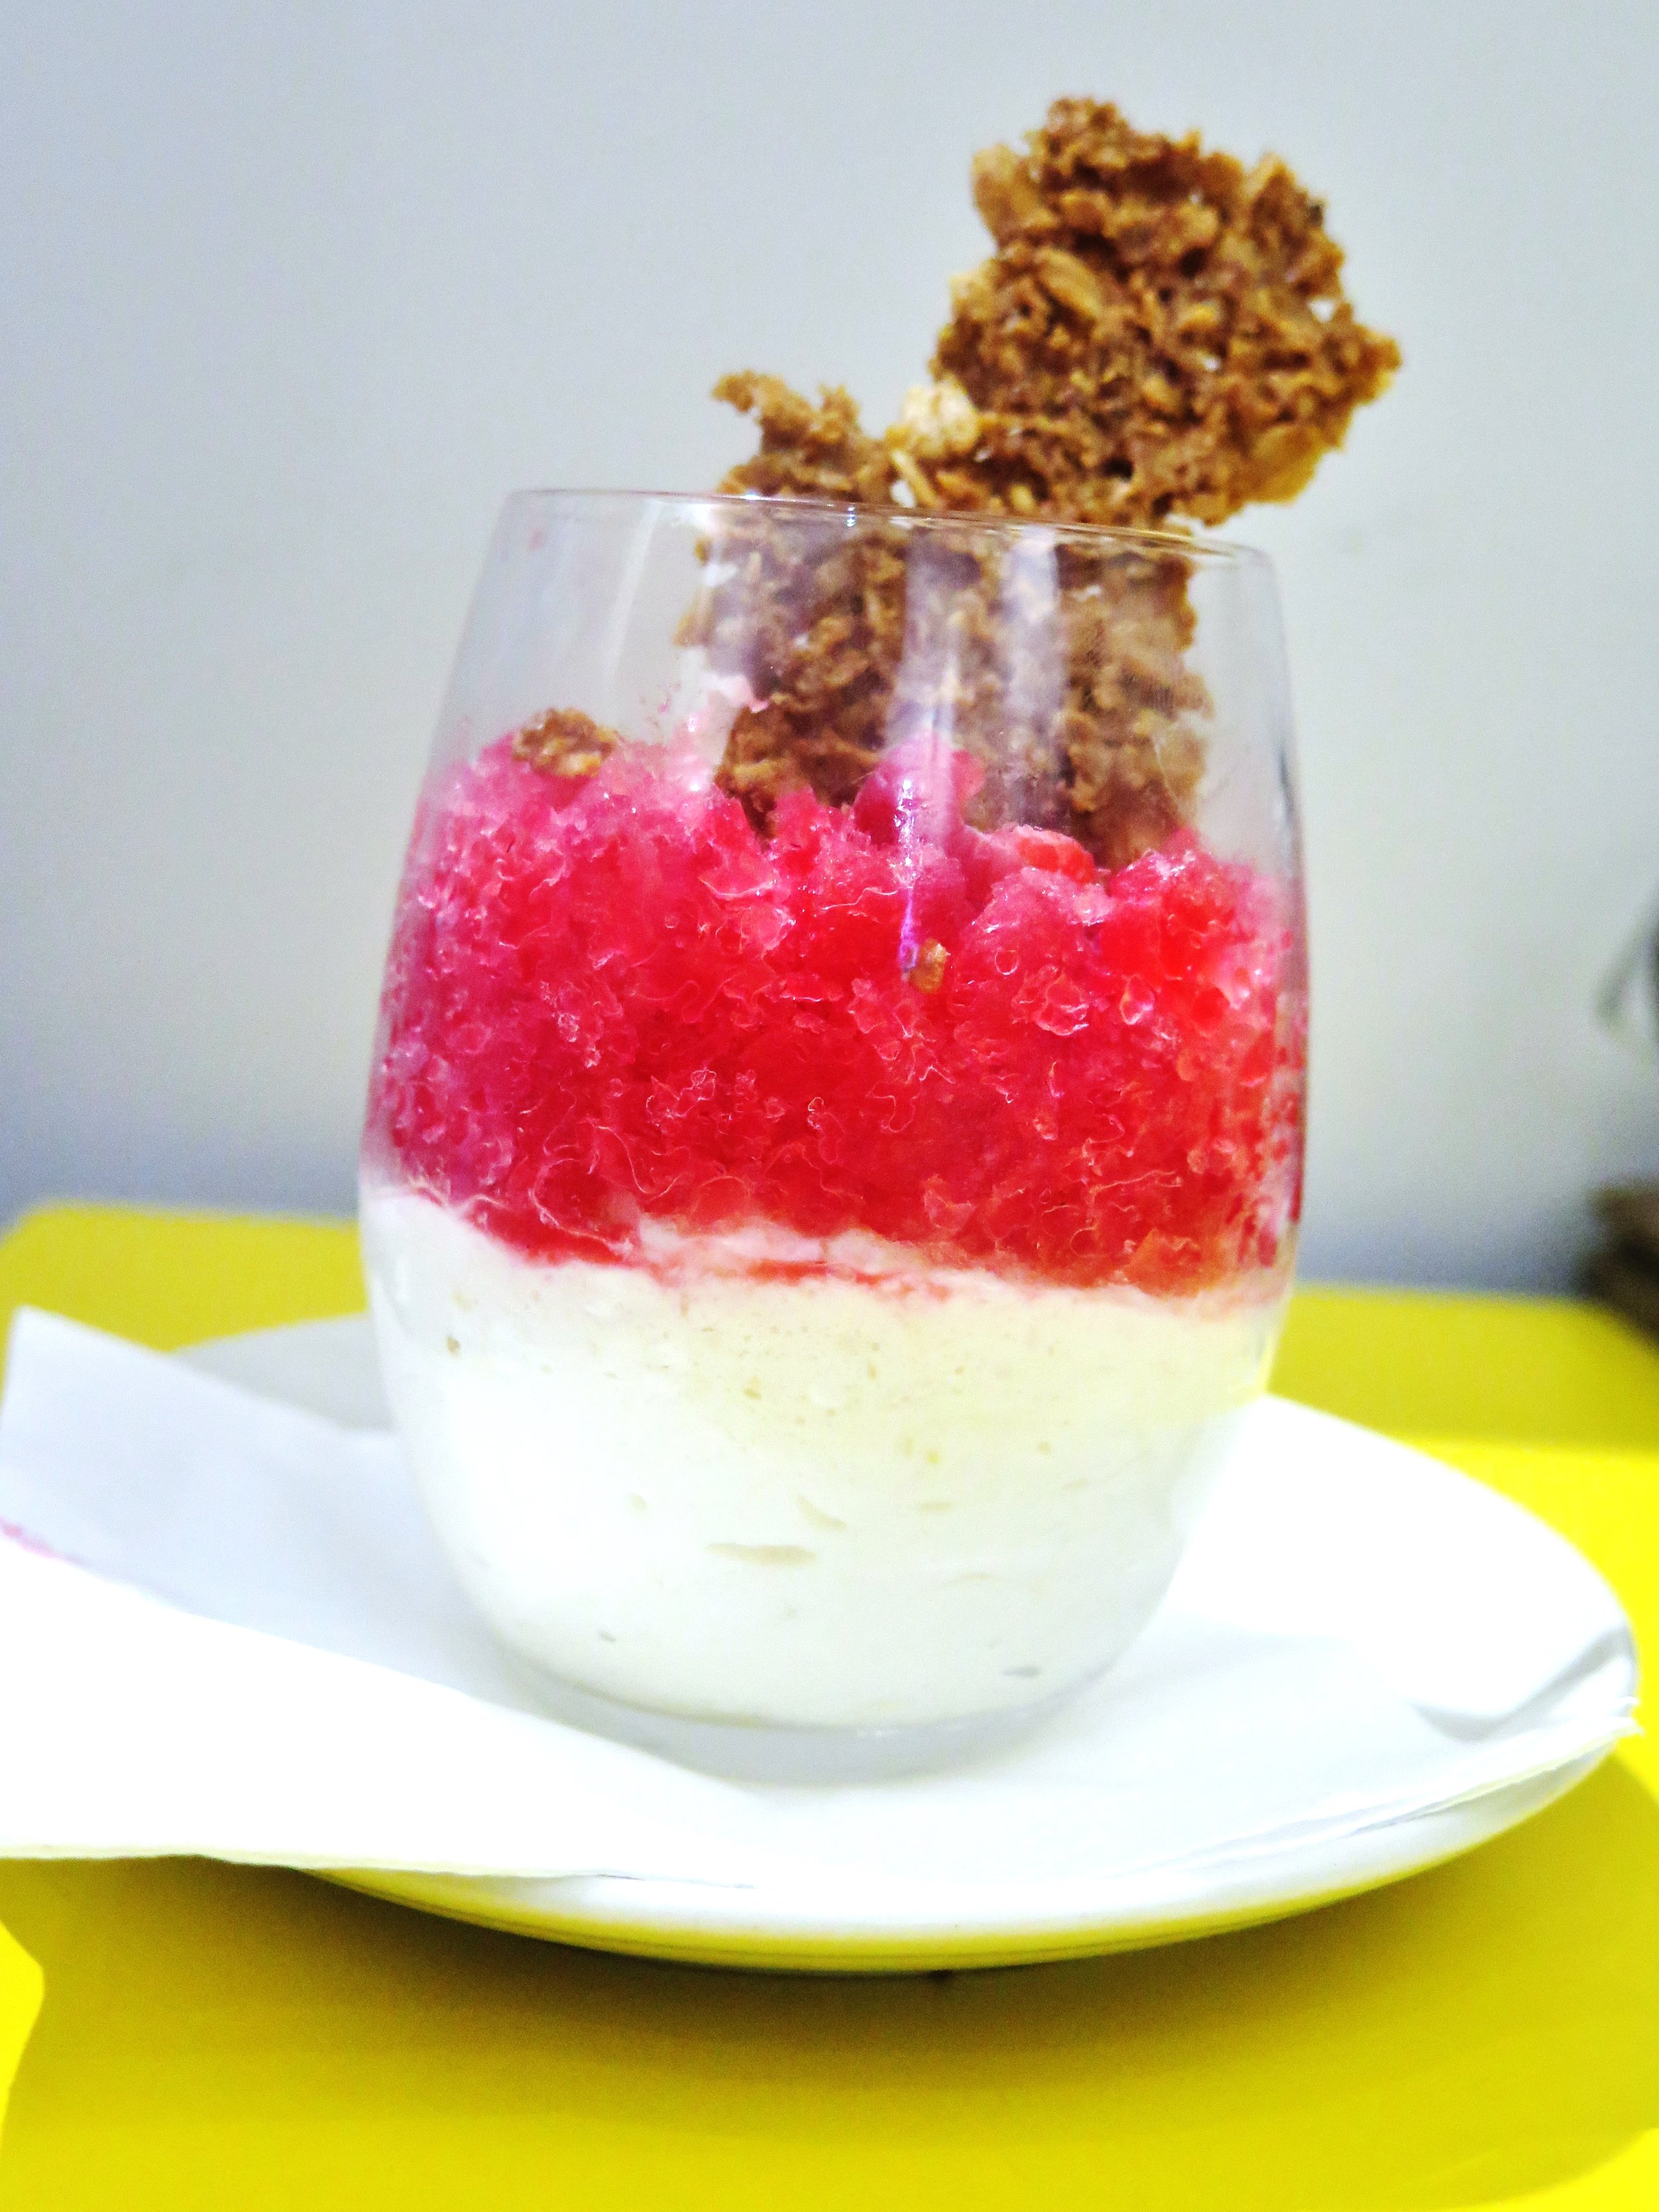
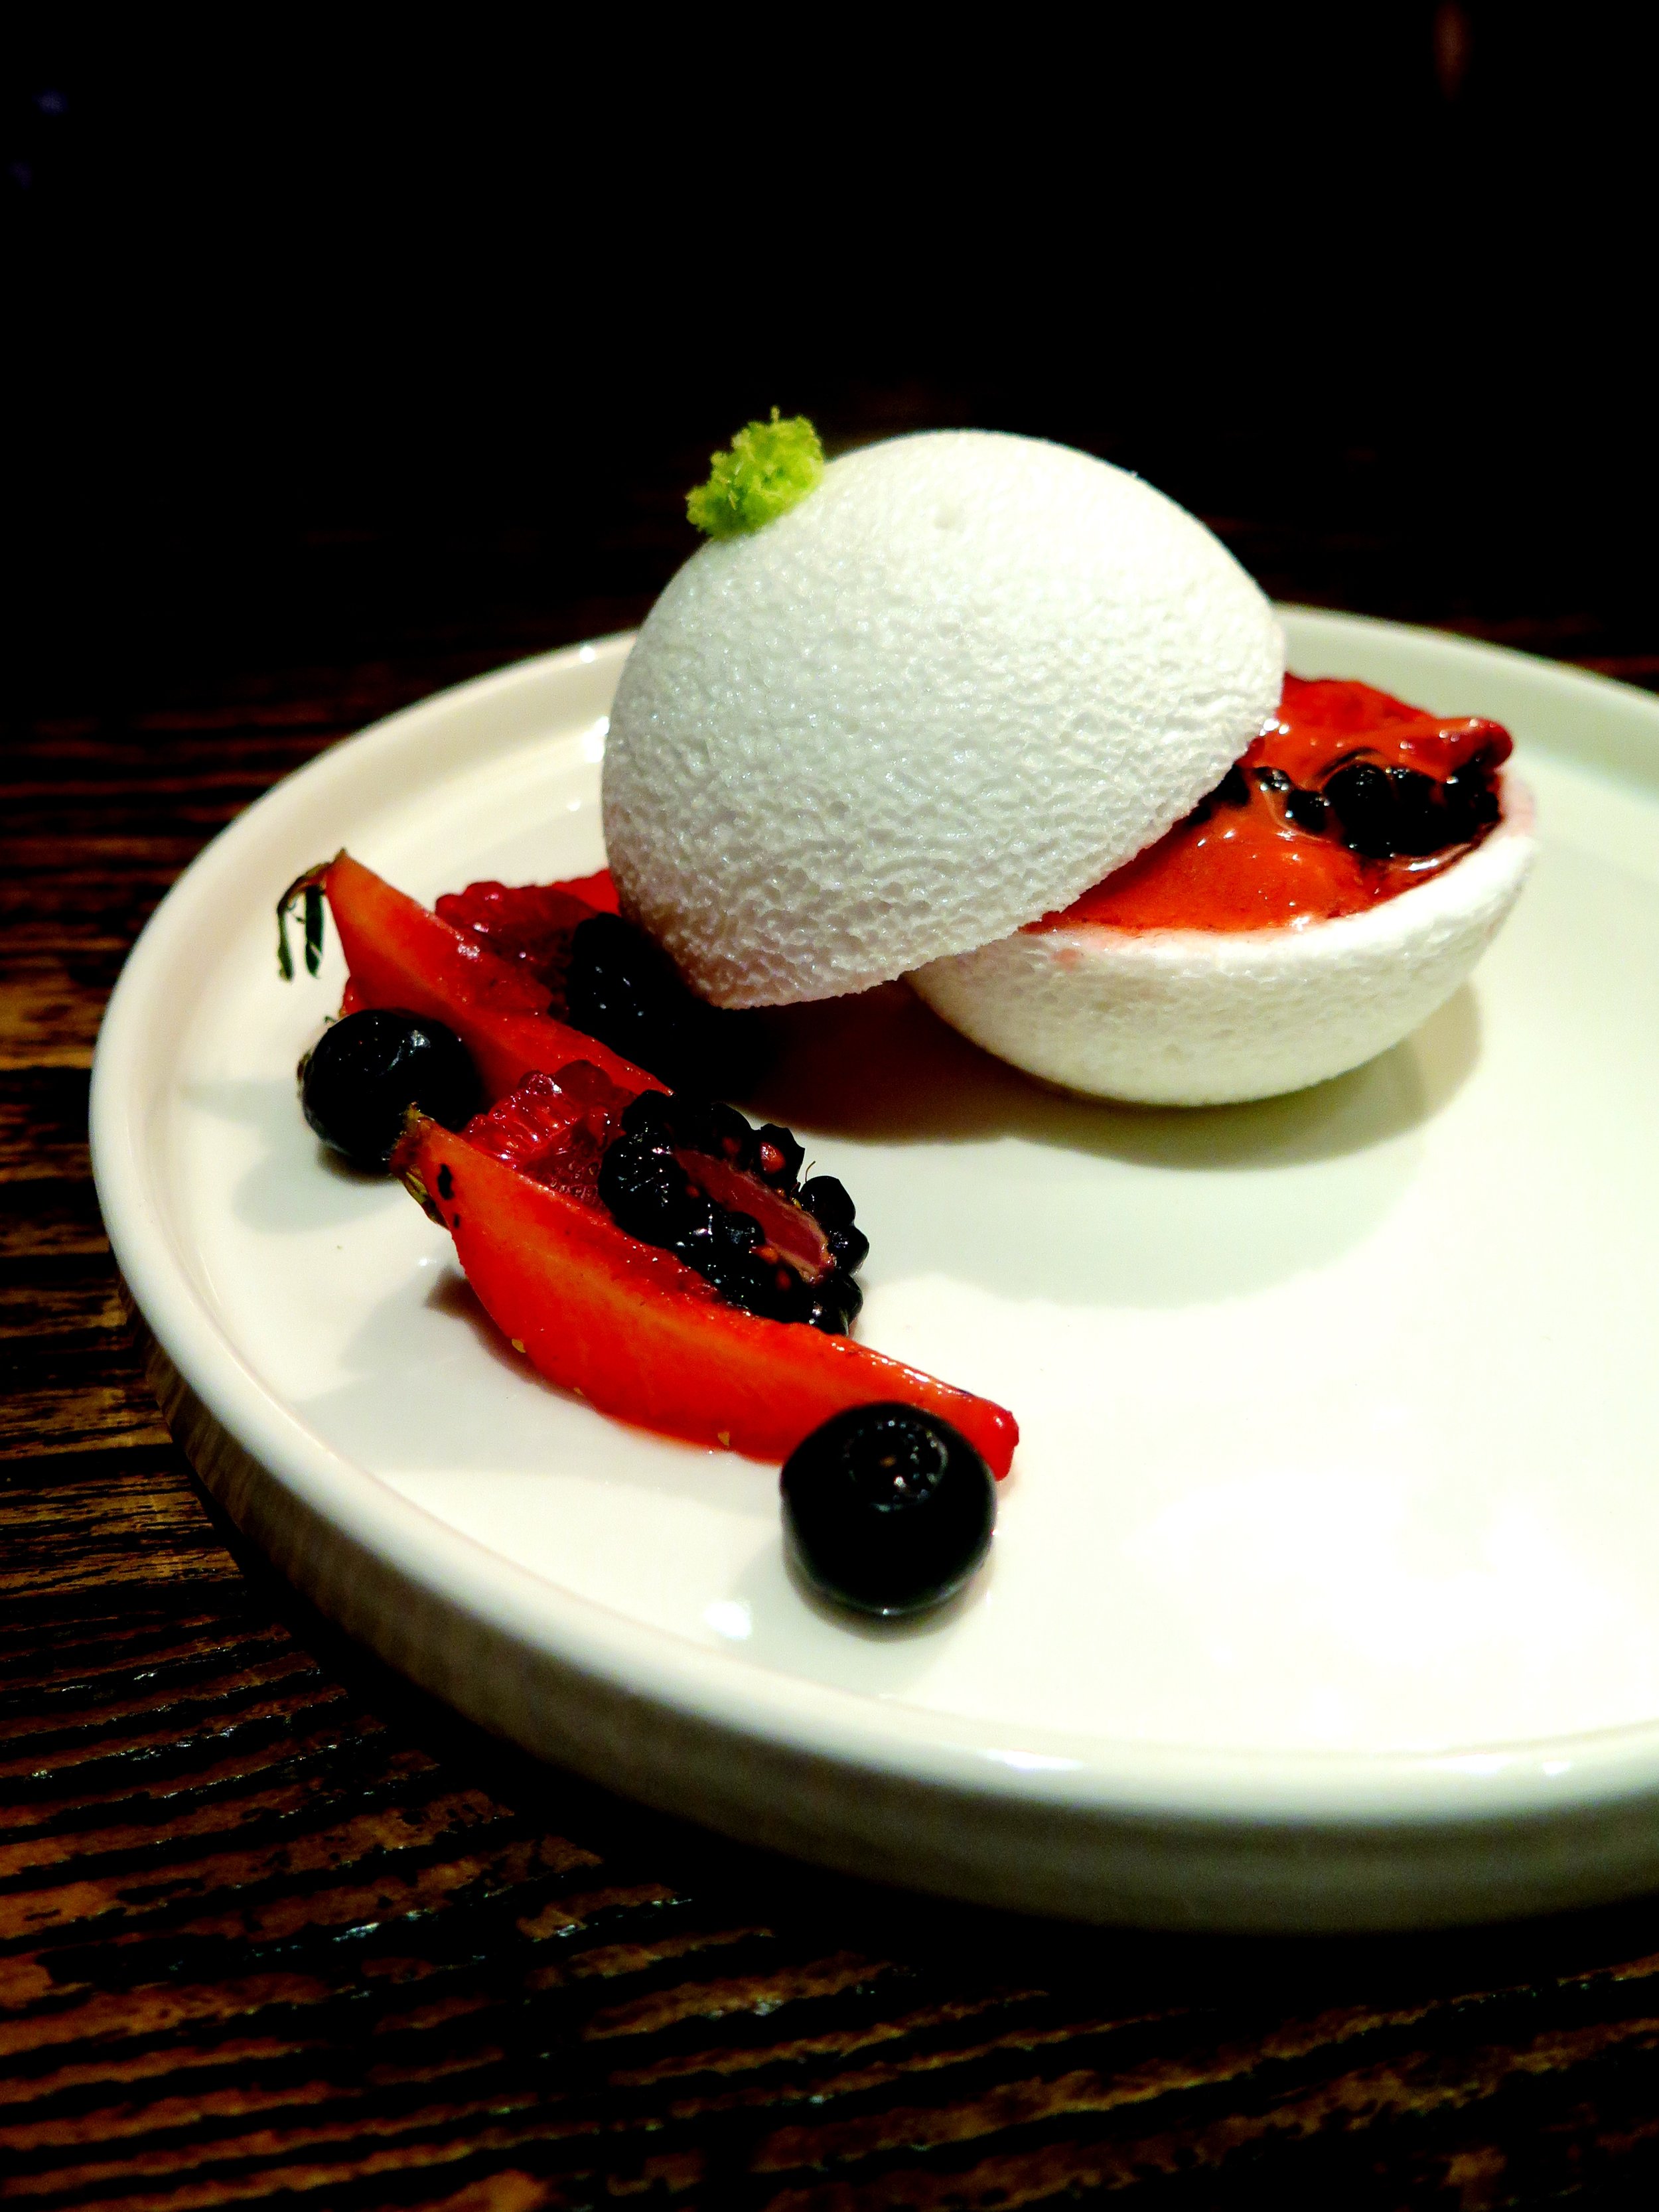
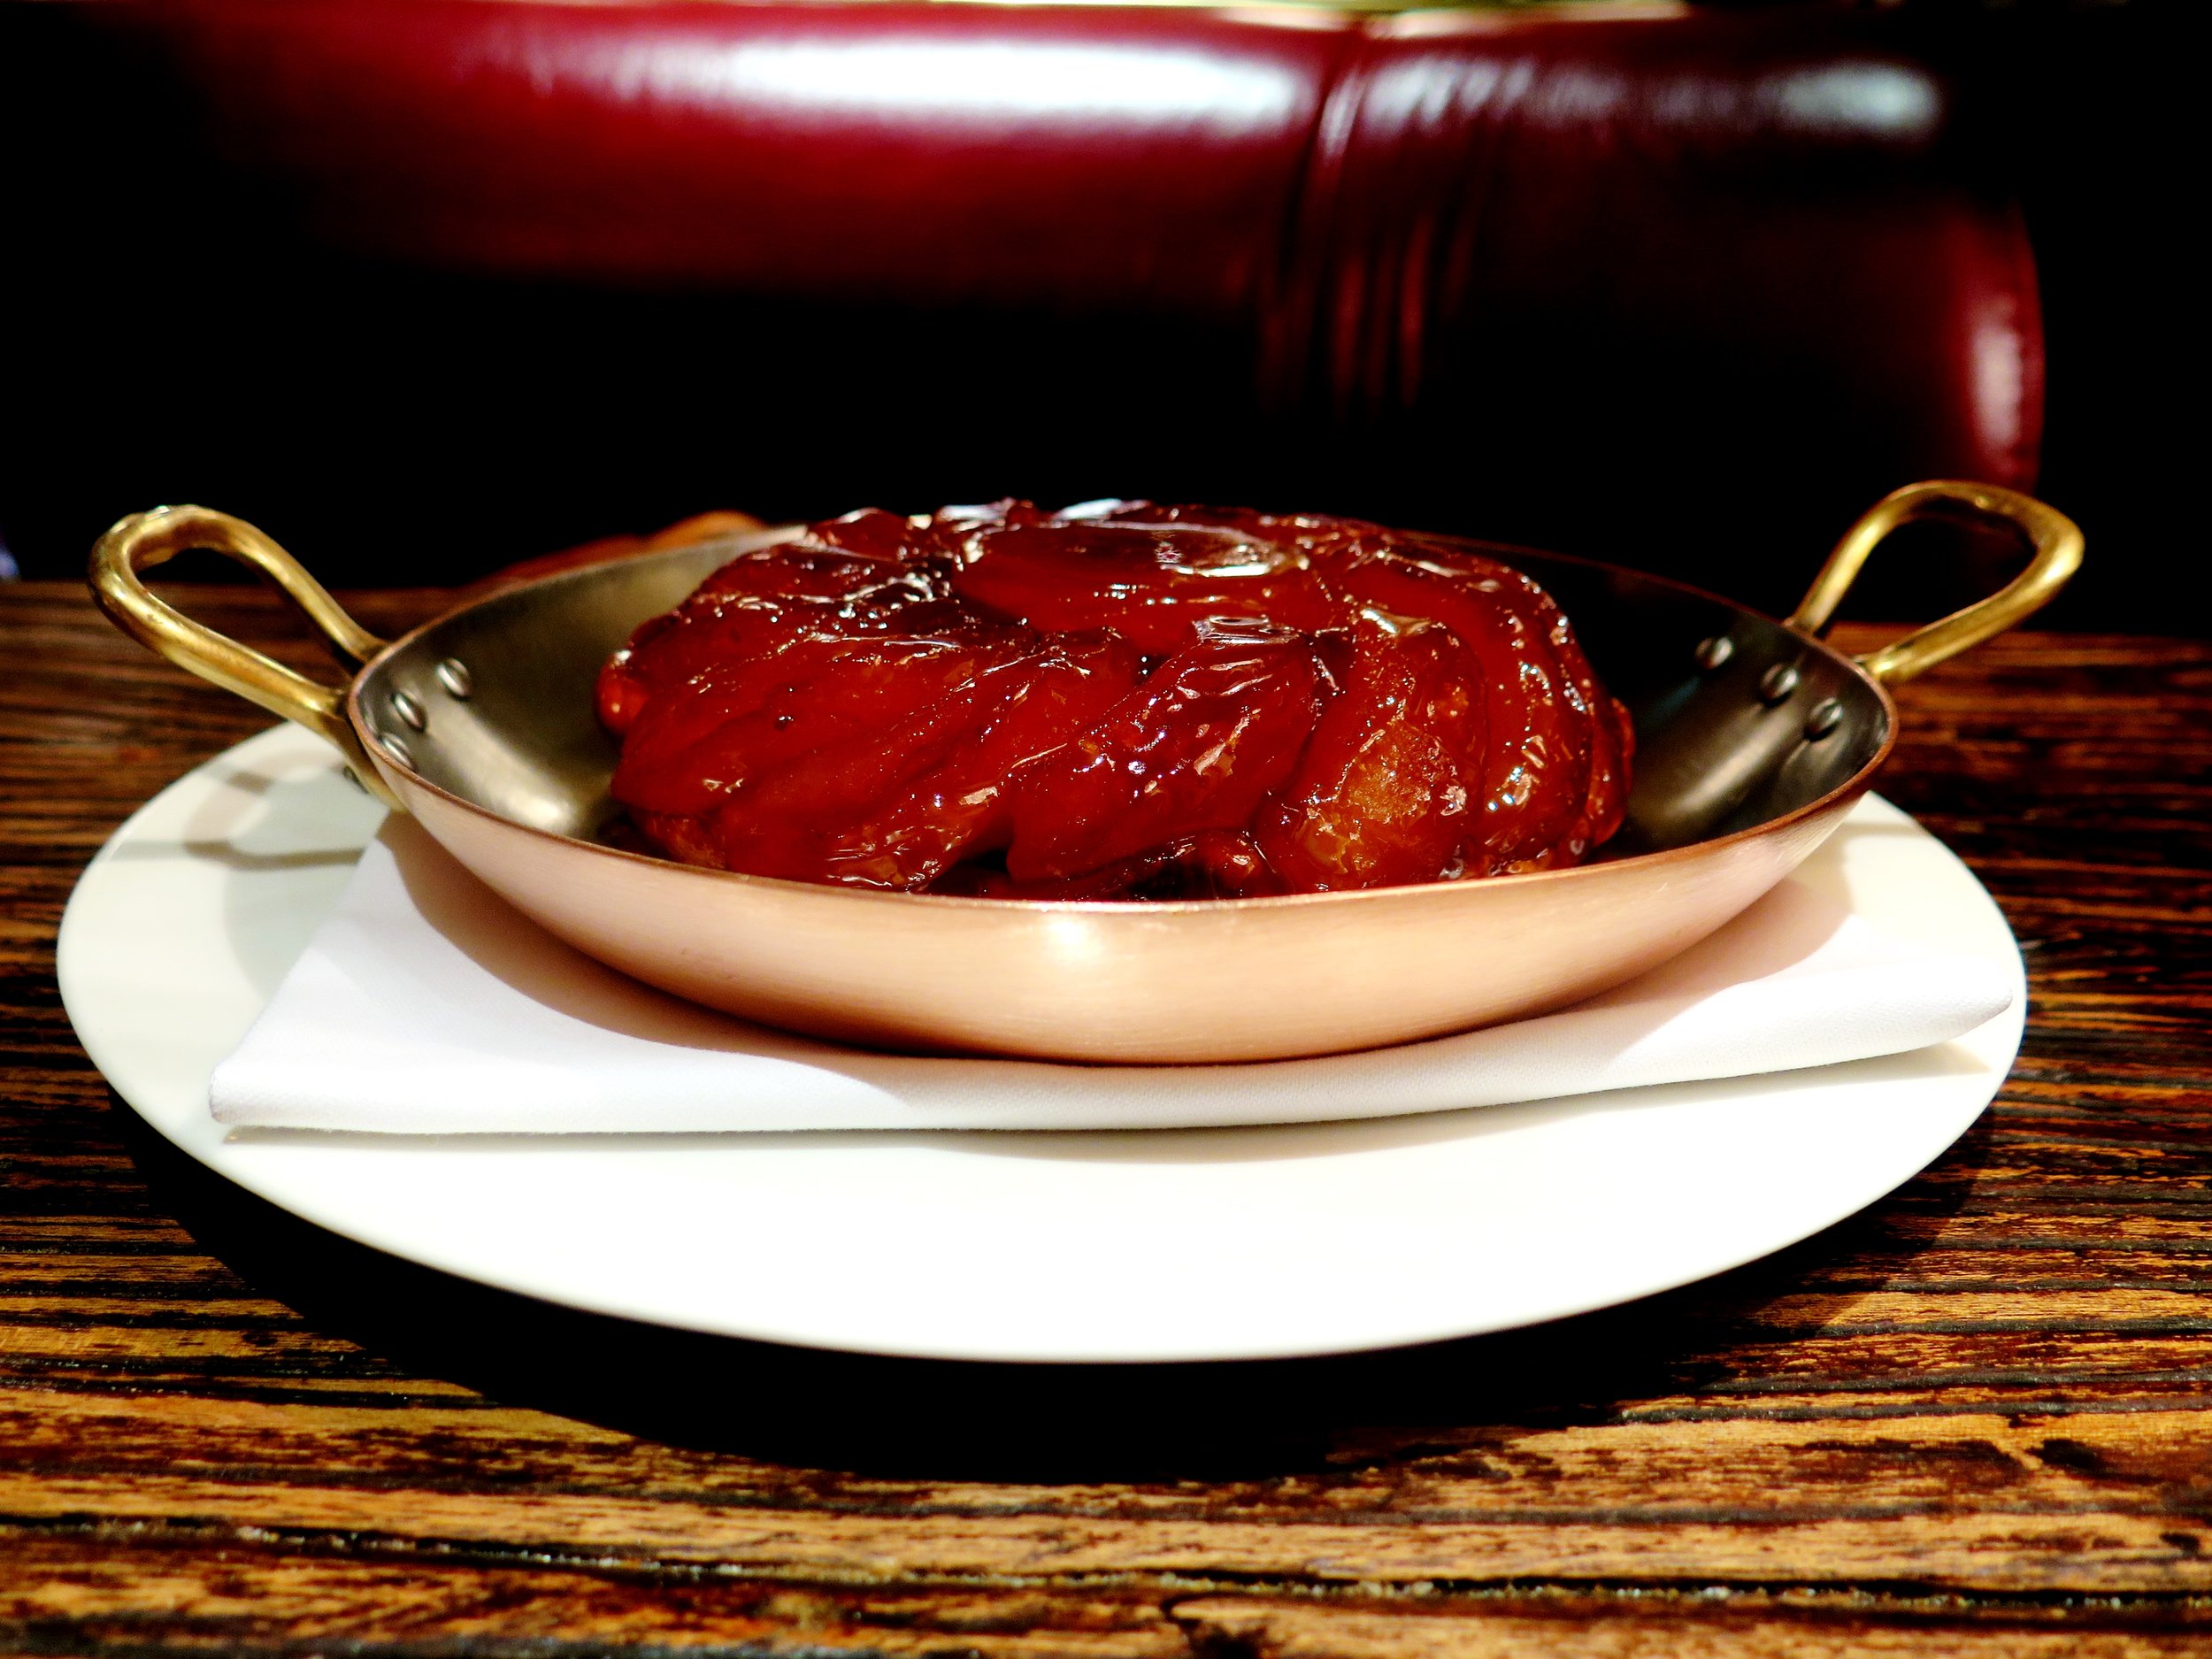
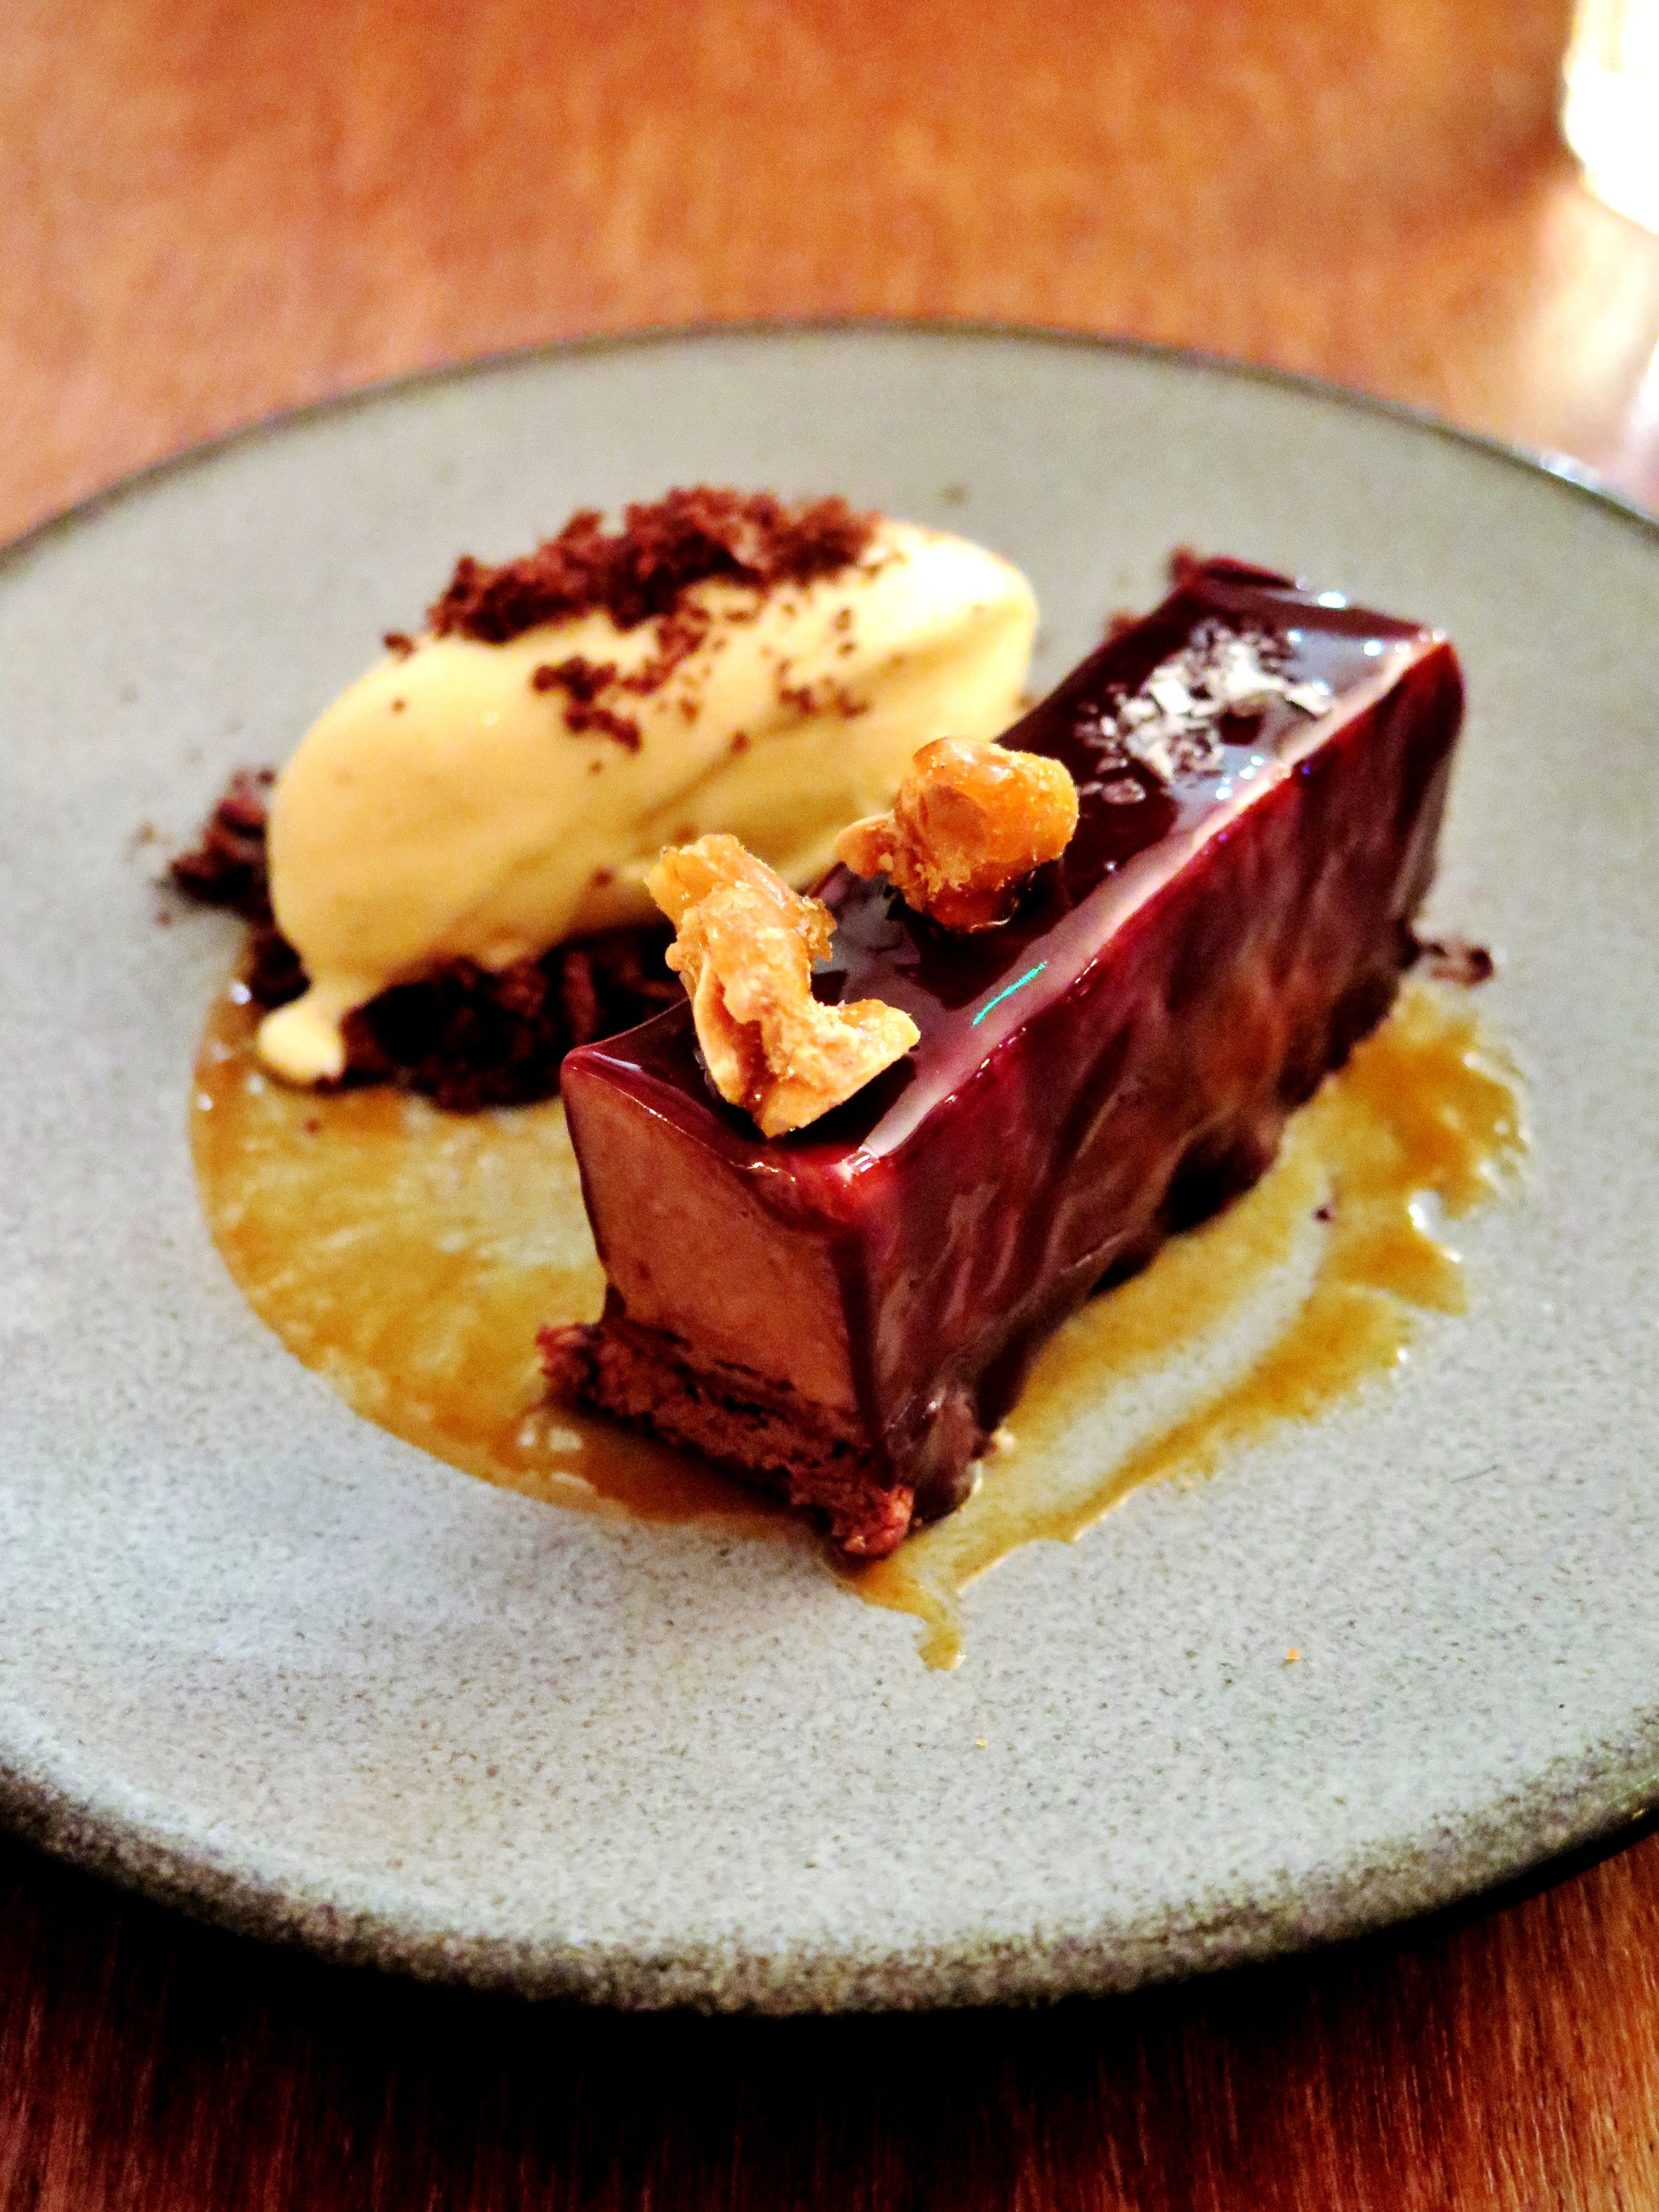
Unfortunately, the tardiness of the meal and poor customer service meant that dessert was not sampled.  The manager did come over at the end to apologise, dealt us his card, and promised it would not happen again.  He offered us an unwanted drink on the house, but it was too little, too late.

Suitable for: business meetings, celebrations, friends, family, smart dates

Price: ££££

Food: 5.5/10

Ambience: 10/10

Customer Service: 2/10

Loos: 9/10

Berner's Tavern


Square Meal

Berners Tavern - London Edition Hotel Menu, Reviews, Photos, Location and Info - Zomato

Comment

Tarta de Santiago

3 Comments

Tarta de Santiago

IMG_2892.jpg

When life gives you … quinces Tarta de Santiago


The scent coming from the paper bag was soft and sweet, and old fashioned rose-like, and when I turned out its contents, eight yellow, somewhat misshapen apple-pears tumbled out.

Tarta de Santiago     These quinces were the unwanted fruit of an unappreciated tree in someone else’s garden.  Beguilingly biblical in appearance, their uncompromising hardness metamorphoses into something utterly different after cooking.

Tarta de Santiago

Tarta de Santiago Originally referred to as the Kydonian melon, and mentioned in 6th Century BCE Greek poetry, the quinces we recognise today are believed to have been indigenous to Kydonia on the island of Crete. The Ancient Greeks dedicated the quince to Aphrodite, goddess of love and beauty, who was often represented with the golden apple of Hesperides in her right hand – that apple, in all likelihood, a quince.  Indeed, quinces symbolised love and fertility, and Plutarch refers to the ancient wedding ritual whereby a bride would take a bite from a quince before retiring to the bridal chamber with her husband – possibly to freshen her breath, too.

Tarta de Santiago The path of the wedding procession of Helen and Menelaus was said to have been strewn with quinces, myrtle leaves and crowns woven from violets and roses. The fruit was also said by Pliny to have warded off the malign influence of the evil eye, and its medicinal value as an aid to digestion was also noted.

Tarta de Santiago

The Byzantines made wine from quinces as well as kydonaton, a thick quince jelly, probably the ancestor of French cotignac or condoignac, a delicacy made with honey, wine and spices that was considered a worthy gift for kings.

Tarta de SantiagoApicius, the first extant Roman cookbook writer, of the first century CE, preserved quinces whole in honey diluted with a spiced wine reduction, and also combined them with leeks, honey, and broth in hot oil in a dish known as Patina de Cydoniis. In the 4th Century CE, Palladius, an agriculturist and writer, composed a recipe for baked quince strips, possibly the first stirrings of membrillo, the Spanish quince gel that we know today.

Tarta de Santiago

During the 16th and 17th centuries, cooks in England prepared many variations of quince preserves which they called quidoniac, quiddony or paste of Genoa.  Often the preserve paste was thick enough to be moulded into animal or flower shapes. Nowadays, many cultures use quinces in their cuisine: in India, a quince sambal is made by making a puree out of quinces, onions, chillies, orange juice and salt. In Iran, quinces are sometimes cored and stuffed with minced meat, and Moroccan tagines often include quince along with dried fruit and spices.

Tarta de Santiago

Despite its pertinence in history and mythology the quince has rather fallen out of fashion.  Now the prized aphrodisiac and breath-freshener has been reduced to an unloved (except by the cognoscenti), knobbly peculiarity.  I hereby am starting a quince appreciation campaign and when life gives you quinces, make membrillo, and with the membrillo make Tarta de Santiago.

Tarta de Santiago

Membrillo is the rose-tinted translucent and slightly grainy gel that miraculously results from boiling quinces with water, sugar and citrus.  Its perfumed exoticness makes one think of orange groves and balmy breezes, and when combined with the citrus infused almond cake and pastry layers, one is transported right to the Alhambra.

Tarta de Santiago


Recipe

Ingredients

Pastry

150g white spelt flour (substitutable with any flour of your choice including gluten-free to create a gluten-free dessert)

40g caster sugar

1 ½ tsp ground cinnamon

½ tsp salt

Grated zest of ½ unwaxed orange

100g butter, roughly chopped into small cubes

1 egg yolk

25cm x 25cm square tin (or round tin with similar dimensions) at least 8cm deep, lined with greaseproof paper

Filling

250g quince paste (membrillo)

2 tbsp lemon juice

Grated zest of ½ unwaxed orange

Grated zest of ½ unwaxed lemon

65g ground almonds

Cake layer

150 ground almonds

100g caster sugar

1 tsp ground cinnamon

½ tsp salt

Grated zest of 1 unwaxed orange

Grated zest of 1 unwaxed lemon

150g butter, melted and allowed to cool slightly

100ml triple sec

3 eggs

Optional candied orange decoration

Follow instructions from my recipe for Citrus Syrup-Soaked Cake

Method

  1. In a blender, blitz together sugar, cinnamon, flour, salt and butter until the mixture resembles damp sand. Add in the egg yolk and blitz until the mixture comes together into dough.  Flatten into a disc, wrap in greaseproof paper and chill in a freezer for 15 minutes or refrigerate for ½ hour.
  2. On a well-floured surface, roll the dough out to a 3mm thickness and transfer to the tin to line the base. Refrigerate while you prepare the filling.
  3. Preheat oven to 180°C. To make the filling, place the quince paste (membrillo), lemon juice and zest in a small pan over a medium heat and stir until smooth and fully combined.  Remove from the heat and stir in the ground almonds.  Remove the tin from the fridge and spread the quince mixture evenly over the pastry.  Refrigerate once more.
  4. To make the cake layer, whisk together ground almonds, sugar, cinnamon, salt and zest in a bowl. In a separate bowl, whisk together melted butter, triple sec and eggs.  Pour the wet ingredients into the dry and whisk until combined in a loose paste.
  5. Remove the tin from the fridge and pour the cake layer mixture over the quince layer. Bake in the preheated oven for 35-40 minutes until golden brown, springy to touch and a skewer comes out clean.  Allow to cool before serving.

Tarta de Santiago


3 Comments

Cauliflower & Quinoa Superfood Salad

2 Comments

Cauliflower & Quinoa Superfood Salad

IMG_2716.jpg

Cauliflower & Quinoa Superfood Salad  

Cauliflower & Quinoa Superfood SaladSuperfood

Line breaks: super|food

Pronunciation: /ˈsuːpəfuːd/

Culina definition: ‘superfoods’ – a marketing ploy term assigned to natural ingredients which have been neglected on shop shelves for a while and could do with a PR boost.  They have nutritional benefits similar to many other natural ingredients and have the potential to reduce the risk of disease if you consume at least your body weight in said superfood in under an hour.

Cauliflower & Quinoa Superfood Salad Cauliflower, pomegranate seeds, quinoa and walnuts have all ridden the calculated PR wave to health fame in the last few years, and indeed that is possibly why they have drifted on to my kitchen shelves.

Cauliflower & Quinoa Superfood Salad Ignoring their “superfood” status, they are particularly delicious when combined.

Cauliflower & Quinoa Superfood SaladThis salad sits at the other end of the spectrum from the straggly, limp green leaf type.

Cauliflower & Quinoa Superfood SaladIt is crunchy, sweet, umami, nutty, juicy, and looks resplendent studded with glistening pomegranate jewels.

Cauliflower & Quinoa Superfood SaladCauliflower & Quinoa Superfood Salad Cauliflower & Quinoa Superfood Salad Cauliflower & Quinoa Superfood SaladIt’s also ridiculously quick to whizz up and can be prepared up to a day in advance (sans dressing, and refrigerated).

Cauliflower & Quinoa Superfood Salad

Recipe

Ingredients

100g quinoa

220g cauliflower

180g pomegranate seeds (1 pomegranate approx.)

200g feta, crumbled

100g walnuts, toasted and roughly chopped

50g fresh coriander, finely chopped


Dressing

10g garlic, crushed

1 tsp salt

4 tbsp tahini

8 tbsp natural yogurt

6 tbsp lemon juice


Method

  1. In a medium sized pan boil 1 litre of water over a high heat. Pour in the quinoa and allow it to simmer for 10-15 minutes until the grains are translucent but still slightly al dente.  Drain the quinoa in a sieve and set it aside to cool.
  2. Chop the cauliflower roughly, and blitz in a blender, pulsing until it resembles coarse couscous. If you don’t have a blender, you can grate the cauliflower by hand to achieve a similar effect.
  3. In a large serving bowl, mix together the quinoa, cauliflower, pomegranate seeds, feta, walnuts and coriander.
  4. In a separate bowl, whisk together all the dressing ingredients to combine. Pour as much as desired of the dressing over the salad just before serving and mix it through.

Cauliflower & Quinoa Superfood Salad

2 Comments

Quick Asparagus & Parmesan Pizza

2 Comments

Quick Asparagus & Parmesan Pizza

IMG_2242.jpg

Quick Asparagus & Parmesan Pizza Pizza is in his DNA.  Five generations of golden, thin, crispiness. One recipe.

Quick Asparagus & Parmesan Pizza

The pizza oven is raging, rapidly devouring its feed of dry wood and spitting out sweet nutty smoke.

Quick Asparagus & Parmesan Pizza


He comes every summer in his Ape brimming with plump mushrooms of dough.

Quick Asparagus & Parmesan Pizza

A light sprinkle of flour on a wooden board, and he gets to work.

Quick Asparagus & Parmesan Pizza

With wrist flicks and little rotations the round becomes a disc, airborne momentarily to ensure evenness.

Quick Asparagus & Parmesan Pizza

A careful spiral of passata with the back of a spoon,

Quick Asparagus & Parmesan Pizza

a shower of mozzarella,

Quick Asparagus & Parmesan Pizza

and a scattering of whatever’s in the garden: fiori di zucchini, melanzane, pepperoncini…

Quick Asparagus & Parmesan Pizza

The flurry of flour continues into the night.

Quick Asparagus & Parmesan Pizza

The dinner table is a moderation-free zone.

Quick Asparagus & Parmesan Pizza

He only stops when even the strictest of eaters has lost count of the number of pizzas (not slices) he/she has consumed, and physical incapacity is the only limitation.

Quick Asparagus & Parmesan Pizza

He doesn’t even really stop there: a couple more are sent to the table per domani.

Quick Asparagus & Parmesan Pizza

A pizza “hangover” ensues along with the inevitable promises of “never again” “not for another year”.

Quick Asparagus & Parmesan Pizza

But as soon as I hit London soil again I want to relieve that pizza-lover’s fantasy and so I make these.

Quick Asparagus & Parmesan Pizza

They’re crisp, thin, verdant, and fresh.

Quick Asparagus & Parmesan Pizza

I don’t believe in barren crusts or meanness so the ingredients are abundant and go right up to and beyond the edge of the base.

Quick Asparagus & Parmesan Pizza

I use spelt instead of plain flour (as usual) to reduce the GI level and add a nuttier more complex flavour to the dough.

Quick Asparagus & Parmesan Pizza

The added bonus of this recipe is that it is ridiculously quick.  Kneading is kept to a minimum (5 minutes) and the rising time is the shortest you’ll ever find for pizza dough – ½ hour.

Quick Asparagus & Parmesan Pizza

The balsamic-maple reduction is optional but I include it to add extra caramelised sweetness, extra tang and a touch of drama.

Quick Asparagus & Parmesan Pizza

Quick Asparagus & Parmesan Pizza

Quick Asparagus & Parmesan Pizza


Ingredients – makes 4 pizzas

Base

250ml warm water

3 tsp dried yeast (fast active yeast)

500g white spelt flour

1 ½ tsp salt

1 tbsp olive oil


Topping

750g asparagus

30g garlic cloves, peeled and crushed

1 tbsp olive oil

1 1/4 tsp salt

Grated zest of ½ lemon

A few grinds of Pepper

400g mozzarella (4 balls), chopped finely into cubes

100g parmesan, grated

3 spring onions, thinly sliced

Small bunch of chives, finely chopped

2 red chillies (optional), finely sliced


2 large baking trays or 4 medium baking trays, greased and dusted with flour


Maple Balsamic Reduction (optional)

120ml balsamic vinegar

2 tsp maple syrup


Method

  1. Heat oven to 120˚C for 5 minutes then switch it off.
  2. In the bowl of a mixer (or large bowl if making by hand) pour in warm water and sprinkle yeast over it. Allow to stand for 5 minutes for the yeast to activate.
  3. Stir in flour, salt and oil. Knead by hand for 5 minutes on a lightly floured surface, or in a machine fitted with a dough hook for 5 minutes until the dough is smooth and when you press your thumb into it, it bounces back up.
  4. Divide dough into two and place each half in a lightly oiled bowl. Cover with cling film and place in warmed oven.  Allow to rise for 30 minutes or until doubled, then remove from oven and preheat it to its highest temperature, usually 250˚C.
  5. While the dough is rising, use a vegetable peeler to shave the asparagus: place the asparagus flat on a surface, and holding it at the woody end, shave it from above the woody end to the top of the spear. I sometimes use the ends to make a stock for asparagus risotto.
  6. Place the ribbons in a bowl and mix with garlic, oil, salt, lemon zest and pepper.
  7. Once risen, divide each half into two and roll out each quarter into a 0.5cm thick disc. Place on tray and scatter each disc with mozzarella, parmesan, and shaved asparagus.  Bake in oven for 15-20 minutes until golden and bubbling.
  8. Once baked, scatter with spring onions, chives, and chillies, if using. Drizzle with balsamic reduction, if desired, and serve immediately.


Maple Balsamic reduction

  1. Boil balsamic and maple syrup together over a high heat for about 5 minutes until it thickens slightly to consistency more like that of pure maple syrup. Allow to cool for 1 minute, and drizzle over pizzas.

Quick Asparagus & Parmesan Pizza

Adapted from The Smitten Kitchen Cookbook

2 Comments

Coconut & Strawberry Jam Thumbprint Cookies

10 Comments

Coconut & Strawberry Jam Thumbprint Cookies

IMG_1559.jpg

Coconut & Strawberry Jam Thumbprint Cookies Standing on a dining room chair to reach the kitchen counter top, swamped by my grandmother’s floral apron, and covered head to toe in drifts of white flour, at three years’ old I felt important and grown up. But first my grandparents and I would visit art galleries, going for afternoon tea (lemon cake for me, always), sitting on the top deck of the bus, drawing, painting, drinking more tea, and then, finally, at the end of the day, my grandmother would let me help her bake her oat and ginger cherry-bejewelled cookies – what I knew and still know as “Granny Biscuits”.  They are still in ready supply whenever I visit my grandmother’s house, and are as chewy, oaty and delicately sweet as they’ve ever been.

Coconut & Strawberry Jam Thumbprint Cookies


My grandfather possessed a dangerously sweet tooth, and, as I’ve previously mentioned, was inclined to satisfy this without regard for moderation.  He would sneak into the larder and consume an entire box of glace cherries.

Coconut & Strawberry Jam Thumbprint Cookies

This trait has wound its way down into my family. I name no names, but once the plastic seal has been broken, glace cherries mysteriously disappear at a rapid rate.  Although I admit I have, at several low points in my life, spooned jam without any justifying bread straight into my mouth, the general jam supply in my household is a more reliable presence.

Coconut & Strawberry Jam Thumbprint CookiesSo when recently I came to press the cherries into the Granny Biscuits (an essential step), and found there to be none, jam was a delicious substitute.

Coconut & Strawberry Jam Thumbprint Cookies

This recipe is further adapted with coconut replacing oats to provide a more even coating and a beautiful golden crunch once baked.

You can use whatever jam or marmalade you desire – strawberry and apricot are two of my favourites.

Coconut & Strawberry Jam Thumbprint Cookies

Ingredients (Makes 25-35 approx.)

350g unsalted butter, at room temperature

200g caster sugar

2tsp vanilla extract

Zest of ½ lemon

½  tsp salt

350g white spelt flour

1 egg, beaten with 2 tsp water

200g desiccated coconut

100g strawberry jam

100g apricot jam


2 baking trays lined with baking parchment


Method

1.)    Preheat oven to 180˚C.

2.)    In a food mixer fitted with the paddle, or in a large bowl with a wooden spoon, beat butter, sugar, vanilla, lemon zest and salt together until fluffy and pale.

3.)    Sift in flour and mix together until fully combined and a soft dough is formed.  Flatten the dough into a roughly 2 cm thick disk, wrap in baking parchment, and chill in the freezer for 15 minutes or the fridge for ½ hour.

4.)    Roll the dough into 30g spheres (roughly 3 cm in diameter), dip each one in the beaten egg and then roll in the coconut.  Space the spheres at least 5 cm apart on the baking sheet.

5.)    Press your thumb in the middle of the spheres to create a teaspoon- sized indent.  Fill the indent with a teaspoonful  of the jam of your choice.

6.)    Place in the oven to bake for 15-20 minutes or until cooked through and the coconut turns golden.  Allow to cool and serve.

Coconut & Strawberry Jam Thumbprint Cookies

10 Comments

Caramelised White Chocolate Cheesecake

5 Comments

Caramelised White Chocolate Cheesecake

IMG_1368-Copy.jpg

  Caramelised White Chocolate Cheesecake with Salty-Sweet Fudgy Biscuit Base & Blackcurrant Glaze

Caramelised White Chocolate Cheesecake


I’m at risk of sounding like one of those mindless click-bait buzzfeed articles when I say this, but I mean ever word: you’ve been eating white chocolate incorrectly your whole life.

Caramelised White Chocolate Cheesecake


Would you believe me if I told you that the innocent Milky Bar Kid’s saccharine white cocoa butter chocolate has a deeper, darker, more seductive side?

Caramelised White Chocolate Cheesecake

The corruption process is simple.  All you need is:

- heat

- good quality white chocolate

-a tray

Caramelised White Chocolate Cheesecake

After about 20 minutes, the heat will begin to convert the pool of glossy molten cocoa butter into white chocolate’s luscious evil sister.  I dare you to try it.

Caramelised White Chocolate Cheesecake

It’s pretty sublime on its own but, if you can resist eating it all, it works deliciously well in a cheesecake.  I pair it with a fudgy, salted, graham cracker-style base and an astringent blackcurrant glaze to cut through the sweetness.

Caramelised White Chocolate Cheesecake

Often cheesecakes call for a base simply made out of crushed store-bought cookies.  I’m no stranger to doing this myself, but I’m always left with a pang of guilt for cheating.  Not only does homemade biscuit base taste better, it’s chemical-free and you have much more control over the flavour balance – this one’s especially fudgy.

Caramelised White Chocolate Cheesecake

However, if you’re feeling lazy you can make the base using 400g digestive biscuits blitzed into crumbs with the 120g browned melted butter.  If you are a coeliac just use gluten-free digestive biscuits.

Caramelised White Chocolate Cheesecake

You can also use non-caramelised white-chocolate.  It will still taste delicious, just not anywhere near as ambrosial.

Caramelised White Chocolate Cheesecake

If you can’t get hold of any blackcurrants, feel free to use fresh or frozen raspberries or redcurrants instead.

Caramelised White Chocolate Cheesecake

This is best made the day before serving and kept in the fridge overnight.  In fact, the fridge works wonders.

Caramelised White Chocolate CheesecakeCaramelised White Chocolate Cheesecake

Ingredients

Salty-sweet, fudgy biscuit base

200g white spelt flour

60g light muscovado sugar

1 tsp bicarbonate of soda

1 tsp salt

60g unsalted butter, diced

70g clear honey

4 tsp vanilla extract

120g unsalted butter, for melting

Large baking tray, lined with baking parchment

20cm square tin (or round with similar capacity), lined with baking parchment

Caramelised white chocolate filling

300g good quality white chocolate, broken into pieces

180ml double cream

500g full fat cream cheese, at room temperature

100g caster sugar

4 eggs, at room temperature

1 tbsp vanilla bean paste (or the seeds of 1 vanilla pod)

Bone dry baking tray (preferably non-stick)

Sour cream topping

220ml sour cream

40g icing sugar, sifted

Blackcurrant glaze

200g blackcurrants

80g caster sugar

3 tbsp water

100g fresh blackcurrants to decorate (optional)

Method

Salty-sweet fudgy biscuit base

  1. Preheat the oven to 180˚C. Pour flour, sugar, bicarb, salt and diced butter into a blender and blitz until the mixture resembles damp sand. Alternatively, use your fingers to rub the butter into the other ingredients.
  2. Whisk together the honey, vanilla and milk. Stir this into the dry mixture to combine and form a paste-like dough.
  3. Spread the dough on to the baking tray in an even 0.5cm thick layer. Bake in the oven for 15-20 minutes until golden brown and cooked through.  If it doesn’t become dry and brittle after cooling, bake for a further 5 minutes.
  4. Brown the 120g of butter for melting by placing it in a pan over medium heat and allowing it to turn a golden brown before setting it aside to cool.  It should give off a wonderfully nutty aroma.
  5. Crumble the baked biscuit into a blender with the browned melted butter, and pulse until it turns to damp sand-like consistency. Tip this out into the lined cake tin and press down to form an even layer.  Place in freezer to set.

Sour cream topping

  1.    Whisk together sour cream and icing sugar until smooth. Store in the fridge until ready to use

Caramelised white chocolate filling

  1. Preheat the oven to 130˚C. Pour broken white chocolate on to the tray and place in the oven. Every 10 minutes remove the chocolate from the oven, stir with a bone dry utensil, and place back in the oven.  After about 30-40 minutes it will have taken on a beautiful honeyed caramel tone.    As ovens vary in character and different chocolate brands vary in ingredient quality, it may take longer.  The chocolate may also seize.  Don’t panic if this happens: just keep going until it turns golden (I’ll explain how to proceed with this in the next step).
  2. Increase the oven temperature to 160˚C. Place the double cream in a small pan over a high heat. Once it begins to boil, remove from the heat and pour into it the caramelised white chocolate.  Stir to combine until smooth. If the chocolate did seize in the oven, it will be lumpy.  If this is the case, pour the lumpy cream and chocolate mixture in a blender and blitz until completely smooth.  If a few recalcitrant lumps remain, simple sieve them out.
  3. Either using a stand mixer fixed with the beater or a hand held whisk, beat the cream cheese together with the caster sugar until completely soft and smooth. Beat in the cream and white chocolate caramel.  In a separate bowl, whisk together the eggs and vanilla.  Pour this into the cream cheese mixture and beat until completely smooth and glossy.
  4. Remove the cake tin with the biscuit base from the freezer, and pour into it the filling mixture. Bake in the oven for 1 ½ hours, checking after 45 minutes.  If it begins to go brown, cover with tin foil and continue to bake for the full time.
  5. Keeping the oven on, remove the cheesecake from the oven and allow it to cool for 10 minutes. Spread the sour cream topping in an even layer over the surface of the cake. Place the cheesecake back in the oven, switch off the oven and leave its door slightly ajar while the cheesecake sets inside for a further 1 ½ hours.
  6. When the cheesecake reaches room temperature, remove from the oven, cover the cake tin with cling film, and place it in the fridge to allow it to set over night, or place it in the freezer for a couple of hours.

Blackcurrant glaze

  1. Place 200g blackcurrants, caster sugar and water in a small pan over a high heat and stir until the sugar is dissolved. When it begins to boil, reduce heat slightly and allow it to simmer for 5-10 minutes or until it thickens to a viscosity like that of maple syrup.  Strain the mixture through a sieve and place the liquid back in the pan to simmer for a further 3 minutes.
  2. Allow the syrup to cool slightly then carefully pour it over the chilled cheesecake. Scatter with fresh blackcurrants and serve.

Caramelised White Chocolate Cheesecake

5 Comments

Scott's - Review

1 Comment

Scott's - Review

IMG_1229.jpg

Scott's - Review And then there is the ramasse-miettes:  I love the scrape of the metal across the tablecloth sweeping away evidence of earlier greed, heralding a new course winging its way across from the kitchens, and reassuring one that the meal isn’t over yet.  I love, too, the re-laying of the tablecloth – a delicate procedure, in which the fresh tablecloth, crackling with starch, is laid across the table while the old cloth is simultaneously peeled back without allowing a crude sliver of the denuded table to be seen - comparable in some ways to a very discreet changing of a baby’s nappy.

There is no such pleasure in a flimsy sheet of paper scrunched up after each course to be replaced with another.  Fine if I’m going to Wagamama, or a corrugated iron hipster hotspot.  Not fine if I’m dining at a refined and traditional Mayfair institution - in this case, Scott’s - and paying commensurate prices .

Scott's - Review


Scott's - Review

I imagine the oyster bar, the focal point of the room, might be appropriate for a boring date.  The whizzing by of waiters bearing stunned seafood reclining on ice crystal cairns would provide enough distraction to fill any chasms of silence.  The menu, like many of Richard Caring’s establishments, is extensive and  includes a well-trawled ocean’s section, but it is somewhat less inspired than Le Caprice.

Scott's - Review

To start, I ordered the hot-smoked salmon: flushed and delicately flaky pieces were nestled in a tangle of pea shoots and broad beans, tied together with a green goddess dressing - a pretty dish, notwithstanding the potency of the tarragon in the dressing.  My dining companion enjoyed his chargrilled squid with quinoa, spicy sausage and rocket.

Scott's - Review

Seared sea bass with lemon and herb butter followed.  I am still tormented by this mis-decision. Why when there was miso-blackened salmon did I choose the least interesting thing on the menu?  I blame the yuzu cocktail.  The fish was fresh and cooked well, but with the bar set high by the exquisite cod with duck broth at Little Social (see review here), my expectations were not met.

Scott's - Review

The obligatory chips were chunkier relatives of Le Caprice’s, but good nonetheless.

Scott's - Review


Scott's - ReviewBaked chocolate fondant with cherries and ripple ice cream did not disappoint. Rich and molten, it was the kind of voluptuous confection that invokes an Augustus Gloop-like desire to bathe in it.

Scott's - Review

Three hours into the meal I expected what has now become an almost universal occurrence: the arrival of a bill-pushing waiter, willing one to leave.  Much to my delight, this did not occur - so Scott’s definitely gets bonus points for service.  In terms of gastronomy, Scott’s was unadventurous, good quality, unfussy and well balanced.

Food: 7/10

Service: 8.5/10

Ambience: 7/10 (9.5/10 if there were tablecloths)

Loos: 9/10

Price: ££££

Suitable for: Smart dates, celebrations, business lunches, seafood lovers

Click to add a blog post for Scott's on Zomato

Square Meal

1 Comment

Summer Berry Lemon Curd Tarts

8 Comments

Summer Berry Lemon Curd Tarts

IMG_1078.jpg

Summer Berry Lemon Curd Tarts I endured school lunches for four years and then abandoned them. Waking up twenty minutes early to throw together a packed lunch seemed worth it at the time.  My school lunches weren’t even bad.  In fact, they were probably rather good – good enough to avoid having Jamie Oliver sniff his way into our school kitchen in pursuit of good TV.

IMG_1007

What turned me (and my stomach) resided in the stainless steel vats adjacent to the desserts:  pools of lurid yellow purulence (custard).

Summer Berry Lemon Curd Tarts


Notwithstanding my decade old aversion, I decided to venture into custard territory last week.  And I found my cure: lemon curd-filled tarts.

Summer Berry Lemon Curd Tarts

Summer Berry Lemon Curd Tarts


Made using both lemon juice and zest, paired with a lemon-infused tart shell, and partnered with fresh berries, these make a tangy and refreshing summer dessert.

Summer Berry Lemon Curd Tarts

Summer Berry Lemon Curd Tarts


I use spelt flour in the pastry to add extra nuttiness and depth of flavour.  It also has a lower GI than wheat flour.   However, if you can't find it, you can substitute plain flour.

IMG_1038


IMG_1021 Summer Berry Lemon Curd Tarts

Summer Berry Lemon Curd Tarts

Summer Berry Lemon Curd Tarts Summer Berry Lemon Curd Tarts Ingredients (makes 12)

Lemon tart shells

360g white spelt flour  (substitute with plain flour if unavailable)

110g icing sugar

Finely grated zest of 1 lemon

¼ tsp salt

190g cold unsalted butter, roughly chopped into small cubes

1 egg yolk

1 tsp vanilla extract

2 tbsp cold water


A 10cm pastry cutter

1 12-hole cupcake tin, greased with butter and then placed in fridge to chill

Baking beads or rice to weigh down the pastry while it bakes

12 cupcake cases


Lemon Curd

Finely grated zest of 4 lemons

200 ml lemon juice (4-6 lemons)

200g caster sugar

4 medium eggs

4 medium egg yolks

180g unsalted butter

1 baking tray with lipped sides

200g blueberries

150g strawberries

150g raspberries

Icing sugar for dusting


Method

Lemon pastry tart shells

  1. Blend together flour, sugar, lemon zest and salt in a food processor, and add in butter, pulsing to combine until the mixture resembles damp sand. Alternatively, if working manually, mix together the dry ingredients in a large bowl and rub the butter in with your fingers.
  2. Pour the egg yolk, vanilla and water into the mixture and pulse/stir until the mixture just comes together. Flatten the pastry dough into a disc , wrap in baking parchment/cling film and chill in the fridge for an hour, or freezer for 20 minutes.
  3. Preheat the oven to 150˚C.
  4. On a floured surface, roll half the dough out to the thickness of 2 or 3 mm, and cut the pastry into discs using the pastry cutter. Gently press the pastry discs into the prepared cupcake tin.  You will find that there is some dough left over.  This can be frozen for about a month.
  5. Set the cupcake cases into the pastry shells and fill them with the baking beads/rice to weigh the pastry down and prevent it from losing its shape during the bake.
  6. Bake in the oven for about 20-25 minutes until golden and firm to touch. If they have not turned golden by this point, remove the baking beads/rice and cupcake cases and bake for a further 5-10 minutes.  Remove from the oven and set aside to cool.  These can be made 2 or 3 days in advance and kept in an airtight container until you are ready to use them.

Lemon curd

  1. Place lemon zest, juice, sugar, eggs, egg yolks and half the butter in a saucepan over a medium-high heat and whisk continuously while the ingredients cook together.  When the mixture has thickened slightly and threatens to stick to the bottom of the pan, reduce the heat and continue to whisk for another couple of minutes until thickened, whisking all the while.  Off the heat, whisk in the remaining butter until thoroughly combined.  It should be smooth and glossy.
  2. Sieve the curd over the baking tray, and spread it out with a spatula so that only a thin layer coats the tray. Cover the surface of the lemon curd with baking parchment or cling film and place the tray in the fridge for a minimum of half an hour or until it has cooled and become slightly firmer.  Alternatively, place the tray in the freezer for 20 minutes.

Assembly

Arrange the pastry shells on a serving plate and spoon in the lemon curd (roughly 3 tsp per case). Top generously with the berries and dust with icing sugar just before serving.  They can be kept in the fridge for up to 6 hours before serving; longer than that they tend to become soggy.

Summer Berry Lemon Curd TartsSummer Berry Lemon Curd Tarts

8 Comments

Brown Butter Brioche Cinnamon Buns

2 Comments

Brown Butter Brioche Cinnamon Buns

IMG_0348.jpg

Brown Butter Brioche Cinnamon Buns

When I was six I experienced peak cinnamon bun.  In the middle of a farmers’ market in Toronto I was handed a parcel wrapped in brown paper.  Inside was a glistening golden sticky buttery cinnamon swirl - a full face experience, and well worth it.  Ever since then I’ve been looking for one to mirror its spiced perfection, but my quest continues to this day.  To the untrained/inexperienced/non-cinnamon obsessed palate a cinnamon bun is just a cinnamon bun.  Wrong.

Brown Butter Brioche Cinnamon Buns

My gluttonous many-year quest has allowed me to sample the many different types:  there is the American gloopy, slightly under baked, doughy, cream cheese-coated type.  This can be found in a ubiquitous American chain (at particular low points during my degree I used to linger outside the Cambridge branch just to catch the cinnamon perfumed scent).

Brown Butter Brioche Cinnamon Buns


At the opposite end of the scale there’s the more refined flaky and French variety which is unsatisfyingly mild in terms of cinnamon flavour if you’re an obsessive like me.

Brown Butter Brioche Cinnamon Buns


Somewhere in between the two is the Nordic variety, cardamom and cinnamon infused, with a delicate dough (my trip to Norway this summer will be dedicated to experiencing as many of these as possible).

Brown Butter Brioche Cinnamon Buns   My own recipe falls somewhere in the middle of the 3 varieties.  The brioche dough is soft and light on the inside and crisp on the outside, the browning of the butter in the filling adds a nutty richness, and the muscovado sugar makes the bun moister and adds greater depth of flavour than plain caster sugar.  As the buns cook, the sugar cinnamon filling caramelises slightly at the base adding a moreish stickiness.

Brown Butter Brioche Cinnamon BunsAlthough the brioche dough requires starting the evening before, don’t let it stop you from making these.  They are, in fact, incredibly easy and quick to make.  It’s also rather lovely going to bed knowing that a cinnamon bun awaits you the next day…

Brown Butter Brioche Cinnamon Buns


Brown Butter Brioche Cinnamon Buns


Ingredients

Brioche

1 ½ tsp active dried yeast

3 tbsp lukewarm water

285g strong white bread flour

¾ tsp salt

40g caster sugar

3 medium sized eggs + 1 to paint the buns

115g cold unsalted butter

Cinnamon Filling

90g butter

160g light brown muscovado sugar

3 tbsp cinnamon

½ tsp salt


1 round 9 inch tin, greased and dusted with flour


Method

  1. In large bowl stir together yeast and water until the yeast has dissolved. Leave in a warm place for 5-10 minutes until the yeast is activated and the mixture begins to go slightly frothy.
  2. Add in the flour, salt, sugar and eggs and mix until thoroughly combined and the dough is smooth and sticky. If you are using a Kitchen Aid, as I do, fit it with the paddle and mix.
  3. Stirring continuously (or with the machine on a medium-high speed) add in the butter bit by bit, waiting until it is fully combined before adding more. Once the butter is fully combined, keep mixing until the dough is smooth and shiny. This will take about 8-10 minutes.
  4. Placed dough in a lightly greased bowl, cover with cling film, and place in fridge overnight or for minimum 8 hours.
  5. The next day make the cinnamon filling by placing the butter in a pan over a medium heat. Once it has melted, leave it on the heat for another minute until it goes golden in colour and has a rich, nutty aroma. Mix the sugar, salt and cinnamon with the butter to form a paste and set aside to cool.
  6. Remove the dough from the fridge and, on a board dusted with flour, roll it out to a rectangle of roughly 30cm by 38cm and to a 3/4cm thickness. Spread the cinnamon filling evenly over the rectangle.
  7. With long side of the rectangle closest to you (i.e. landscape as opposed to portrait), roll the dough from the long side to the other long side tightly, like a scroll. With the seam side down, slice the roll into 12 even slices. Arrange the slices spiral side up in the prepared tin, cover with a tea towel, and allow to rise for an hour in a warm place.
  8. Preheat the oven to 180˚C. To give the buns a beautiful golden shine, beat the egg and brush a thin layer over them.
  9. Place the tin in the oven and allow to bake for about 20-30 minutes until the surface is a golden brown and a skewer comes out clean. If it looks a little too dark early on in the bake, cover with tin foil. Once cooked, place on a wire rack to cool (or eat immediately).

Brown Butter Brioche Cinnamon Buns

2 Comments

Honey & Co Review

9 Comments

Honey & Co Review

IMG_6330.jpg

  IMG_6357

There is a particular trend that is permeating the London dining scene like a contagion.

In the flurry of new openings, and novel and exotic twists on traditional gastronomies, a number of restaurateurs have become smitten with Spanish tapas, and have decided to exploit this style of cuisine for all its worth. Tapas are traditionally displayed on a menu in a long list, and served all at once, so diners can delight in dipping in and out of them with a few drinks as they please.  Instead of serving a carefully structured plate of well-balanced complementary elements, the restaurants at fault are breaking the plates down into individual elements.

They call them “small plates”, and I detest them.


IMG_6350


You’ll know that you’ve found yourself in this “small plate” trap when the waiter suggests that each person orders three, despite the fact that one is the cost of a normal large plate.  Not only do they expand their profits substantially by doing this, but the effort required by the kitchen is significantly reduced. Chefs don’t need to bother about planning dishes when they can just make whatever the hell they like, call it another small plate and let the diner err when structuring their picky little meal.   Oh, and these small plates seem to have a life of their own: you see, they can arrive according to their own whim and in any combination.  At my most recent visit to a restaurant of this type, all vegetables were deemed unsuitable to be served with fish.

IMG_6291

My rage against small plates had been boiling for several weeks when I decided to return to Honey & Co, where I knew my craving for a large plate could be fulfilled.  Call me demanding, or even greedy, if you like. I’d been before and thoroughly enjoyed the experience, but sadly forgot to bring my camera.  This time, however, I was armed.  Itamar Srulovich and his wife Sarit Packer rule the roost at this tiny 30 cover Canaan.  He’s ex- Ottolenghi - an almost guarantee of success - and the Ottolenghi influence is strongly evident in the cuisine.  Décor is kept to a minimum, with stark white walls and patterned blue tiled floor forcing your eye greedily towards the focal countertop display of spiced and perfumed cakes.  Despite the minimalism, there is no lack of atmosphere.  Most people are so pleased to have acquired their 1.5 hour table slot that they exude an aura of excitement.

IMG_6326

The menu is divided into starters and mains (hallelujah) – I plumped for spring salad of peas, courgettes, and warm manouri cheese with a lemon and saffron sauce.  Crisp, and light with the nuttiness of the manouri and electric tang of citrus, the dish was very pleasant.

IMG_6331

One dining companion went down the more obvious but inevitably delicious route of falafel served with a tabbouleh and tahini sauce – one of the most popular on the menu (the chefs undoubtedly roll falafel in their sleep).

IMG_6330

The other opted for the braised artichoke with parsley za’atar and yoghurt dipping sauce.

IMG_6328

This was rather a tame option as there only so much you can do to a whole artichoke in terms of flavour(read: very little), and so no matter how delicious the sauce the eating becomes tiresome.  It resides alongside eating fish and quail on the bone in my list of things that I just don’t have time for.  I can’t be bothered to fuss around with scraping a half centimetre of blandish artichoke flesh against the back of my teeth.

IMG_6351


My main course was very good: a plate abounding with plump parcels (aka Menti) of burnt courgette and herb with olive oil braised broad beans and whipped feta, the latter  adding a kick of saltiness to draw out the sweetness from the  dumplings and green vegetables.

Despite the petit nature of the restaurant (even the waitresses are petite, needing to squeeze between the close-set tables), the kitchen at Honey & Co must go through roughly an entire field of mint every day.  It resides proudly on almost every plate, and nor is its presence irrelevant – it lifts the earthier flavours into more summery tones, like for example, the shawarma of slow cooked lamb shoulder burnt pitta and goat’s yoghurt with amba mint and pomegranate.  I’m not the greatest fan of lamb, but this dish convinced me that my prejudice was poorly founded.

IMG_6340

The lamb was succulent, tender and sweet, and lifted to higher planes with the addition of juicy gems of pomegranate and the ubiquitous mint.

IMG_6343

The only disappointment was my dining companion’s chicken makloobah with saffron rice and a lemon yoghurt sauce. Visually, the dish lacked the vibrant flair that every other possessed and was a little bland.

IMG_6370

One dining companion went on to order the pink grapefruit and raspberry granita with yoghurt mousse and honeyed oat crisp.  The flavours bounced nicely off each other but I found the granita a little too perfumed.

IMG_6375

I’m also more inclined to a substantial dessert: I don’t particularly care for palate cleansers.  If I’m going to sin, then I’ll sin properly. And there’s one vital way to do that at Honey & Co: the cheesecake with kadaif pastry and honey.  Perhaps not the most beautiful of desserts, but more than made up for in flavour – the cheesecake is well balanced, creamy and contrasts perfectly with the crunchy, sticky tangled nest of kadaif.

IMG_6372

Bold, well-balanced, vibrant, and generous, the food at Honey & Co is the perfect antidote to the small plate disease.


Food: 8.75/10

Ambience: 7/10

Service: 9/10

Price: ££££

Loos: N/A

Suitable for: buisness lunches, casual dates, family, friends, vegetarians

Square Meal

Click to add a blog post for Honey & Co. on Zomato

9 Comments

Sticky Glazed Carrot, Pomegranate, Orange, Lentil & Feta Salad

8 Comments

Sticky Glazed Carrot, Pomegranate, Orange, Lentil & Feta Salad

IMG_8334.jpg

I wandered into my favourite greengrocer yesterday in search of inspiration, and came out laden with half the store.  Amongst the wooden crates I found the most beautifully vibrant baby carrots and blushing, freckled pomegranate orb.

Sticky Glazed Carrot, Pomegranate, Orange, Lentil & Feta Salad - Recipe

Although lentils and carrots are usually associated with comfort and winter, I used fresh orange and pomegranate jewels to lift them to a lighter, more summery dish.

The carrots are poached in orange juice and maple syrup until juicy and softened and the liquid has reduced to a golden caramel.  They are then roasted until sticky, slightly charred and a little withered, but dense with succulence and depth of flavour. The caramel is turned into a citrusy dressing to drench the lentils, with the sweetness balanced with the salty kick of feta.

Sticky Glazed Carrot, Pomegranate, Orange, Lentil & Feta Salad - Recipe

Ingredients

200g puy lentils

2 tsp vegetable bouillon stock

1 litre boiling water

400g baby carrots

Juice of 3 oranges (15 tbsp)

5 tbsp maple syrup

¼ tsp salt

2 tbsp olive oil

1 ½ tsp lemon juice

1 tbsp pomegranate molasses

¼ tsp salt

2 large garlic cloves, crushed

2 oranges supremed (i.e. segmented with skin and membrane removed)

100g feta

140g pomegranate seeds (half a pomegranate)

20g fresh coriander, roughly chopped

Method

  1. Place lentils, stock and boiling water in a pan over a high heat and allow to simmer with a lid on for 30-35 minutes until fully cooked. They should be soft and no longer chalky, but definitely not mushy.  Drain them, and set aside in a bowl to cool.
  2. While the lentils are cooking, prepare the carrots: pour the orange juice into a large frying pan over a medium high heat, add the maple syrup and salt, and stir to combine. Carefully arrange the carrots in the pan and allow to simmer for about 30 minutes or until the carrots have softened and the liquid has reduced by about two thirds and become viscous and syrupy.  Remove from the heat.
  3. Preheat the grill to 230˚C. Remove the carrots from the frying pan (while preserving the syrup), arrange them on a baking tray and grill for 5 minutes (checking after 3 minutes) or until they are slightly charred.
  4. Into the pan with the remaining syrup, pour in the olive oil, pomegranate molasses, lemon juice, crushed garlic cloves and salt to make the dressing. Stir the mixture over a low heat until fully combined. Pour the warmed dressing over the bowl of lentils.
  5. To serve, carefully spoon the lentils and any non-absorbed dressing on to a platter, and scatter with pomegranate seeds and crumbled feta. Arrange the orange segments and roasted carrots over the top, and sprinkle with the chopped coriander.
Sticky Glazed Carrot, Pomegranate, Orange, Lentil & Feta Salad - Recipe

HUNGRY FOR MORE?

8 Comments

Cherry & Yuzu Frozen Yoghurt Almond Cookie Sandwich

10 Comments

Cherry & Yuzu Frozen Yoghurt Almond Cookie Sandwich

IMG_6945.jpg

(Affectionately known as Froyo Yoyos) Cherry & Yuzu Frozen Yoghurt Almond Cookie Sandwich

If something becomes a fad, I usually try to avoid it.  Cupcakes were once things of joy, their light, sweet, spongeyness perfuming the house with the scent of birthdays.  And there was always the hope of left over icing, not to mention the ease with which one could convince oneself that the perfectly domed surface was in need of decapitation, just to preview the crunchy golden coated delicate sponge, just in case the cupcakes weren’t guest-worthy.  But now those simple pleasures have been crushed for me as the once-a -year treat has lost its golden hued novelty.

Cherry & Yuzu Frozen Yoghurt Almond Cookie Sandwich

The single-concept shops dedicated to cupcakes are now a graveyard for the dying fad.  I walked past a well-known purveyor of cupcakes in the middle of an airless department store only last week, and watched as the woman behind the counter shuffled the gaudy treats into reverse rainbow order in an attempt to look busy.

Cherry & Yuzu Frozen Yoghurt Almond Cookie Sandwich

Frozen yoghurt is no longer a novelty, but for me at least it has not yet lost its appeal.  Some people (including me) are able to delude themselves that even with the marshmallow, cookie dough, caramel topping it’s a healthier version of their favourite ice cream.

Cherry & Yuzu Frozen Yoghurt Almond Cookie Sandwich

When the clouds deigned to expose a sliver of sunlight for a short while on Saturday, I decided to indulge in a little frozen yoghurt.

Cherry & Yuzu Frozen Yoghurt Almond Cookie Sandwich


Cherry & Yuzu Frozen Yoghurt Almond Cookie Sandwich

The cherries at my favourite fruit monger were so glossy and irresistibly crimson they were begging to be involved in my hoping-for-summer recipe.  I combined them with yuzu juice for a touch of astringency to cut through the sweet creaminess of the yoghurt. Then, to add a childlike allure, I sandwiched the frozen yoghurt between two discs of biscuit which I’d infused with almond extract to bring out the cherry flavour further.

Cherry & Yuzu Frozen Yoghurt Almond Cookie Sandwich

The yuzu juice provides a wonderfully tart citrusy note to the frozen yoghurt.  If you can't find it, substitute it with lemon or lime.

Cherry & Yuzu Frozen Yoghurt Almond Cookie Sandwich

I used an ice cream churner to make the frozen yoghurt smoother and the ice crystals finer, but if you don’t have one this stage can be skipped and the result will still be delicious.

Cherry & Yuzu Frozen Yoghurt Almond Cookie Sandwich

Of course, the cherry and yuzu frozen yoghurt can be enjoyed sans biscuit.  The biscuit is however, rather useful if you wish to turn it into a hand held treat, whether or not the sunshine lingers.

Cherry & Yuzu Frozen Yoghurt Almond Cookie Sandwich

Cherry & Yuzu Frozen Yoghurt Almond Cookie Sandwich


Ingredients  (makes 8-10)

Cherry and Yuzu Frozen Yoghurt

375g cherries, halved and pitted

125g caster sugar

250g full fat natural yoghurt (don’t use Greek)

1 tsp yuzu juice

6 drops of almond extract

1 medium sized (18cm x 28cm approx.) loaf tin, lined with cling film


Almond Biscuit

160g butter, at room temperature

2 egg yolks

10 drops almond extract

210g plain flour

50g sugar

1tsp vanilla extract

¼ tsp salt

1 large baking tray lined with baking parchment

4.5/5cm circular cookie cutter or wine glass


Method

Cherry & Yuzu Frozen Yoghurt

  1. Place cherries and sugar in a small pan over a high heat. Stir occasionally to prevent sugar from burning.  When enough liquid has run out from the cherries to coat the base of the pan and it begins to boil, reduce heat to medium.  Allow to simmer for 10 minutes until the liquid from the cherries has reduced and is just slightly thicker than maple syrup.
  2. Allow the cherries and syrup to cool then blitz them together with the yuzu, almond extract and yoghurt until smooth. If you are using an ice cream maker, chill the mixture and then churn according to the manufacturer’s instructions.  Otherwise, proceed to step 3.
  3. Pour the mixture into the cling film-lined loaf tin, and smooth the surface with a spatula. Place in freezer for 1-2 hours until solid.

Almond Cookies

  1. Beat the butter in a mixer (or by hand) until light and fluffy. Into this, beat the almond extract, vanilla extract and egg yolks.
  2. In a separate bowl, mix together flour, sugar and salt. Stir this into the butter mixture until a dough forms.
  3. Flatten the dough into a disk, wrap in baking parchment and place in freezer for 15 minutes (or fridge for 30 minutes).
  4. Preheat oven to 160˚C.
  5. On a floured surface, roll out the dough to 7mm thickness. Using the cookie cutter, cut the dough into the discs and place on lined tray.
  6. Bake for 7-10 minutes until cooked all the way through but still pale. Allow to cool.

Assembly

Remove the loaf tin containing the frozen yoghurt from the freezer. Using the cookie cutter, cut the frozen yoghurt into discs and sandwich each disc between two almond biscuits.  Store these in an airtight container and return to the freezer until ready to serve.

Cherry & Yuzu Frozen Yoghurt Almond Cookie Sandwich

10 Comments

Little Social - Review

9 Comments

Little Social - Review

IMG_5694.jpg

Little Social - Restaurant Review I’d like to be able to write how the waiter’s grime-rimmed thumbnail, with which he had just gouged something sinister out of his ear, nudged against the contents of the plate; how a glistening black hair, half submerged in the dish’s paludinal liquid, entangled itself with the semi-solid floating gelatinous elements; how the plate’s arrival was preceded by the fragrance similar to that of water left stagnant in a vase until the stems of the decaying plant have become slimy, and a beige skin has formed on the surface; how I lifted a debris-encrusted spoon of the liquid into my mouth only for my taste buds to be assaulted by the week-long damp cloth- tasting infusion.

But I can’t.

Little Social - Restaurant Review


Little Social - Restaurant Review

Because Little Social is impeccable. Nestled in a slither of a side street, it is an Elysium secluded from the tourist-thronged pavements of Regents St.  Jason Atherton’s classic French bistro interior strikes a harmonious balance between refined elegance and comfortableness.  Johannes, soon-to-be manager, glides around the room attentively, infusing it with his charm.  The menu is French inspired Modern European with subtly innovative twists and combinations.

Little Social - Restaurant Review

Little Social - Restaurant Review

Always lured by the umami perfume of truffles, I ordered the Burrata, pear quince, truffled honey and pickled walnuts - a decadent combination that I imagine would have gone down very well at a lavish Roman banquet.  Burrata is the queen of soft cheeses, and I’ve had the misfortune to witness numerous acts of treason committed against it by a number of restaurant kitchens.  This was not the case at Little Social. Rich, latticed, and butter-soft, the cloud of burrata melted on the palate, while the truffle infusion added a kick of savoury to the sweet decadence.

Little Social - Restaurant Review

The pear quince exceeded the expectation provided by the modest menu description: some slices were poached – soft, spiced and near caramelised, some were lightly macerated – sweet with a little more texture, and some were left fresh, adding a crispness to the dish.  This sweetness was cut through by the astringent balsamic reduction and pickled walnuts.

Little Social - Restaurant Review

I had carved out a path of indulgence in the menu but my dining companion opted for a lighter course: salad of baby carrots, avocado, fennel, clementines and coriander.  I’ve ordered this several times before and it tastes and looks like summer: vibrant, fresh, crunchy, creamy and tangy, it is a well-balanced dish.


Little Social - Restaurant Review

For main, I ordered roasted Cornish line-caught cod, Asian spiced cauliflower and aromatic duck broth.

Little Social - Restaurant Review

The cod was so tender it almost anticipated the arrival of my fork. The cauliflower was done in two ways: florets, and a delicately spiced textured puree, both of which complemented the fish.  The broth imbued the other elements with its contrasting smoky savouriness.

Little Social - Restaurant Review

My dining companion’s choice of the risotto of wild mushrooms, parmesan & wild garlic proved that the vegetarian options are in no way neglected.


Little Social - Restaurant Review

At this point in the review I would love to furnish you with an opportunity for schadenfreude.  Alas I cannot.  I can’t even say that I had the misery of having to wait a long time to return to Little Social as I returned a week later.  On my birthday, I turned down the prime opportunity to sample another of London’s fine dining establishments, and I even eschewed my traditional birthday cake.  Some might think this decision radical and rash, but the reason lay in the heart of Little Social’s pastry kitchen.

Little Social - Restaurant Review

Deep russet brown, glistening, sticky, oozing, sweet, crisp, buttery, crunchy with a caramel darkened to sultry, sweet, savoury and nutty depths, just approaching the perilous realm of burnt: the tarte tatin can only be compared to Hephaestus’ offerings to the gods.

Little Social - Restaurant Review

The crisp meringue with Gariguette strawberries, lime Chantilly, fraises des bois and elderflower sorbet was also delicious.

Little Social - Restaurant Review

A perfectly formed orb of crisp meringue contributed texture and sweetness to the smooth tangy sorbet and berry interior, making it a delightfully elegant and refreshing dessert.

Little Social - Restaurant Review

You may be unsettled by the fact that there were no faults.  I strained to find even the finest of hairline cracks in the restaurant’s performance, reliving the meal in my head, scrutinising the individual elements.  I even went back a second time to check.  And checking yet again, and again,  would be no Sisyphean task.

Little Social - Restaurant Review


Food: 10/10

Service: 10/10

Ambience: 9/10

Service 10/10

Loos: 8/10

Suitable for: smart dates, business lunches, birthdays, family, friends, pre-theatre dining, vegetarians


Square Meal

Little Social on Urbanspoon

9 Comments

Stripy Lemon & Raspberry Cake - Recipe

21 Comments

Stripy Lemon & Raspberry Cake - Recipe

IMG_5587.jpg

Stripy Lemon & Raspberry Cake This stripy lemon and raspberry cake speaks for itself: elegant and refined on the outside, yet quirky on the inside - great if you feel like a change from the usual, and you’re in the mood for something fun.

Stripy Lemon & Raspberry Cake


Stripy Lemon & Raspberry Cake

Unlike most layer cakes, the stripes are vertical.  This makes it both superficially pleasing and more delicious - more stripes = more sumptuous raspberry compote...

Stripy Lemon & Raspberry Cake


Please don’t be intimidated by the lists of ingredients and the recipe.  It really is a lot easier  and quicker than you may think: the stripes are formed by baking the sponge in a baking sheet, spreading the cooked surface with the raspberry compote, cutting it into strips, and rolling them, one strip after the other, swiss roll-like, into a ‘log’.

Stripy Lemon & Raspberry Cake

The sponge is light and lemony, the raspberry compote is tart and moreish, and the icing is infused with berries to provide a little summery freshness.

Stripy Lemon & Raspberry CakeStripy Lemon & Raspberry CakeStripy Lemon & Raspberry CakeStripy Lemon & Raspberry CakeStripy Lemon & Raspberry CakeStripy Lemon & Raspberry CakeStripy Lemon & Raspberry CakeStripy Lemon & Raspberry Cake

Ingredients

Cake

120g plain flour

1 tsp baking powder

¼ tsp salt

3 large eggs

140g caster sugar

Zest of 1 lemon

½ tbsp. water


Baking sheet 38x25x2.5 cm, lined with baking parchment and covering both the base and shallow sides.

Additional baking parchment


Raspberry compote

200g raspberries fresh or frozen, but if using frozen, defrost before use

40g caster sugar

2 tsp vanilla extract

2 tbsp water

150g raspberry jam

2 tbsp corn flour

½ tsp lemon juice


Crumb coating (optional – but makes icing easier and adds extra tanginess and interest to the cake)

75g icing sugar, sieved

50g butter at room temperature

2 tsp lemon juice


Berry-infused cream cheese icing

25g red berries (raspberries and redcurrants work well, and you can use frozen), blitzed until smooth to make a puree

½ tsp lemon juice

75 g cream cheese, at room temperature (essential)

50g unsalted butter, softened to the point that it is threatening to turn into liquid

300g icing sugar, sieved


Method

Raspberry compote

  1. Place frozen/fresh raspberries, sugar, vanilla extract, and water in a saucepan over high heat and stir until the sugar has dissolved. Simmer for 5 minutes or until the texture is slightly syrupy.
  2. Stir in the raspberry jam and corn flour, and boil for a further 2 minutes. Remove from heat.
  3. Blitz the mixture together with the lemon juice in a blender until smooth.

Lemon Sponge Cake

Stripy Lemon & Raspberry Cake

  1. Preheat oven to 220˚C.
  2. Beat together eggs and sugar for about 5 minutes until pale and custard-like (I find it easier to use an electric mixer).
  3. Fold into the wet mixture the sifted flour and baking powder, lemon zest, salt and water. Stir as little as possible and with a light hand so as to keep the mixture airy.
  4. Pour the mixture into the lined baking sheet and spread it out in an even layer right up to the edges of the tray. Place in the centre of the oven, and bake for 4-5 minutes until golden brown and a skewer comes out clean.
  5. While the cake is still warm from the oven, flip it upside down on to a large sheet of baking parchment. Carefully peel off the parchment layer on which it was baked.
  6. Spread the compote evenly over the lemon sponge, and slice lengthways (i.e. from short side to short side) into 4 equal strips of cake.
  7. Begin with one strip and roll into a coil. Place the edge of the roll next to the edge of the second strip and continue to roll.  Continue with the remaining strips until a large spiral is formed.  Place the ‘log’ spiral side up on a plate or cake stand.

Lemon crumb coating (optional, but makes icing the cake easier, and adds extra tanginess and interest)

  1. Beat together icing sugar, lemon and butter until creamy and spread in a thin layer over the top and sides of the cake. Place in the fridge for half an hour, or the freezer for 10 minutes.

Berry-infused cream cheese icing

  1. Beat the butter until completely smooth, then beat in the cream cheese. Stir in the berry puree and lemon juice, before beating in the icing sugar.
  2. Spread evenly over the cake using a spatula. Decorate with berries, or as desired.


Stripy Lemon & Raspberry Cake


21 Comments

Seeded Spelt Crackers - Recipe

9 Comments

Seeded Spelt Crackers - Recipe

IMG_5199.jpg

Last week I panic baked.  My usually dependable supply of Dr Karg’s seeded spelt and emmental and pumpkin seed crisp breads had run dry. Only a few sad seeds in the corner of the packet remained, which I ate mournfully, before desperation led me to pulling open drawers in search of the emergency packet I had hidden from myself.

IMG_5211
IMG_5211
Seeded Spelt Crackers - Recipe

My hunt was rewarded with absolutely no trophies.  I must have found them some time before.

Seeded Spelt Crackers - Recipe

Necessity mothered invention: I combined some of my favourite ingredients to make my own version of the crisp breads, and they turned out rather well, perhaps even better than the originals. My family had clearly also been struck by panic, as two batches were devoured in ten minutes…

Seeded Spelt Crackers - Recipe

These crisp breads are ridiculously quick to make, healthy (when you don’t eat the whole batch in one sitting – an almost impossible feat), and delicious.  They’re also versatile – the seeds can be eliminated and/or exchanged for other varieties as desired, and they can be served with hummus, red pepper pesto (see my recipe), guacamole etc.  They can also be made dairy-free by eliminating the cheese.

Seeded Spelt Crackers - Recipe

Ingredients

115g white spelt flour

100g wholemeal spelt flour

¾ tsp salt

30g sesame seeds

15g poppy seeds

30g pumpkin seeds

50g cheddar, grated

50g parmesan grated, + 5g for sprinkling

1 tsp cayenne pepper (optional)

125ml water

1 tbsp olive oil

1 baking tray, overturned, greased with oil and dusted with flour

Method

  1. Preheat oven to 220˚C. In a large bowl mix dry ingredients together. Pour in water and oil and stir until mixture clumps together into quite a dry dough.  You may need to knead it slightly with your hands.
  2. Place dough on overturned baking tray and roll it out until it reaches the edges of the tray. It should be about 3mm thick.
  3. Sprinkle with the extra parmesan, prick the dough liberally with a fork, and score it into your preferred geometric shapes. I like 4cm x 10cm rectangles.
  4. Place in oven and bake for 10-15 minutes until golden, and firm to touch. Leave to cool – they will become crisper as they cool.
Seeded Spelt Crackers - Recipe

9 Comments

Portland Restaurant - Review

Comment

Portland Restaurant - Review

IMG_4899.jpg

Little Social - Review Giles Coren recently reviewed Portland, Great Portland Street’s new culinary adornment.  So wonderful was his experience that he claimed it to be “a perfect restaurant”.  I tweeted this on my way to dinner there, only to have him sardonically (and mistakenly) reply that I had misquoted by using the definite article rather than the indefinite.  His keen eye for detail may have been put to better use in his restaurant critique – “perfect”, with or without the definite article, is not a term to be so liberally bandied about.

Portland - Restaurant Review


A gust of ice cold breeze swilled around the intimately sized room as the door shut behind us.  We found ourselves in a space of clean lines, bare wooden tables, suspended chrome lights, white walls and a voguish open kitchen with jars of things being pickled bordering its front.  The friendly waitress showed us to our table and bestowed both sparking and still water in glass jars upon the table, on the house – no money leeching here.  The modern European menu consists of lists of fashionable Japanese/foraged ingredients with names fun to roll around in your mouth like ‘ventricina’, ‘enoki’, ‘sriracha, and ‘culaccia’.  Indeed, while we were reading some of them out loud, the waitress standing some distance from our table leapt across the room to explain to us what they were.  She was almost worryingly attentive, but still charming – and nowhere near as intrusive as the service I experienced at Hakkasan a few months ago: I’ve been informed that my voice is like a foghorn, but this does not excuse the fact that the waitress ran across the room’s expanse to answer a question I had discreetly directed to my friend regarding the different sauces.  There must be microphones under the tables - I was on edge for the remainder of the evening.

Portland - Restauran Review

Bread and butter arrived.  The butter, as the waitress gleefully announced, was lightly dusted with grated ox heart.  Intrigued by the gory wood shavings, we showered the sourdough with them.  Either the bread was too strong, or a rather more generous helping was necessary, as the heart provided only the slightest murmur of saltiness – which may, even then, only have been the salt in the butter itself.

Portland - Restauran Review

Always curious to test a restaurant’s aptitude for preparing vegetarian cuisine, and with a pig-like keenness for truffles, I ordered the salsify with 36-month Comté and spring truffle.  The vegetable was soft, with a slightly chewy texture, which reminded me of the traditional South African koeksisters I first enjoyed when I was three.  Combined with the savoury perfume of the truffle and the salty delicate Comté the dish was excellent.  My discerning dining companion gave his delicate foam-coated Roscoff onion and Cornish mussels with cider and brown butter a firm 10 out of 10.

Portland Restaurant - Review

His main, monkfish with ponzu and enoki, failed to live up to the starter despite the sensitive cooking of the fish.  Instead, it was rather texturally challenged, the gelatinous ingredients stacked in slippery formation on the plate.

Portland - Restaurant Review

With my dining companion looking on with food envy, I revelled in the rich tender flesh of the venison I’d ordered and the caramelised sweetness of the accompanying parsnip.  Although they did not detract from the excellence of the dish, the contribution of oats to the dish wasn’t significant, nor was it necessary.

Portland - Restaurant Review

Dessert ensued.  Ever since my stint at Le Caprice I’ve longed for the citrus tang of yuzu.  I salivated (metaphorically) as the elegant triangles of yuzu tart decked with cigarettes of green tea meringue made their way from the open kitchen to my table.  It did not disappoint.  The meringue, though delicate was an interesting and elegant addition, and the frozen yoghurt added a creaminess to the kick from the yuzu tart.

Portland - Restaurant Review

At this point I was beginning to feel myself slipping rather gormlessly into the haze of Giles Coren’s utopia.  I needn’t have worried.  It didn’t last.  Within the ambrosial Elysium he had conjured up in his review, hairline cracks were beginning to show.  They even began to establish themselves in the food.  After the first few spoonfuls of his chocolate bar with peanut butter praline and peanut ice cream, my dining companion began to dig with greater purpose into the dessert.  With tweezer like precision he honed in on the source of his suspicion and plucked out a 3.5 inch strand of something between the thickness of a human hair and an animal whisker.  Unwilling to stir up a fuss he smeared it down on to the rim of his pate and pressed on.

Portland - Restaurant Review

At this point, mid-dessert and  without any prior warning, the waitress rushed over to us and told us that we had to get up that very minute as the next guests for our table had arrived.  I could see them out of the corner of my eye peeling off their coats and inching their way round the restaurant to assert themselves over what was apparently no longer our table.  We were told that we could sit at the bar, a row of five bar stools lined up against the glass window.  We slunk over, but every stool was taken.  Clearly we still had some status in the pecking order as one of the waiters squeezed his way through the tables and removed a couple from their chairs who had yet to eat so that we could sit.

Portland - Restauran Review

The waitress then arrived with my half eaten and melting pool of yoghurt and yuzu.  The illusion was shattered further by the location of our new position right next to the door.  Gusts of bone-chilling wind swept into the room whenever the door opened.  Huddled in our coats next to the exit we no longer felt welcome.  Two truffles arrived with the bill, a nice touch apart from the fact that they were decidedly average: the shell was factory-made, and the caramel filling leaked out of the pre-made hole on to the plate.

Portland - Restaurant Review

Whether Portland is “a perfect restaurant” as asserted by Giles Coren, or “the perfect restaurant” is irrelevant.  Whilst much of the food is excellent, a few too many hairline fractures appeared over the course of the meal for the restaurant even to near an exemplum of restaurant utopia.  The appearance of a hair, too, was somewhat less than perfect, and not all that appealing.

Food: 9/10

Service: 5/10

Ambience: 6/10

Loos: 6/10

Price: ££££

Suitable for: business lunch, friends, family,  casual dates


Portland on Urbanspoon

Square Meal

Comment

Candied Ginger & Orange Hazelnut Biscotti - Recipe

2 Comments

Candied Ginger & Orange Hazelnut Biscotti - Recipe

IMG_0144.jpg

Candied Ginger & Orange Hazelnut Biscotti - Recipe Biscotti, or cantucci, as they are known in Tuscany are crunchy and chewy slivers of twice baked and ridiculously moreish, Italian biscuits traditionally containing almonds, and often an abundance of dried fruit.  They are obligatorily dipped into an immodestly full glass of Vin Santo (Italian sweet wine) and held there until the majority of the wine has been absorbed by the biscuit and there’s every chance it will land in one’s lap before it reaches one’s ready and waiting mouth.

Candied Ginger & Orange Hazelnut Biscotti - Recipe


Unfortunately, biscotti are endangered in Britain.  Their reputation is marred by the imitation biscotti that have taken up residence in the majority of common coffee chains.

Candied Ginger & Orange Hazelnut Biscotti - Recipe

These poor copies of the true Italian post-prandial biscuit are so dry that they react like silica gel to one’s mouth, so stale that you may need to sacrifice a tooth to consume them.

Candied Ginger & Orange Hazelnut Biscotti - Recipe

For this pleasure the coffee chains also charge a trillion percent mark-up on what are the easiest and most inexpensive biscuits to make.  Also, they’re often sold individually – who stops at just one?

Candied Ginger & Orange Hazelnut Biscotti - Recipe

This recipe is very versatile.  I love strong flavours, and so I paired ginger with orange to give the biscuits a tang, and added the toasted hazelnuts for slight smokiness.  However, these ingredients can be substituted with any dried fruit and nut of your choice, or indeed left plain.  Use 200g of the dried fruit, 250g of the nut of your choice and, in place of the orange & ginger syrups, sub in an extra 2 tbsp honey.

Candied Ginger & Orange Hazelnut Biscotti - Recipe

Ingredients

For the biscuit

500g plain flour

350g sugar

3 tsp baking powder

½ tsp salt

3 eggs + 1 egg white + 1 egg yolk for later

2 tsp vanilla essence

3 tsp curaçao (triple sec)

250g roasted hazelnuts crushed into halves or slightly smaller pieces

2 tbsp honey

Zest of 1 orange

2 trays lined with baking parchment

For the candied oranges                                                

2 oranges

1 cup water

3/4   cup sugar

For the candied ginger – or 140g store bought

200g ginger peeled and slices into 1/8 inch disks

4 cups of water

170g sugar


Candied ginger method

  1. Place sliced and peeled ginger in shallow pan with water and bring to boil.  Allow to simmer with the lid on for 25 minutes
  2. Drain the ginger saving 1 cup of liquid and pour in sugar. Bring to medium heat and stir until the sugar is dissolved. Allow to simmer for about 15 minutes until the liquid becomes syrupy and the ginger is translucent.
  3. Place sieve over a bowl and pour the mixture over to drain off the syrup. Reserve both elements for later use.

Candied orange peel method

  1. Slice the peel off the oranges with a knife in thick strips, cutting close to the flesh. Cut the peel into thin 0.5 cm strips and those to roughly 2cm lengths.
  2. Place chopped orange peel, sugar and water in pan and bring to boil. Reduce to medium heat and allow to simmer for 15-20 minutes or until the liquid is mostly evaporated and syrupy and the oranges are translucent and lacking the sourness of their fresh state.

Biscuit method

  1. Preheat oven to 180C. Mix all the dry ingredients together with the toasted hazelnuts in a large bowl.
  2. In a separate bowl separate one egg and place the yolk aside for later use.  Mix together the 3 whole eggs, the egg white of one egg and the other liquid ingredients with the candied orange peel (along with it syrup) and the drained pieces of ginger along with 2 tbsp of the ginger syrup.
  3. Pour liquid mixture into the dry and stir until combined in a stiff dough.
  4. Sprinkle a wooden board with flour and spoon 1/6 of the mixture onto it. Coat your hands in flour and roll the dough out into a 5 cm wide log. Place on tray. Repeat with rest of mixture, leaving a large at least 10cm distance between each piece since it will spread whilst cooking.
  5. Bake for 20 minutes or until deep golden brown. With knife at the ready, take them out and slice diagonally into 3 cm widths and turn them so they’re cut side up.  Turn off the oven and place these back in to dry out for another  10 minutes. Or just leave them in until ready to serve.

Candied Ginger & Orange Hazelnut Biscotti - Recipe

2 Comments

Peanut Butter and Jam Cookies - Recipe

Comment

Peanut Butter and Jam Cookies - Recipe

IMG_4786.jpg

Peanut Butter and Jam Cookies - Recipe Memories of countries and cities I’ve visited are strongly intertwined with my culinary experiences there.   Whenever I’m asked about my trip to Cuba, memories of the music, culture and politics, the beauty of the countryside, the cars, and the buildings are always drowned by the paddies of rice starch dotted with beans which faced me every meal time.  The lone cylinder of “Master Potato Crisps” (lesser Pringles), furry with dust, which commanded an entire shelf in an embargo-challenged grocery store emerged as a perverse highlight.

Peanut Butter and Jam Cookies - Recipe


I will never be able mentally to separate Canada from the oozing, sticky-sweet clasp of a particular Toronto cinnamon bun (it may have been preceded by some, but its superiority has eradicated all past and future competition).  New York is always a complete sensory overload: last year I ate overtime to cram Lebanese, Thai, raw vegan, Chinese, Italian, modern European, American, French, Greek, Mexican, and Brazilian into five days - delicious and, arguably, gluttonous.  Yet, despite this mammoth accomplishment, one of the most outstanding of the culinary delights I’ve sampled there is something rather less exotic: the peanut butter cookie.  It may be humble in name, maybe in appearance too, but it is most certainly not humble in nature.  The source of this ambrosia is the well-established City Bakery, off Union Square, known best for its croissant pretzels, seductively viscous hot chocolate and, of course, its peanut butter cookies -crumbly on the outside and soft and chewy in the interior, with salty and sweet in fine-tuned balance creating an insatiable desire for more.

Peanut Butter and Jam Cookies - Recipe

At brunch a couple of weekends ago, one of my friends confessed her current obsession: sneaking off to her kitchen cupboard armed with a bread stick to pair with that American favourite of jam and peanut butter.

Peanut Butter and Jam Cookies - Recipe

The memory of the palate-coating, salty-sweetness of the City Bakery peanut butter cookies reasserted itself.  Over the next week it took up stubborn residence, so I made up my own.  They worked.  I know this because I made them twice: I left the first batch out to cool, exited the kitchen for 10 minutes, and when I returned, they were gone, my brother unabashedly dusting the last few crumbs off his sweater.  With family members temporarily banished from the kitchen, the second batch survived long enough to be photographed.  Although delicious on their own, I sandwiched mine with raspberry jam to offset the sweet salty nuttiness with a little tang. Julia D. you are to blame for this recipe (and it is, indeed, dedicated to you).

Peanut Butter and Jam Cookies - Recipe

Often cookie recipes frustratingly demand that the dough is chilled before baking.  These can be made, baked and eaten in 20 minutes - no torturous chilling necessary.

Peanut Butter and Jam Cookies - Recipe

Ingredients (makes 34 individual cookies)

115g unsalted butter, at room temperature

190g granulated sugar

60g light brown sugar

¾ tsp salt

250g smooth peanut butter

1 large egg

½ tsp vanilla extract

140g white spelt flour (or plain flour)

150g raspberry jam (optional)

2 baking sheets lined with baking parchment


Method


  1. Preheat oven to 180˚C.
  2. In a mixer (or by hand), cream together butter, granulated sugar, light brown sugar and salt until pale and fluffy. Mix in peanut butter, egg and vanilla extract until fully combined.  Gently stir in the flour.
  3. In the palms of your hands, roll a tablespoon of the mixture at a time to form 4cm spheres. Space them out on the tray.  When the mixture is used up, gently press a fork into the spheres to flatten them and form a criss-cross pattern as pictured.
  4. Bake in oven for 12-14 minutes until slightly golden and still soft to touch. Allow to cool slightly before sandwiching each pair together with a teaspoon of raspberry jam.

Peanut Butter and Jam Cookies - Recipe

Comment

Momo - Restaurant Review

Comment

Momo - Restaurant Review

IMG_4479.jpg

Momo - Restaurant Review Multi-coloured light shines through the stained-glass windows of the ceiling in triangles, and everywhere there are glass lamps, carved wooden symbols, and ornate mirrors.  In the middle of all this opulence there is a feast of tiered pastries and sweets crowned with luscious fruits, layered gold henna-d tea glasses, as well as Persian rugs, bronze statues and intricate silver vessels…even the answering machine has a Moroccan accent.

Momo - Restaurant Review

It’s like stepping into a restaurant off the Jemma el-Fnaa - almost.  But then there are a few things that sending you hurtling back to the western world:  the giant green chair outside belongs more to a car boot sale than this North African sanctuary, the bathrooms (including hand dryer) have been sprayed with rust-coloured sparkles, and the music projected into this emporium is more of a late night Kiss-FM mash up than Berber folk.

Momo - Restaurant Review

We were seated around a marble table next to the gold focal display dripping with glucose-laden delights, convenient for us to salivate over (figuratively only, of course) throughout the meal.

Momo - Restaurant Review

But as one of my dining companions noted, we had ended up being seated at the only wobbly table in the room -dangerous, if you’re as clumsy as I am.

Momo - Restaurant Review

The restaurant was empty for the first half hour, meaning that service was good – efficient but not intrusive, and with waiters at our exclusive beck and call.  This was not a sign of any absence of quality, but rather people’s lack of awareness that Momo does brunch.  The popularity of brunch in London has soared over the last few years but there is only a handful of places that stray from the omelette/bacon/pancake norm.

Momo - Restaurant Review

On previous trips to Morocco I’ve eaten so much at breakfast that I’ve managed to continue the whole day, camel-like, without any other meals.  It’s good to be able to continue this tradition in London, especially considering the dearth of decent Moroccan restaurants here.

Momo - Restaurant Review

We ordered tea to start – Moroccan mint for me.  The metre- high, admirable yet worrying, yellow stream brought back memories of Marrakech and the numerous carpet salesmen, antique vendors and herbalists who had poured out the perfumed nectar, laced with tooth-rotting sweetness, into patterned tea glasses on gold trays, in the hope of seducing us into buying their goods.  The menu is extensive, with innumerable pastries, sweets and traditional Moroccan tagines.  The absence from the menu of traditionally cooked eggs was refreshing (of particular interest to me after I wasted £13.80 on a limp and bland two-egg omelette at Christopher’s in Covent Garden – I shan’t be darkening their doorstep again).

Momo - Restaurant Review

I ordered the Full Moroccan Breakfast (sans poached egg) which consisted of batata hara, merguez, turkey bacon, coco beans in charmoula sauce, garlic-cooked mushroom-filled roast tomato. The potatoes were soft, and had soaked up the piquant sauce, while the merguez were salty, spicy and juicy, the turkey bacon crisp, the mushrooms delightfully garlicky, and the beans flavourful and comforting.  I’d order Moroccan breakfast over British, any day.  Over all, the dish worked well, but it could have done with a touch more salt to draw more flavour out of the starches.

Momo - Restaurant Review Momo - Restaurant Review

My dining companions were content with their orders, too: scrambled eggs on toast with cured beef, cumin and fine herbs,

Momo - Restaurant Review

and tchaktchouka: merguez, spiced peppers, tomatoes with a fried free range egg, the latter bubbling furiously for five minutes or so after arriving.

Momo - Restaurant Review

After all this, we rolled off our chairs to examine more closely the array of decadent offerings.

Momo - Restaurant ReviewMomo - Restaurant Review

Much to my disappointment there were no baklava (or “balaclava” – rather embarrassingly, the malapropism slipped from my mouth).  We plumped for the praline mousseline horn, admittedly more for its inelegance of name than for its advertised flavours.

Momo - Restaurant Review


This tactic, however, worked in our favour: the pastry was crisp, flaky and filled with a light, and not-overly sweet, praline cream.

Momo - Restaurant Review

The maghrebine pastries were also exotic in appearance, looking somewhat as though they were made of play dough, as my dining companion observed.

Momo - Restaurant Review

This is how we ranked them: in first place, the shiny brown- coffee- bean- on-steroids shaped delicacy; in second place, the almond paste ball nestled in a yellow flower-shaped pastry cup, and stabbed with a nut; in third, the lurid frilly sea-monster (whose green resembled rather disconcertingly that of the giant green chair outside the restaurant).

Momo - Restaurant Review Momo - Restaurant Review

A few mint teas later we tore ourselves away from the Moroccan den.  All in all, the experience had all the necessary qualities of a good brunch: interesting, good quality and decently-priced food, an ambience of decadence and luxury, and good service.   Or maybe I was just seduced by the endless streams of sweet mint tea…

Suitable for: Smart dates, friends, family, vegetarians, brunch, lunch, dinner, cocktails, business lunches, afternoon tea, something different

Food: 8/10

Ambience: 9/10

Service: 9/10

Loos: 6/10 - I walked into the men's.  For future reference this sign = women's:

Momo - Restaurant Review

Momo on Urbanspoon

Comment

Caramelised Fig, Feta, Orange & Rocket Salad - Recipe

Comment

Caramelised Fig, Feta, Orange & Rocket Salad - Recipe

IMG_4390.jpg

Caramelised Fig, Feta, Orange & Rocket Salad - Recipe I often spend summers in Italy.  In the evenings, when the vine- ripening summer sun begins to soften and the incessant squeak and rattle of the plough eventually dies, I usually clamber up the nearby hill, meandering across the crest.   On one of my walks, I headed towards the nearby palazzo, along the path bordered by Cyprus spears.
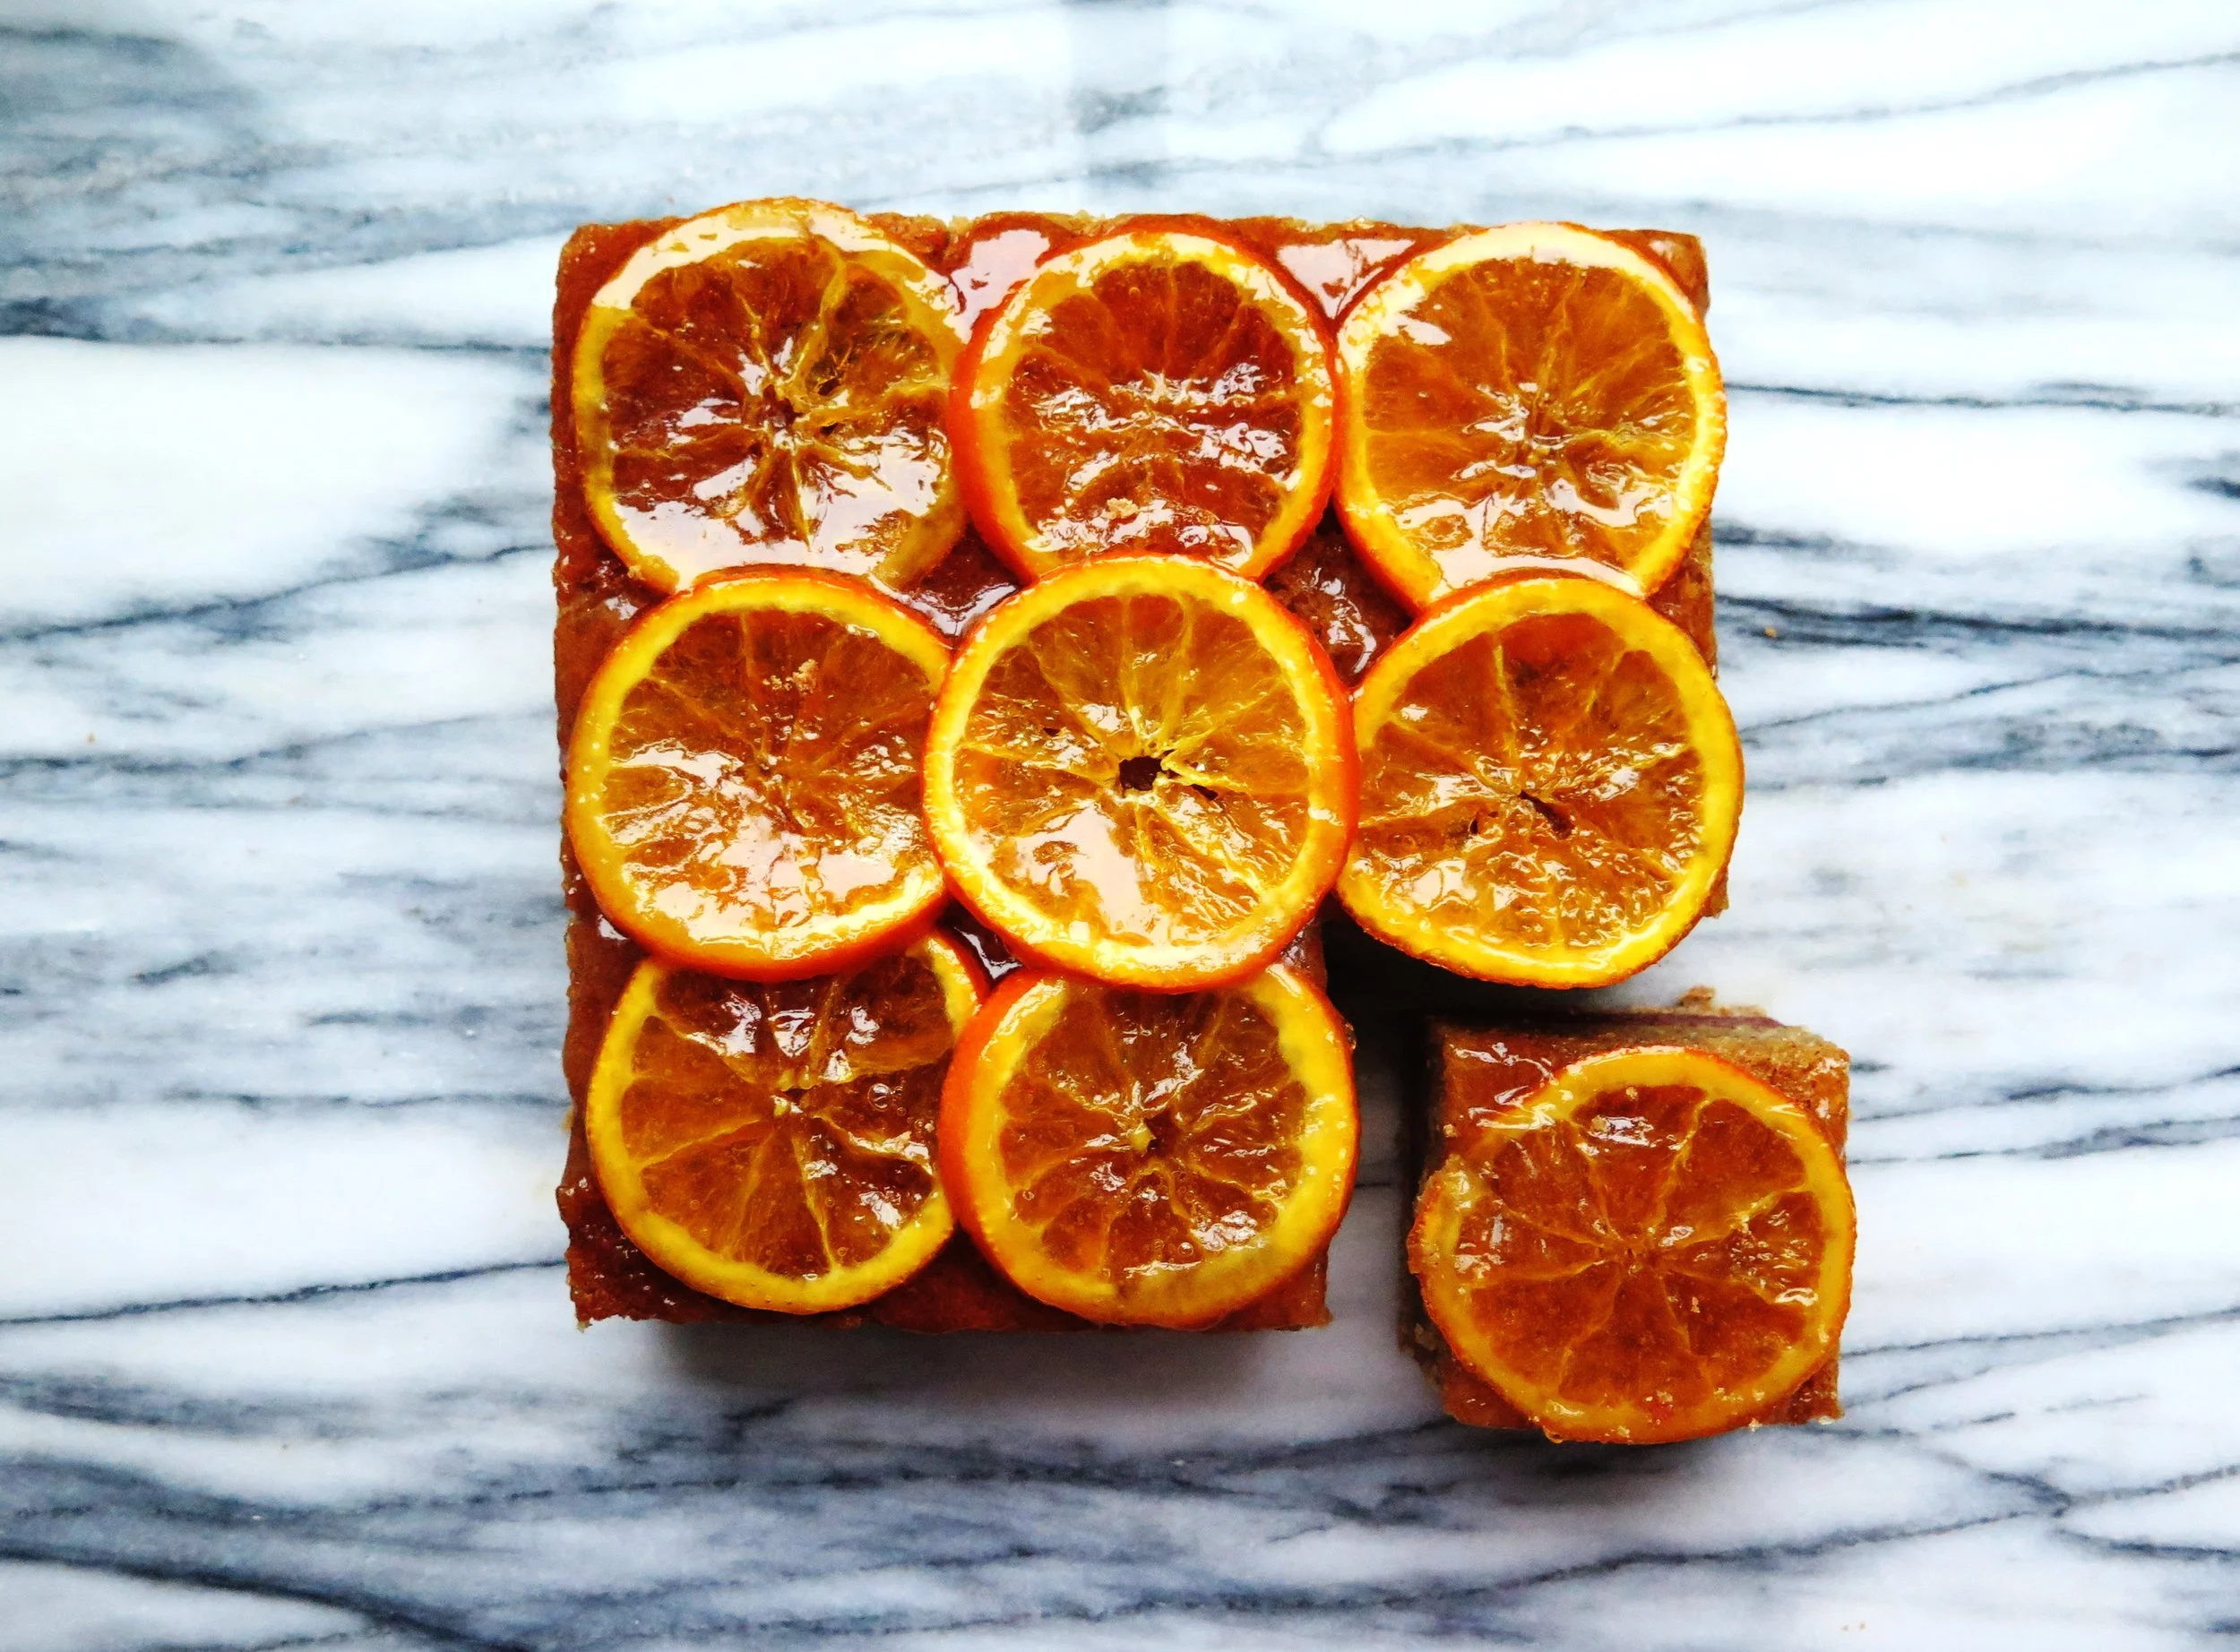
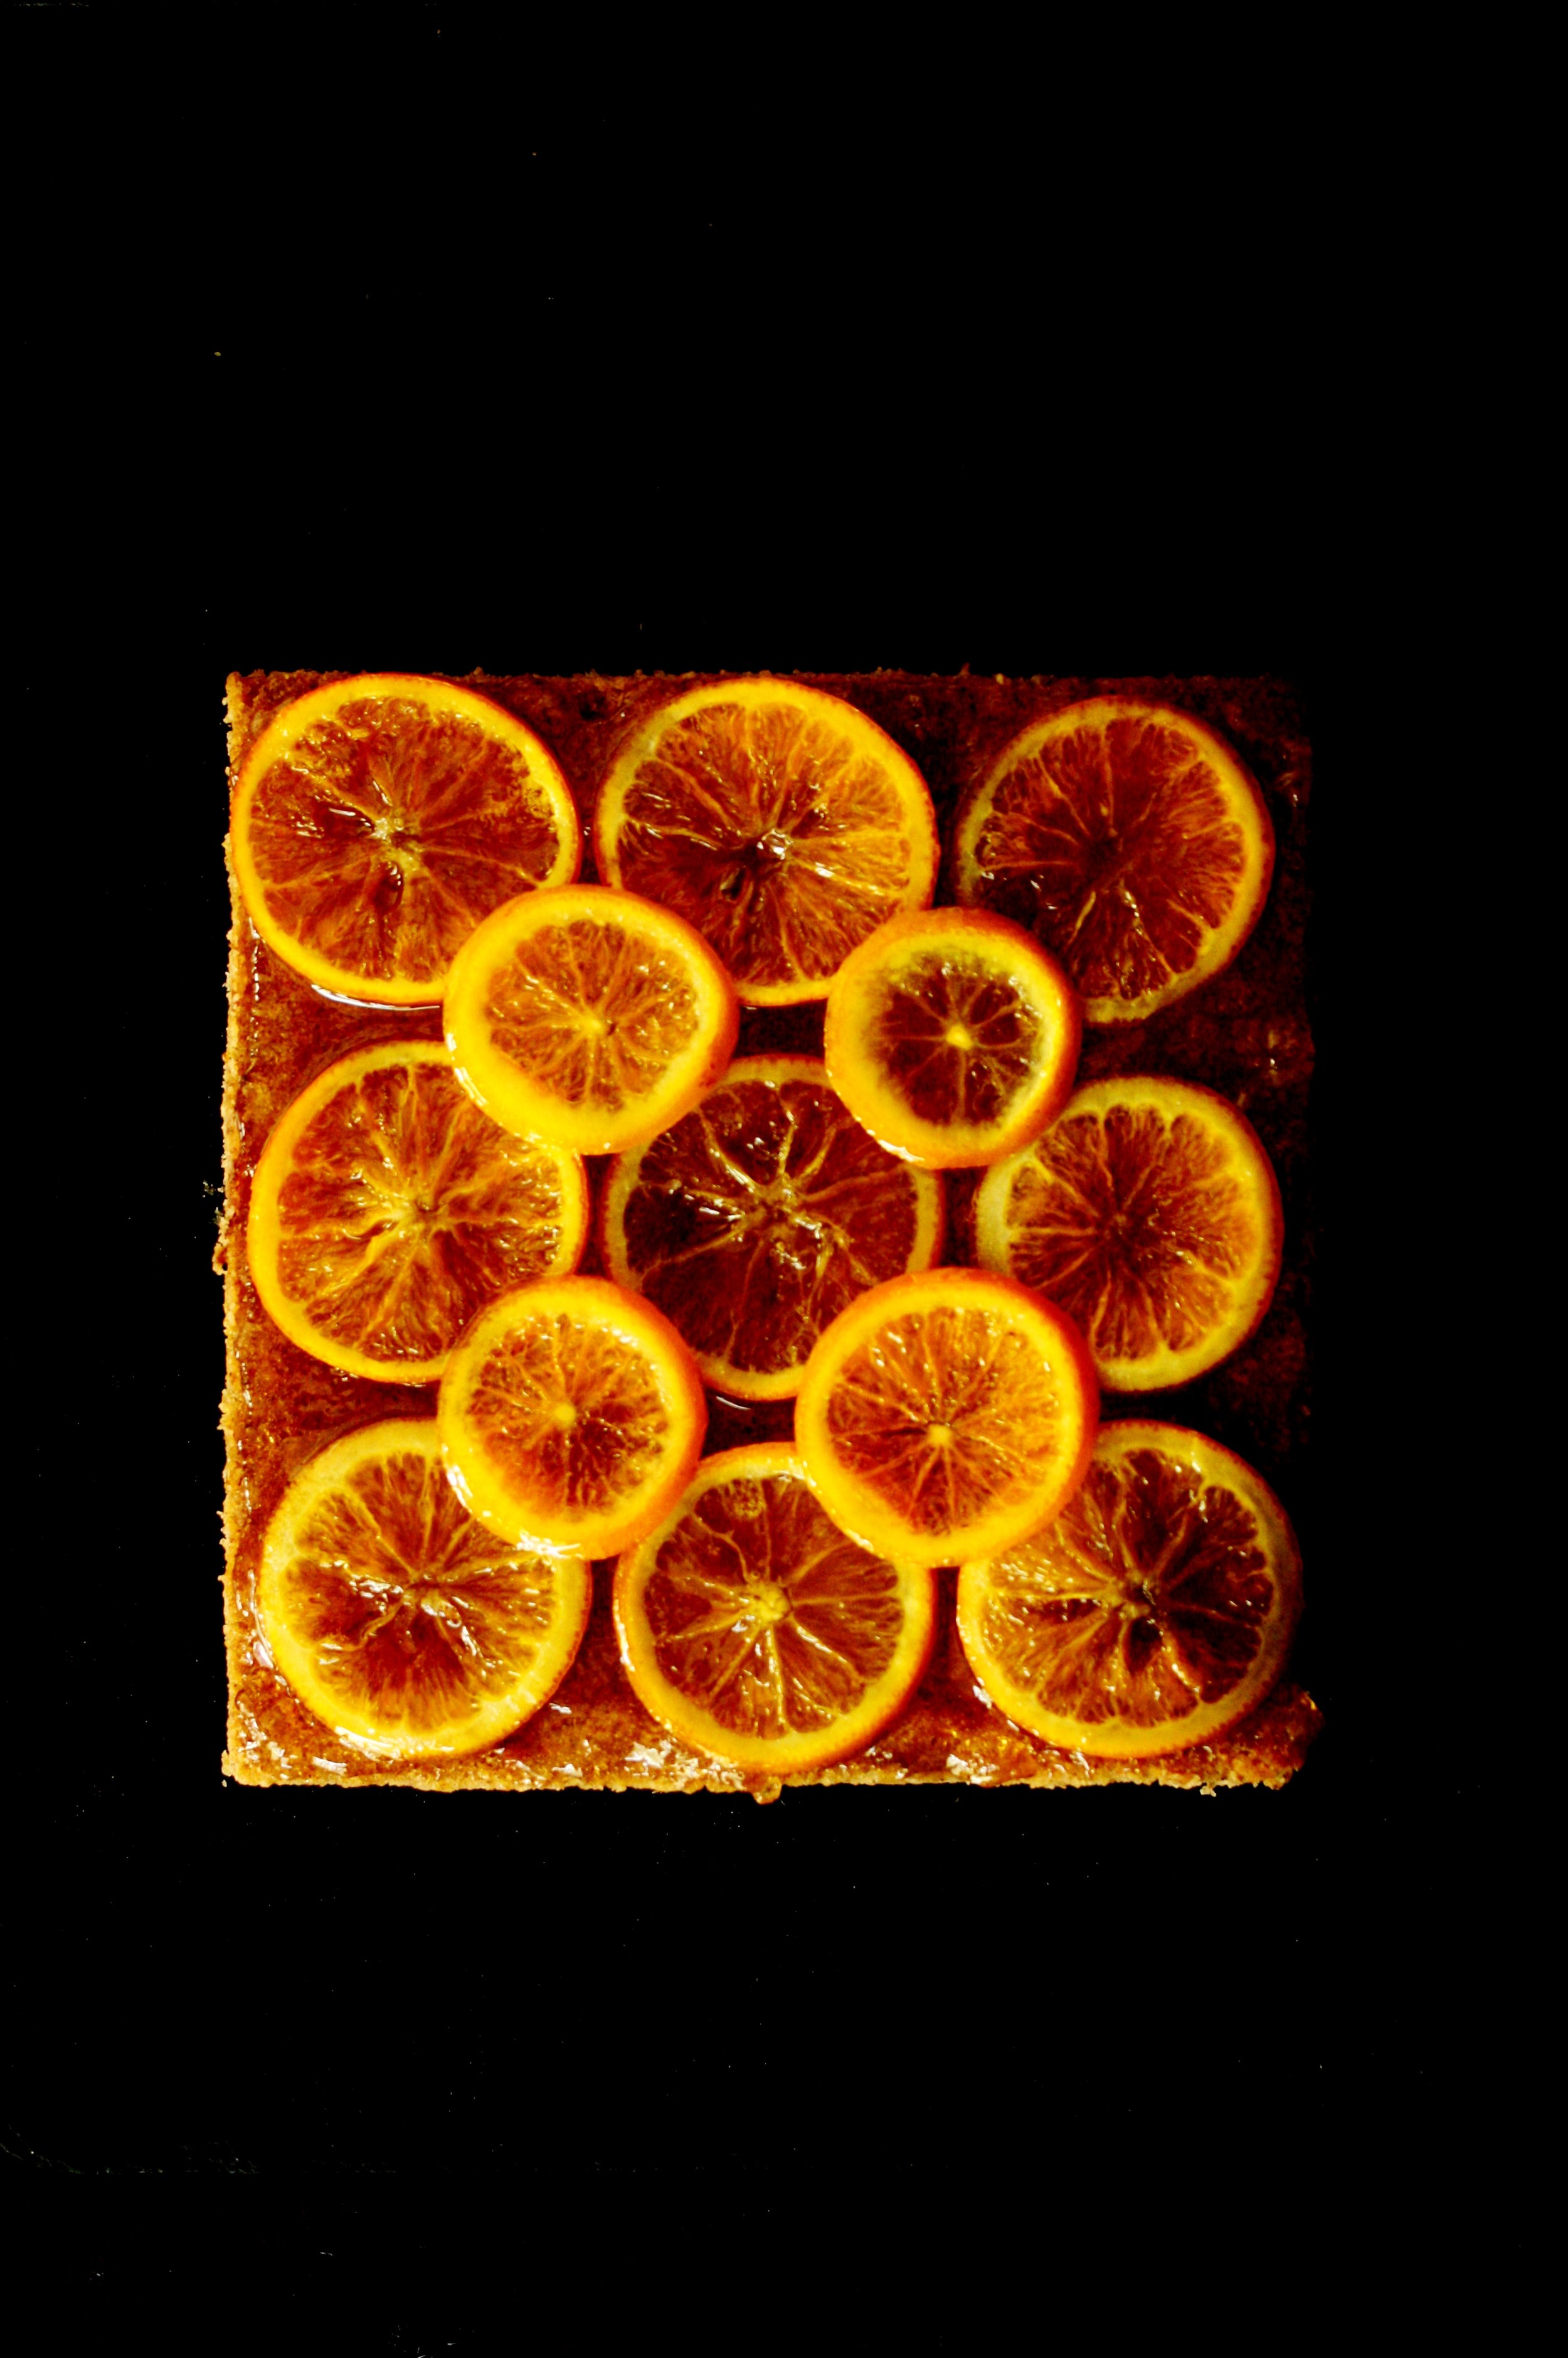
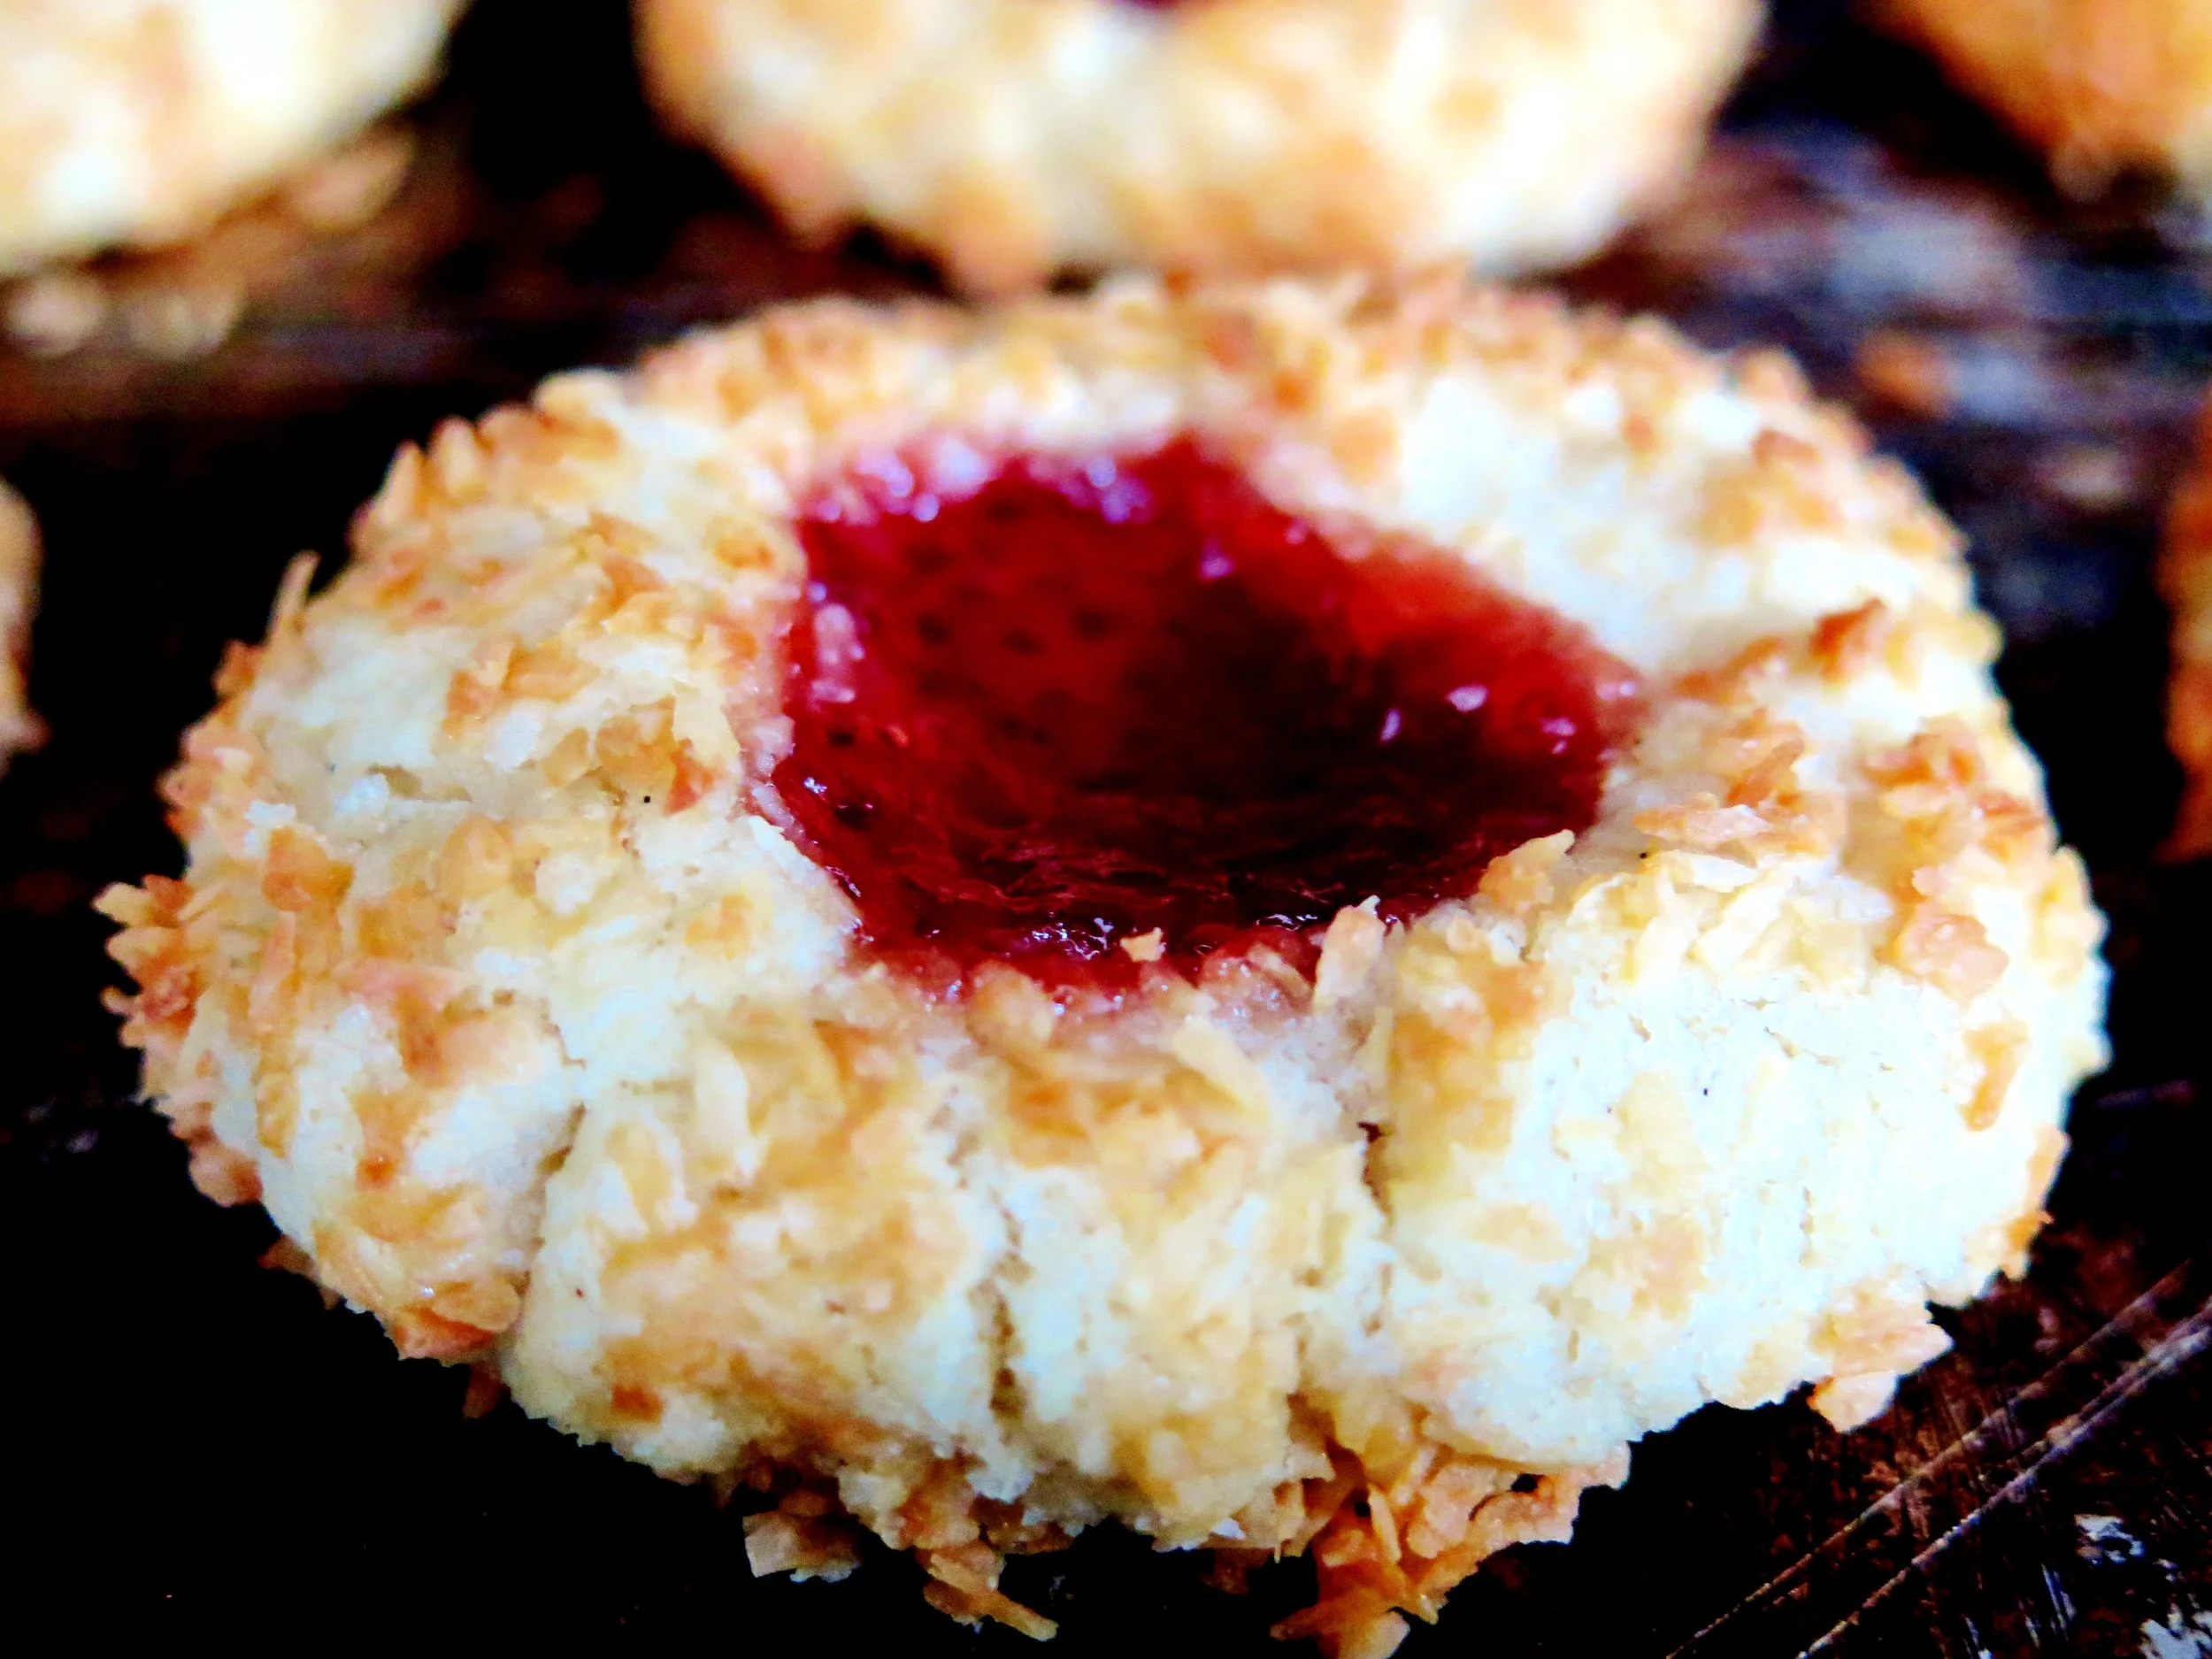
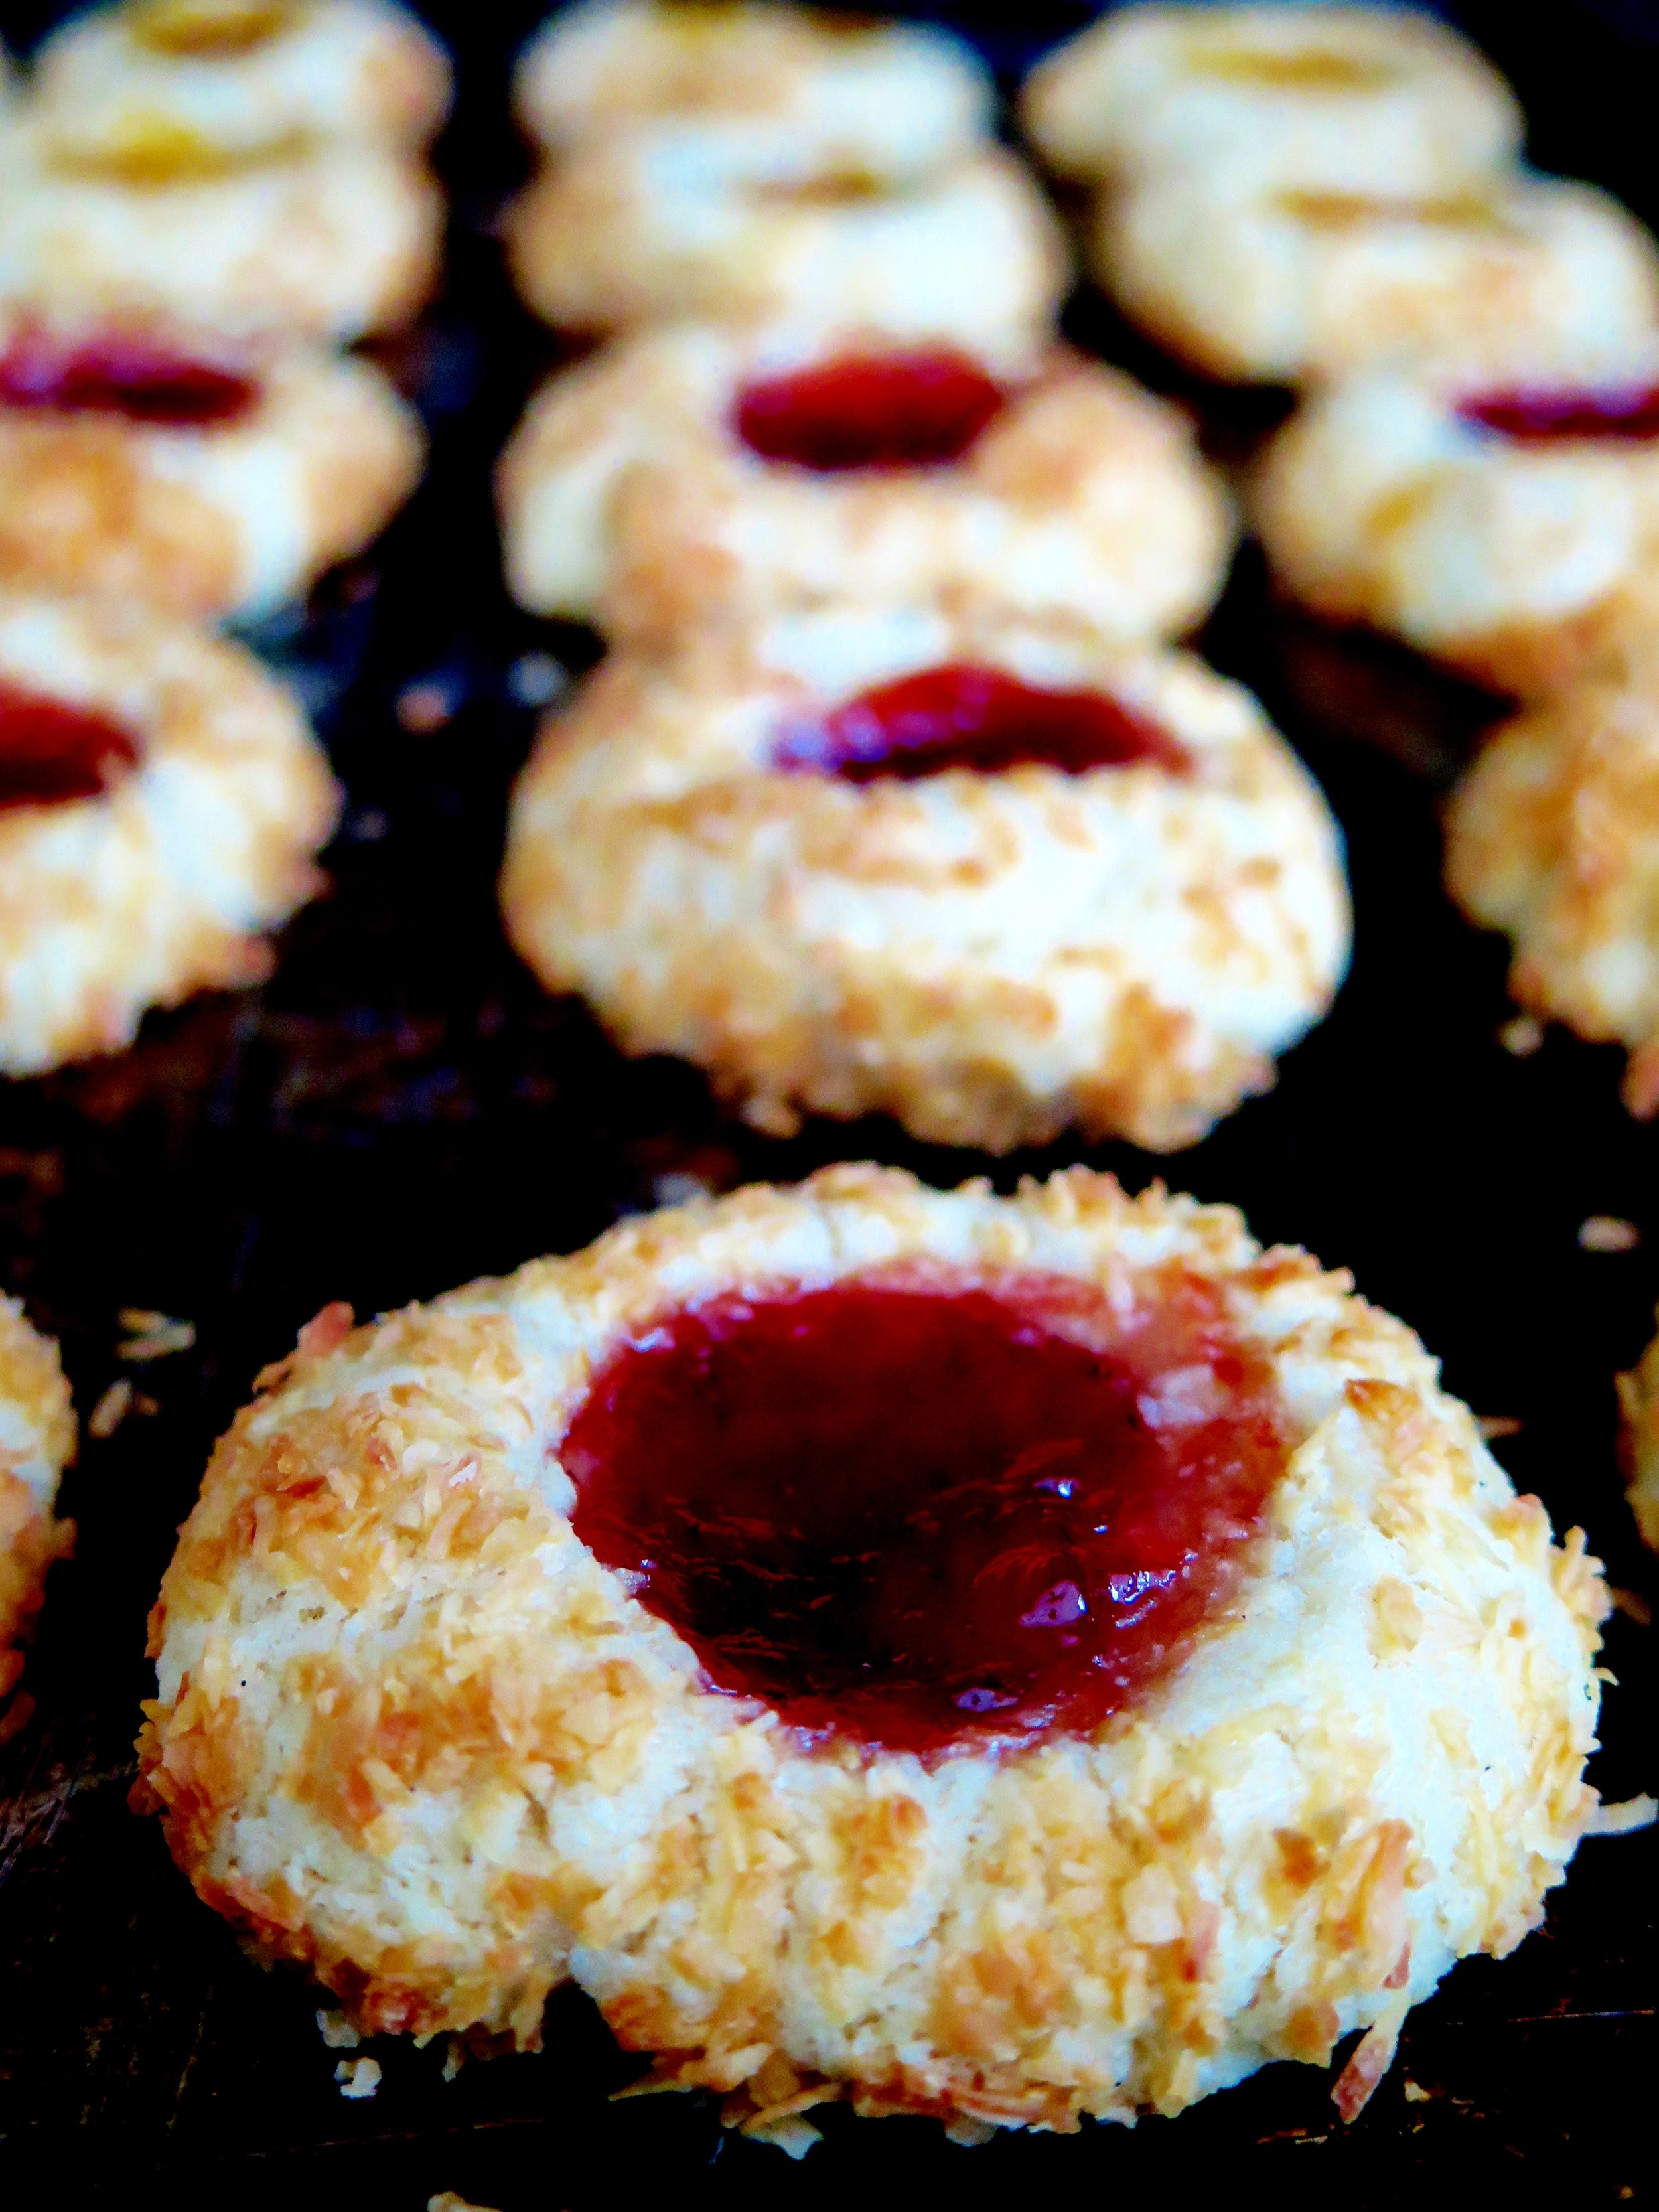
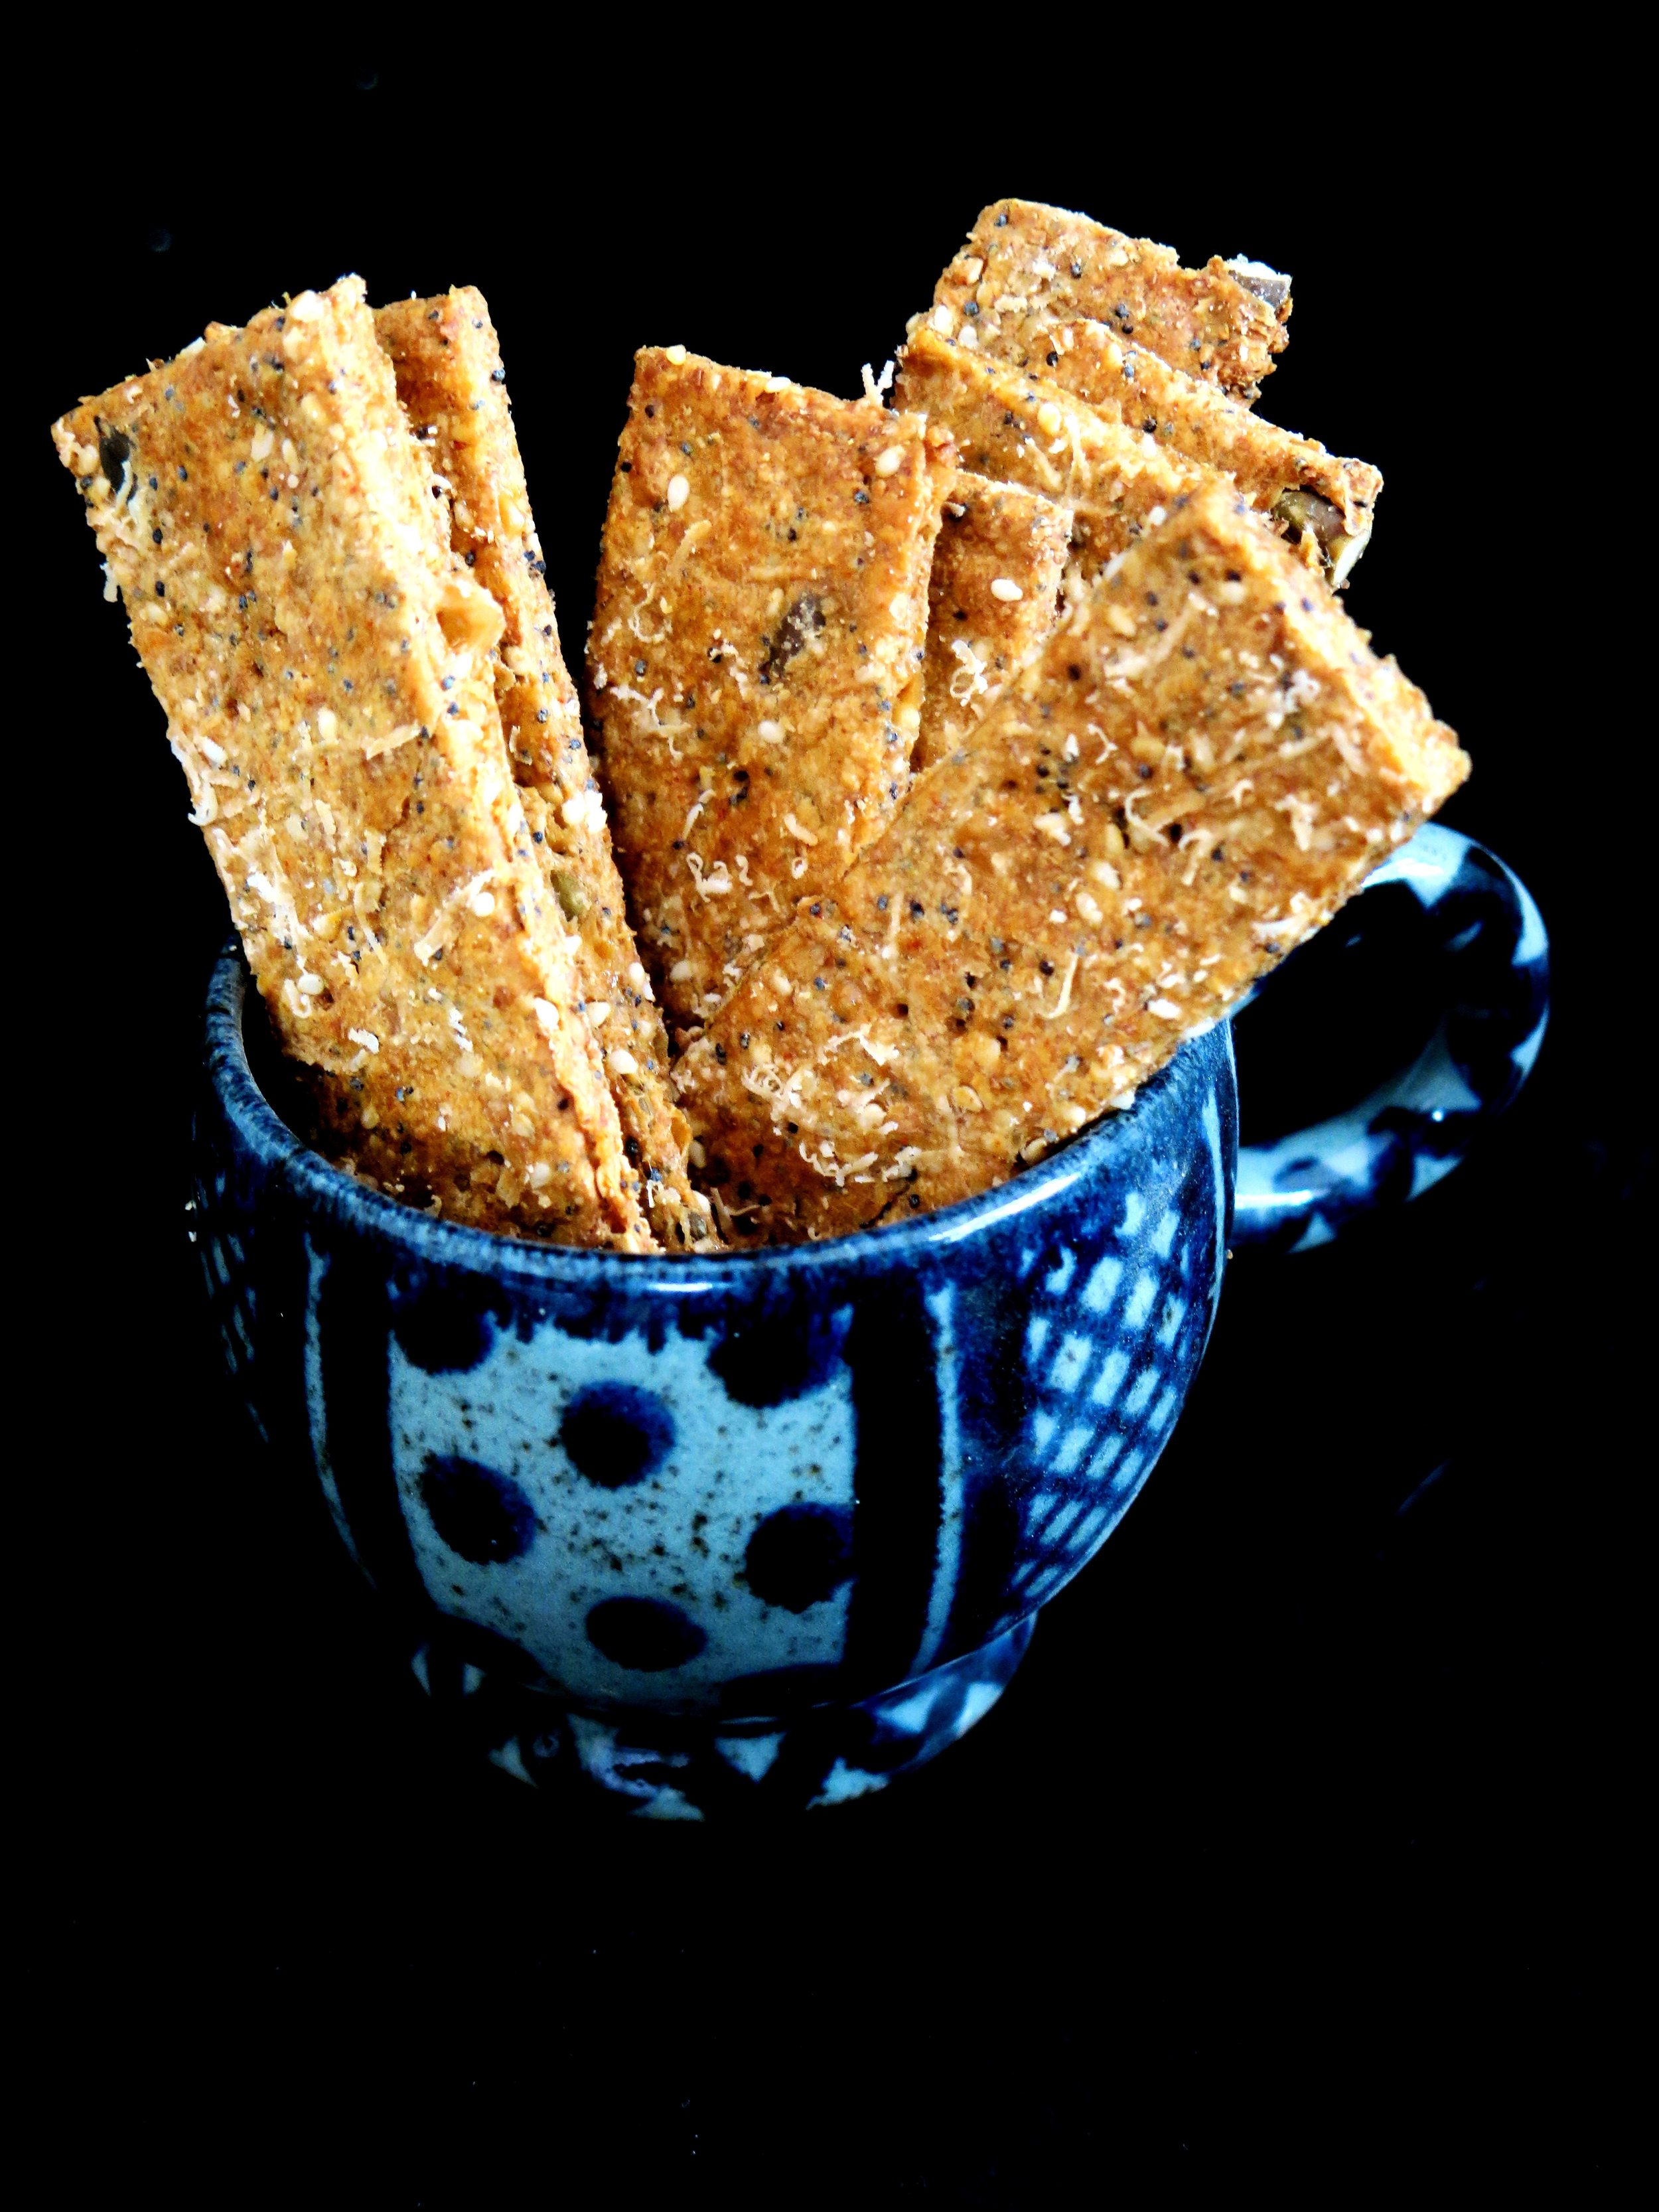
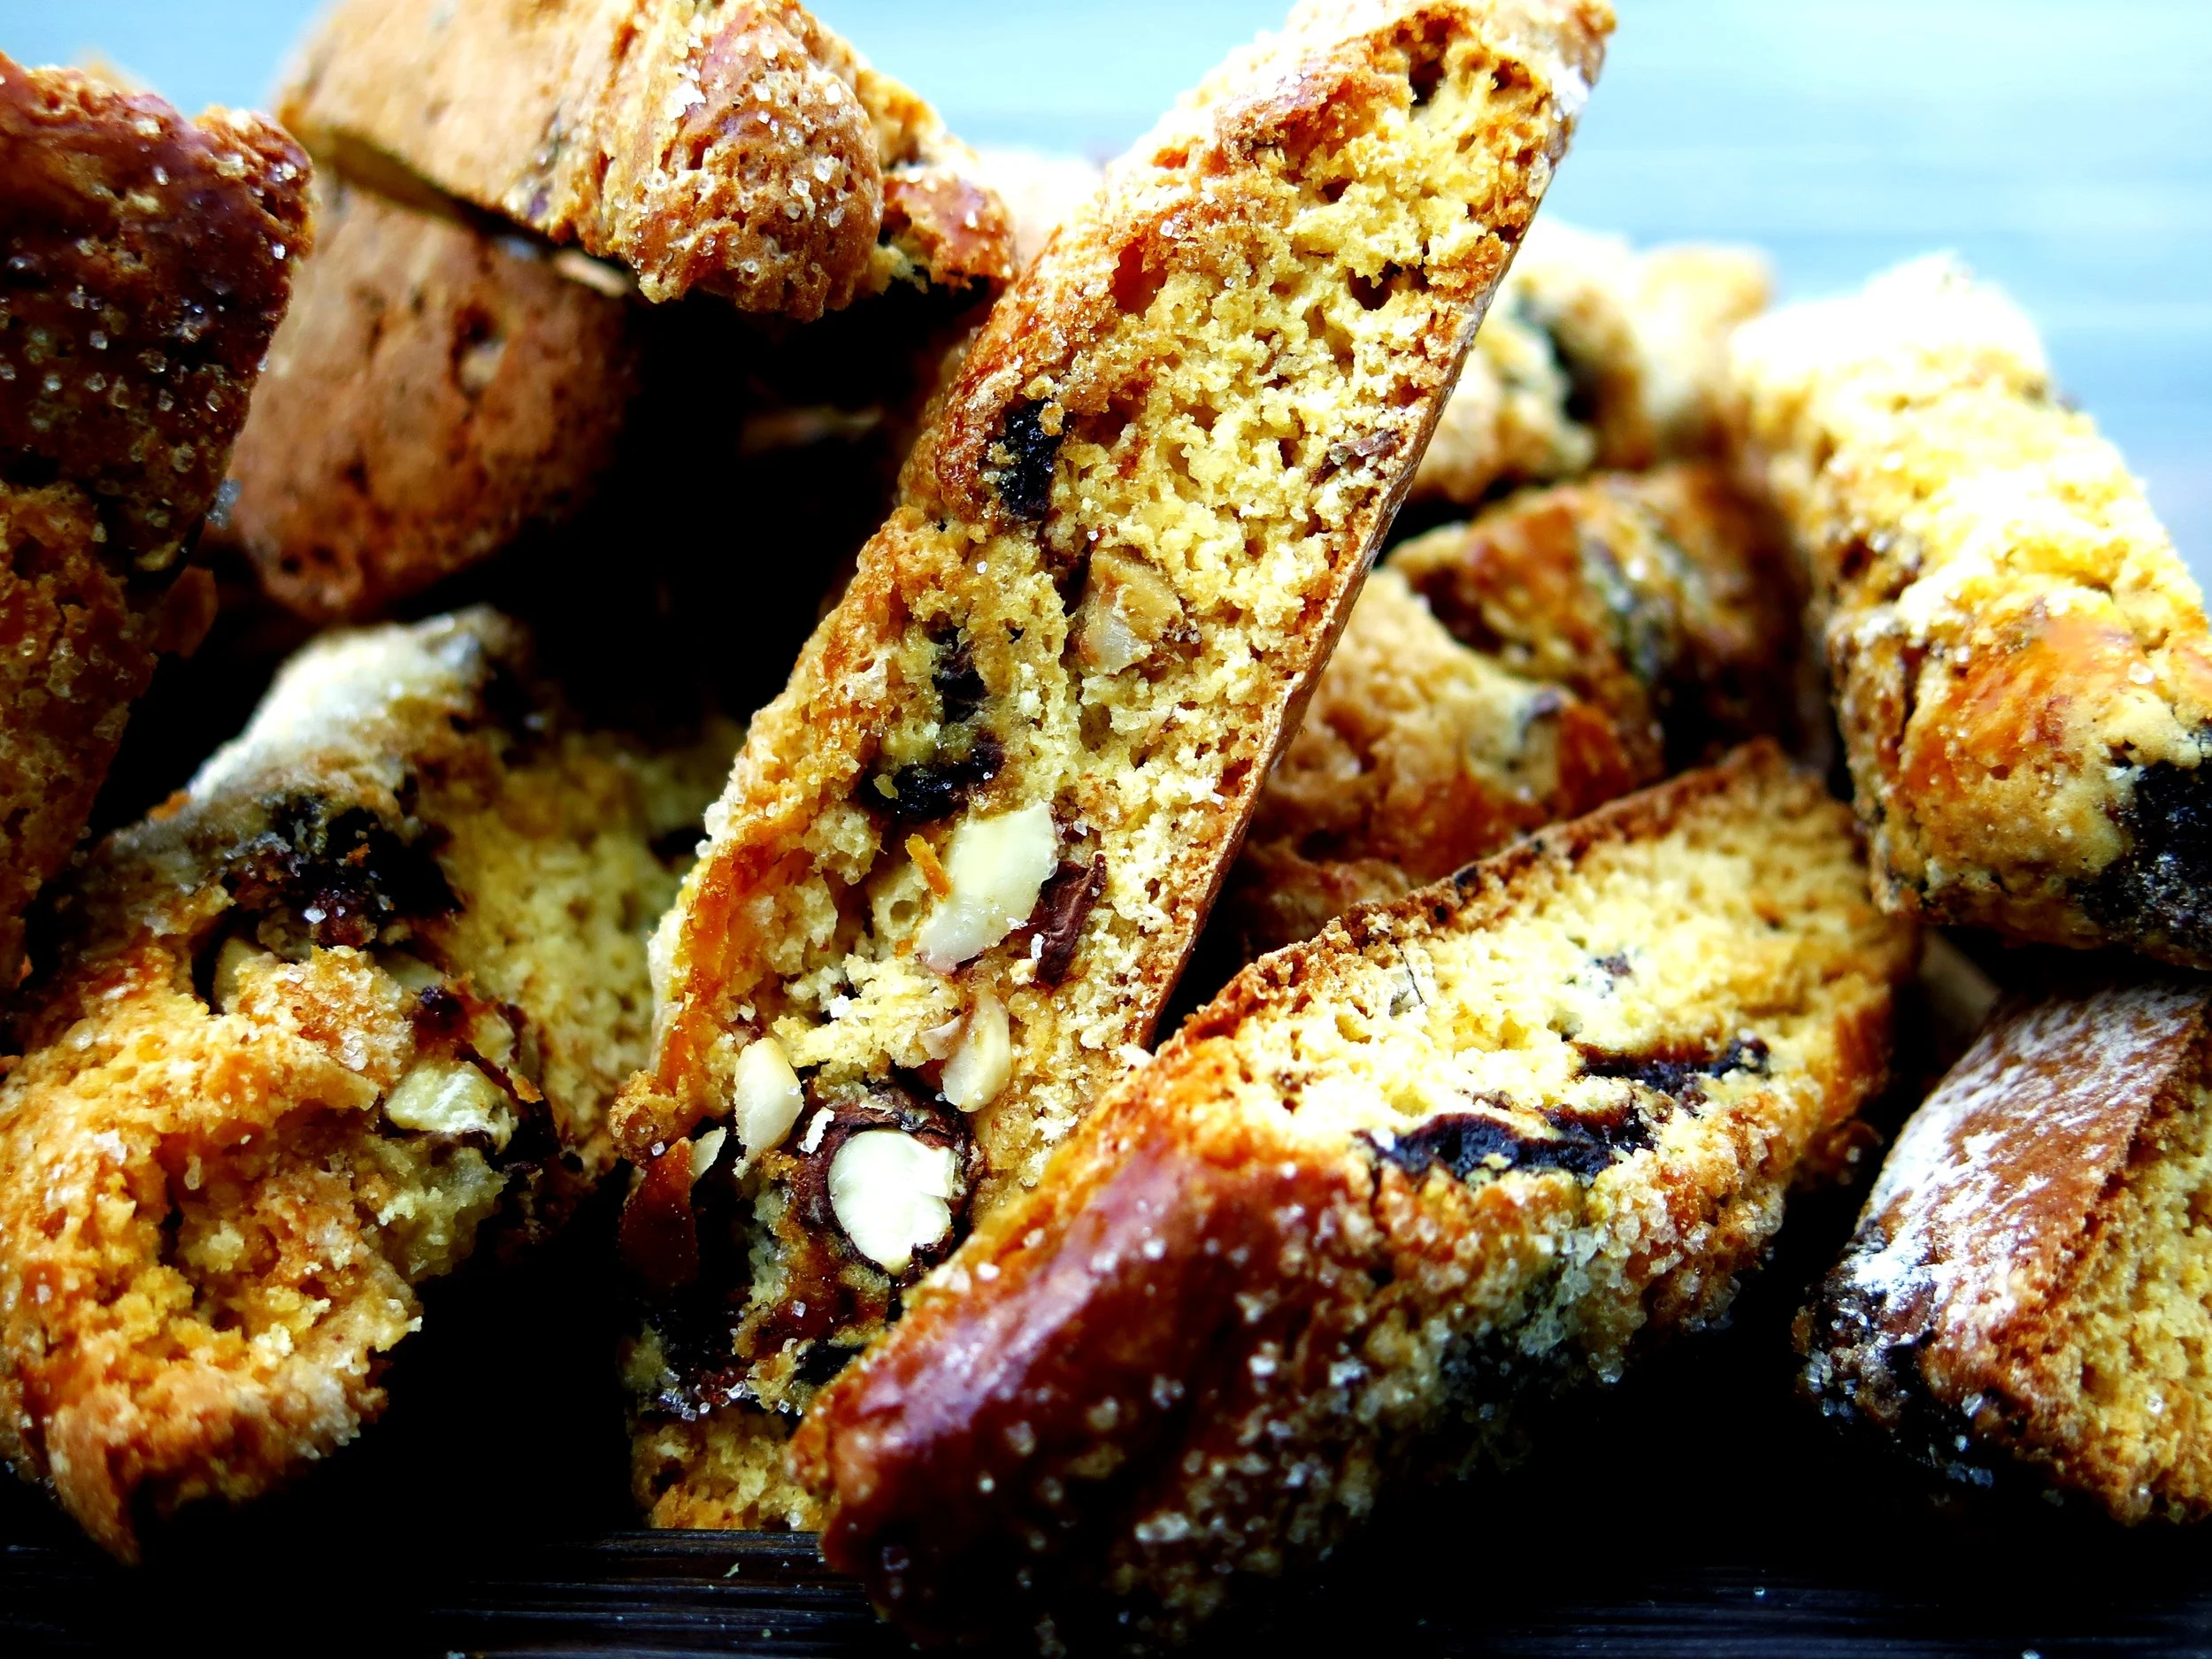
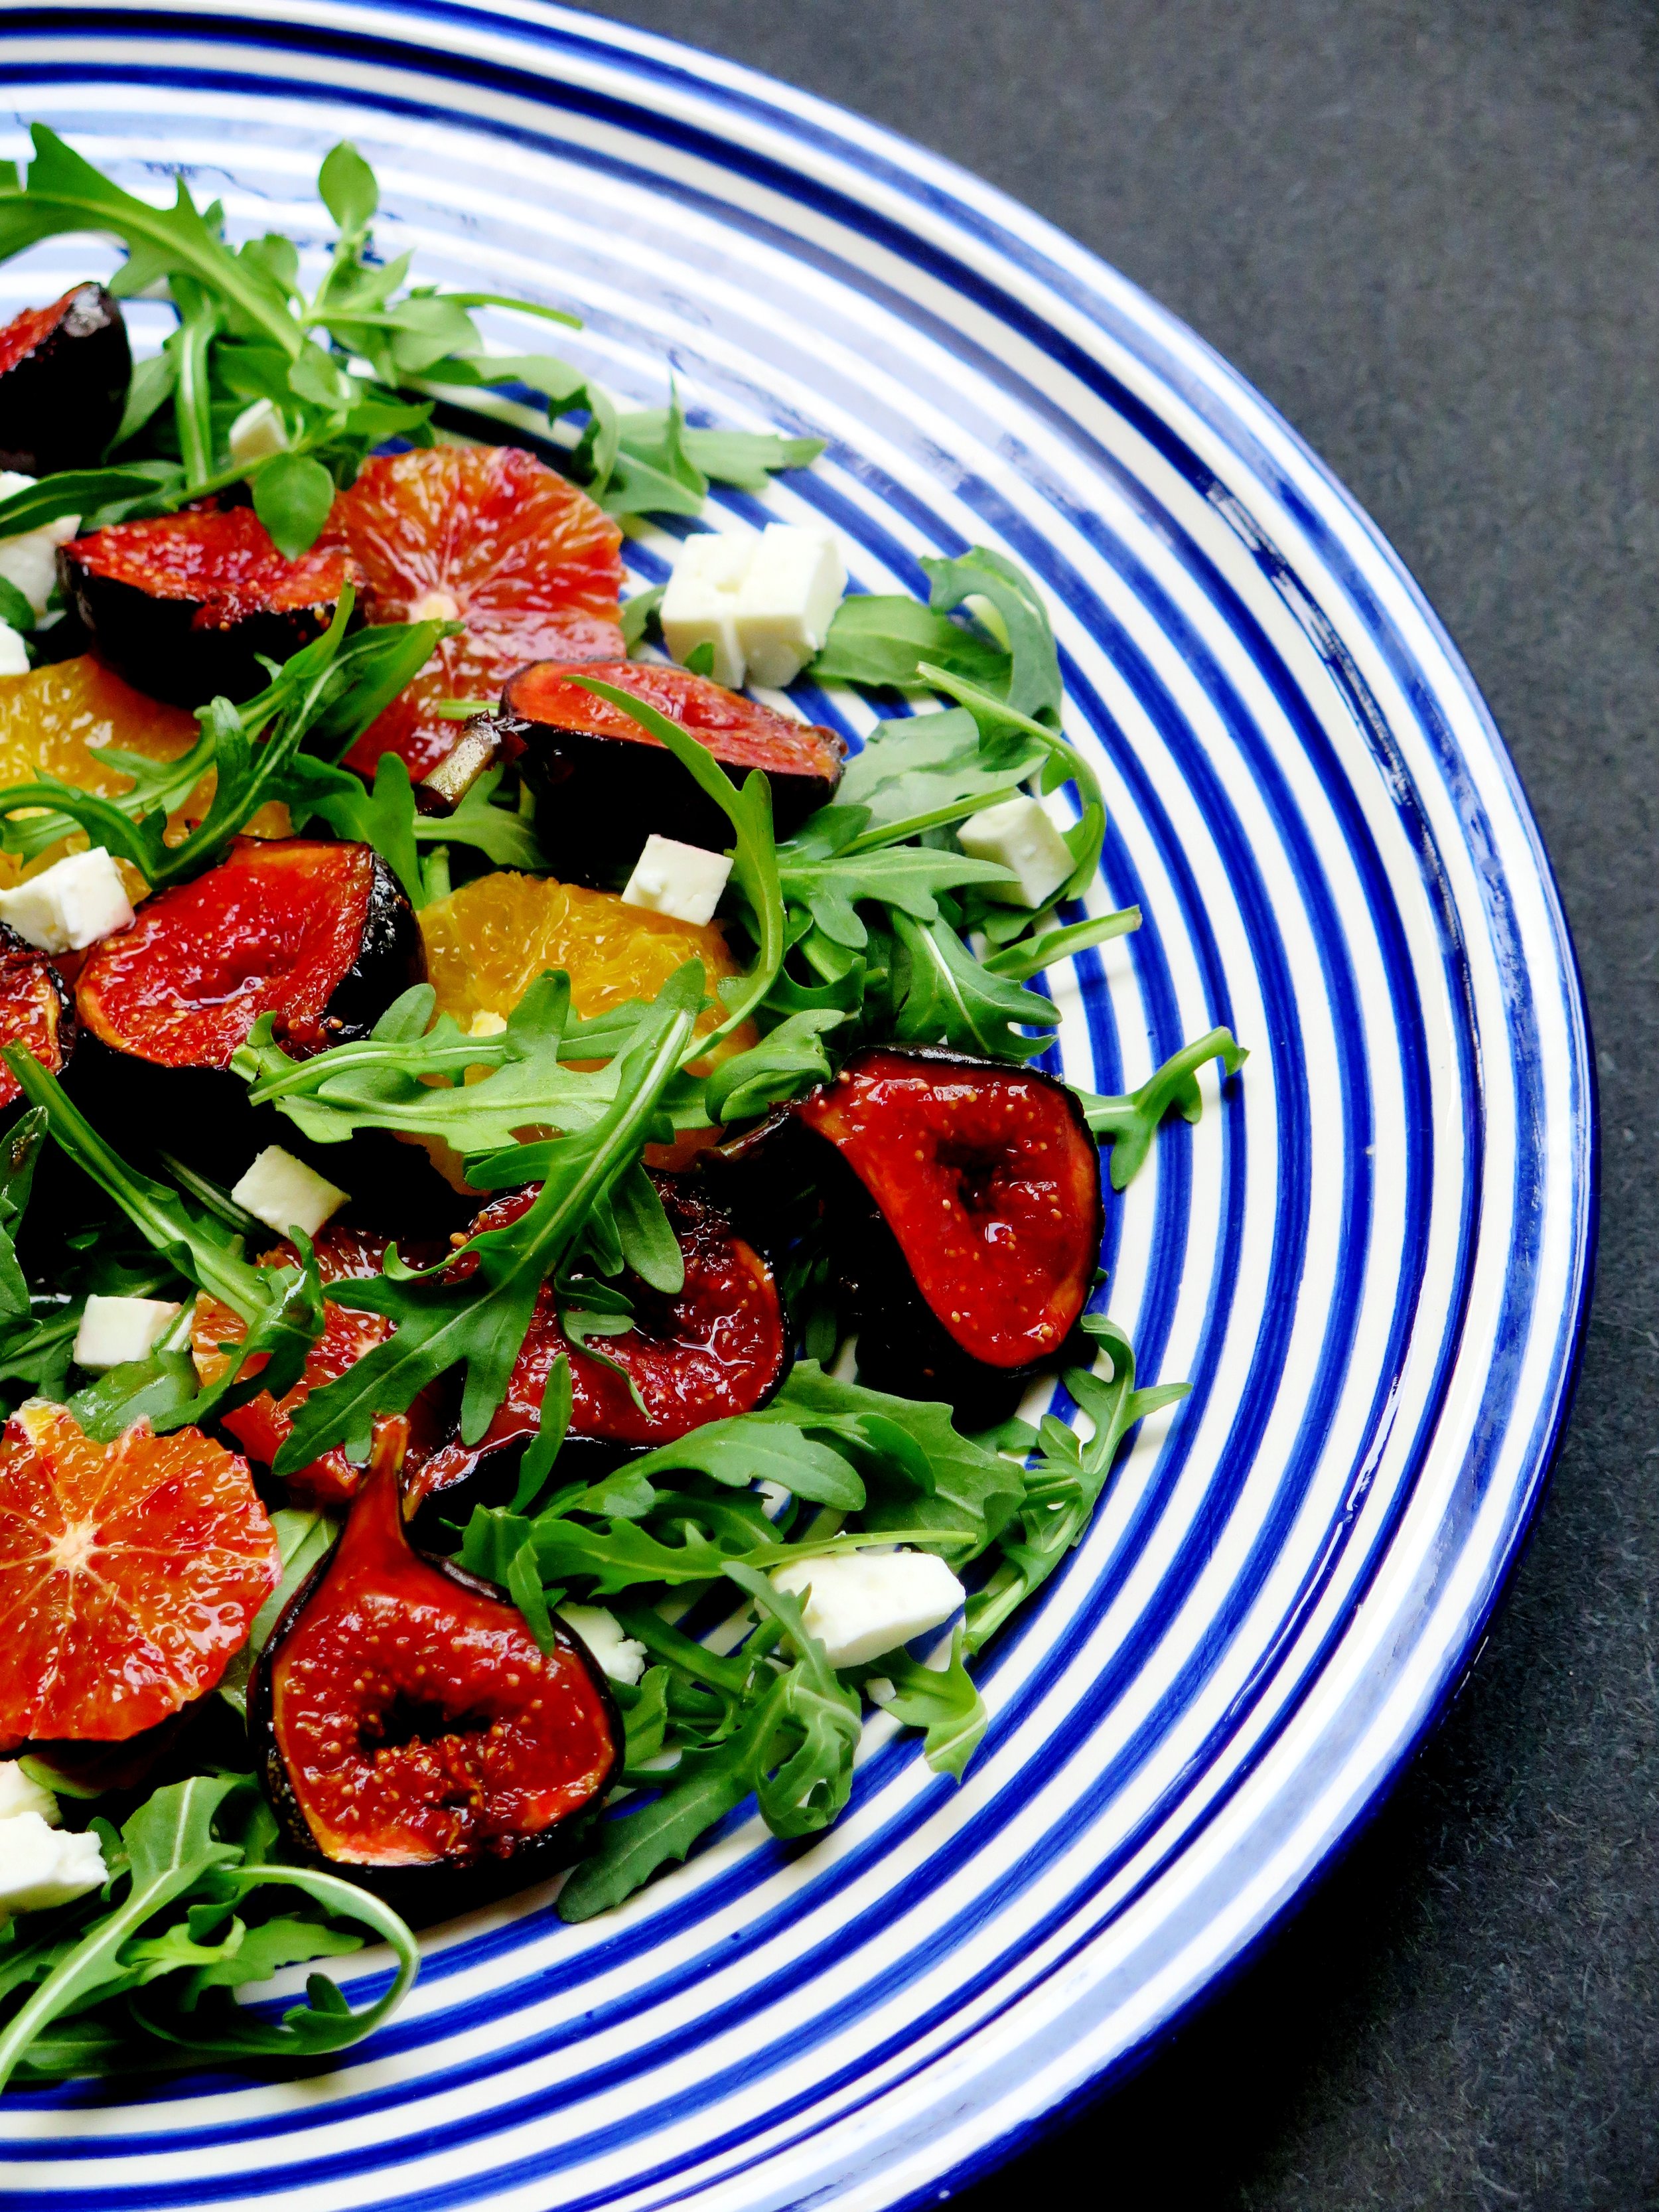
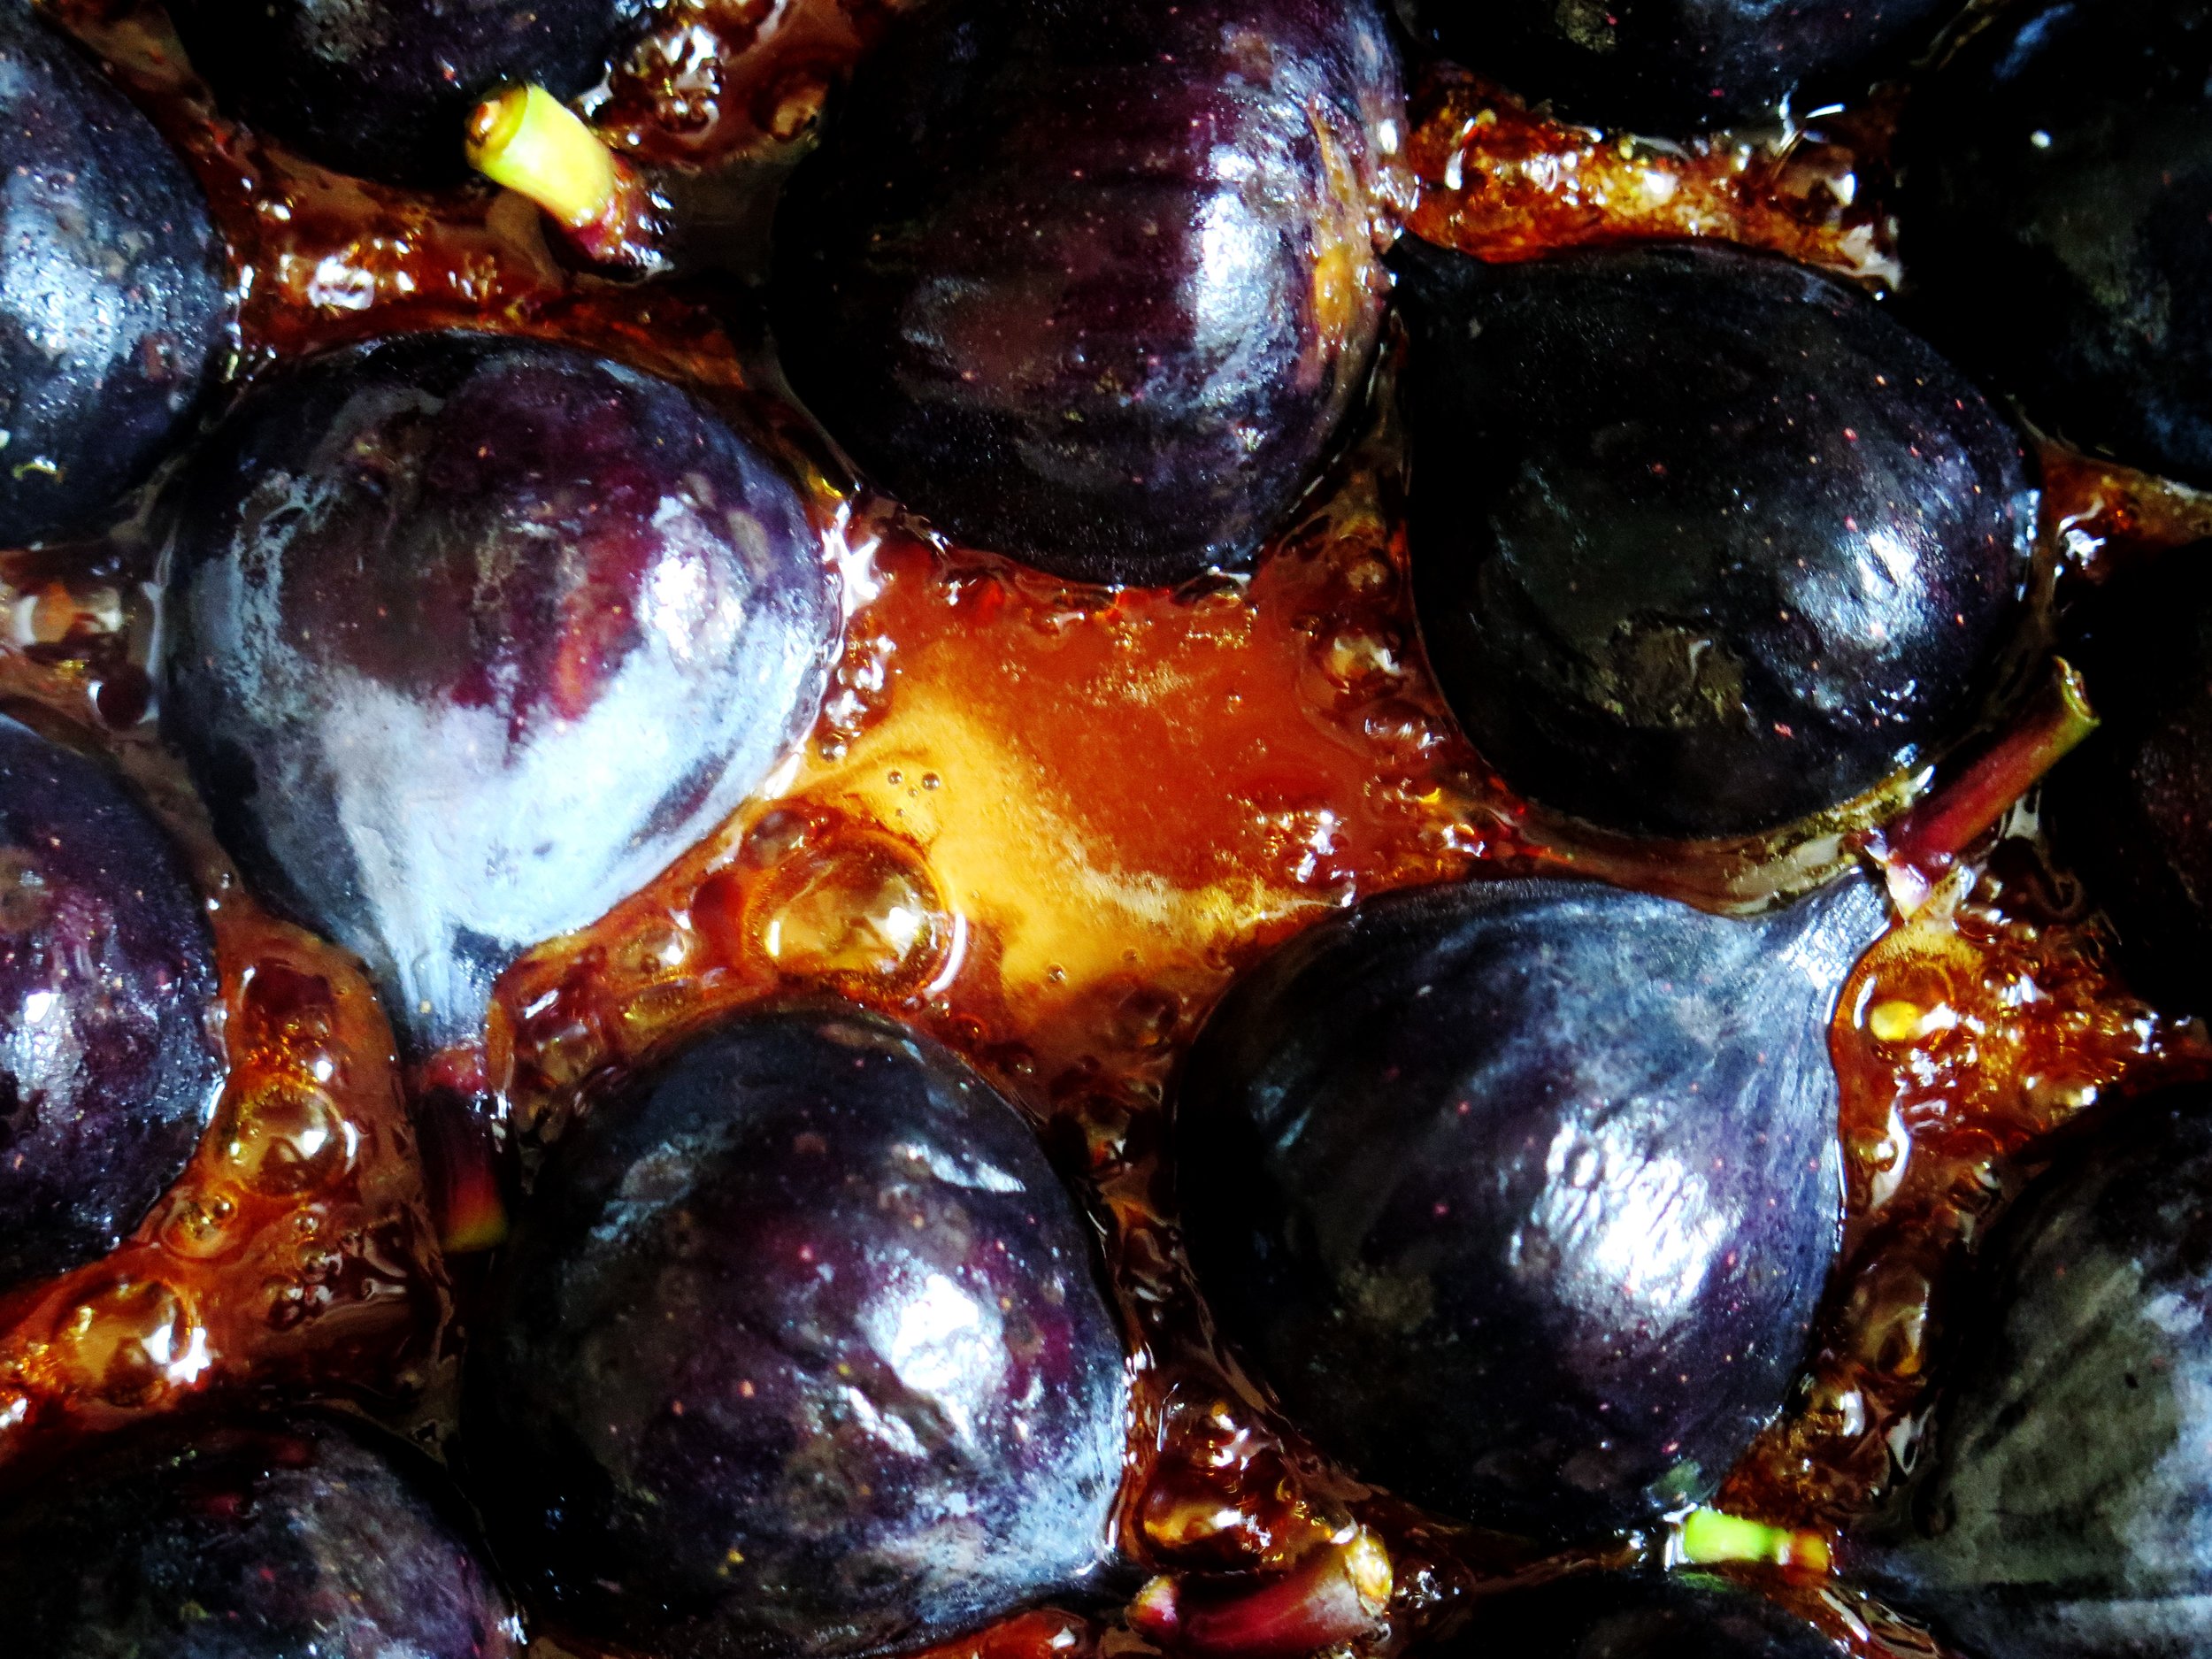
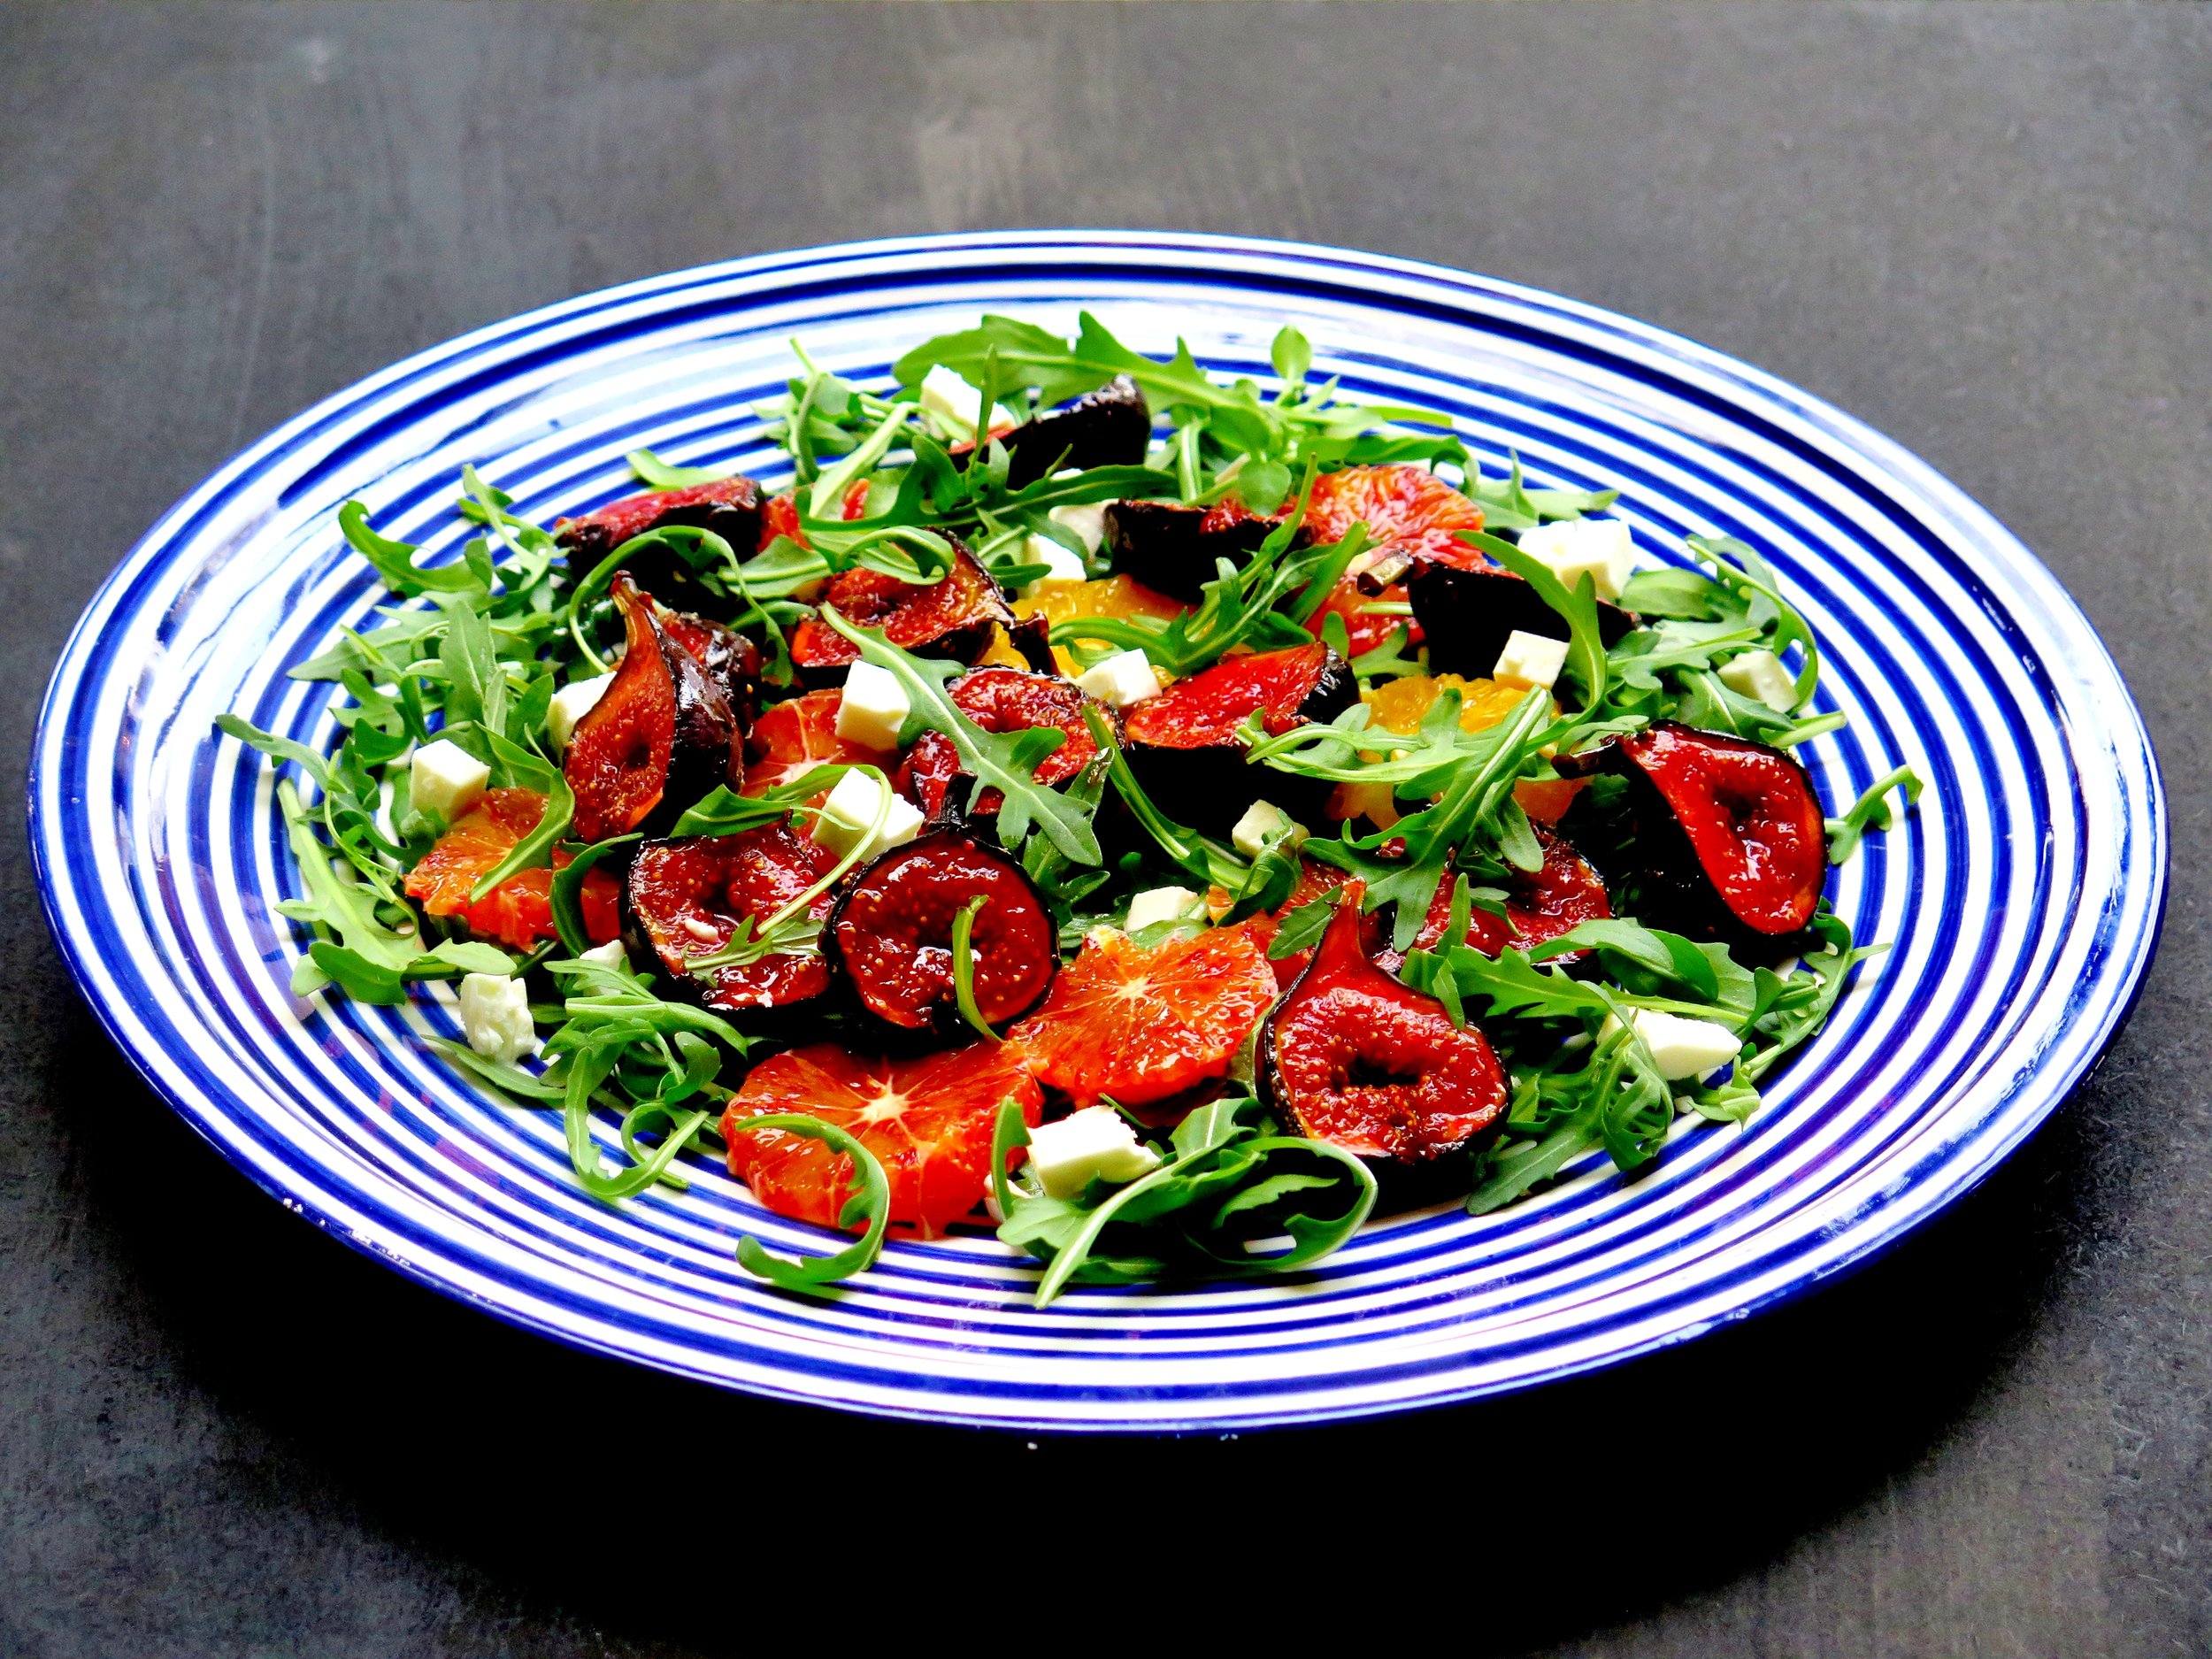
 

Caramelised Fig, Feta, Orange & Rocket Salad - Recipe

Caramelised Fig, Feta, Orange & Rocket Salad - Recipe

Lizards basking in the heat still held by the pale ochre walls scuttled away at my footsteps, and a green shutter creaked in the mild breeze.

Caramelised Fig, Feta, Orange & Rocket Salad - Recipe

The knobbed tree in front stood with its arms filled with waxy green dewdrop-like figs, nodding gently like a recently metamorphosed Ovidian nymph.   I reached to tug at a branch, and a cluster melted softly off it.  The pink juices dripping down my fingers, I gathered two handfuls and made my companion fill his pockets with the good intention of bringing some back for others to try.

Caramelised Fig, Feta, Orange & Rocket Salad - Recipe

As so often happens, the thoughtful food gift didn’t reach its destination (I ate it), but I went back the next day, and the next.  I was converted from someone with a slight aversion to figs to an obsessive.

Caramelised Fig, Feta, Orange & Rocket Salad - Recipe

This salad combines the earthy lusciousness of figs with caramel to add depth and sticky sweetness to the dish.  This contrasts with the fresh tanginess of oranges – blood oranges are currently in season so are fantastic to use – and the saltiness of the feta and peppery rocket leaves.

Caramelised Fig, Feta, Orange & Rocket Salad - Recipe

The dressing is fresh, sweet, salty and savoury, tying all the elements together.

Caramelised Fig, Feta, Orange & Rocket Salad - Recipe


Ingredients  Serves 2 (or 4, as a side)

8 figs, halved

50g caster sugar

juice of 1 orange

2 tbsp olive oil

2 tsp lemon juice

2 cloves garlic

1 tbsp pomegranate molasses (substitute with balsamic vinegar, if necessary)

¼ tsp salt

2 oranges, peeled and sliced into 1/2 cm discs

100g rocket

100g feta, sliced into ½ cm cubes


Method

  1. Place a shallow frying pan over a medium/high heat, pour in sugar and allow to melt, stirring occasionally to prevent it from burning.
  2. Place halved figs face down in the molten sugar and cook in the caramel for 2 minutes. Turn them over to cook for a further 1 minute.  Remove from pan and place on serving plate.
  3. For the dressing, pour the orange juice, olive oil, garlic, salt, and pomegranate molasses into the caramelised sugar pan and stir until the caramelised sugar has dissolved into the liquid. Remove from stove and stir in lemon juice.
  4. Scatter rocket, orange slices and feta on the serving plate with the figs and drizzle with the dressing.

Caramelised Fig, Feta, Orange & Rocket Salad - Recipe

Inspired by Ottolenghi

Caramelised Fig, Feta, Orange & Rocket Salad - Recipe

Comment