Viewing entries in
Petit Fours

Candied Ginger & Orange Hazelnut Biscotti - Recipe

2 Comments

Candied Ginger & Orange Hazelnut Biscotti - Recipe

IMG_0144.jpg

Candied Ginger & Orange Hazelnut Biscotti - Recipe 
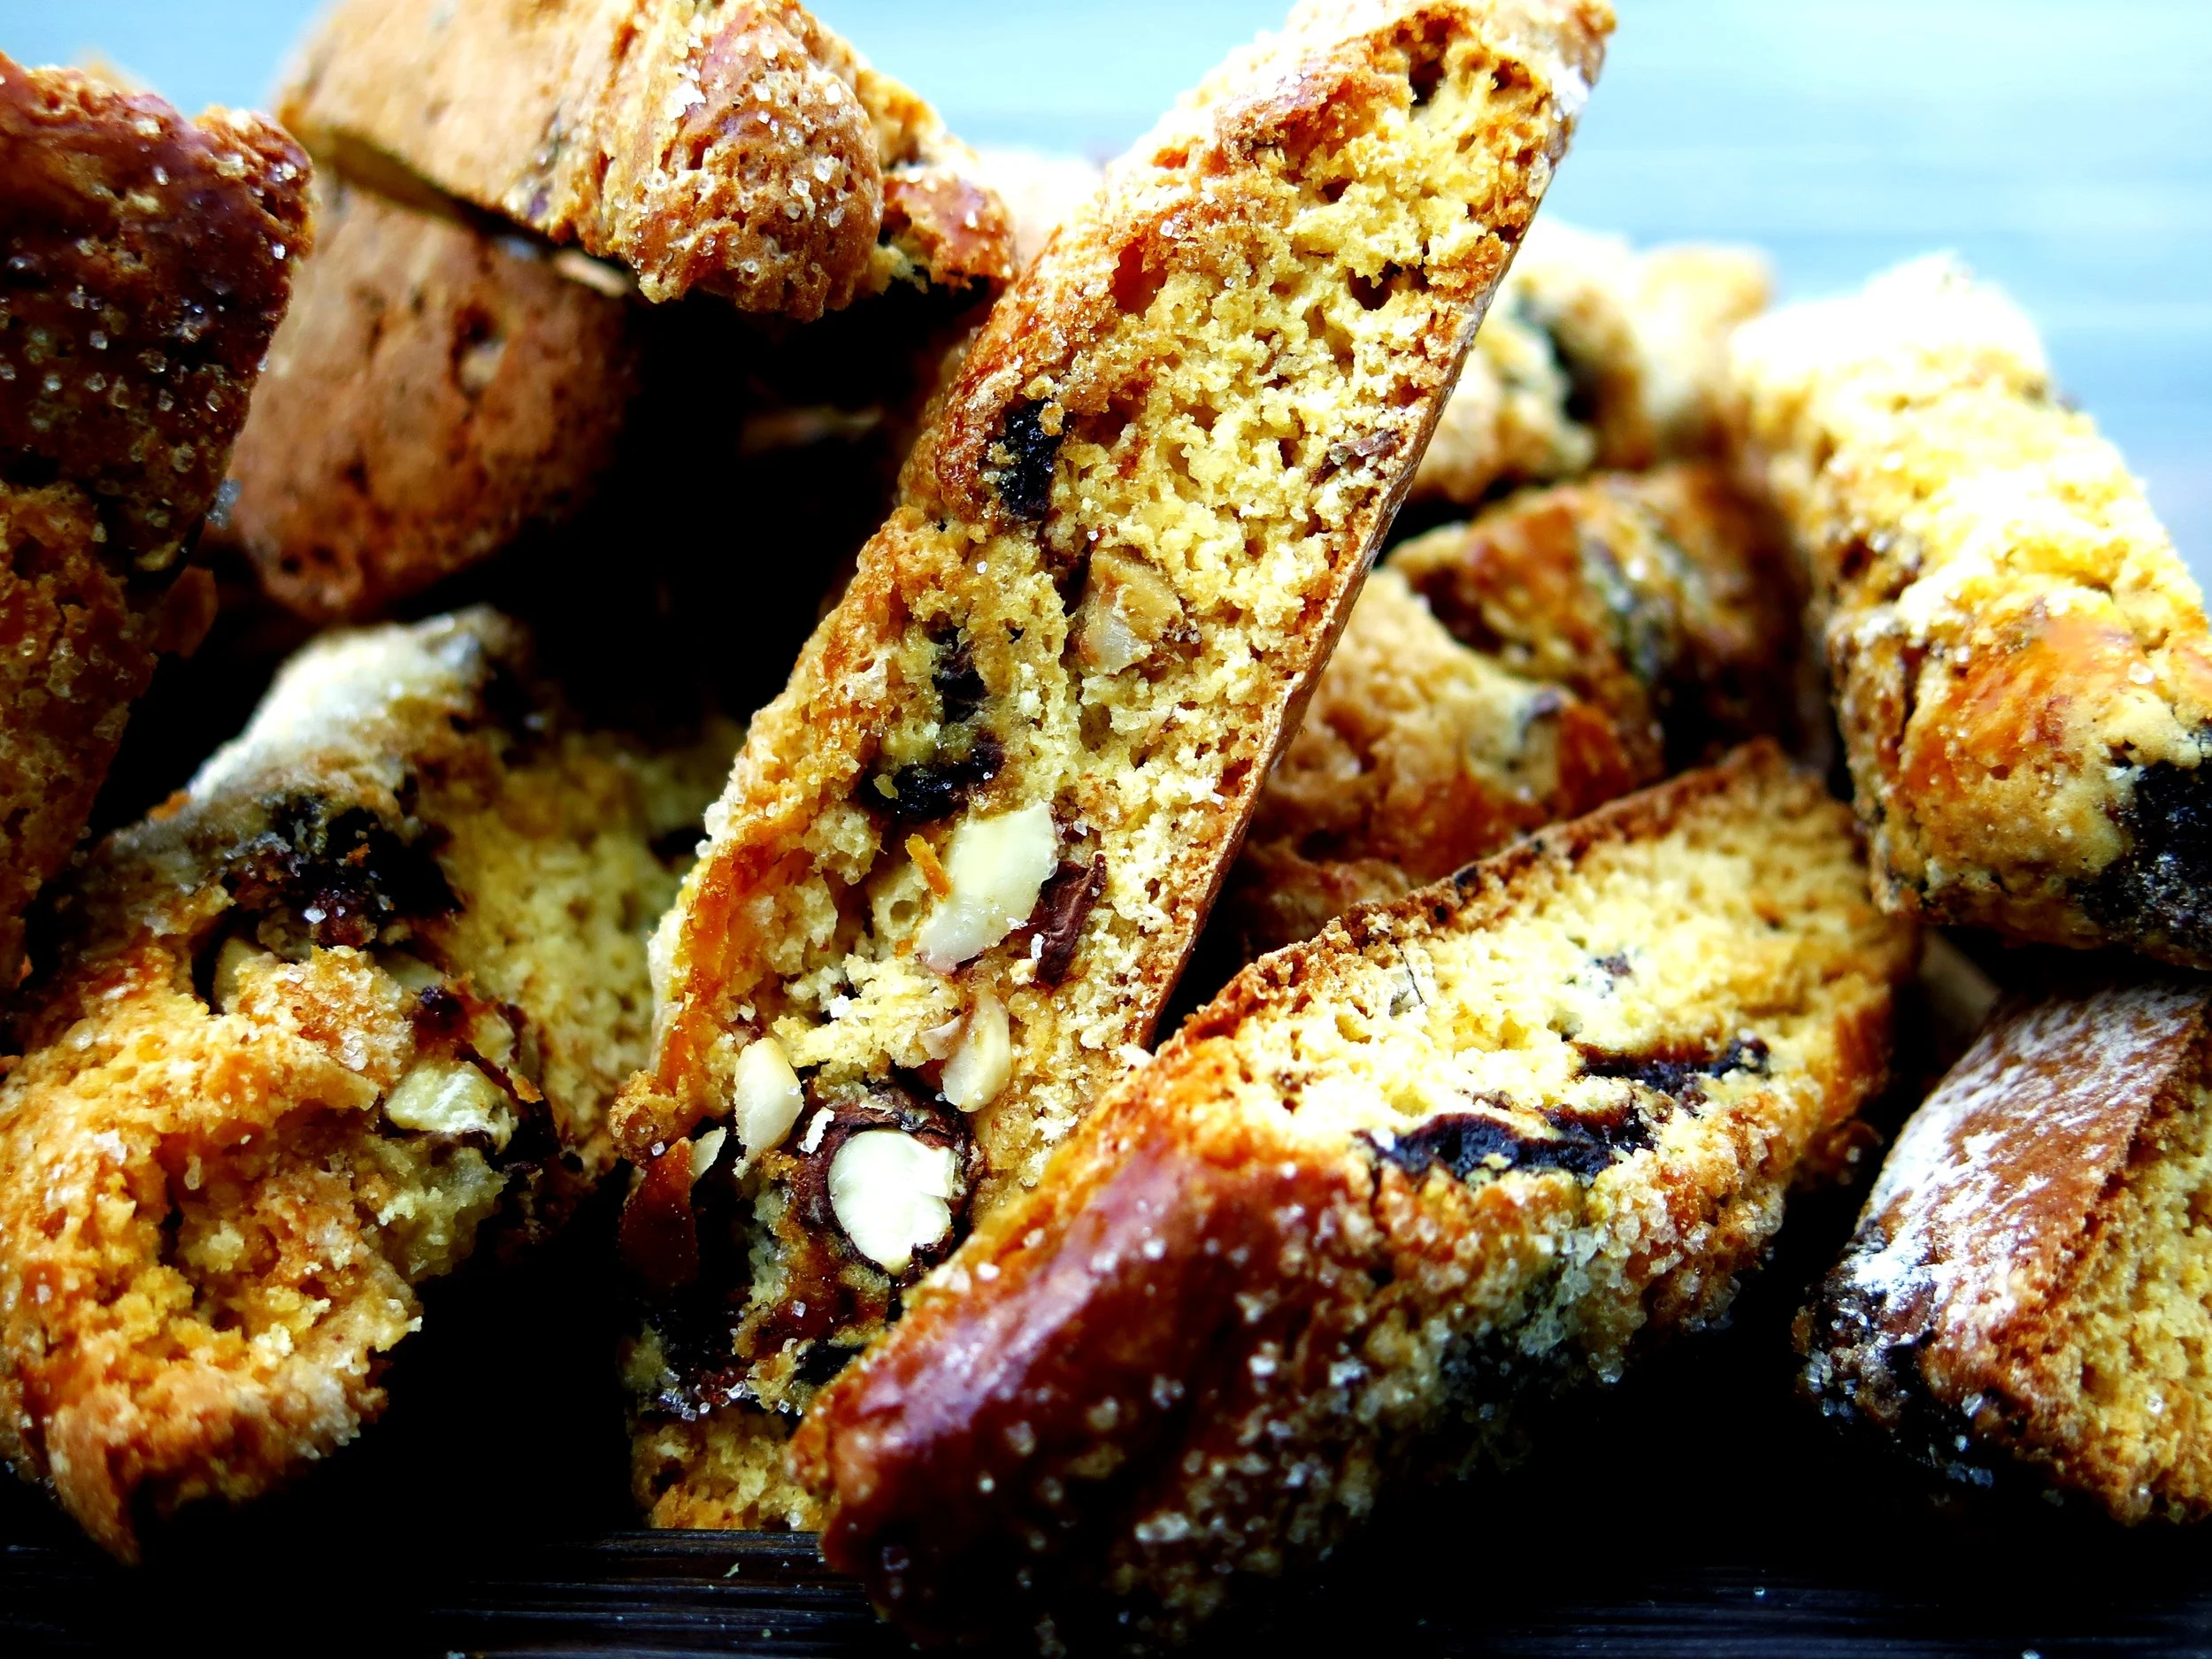
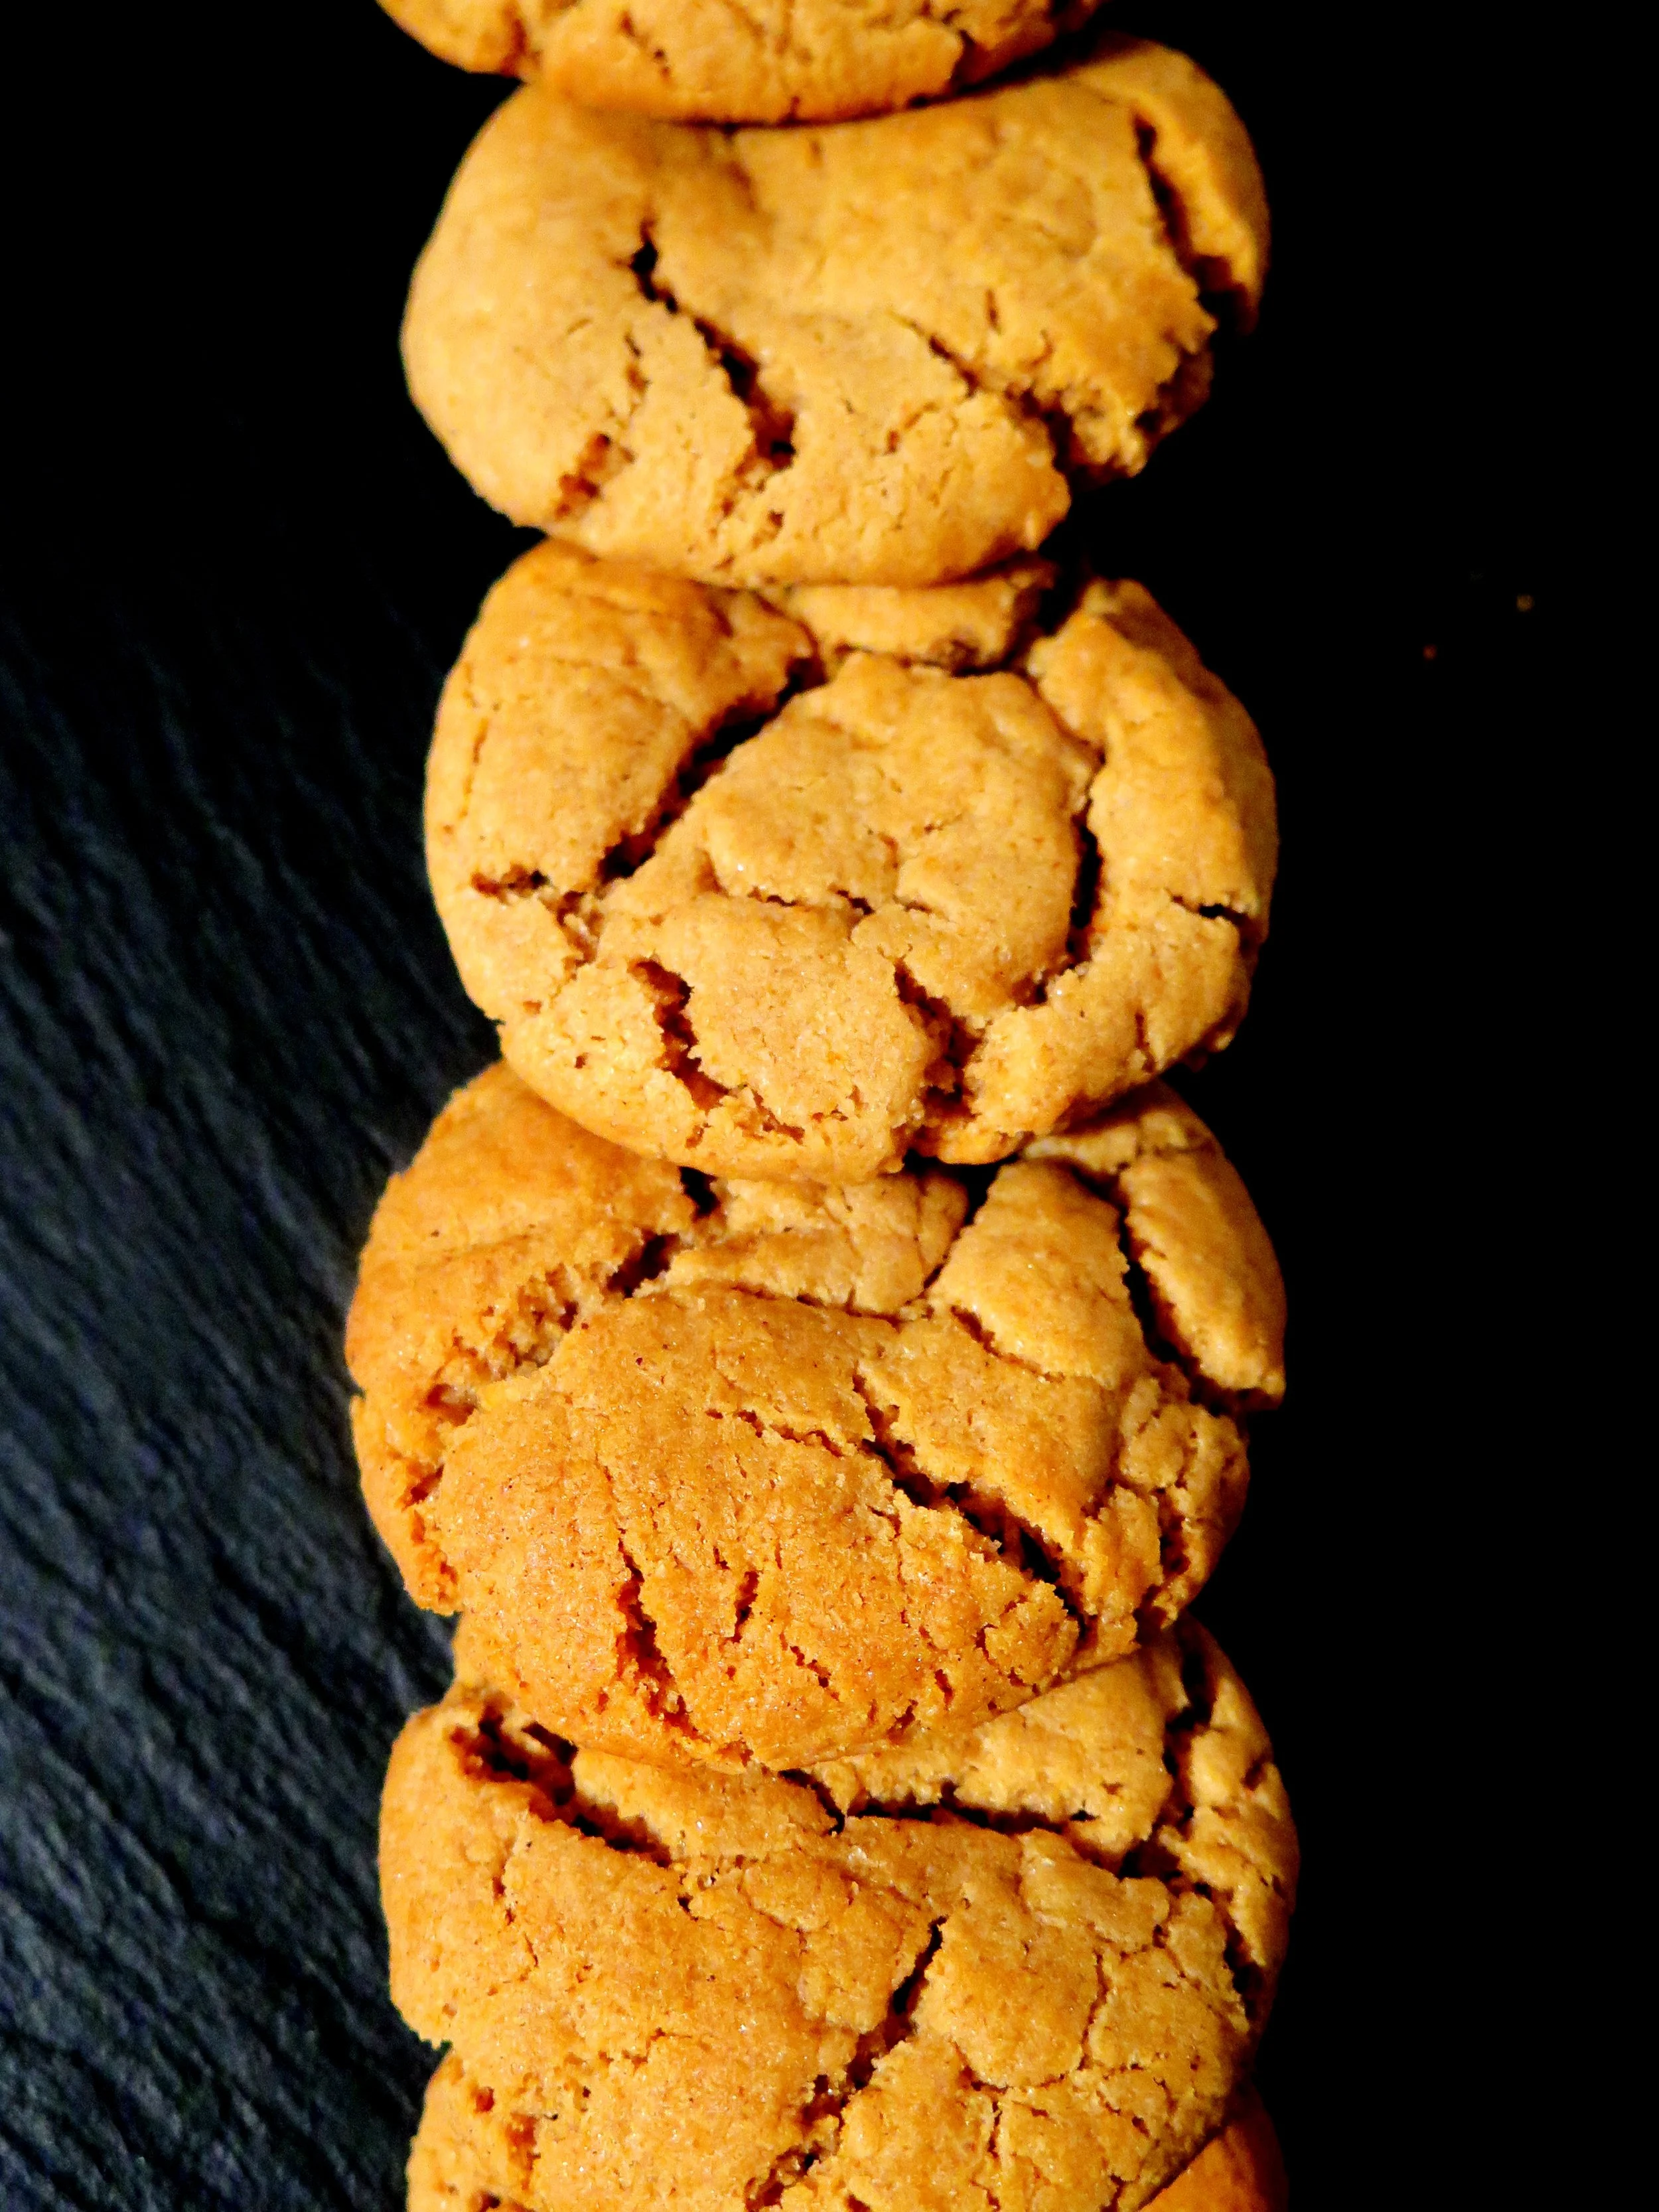
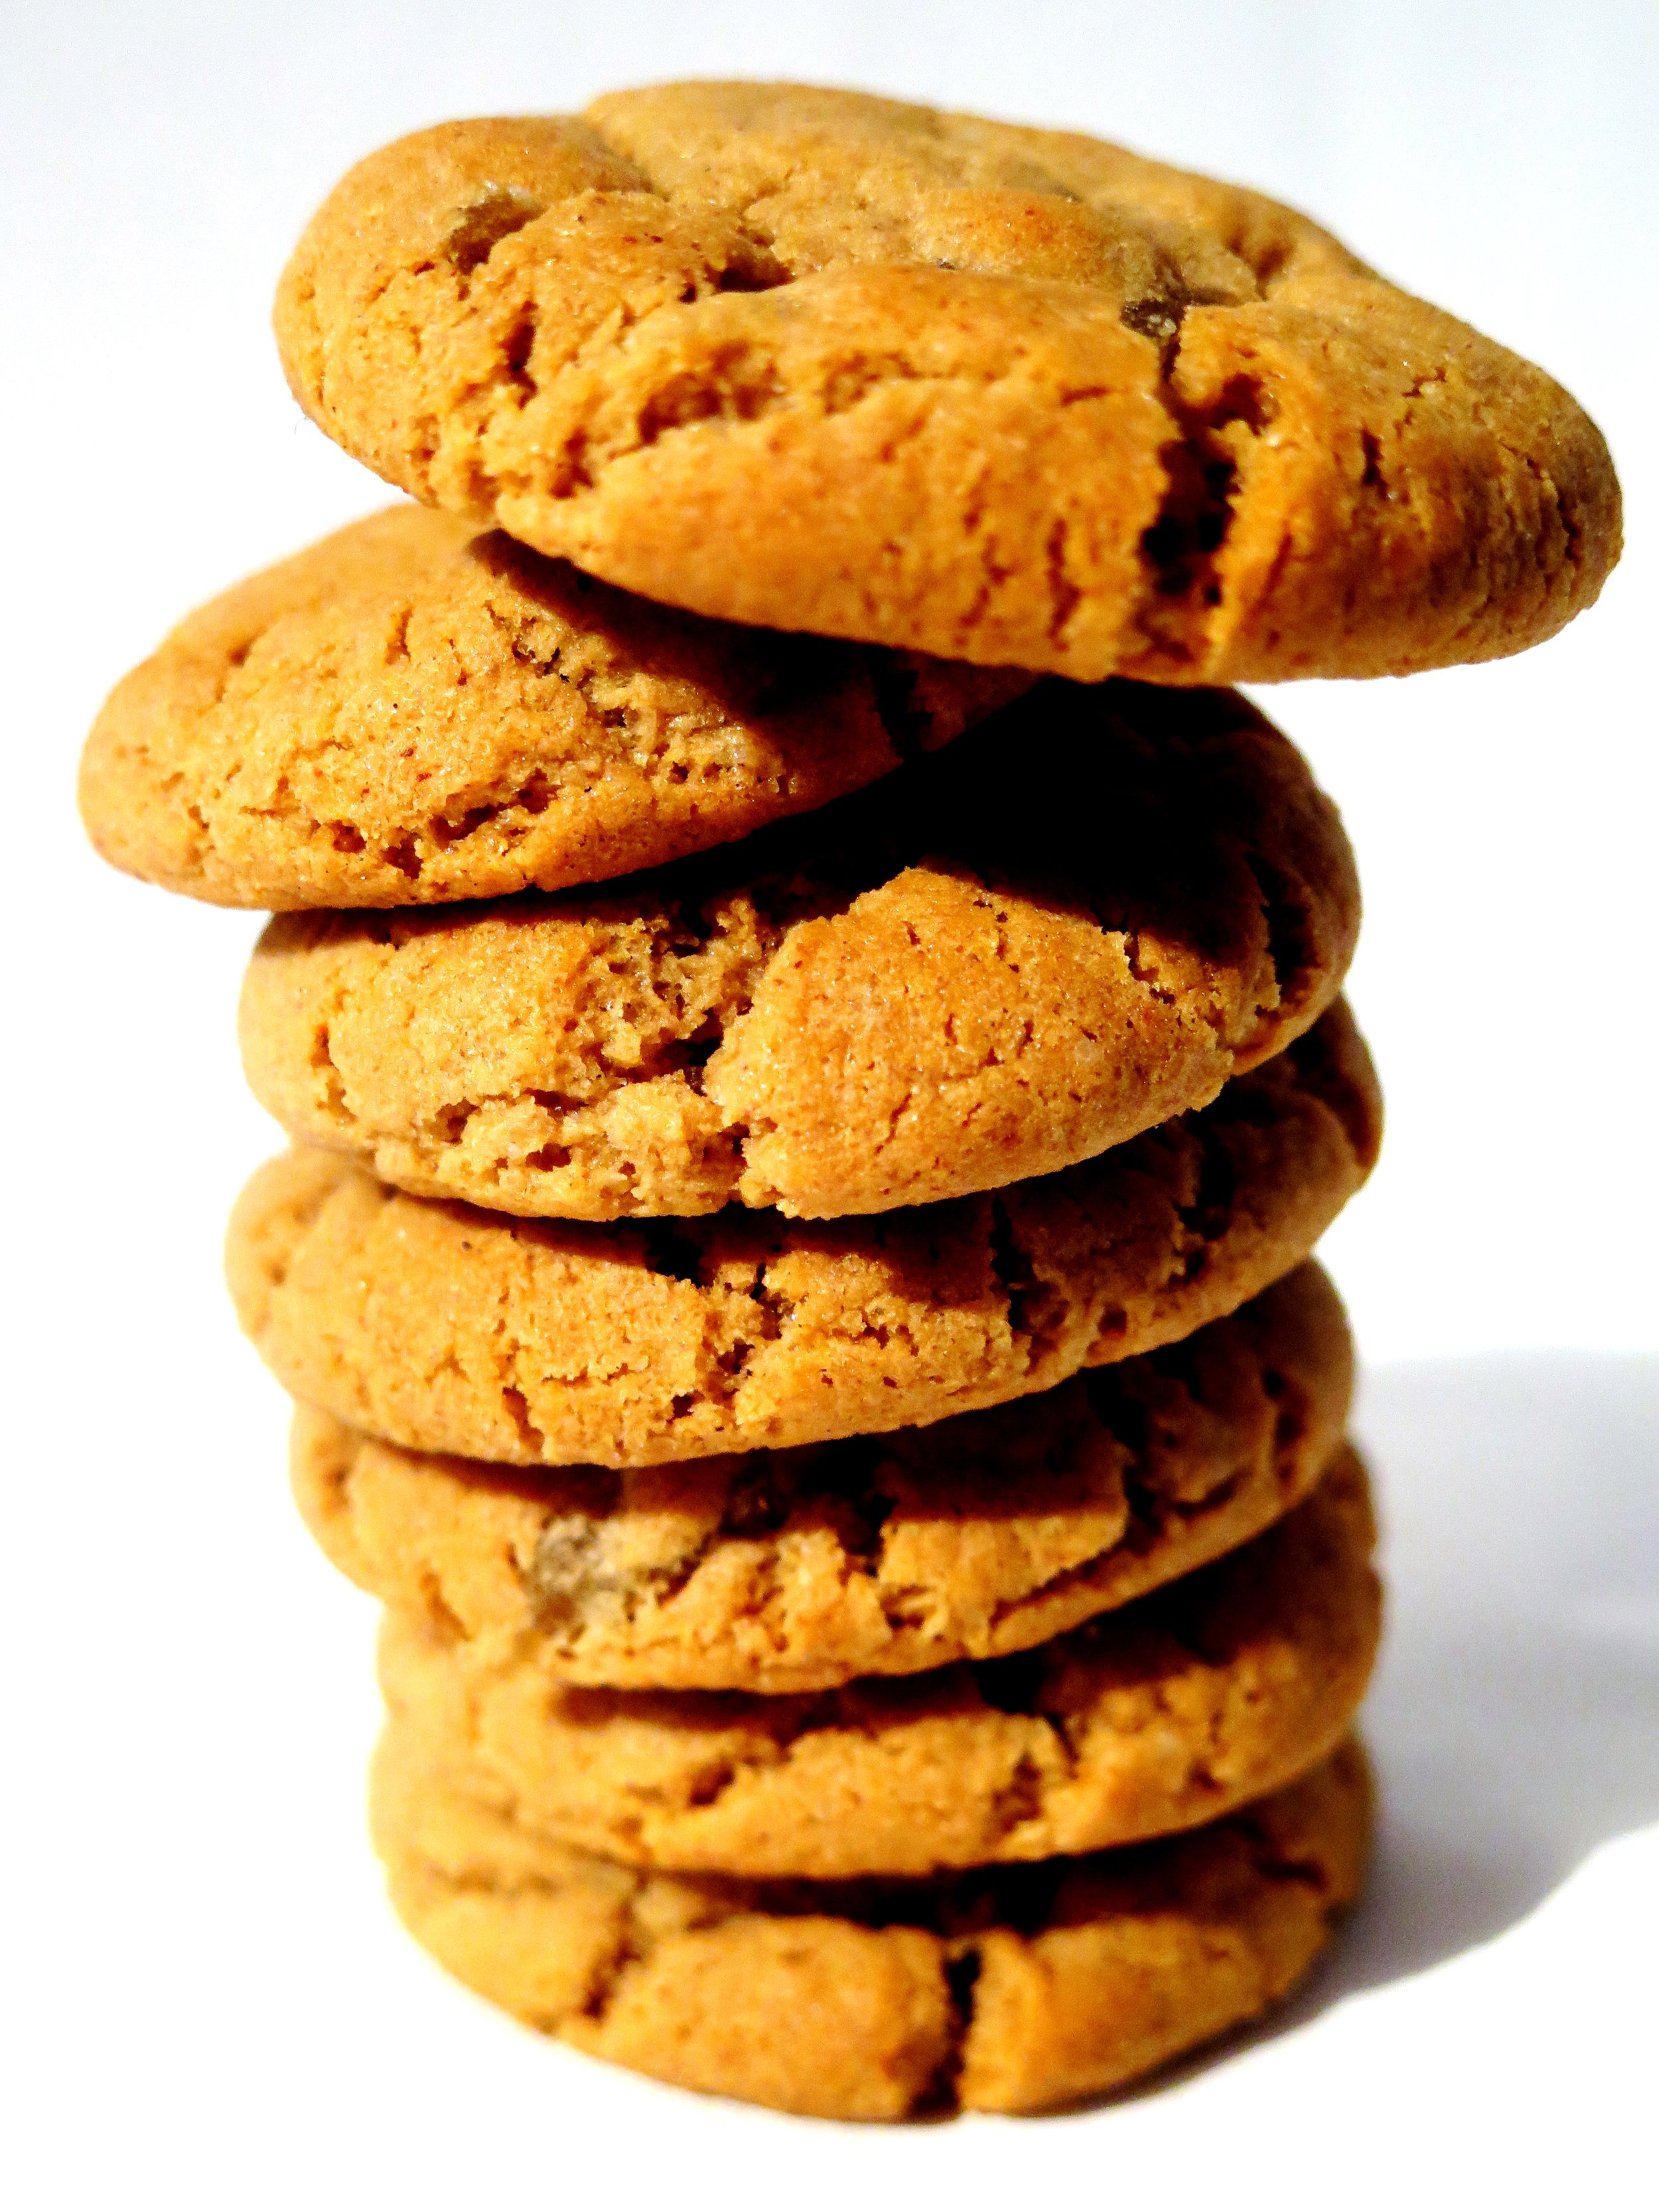
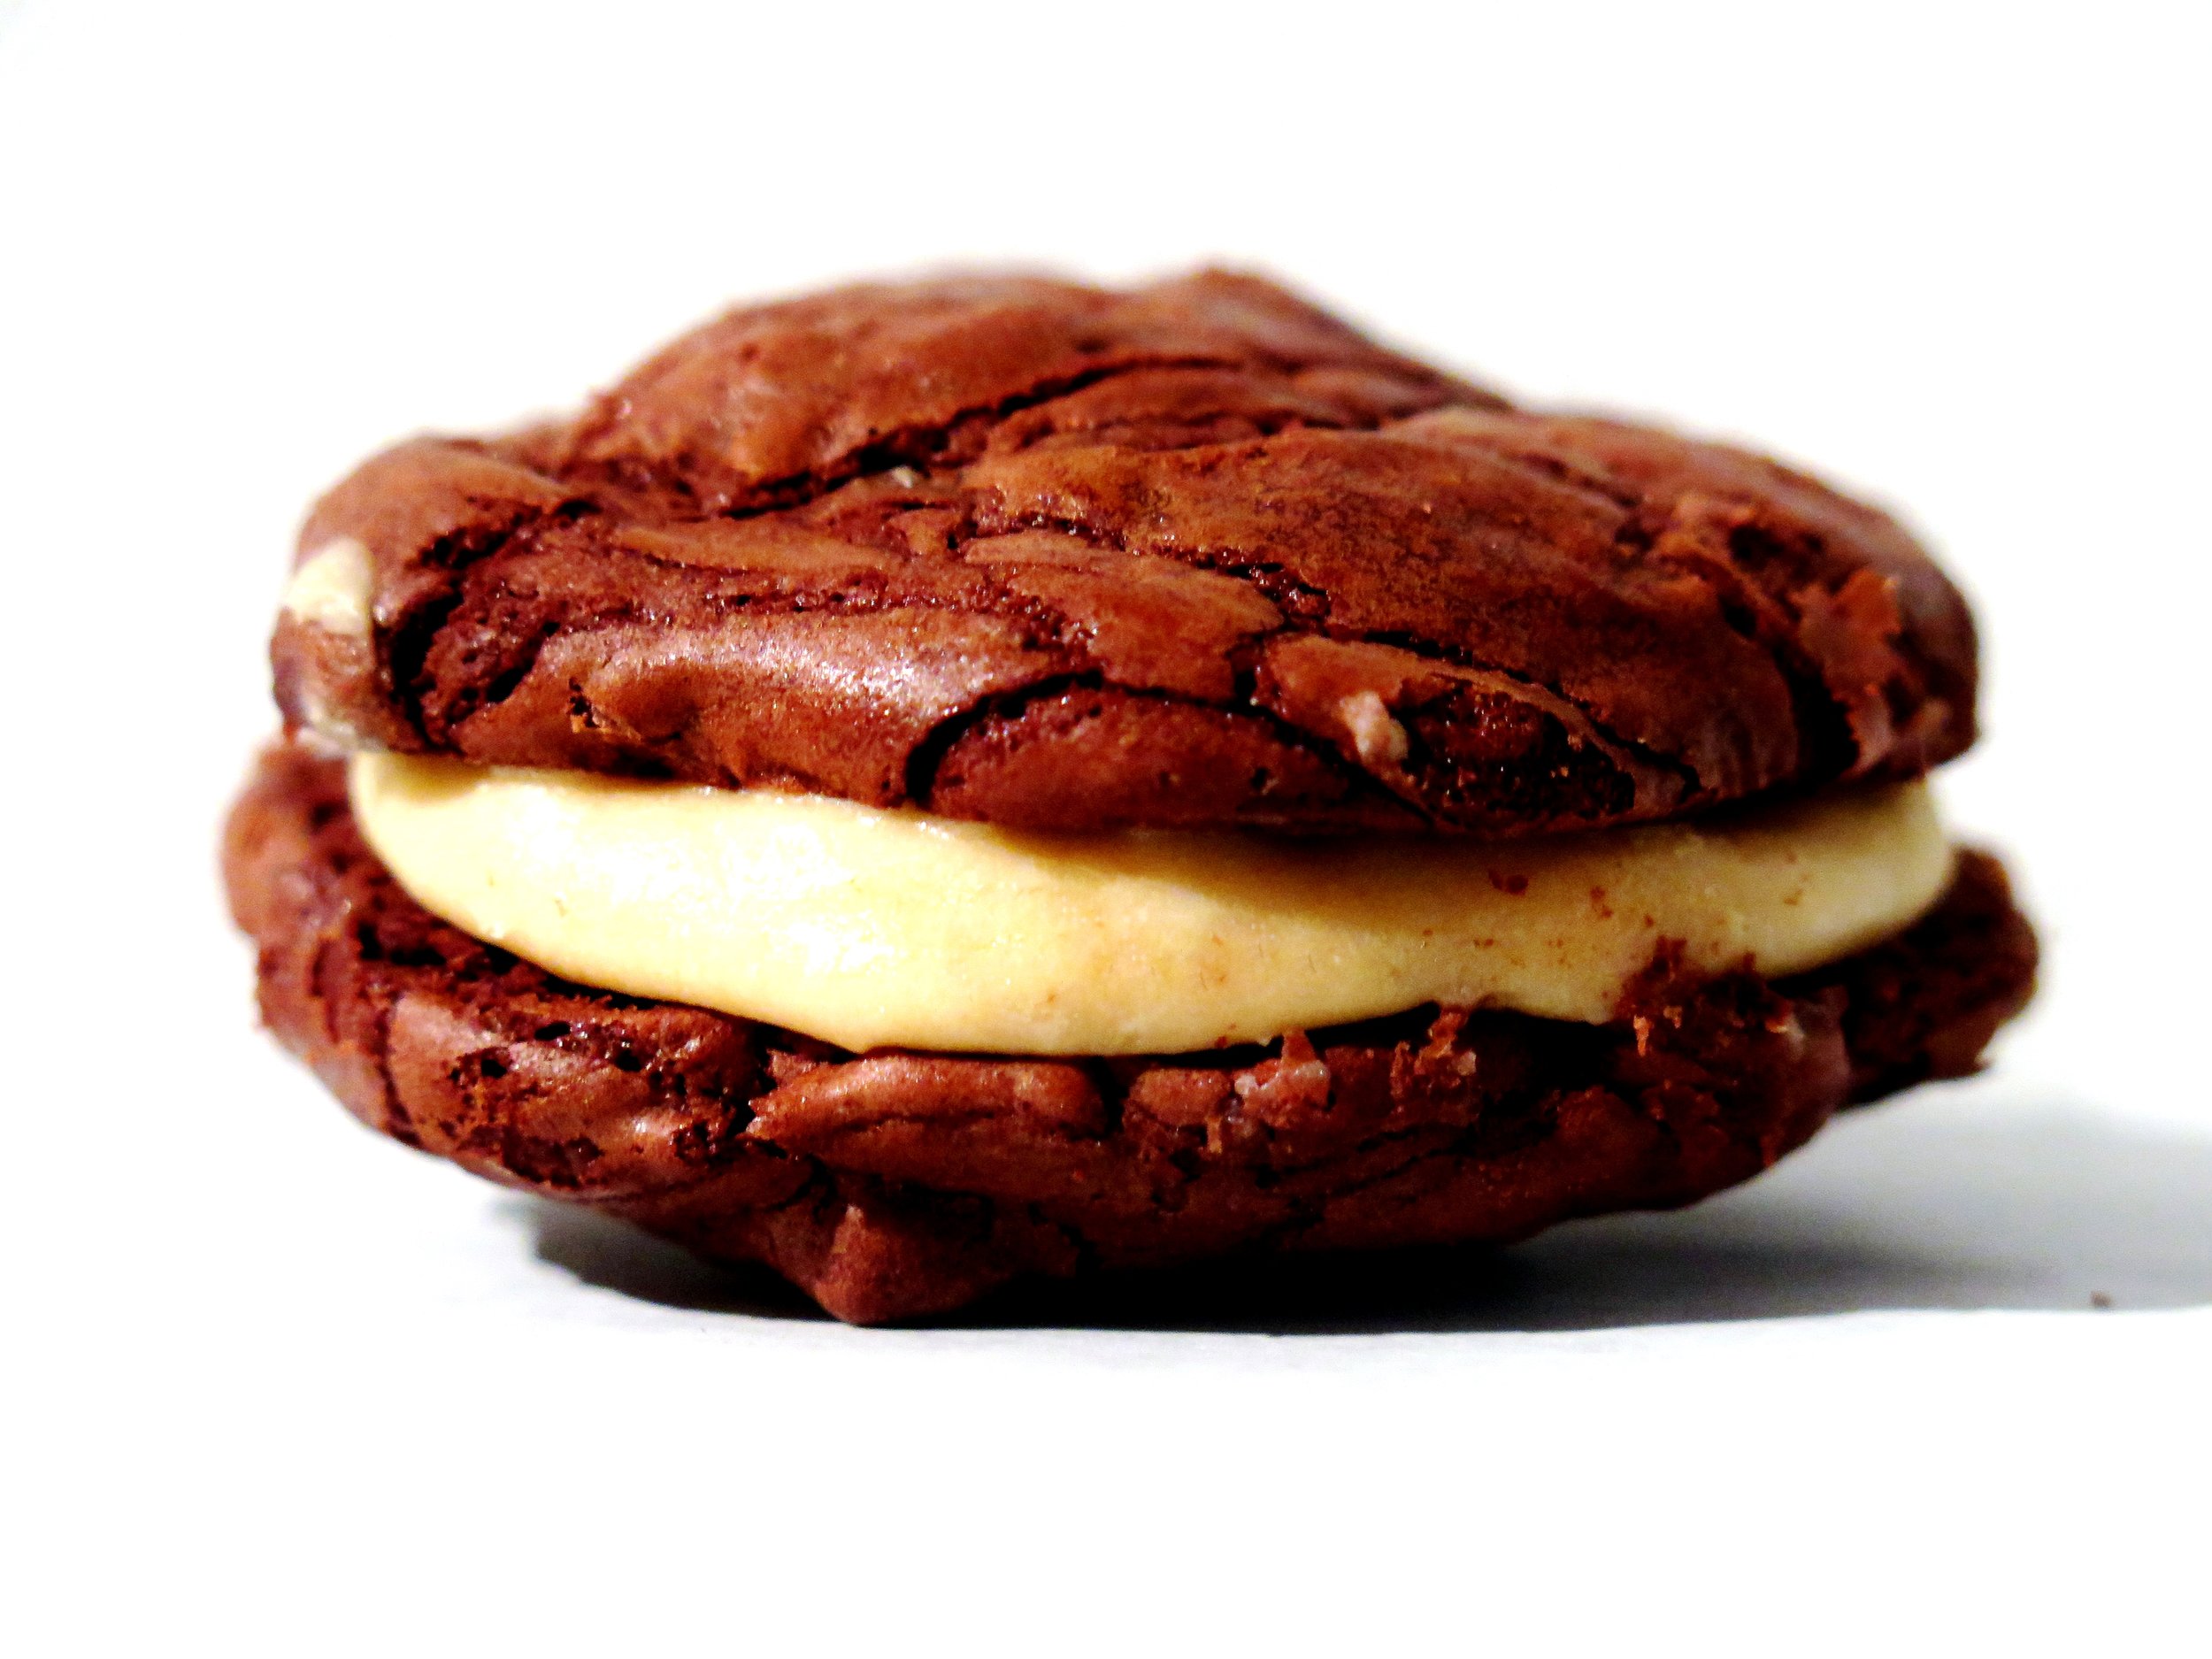
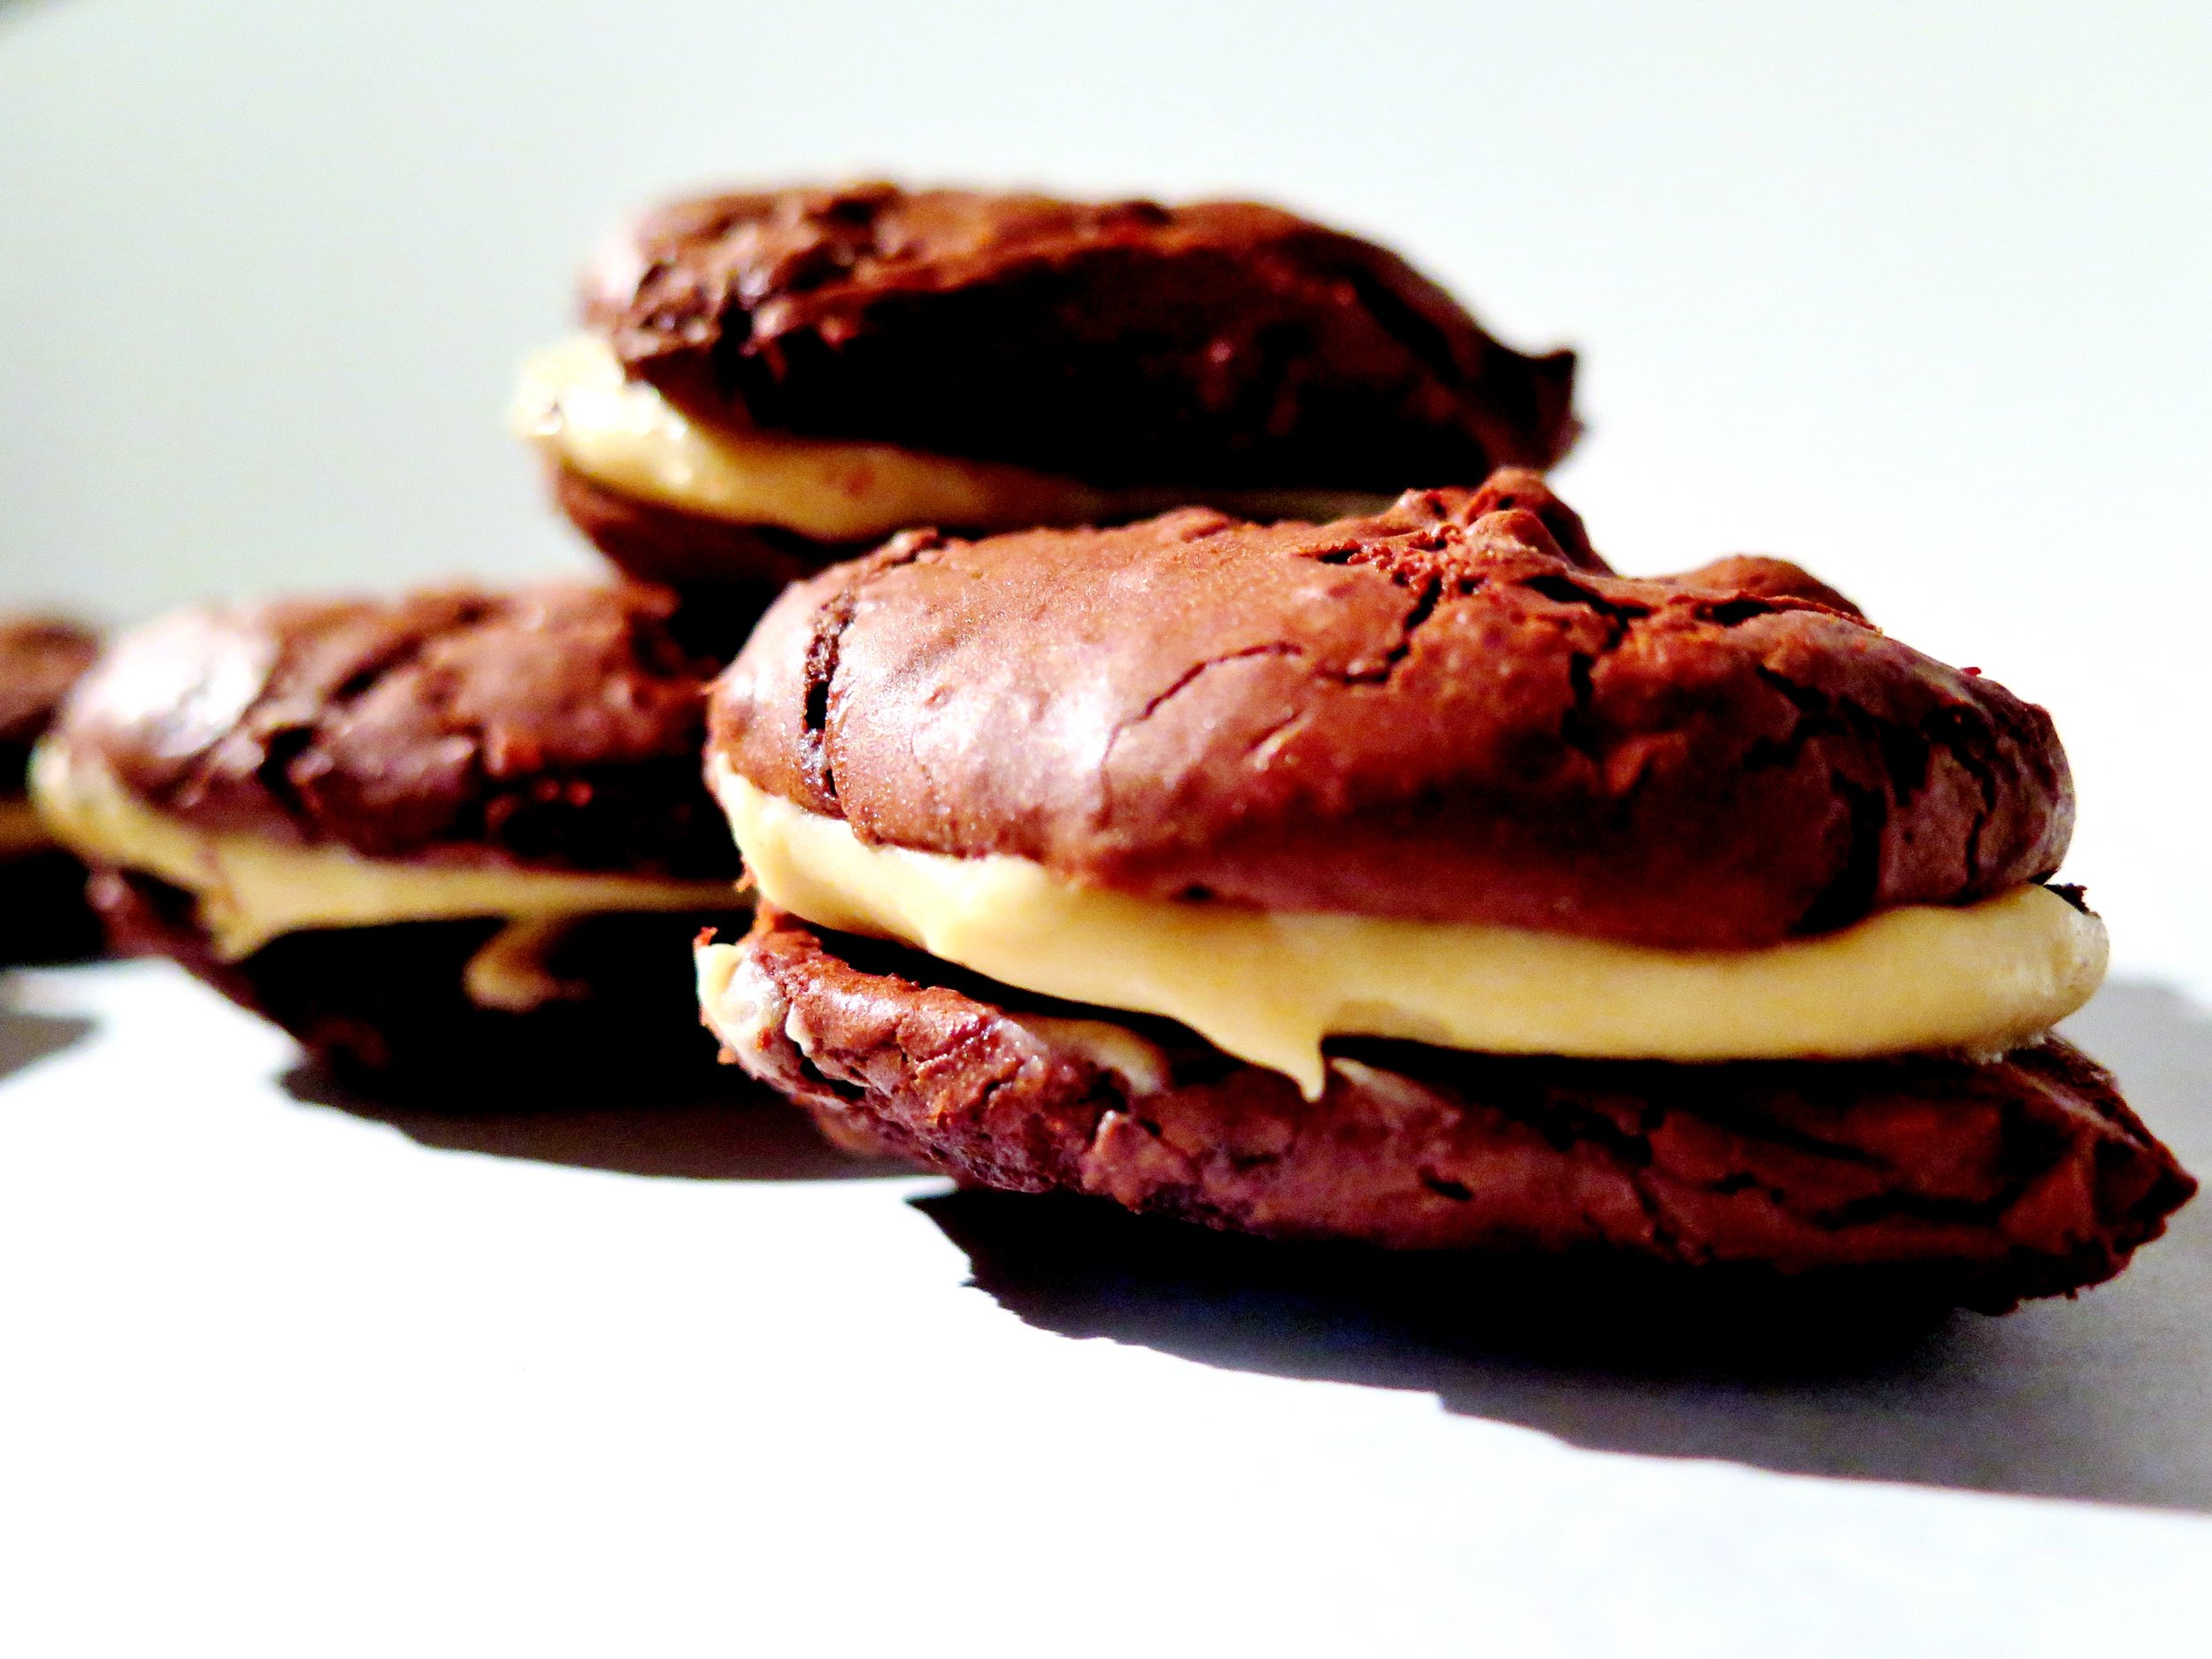
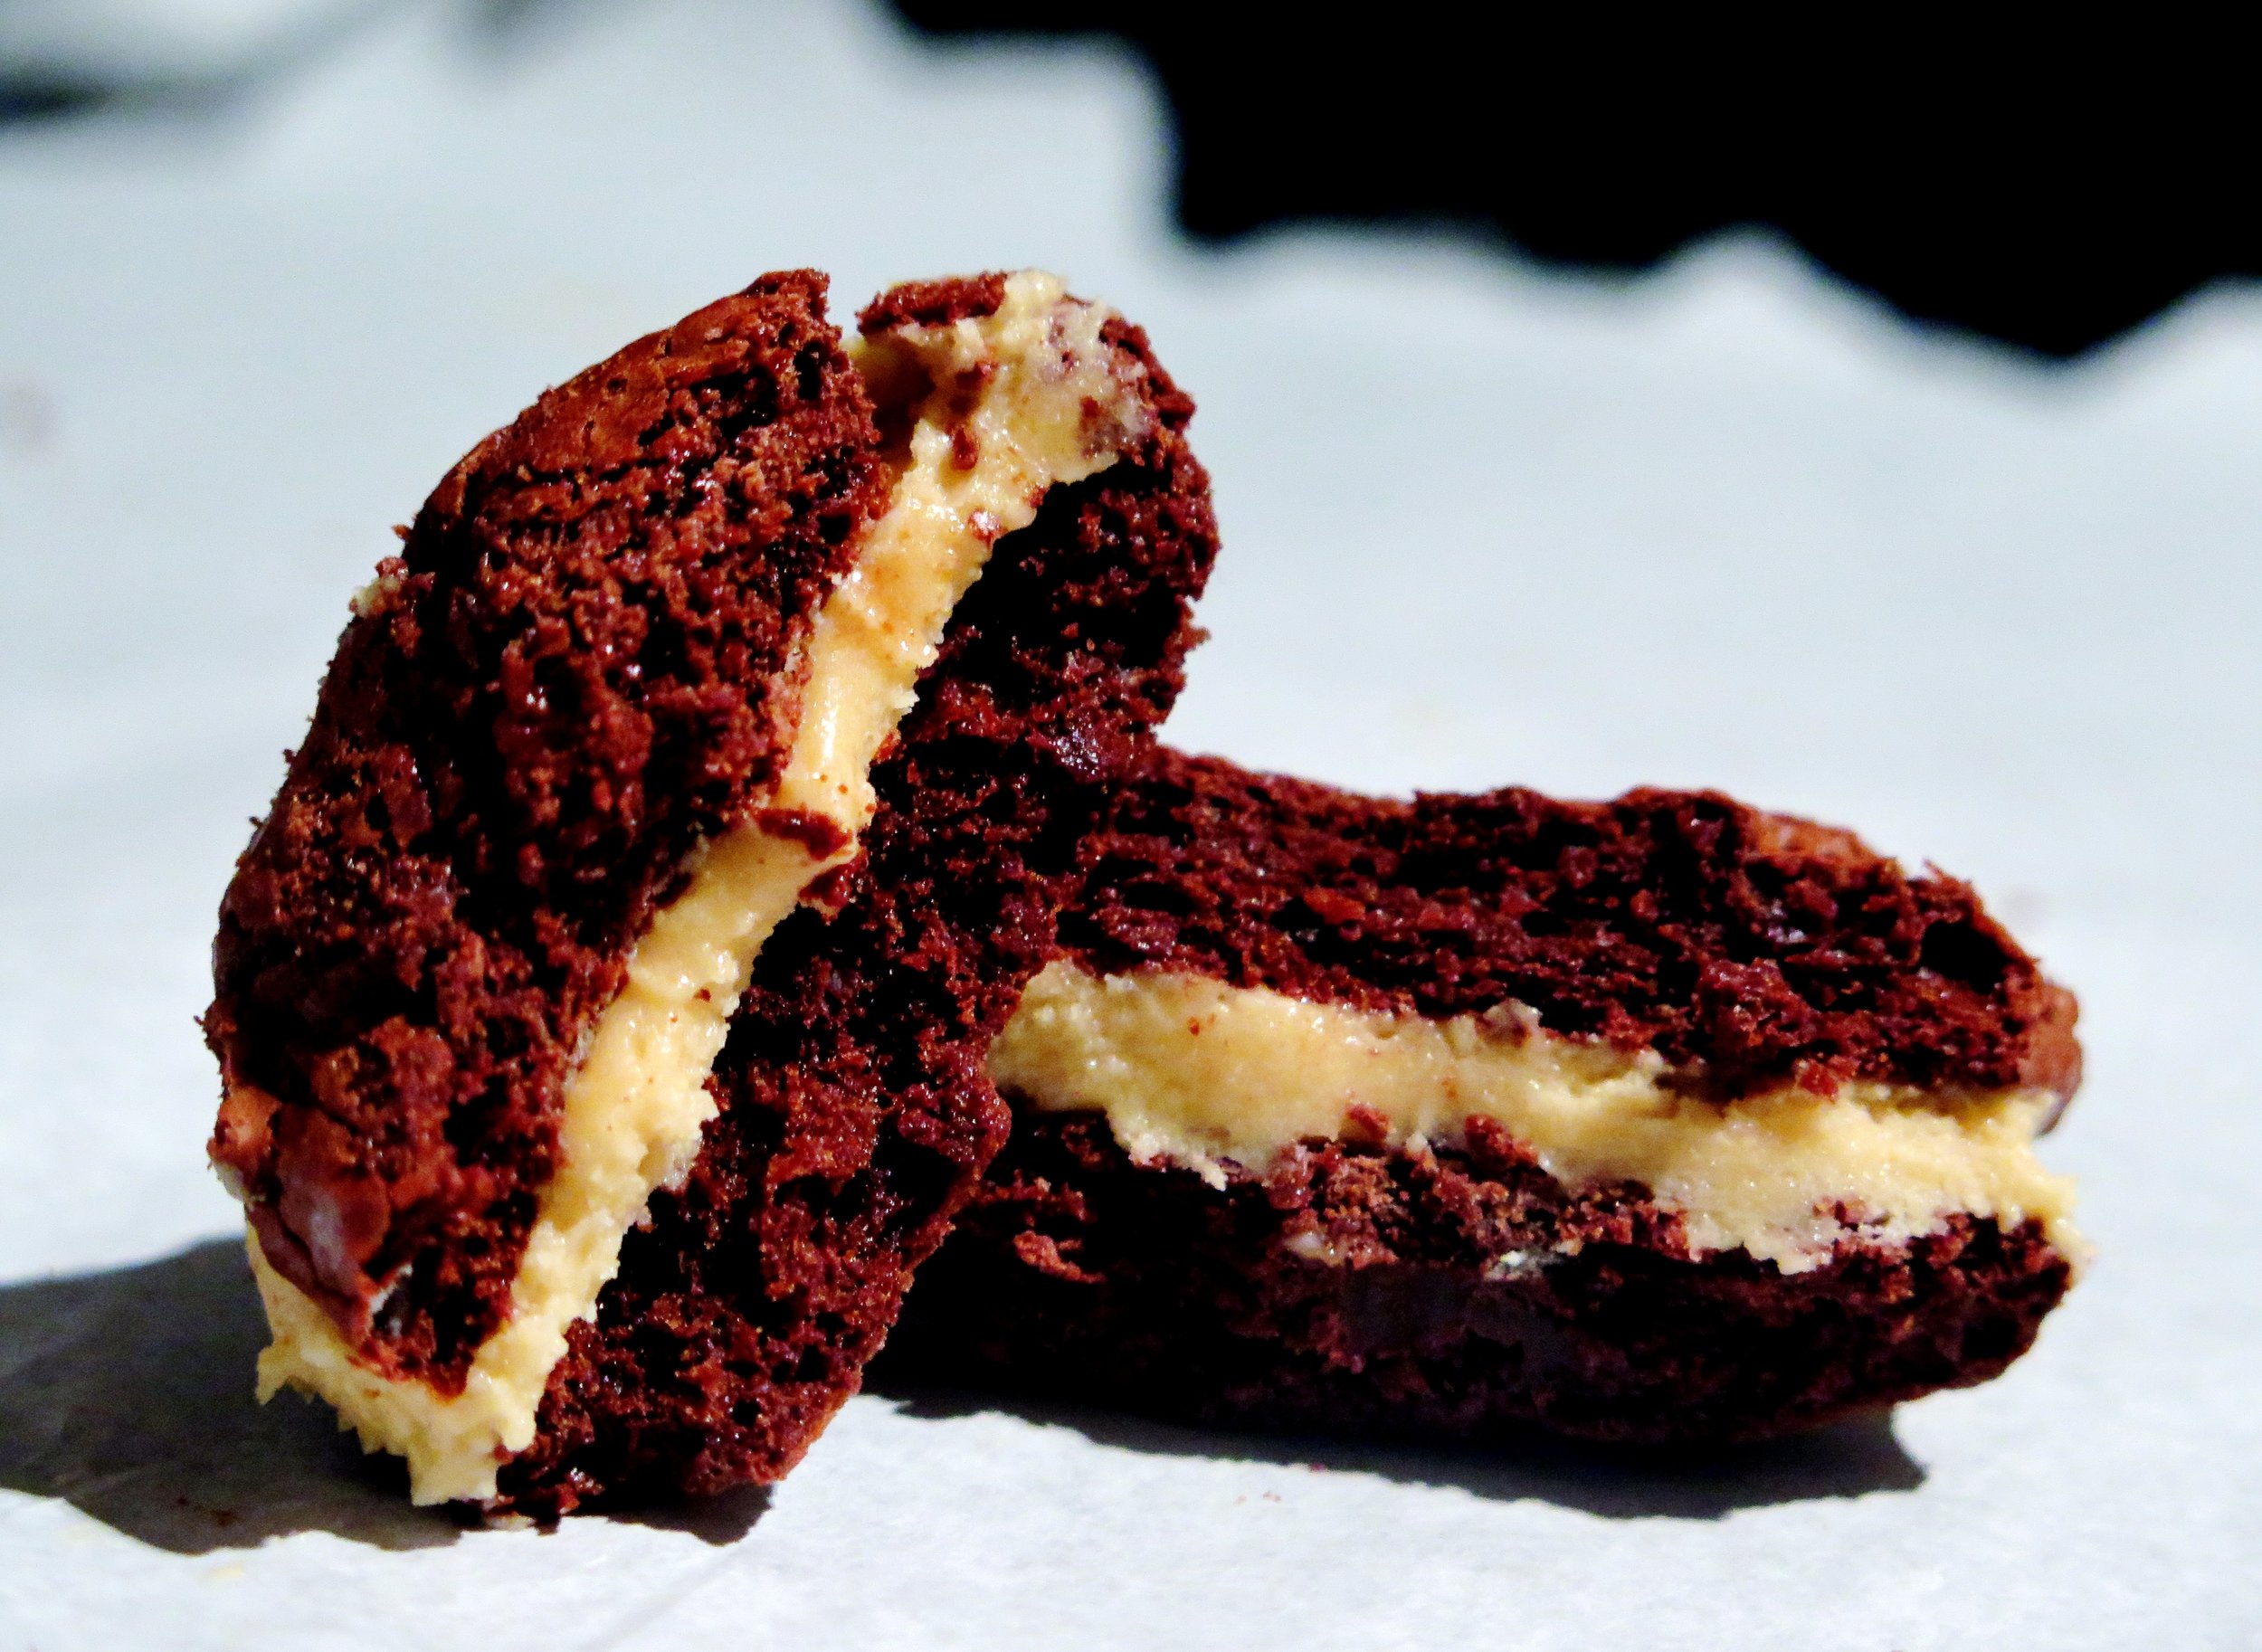
Biscotti, or cantucci, as they are known in Tuscany are crunchy and chewy slivers of twice baked and ridiculously moreish, Italian biscuits traditionally containing almonds, and often an abundance of dried fruit.  They are obligatorily dipped into an immodestly full glass of Vin Santo (Italian sweet wine) and held there until the majority of the wine has been absorbed by the biscuit and there’s every chance it will land in one’s lap before it reaches one’s ready and waiting mouth.

Candied Ginger & Orange Hazelnut Biscotti - Recipe


Unfortunately, biscotti are endangered in Britain.  Their reputation is marred by the imitation biscotti that have taken up residence in the majority of common coffee chains.

Candied Ginger & Orange Hazelnut Biscotti - Recipe

These poor copies of the true Italian post-prandial biscuit are so dry that they react like silica gel to one’s mouth, so stale that you may need to sacrifice a tooth to consume them.

Candied Ginger & Orange Hazelnut Biscotti - Recipe

For this pleasure the coffee chains also charge a trillion percent mark-up on what are the easiest and most inexpensive biscuits to make.  Also, they’re often sold individually – who stops at just one?

Candied Ginger & Orange Hazelnut Biscotti - Recipe

This recipe is very versatile.  I love strong flavours, and so I paired ginger with orange to give the biscuits a tang, and added the toasted hazelnuts for slight smokiness.  However, these ingredients can be substituted with any dried fruit and nut of your choice, or indeed left plain.  Use 200g of the dried fruit, 250g of the nut of your choice and, in place of the orange & ginger syrups, sub in an extra 2 tbsp honey.

Candied Ginger & Orange Hazelnut Biscotti - Recipe

Ingredients

For the biscuit

500g plain flour

350g sugar

3 tsp baking powder

½ tsp salt

3 eggs + 1 egg white + 1 egg yolk for later

2 tsp vanilla essence

3 tsp curaçao (triple sec)

250g roasted hazelnuts crushed into halves or slightly smaller pieces

2 tbsp honey

Zest of 1 orange

2 trays lined with baking parchment

For the candied oranges                                                

2 oranges

1 cup water

3/4   cup sugar

For the candied ginger – or 140g store bought

200g ginger peeled and slices into 1/8 inch disks

4 cups of water

170g sugar


Candied ginger method

  1. Place sliced and peeled ginger in shallow pan with water and bring to boil.  Allow to simmer with the lid on for 25 minutes
  2. Drain the ginger saving 1 cup of liquid and pour in sugar. Bring to medium heat and stir until the sugar is dissolved. Allow to simmer for about 15 minutes until the liquid becomes syrupy and the ginger is translucent.
  3. Place sieve over a bowl and pour the mixture over to drain off the syrup. Reserve both elements for later use.

Candied orange peel method

  1. Slice the peel off the oranges with a knife in thick strips, cutting close to the flesh. Cut the peel into thin 0.5 cm strips and those to roughly 2cm lengths.
  2. Place chopped orange peel, sugar and water in pan and bring to boil. Reduce to medium heat and allow to simmer for 15-20 minutes or until the liquid is mostly evaporated and syrupy and the oranges are translucent and lacking the sourness of their fresh state.

Biscuit method

  1. Preheat oven to 180C. Mix all the dry ingredients together with the toasted hazelnuts in a large bowl.
  2. In a separate bowl separate one egg and place the yolk aside for later use.  Mix together the 3 whole eggs, the egg white of one egg and the other liquid ingredients with the candied orange peel (along with it syrup) and the drained pieces of ginger along with 2 tbsp of the ginger syrup.
  3. Pour liquid mixture into the dry and stir until combined in a stiff dough.
  4. Sprinkle a wooden board with flour and spoon 1/6 of the mixture onto it. Coat your hands in flour and roll the dough out into a 5 cm wide log. Place on tray. Repeat with rest of mixture, leaving a large at least 10cm distance between each piece since it will spread whilst cooking.
  5. Bake for 20 minutes or until deep golden brown. With knife at the ready, take them out and slice diagonally into 3 cm widths and turn them so they’re cut side up.  Turn off the oven and place these back in to dry out for another  10 minutes. Or just leave them in until ready to serve.

Candied Ginger & Orange Hazelnut Biscotti - Recipe

2 Comments

Peanut Butter and Jam Cookies - Recipe

Comment

Peanut Butter and Jam Cookies - Recipe

IMG_4786.jpg

Peanut Butter and Jam Cookies - Recipe Memories of countries and cities I’ve visited are strongly intertwined with my culinary experiences there.   Whenever I’m asked about my trip to Cuba, memories of the music, culture and politics, the beauty of the countryside, the cars, and the buildings are always drowned by the paddies of rice starch dotted with beans which faced me every meal time.  The lone cylinder of “Master Potato Crisps” (lesser Pringles), furry with dust, which commanded an entire shelf in an embargo-challenged grocery store emerged as a perverse highlight.

Peanut Butter and Jam Cookies - Recipe


I will never be able mentally to separate Canada from the oozing, sticky-sweet clasp of a particular Toronto cinnamon bun (it may have been preceded by some, but its superiority has eradicated all past and future competition).  New York is always a complete sensory overload: last year I ate overtime to cram Lebanese, Thai, raw vegan, Chinese, Italian, modern European, American, French, Greek, Mexican, and Brazilian into five days - delicious and, arguably, gluttonous.  Yet, despite this mammoth accomplishment, one of the most outstanding of the culinary delights I’ve sampled there is something rather less exotic: the peanut butter cookie.  It may be humble in name, maybe in appearance too, but it is most certainly not humble in nature.  The source of this ambrosia is the well-established City Bakery, off Union Square, known best for its croissant pretzels, seductively viscous hot chocolate and, of course, its peanut butter cookies -crumbly on the outside and soft and chewy in the interior, with salty and sweet in fine-tuned balance creating an insatiable desire for more.

Peanut Butter and Jam Cookies - Recipe

At brunch a couple of weekends ago, one of my friends confessed her current obsession: sneaking off to her kitchen cupboard armed with a bread stick to pair with that American favourite of jam and peanut butter.

Peanut Butter and Jam Cookies - Recipe

The memory of the palate-coating, salty-sweetness of the City Bakery peanut butter cookies reasserted itself.  Over the next week it took up stubborn residence, so I made up my own.  They worked.  I know this because I made them twice: I left the first batch out to cool, exited the kitchen for 10 minutes, and when I returned, they were gone, my brother unabashedly dusting the last few crumbs off his sweater.  With family members temporarily banished from the kitchen, the second batch survived long enough to be photographed.  Although delicious on their own, I sandwiched mine with raspberry jam to offset the sweet salty nuttiness with a little tang. Julia D. you are to blame for this recipe (and it is, indeed, dedicated to you).

Peanut Butter and Jam Cookies - Recipe

Often cookie recipes frustratingly demand that the dough is chilled before baking.  These can be made, baked and eaten in 20 minutes - no torturous chilling necessary.

Peanut Butter and Jam Cookies - Recipe

Ingredients (makes 34 individual cookies)

115g unsalted butter, at room temperature

190g granulated sugar

60g light brown sugar

¾ tsp salt

250g smooth peanut butter

1 large egg

½ tsp vanilla extract

140g white spelt flour (or plain flour)

150g raspberry jam (optional)

2 baking sheets lined with baking parchment


Method


  1. Preheat oven to 180˚C.
  2. In a mixer (or by hand), cream together butter, granulated sugar, light brown sugar and salt until pale and fluffy. Mix in peanut butter, egg and vanilla extract until fully combined.  Gently stir in the flour.
  3. In the palms of your hands, roll a tablespoon of the mixture at a time to form 4cm spheres. Space them out on the tray.  When the mixture is used up, gently press a fork into the spheres to flatten them and form a criss-cross pattern as pictured.
  4. Bake in oven for 12-14 minutes until slightly golden and still soft to touch. Allow to cool slightly before sandwiching each pair together with a teaspoon of raspberry jam.

Peanut Butter and Jam Cookies - Recipe

Comment

Anti-Valentine's Day Soft & Chewy Hot Spiced Double Ginger Cookies

Comment

Anti-Valentine's Day Soft & Chewy Hot Spiced Double Ginger Cookies

IMG_3475.jpg
IMG_3475.jpg
Anti-Valentine's Day Soft & Chewy Hot Spiced Double Ginger Cookies

Every year the bile-inducing  pink and fluffy over-commercialised day of dictated love comes about. And unsurprisingly, due to their arguable aphrodisiac qualities, sales of oysters peak.  Well as you or your date slurp these down on your Valentine’s date, think of this: oysters are related to slugs.  Why not grab a few from your garden, douse them with some Tabasco with buttered bread on the side and gulp these instead – cheaper and more plentiful (this is not actually a recipe).

Anti-Valentine's Day Soft & Chewy Hot Spiced Double Ginger Cookies

Something a little more acceptable as an anti-Valentine’s day recipe might be this: soft & chewy hot spiced double ginger nut cookies.  They’re not red, not cloying-sweet and they’re not heart shaped.  They even have a little rebellious kick to them if you choose to add the cayenne pepper, which as a spice addict, I love.  But if you prefer something a little milder, leave it out.  If you want to shake off a stalker add more (roughly 5x stated quantity) and deliver gift wrapped.

Anti-Valentine's Day Soft & Chewy Hot Spiced Double Ginger Cookies

Makes about 35 cookies

Ingredients

200g unsalted butter, softened

440g self-raising flour

125g caster sugar

3 tbsp ground ginger

1 1/2 tsp bicarbonate of soda

1/4 tsp cayenne pepper (optional)

1/4 tsp salt

100g stem ginger (;preserved in syrup), finely chopped

2 tbsp ginger syrup (from the preserved ginger)

180g golden syrup

30g treacle

1 tsp vanilla extract

2 baking tray lined with baking parchment

Method

1.)Preheat oven to 160°C.

2.)Place butter, flour, sugar, ground ginger, bicarbonate of soda, cayenne pepper (if using) and salt in a blender and blitz until thoroughly mixed and is like damp sand.

3.) Warm chopped ginger, ginger syrup, golden syrup, treacle and vanilla extract in a pan over a low heat for a couple of minutes until the mixture becomes less viscose.  Pour this into the dry ingredients and pulse until combined into a dough.

4.) Roll the dough into 3cm wide spheres and space them out on the baking trays  as they will spread whilst baking.

5.) Place in preheated oven and bake for 7-10 minutes until golden and slightly crisp on outside and very soft on the inside.  They should seem slightly under-baked as they will continue to cook as they cool and this will make them deliciously soft and chewy.

Anti-Valentine's Day Soft & Chewy Hot Spiced Double Ginger Cookies
Anti-Valentine's Day Ginger Cookies - Recipe

Comment

Salted Caramel-filled Chewy Chocolate Brownie Cookies

3 Comments

Salted Caramel-filled Chewy Chocolate Brownie Cookies

IMG_9341.jpg

Salted caramel-filled chewy chocolate brownie cookies I blame salted-caramel for my short-sightedness.  At the end of morning assembly, when I was five years’ old, the headmistress would read a prayer.  Every one of us would dutifully lower her head and shut her eyes.   I pressed mine tightly closed with my hands until, like some computer generated visualiser, semi-hallucinogenic patterns appeared.  Well, mainly one pattern: a recurrent drop of molten gold slipping seductively into its glistening pool, creating ripples that seemed to extend to the corners of dark space behind my eyelids.  I found the effect narcotic, and would do this without fail every morning.

I now realise that the real-life equivalent to that voluptuous liquefied gold is salted caramel: fudgy, creamy slick, viscous and dangerously addictive, I’m obsessed.

Salted caramel-filled chewy chocolate brownie cookies

Too often it drenches and drowns all other culinary thoughts and ideas I have, but to resist its ambrosial pull is futile.  So, instead, I have decided to partner it with its already well-established acquaintance - chocolate.  That’s not to say that these cookies are in any way ordinary.

Salted caramel-filled chewy chocolate brownie cookies

Most shop bought packets of chocolate cookies are filled with empty promises, often dry, floury, over sodium bicarbonated, and rock solid.

Salted caramel-filled chewy chocolate brownie cookies

I have a friend who has developed and perfected the “cookie-pinch”.  Her forefinger and thumb clamp down on unsuspecting biscuits in their paper wrapping.  The motion is swift and discreet, but in that split second the pads of her well-attuned digits estimate the freshness of the cookie to the nearest hour.

Salted caramel-filled chewy chocolate brownie cookies

Salted caramel-filled chewy chocolate brownie cookies

These chocolate biscuits, however, are crisp, rich, chewy and soft, and cushioned by their silky smooth salted caramel filling, rendering my friend’s admirable skill totally redundant.

Salted caramel-filled chewy chocolate brownie cookies

Salted caramel-filled chewy chocolate brownie cookies

Ingredients

Cookie

200g dark chocolate, chopped

40g unsalted butter

2 eggs

150g caster sugar

1 tsp vanilla extract

35g plain flour, sifted

¼ tsp baking powder, sifted

¼ tsp salt


Salted caramel frosting

165g white caster sugar

60ml water

125ml single cream

150g unsalted butter, chopped

250g icing sugar, sieved

1 tsp vanilla extract

½ tsp salt


2 baking trays, lined with baking parchment

Cookies

  1. Preheat oven to 180˚C
  2. Melt chocolate and butter together in a small pan over a low heat until only just melted and smooth, stirring frequently. Set aside to cool.
  3. In an electric mixer, whisk together eggs, sugar and vanilla for about 10 minutes or until the mixture becomes smooth and slightly thicker.
  4. Gently fold in the cooled chocolate and butter mixture.  Once combined, fold in the sieved flour, baking powder and salt until just combined and let stand for 10 minutes.
  5. Drop the mixture, 1 tablespoon per biscuit on to the baking trays leaving 5cm between them as the mixture will spread.
  6. Bake for 8–10 minutes or until shiny and cracked. Allow to cool on trays.

Salted caramel icing

  1. Stir together sugar and water in a pan over a high heat until sugar has dissolved. Allow to bubble up for about 5-10 minutes until it turns a deep burnished gold.  Don’t be afraid to let it turn quite rusty in colour – the deeper in colour you dare to go (without it burning) the more depth of flavour.
  2. As soon as it gets to the above stage pour in cream and butter and whisk immediately and continuously over the high heat until fully combined. If the sugar crystallises, don’t panic.  Keep whisking over a high heat until it melts once more.
  3. Remove from heat and let it cool. You can place it in fridge, or freezer, or, if you’re greedy and impatient, you can place the pan in an ice water bath and stir until cool.  I opt for the latter option.
  4. Beat together caramel, icing sugar, vanilla and salt until combined.
  5. Sandwich the cookies together using 2 tbsp of the icing (or more depending on how caramel-crazed you are).

Salted caramel-filled chewy chocolate brownie cookies


(adapted from Donna Hay)

3 Comments

1 Comment

Baklava

IMG_5989.jpg

baklava 
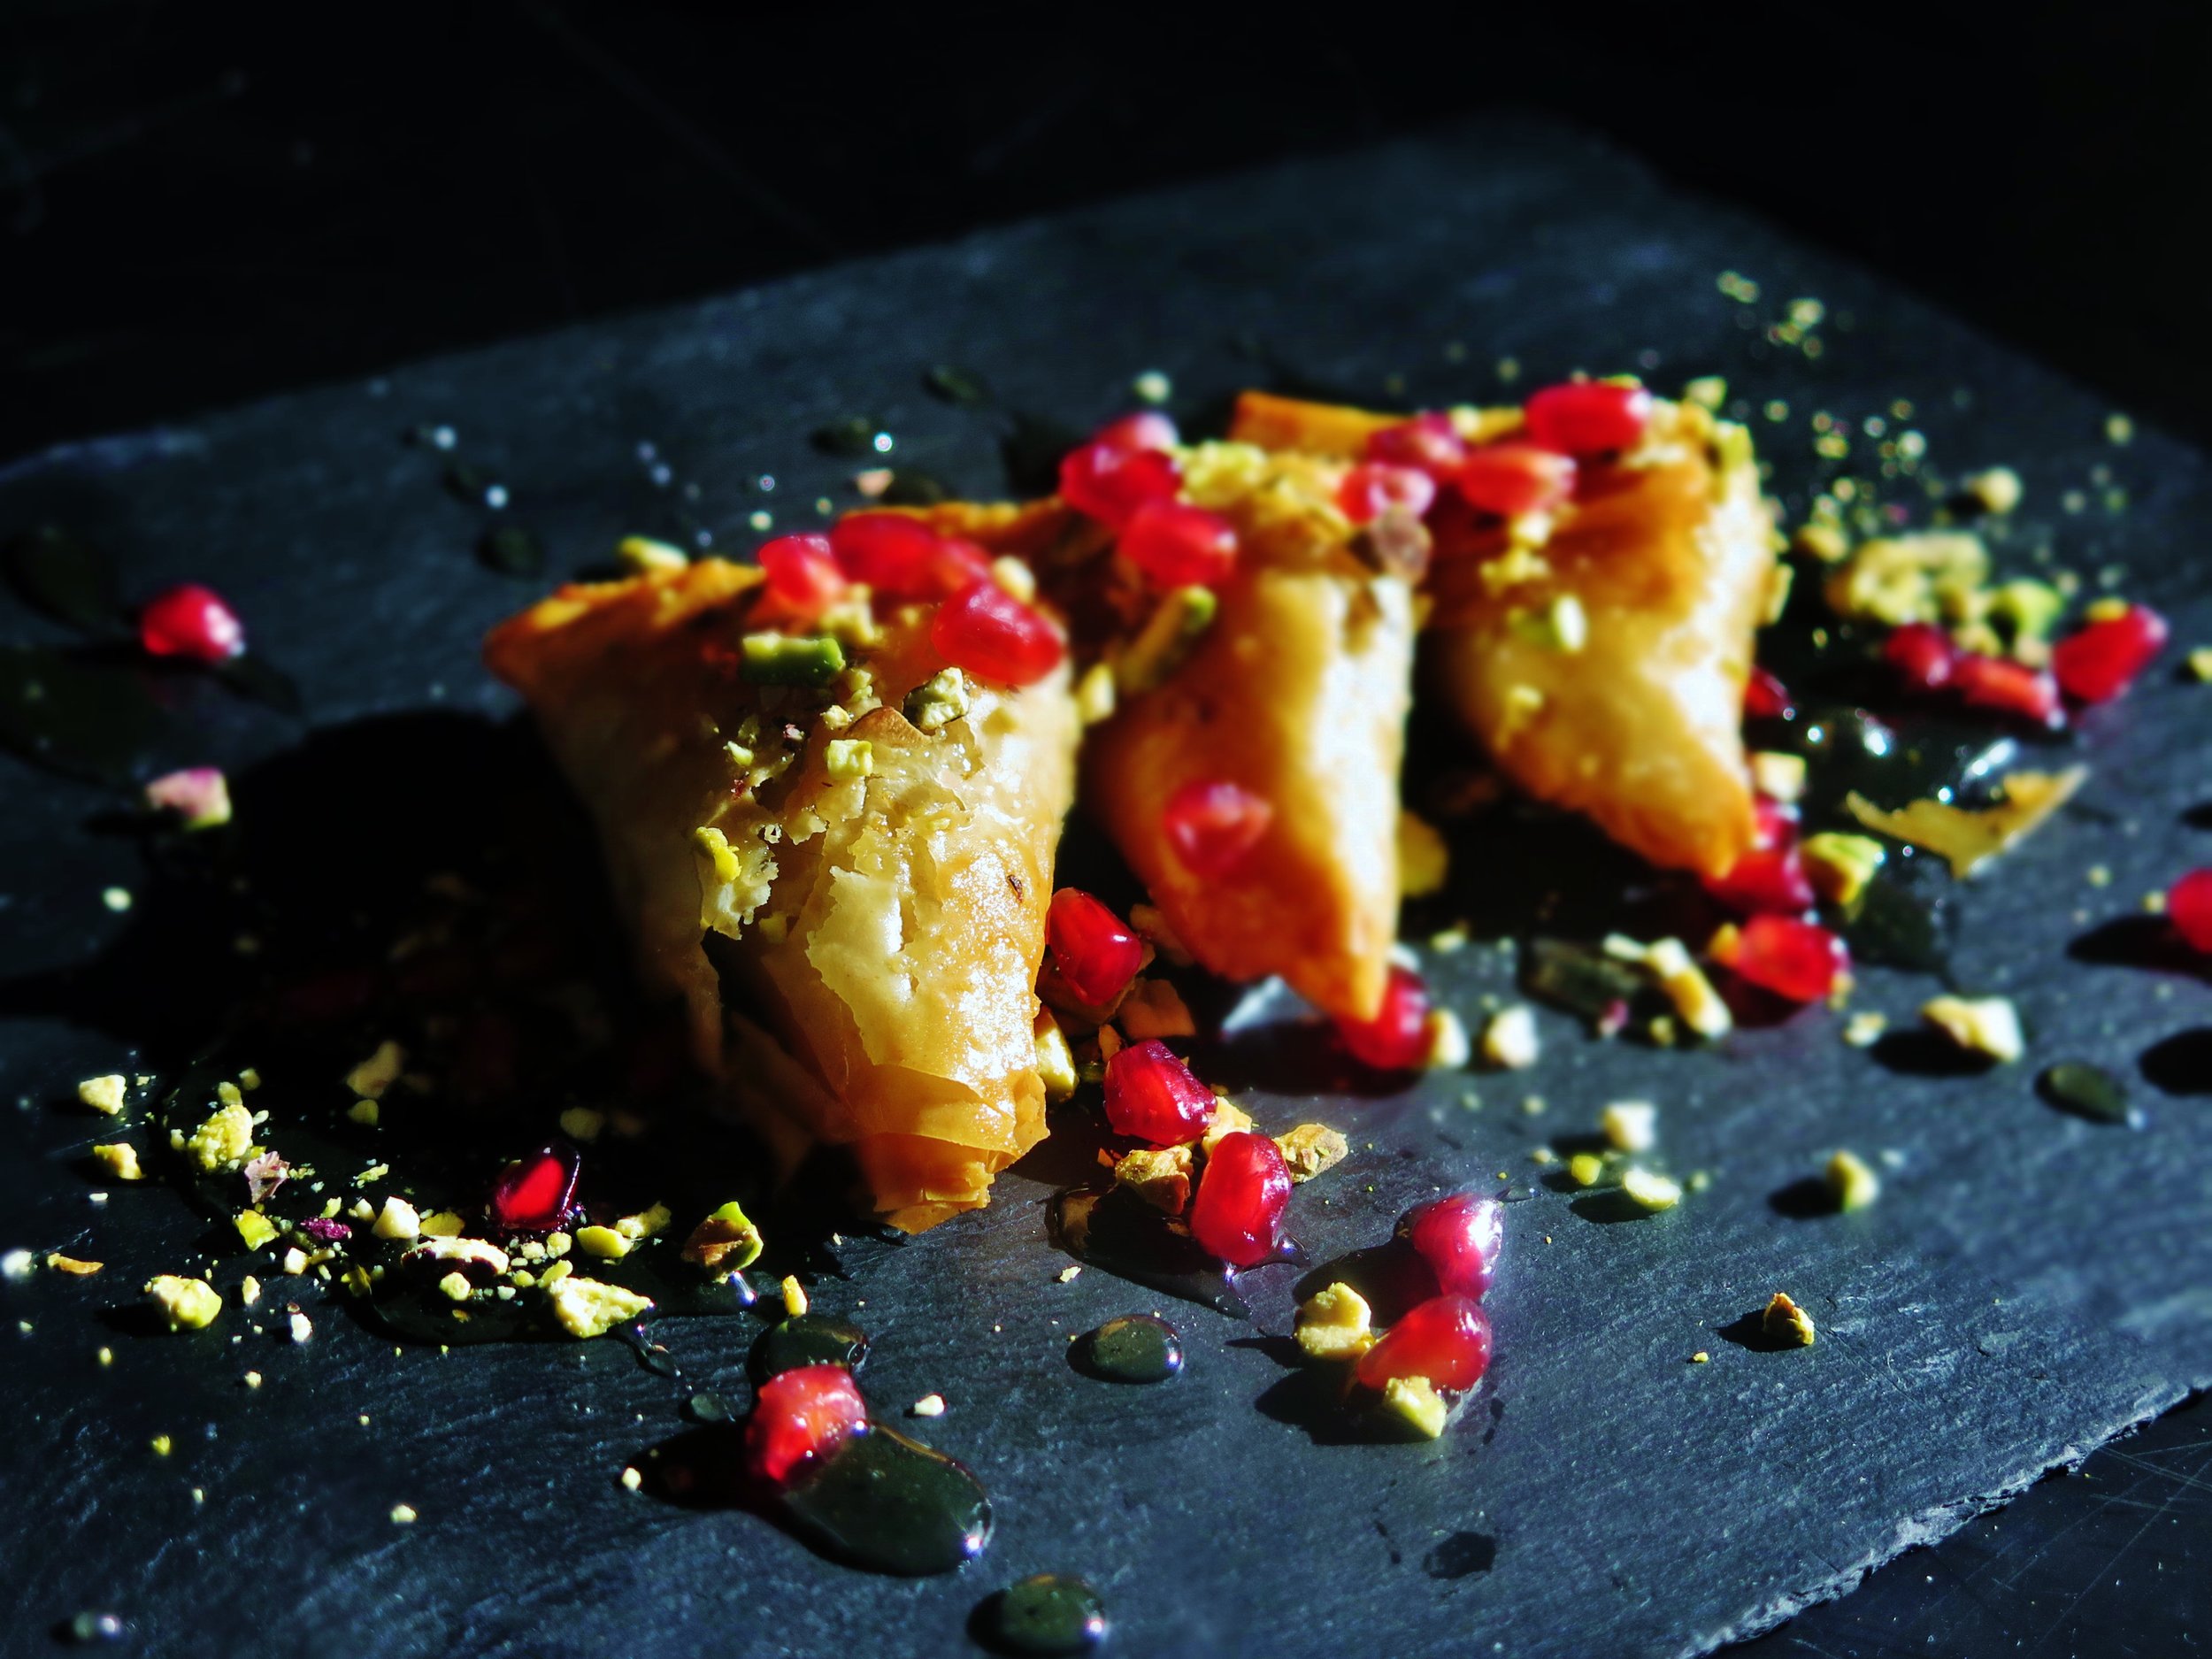
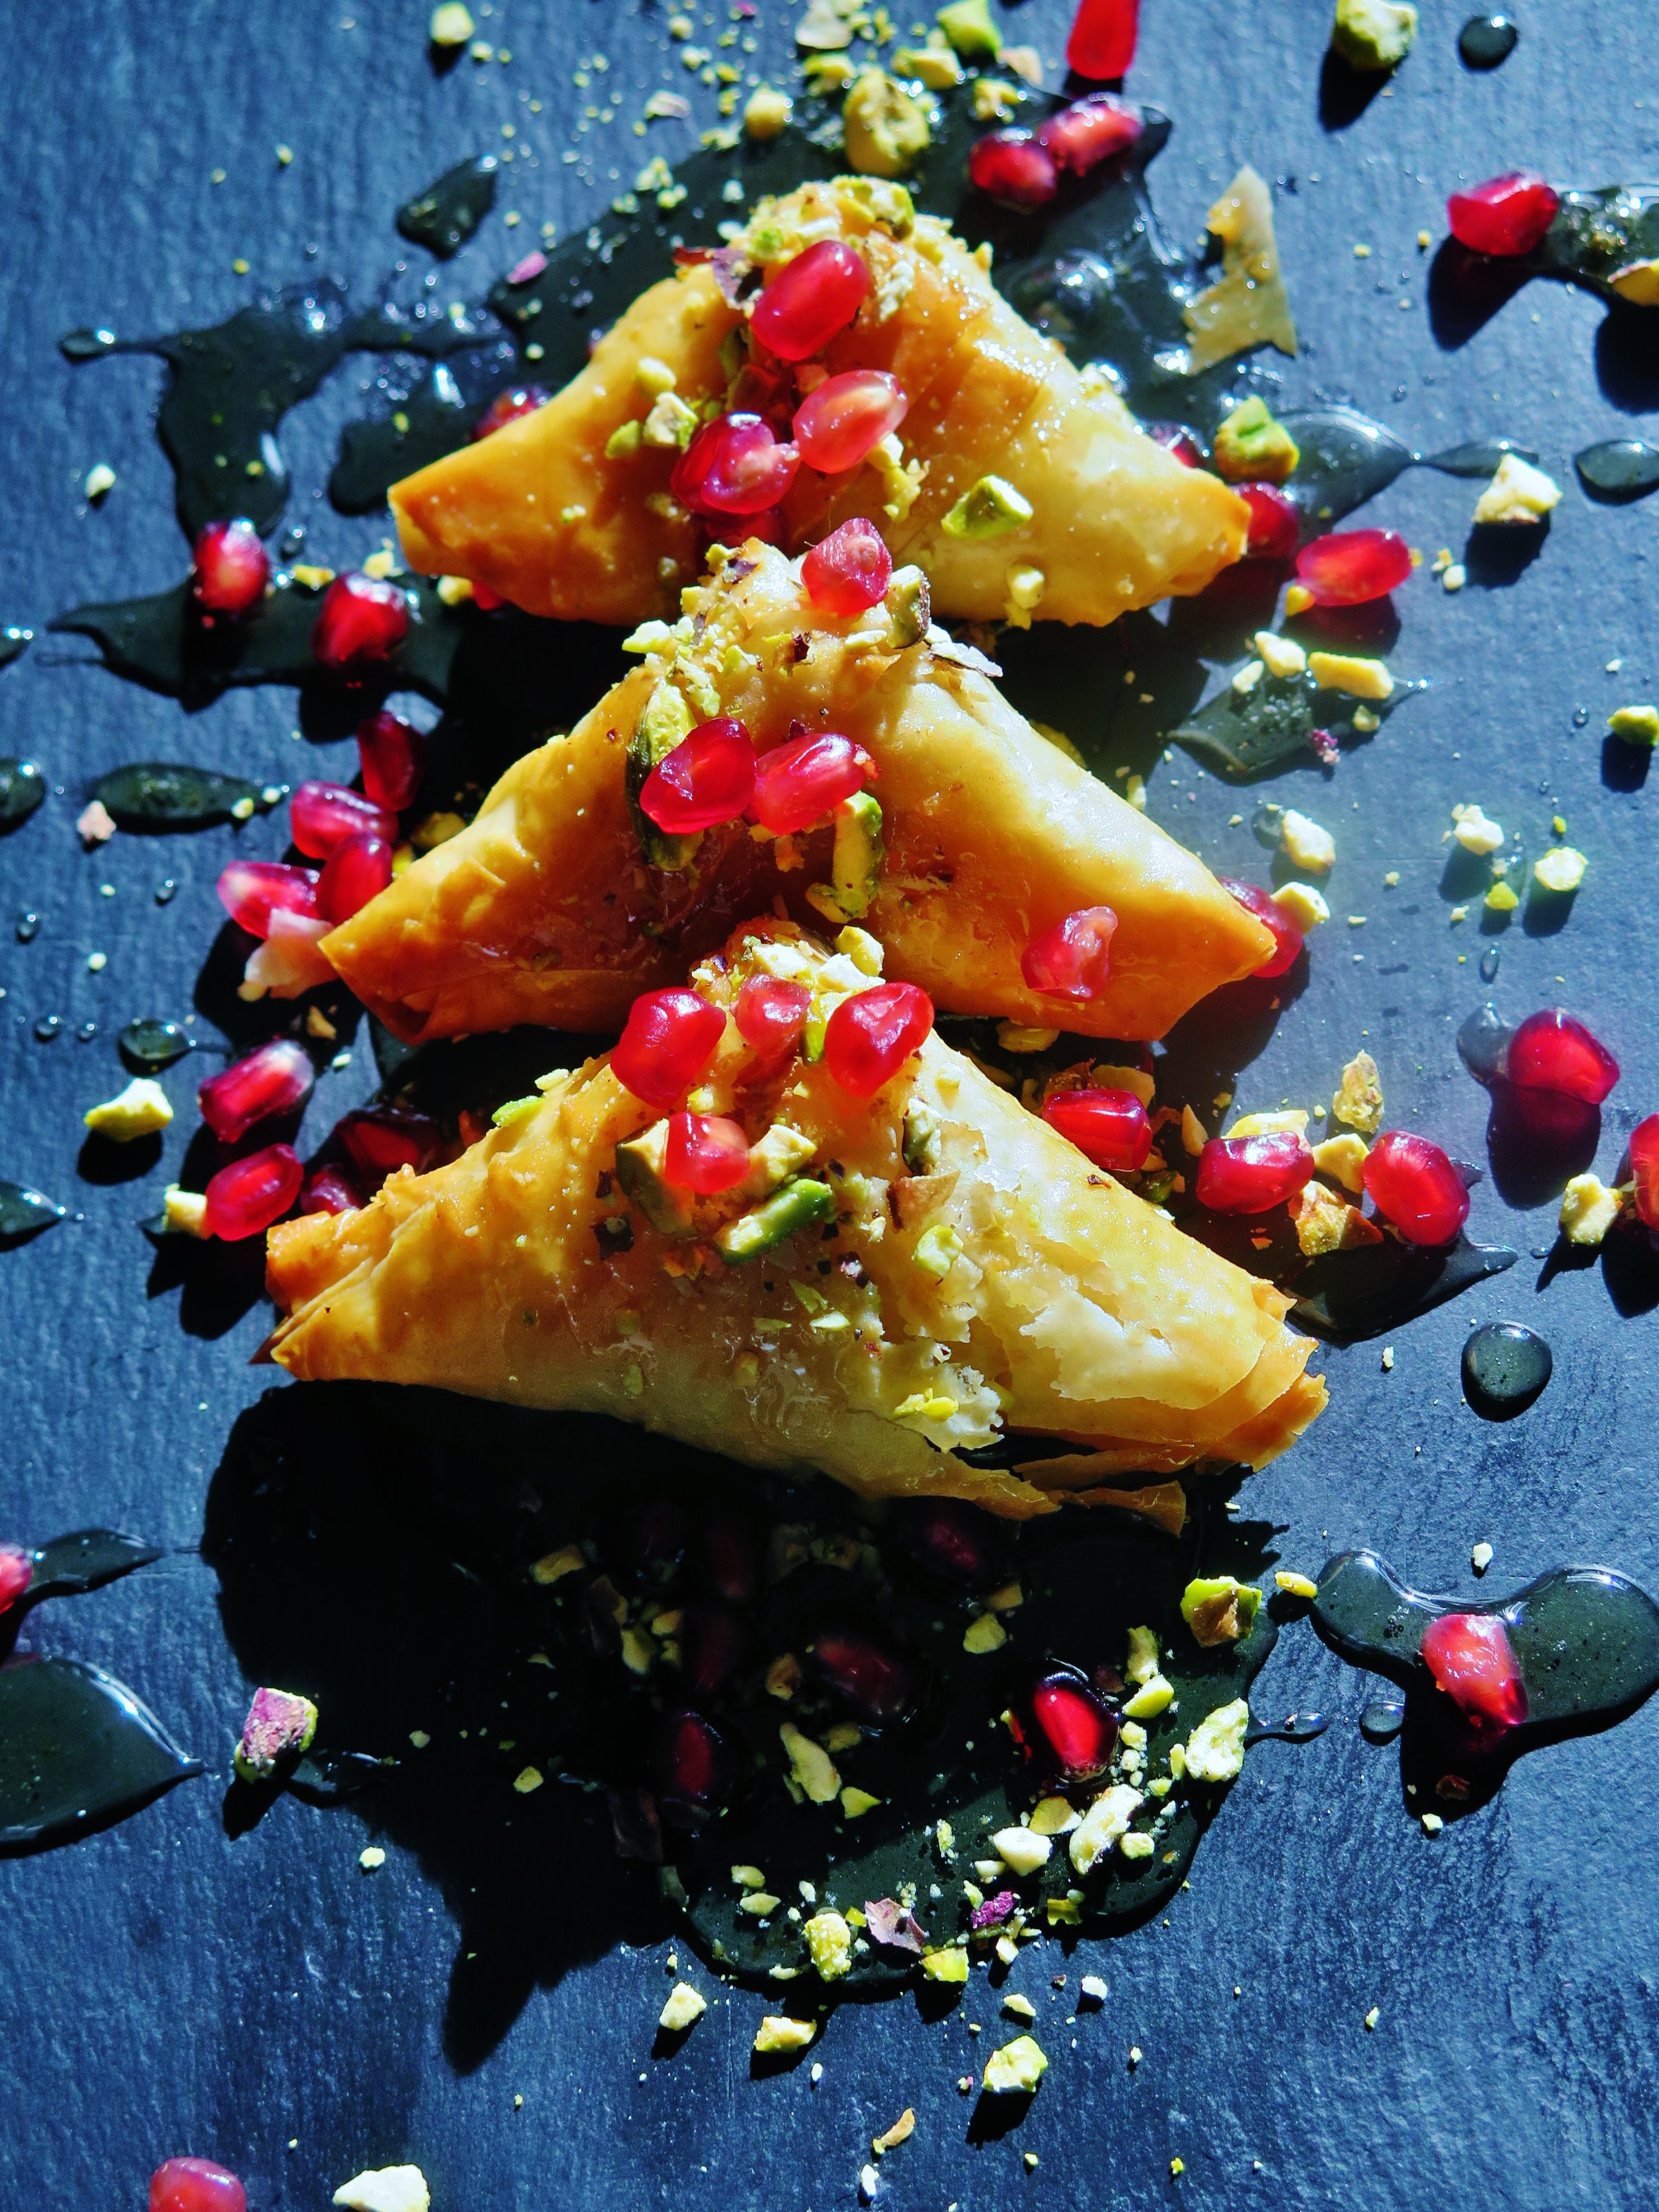
Its origins lie as either  Central Asian Turkic traditional layered breads, or traditional Roman desserts from Istanbul the capital of the Eastern Roman Empire (I favour the latter option).  Breakfast, afternoon tea, dinner – these golden perfumed sweets are appropriate at any time of the day in may book and they are way simpler & quicker to make than you might think.

baklava with ground pistachio & pomegranate

baklava

Many recipes call for the pastry to soak for 8 hours or more – I came up with a recipe that can be made and cooked (and eaten) in less than half an hour.


IMG_5955

baklava

Ingredients


¼ cup caster sugar

¼ cup water

¼ cup orange blossom honey

1 ½ tsp lemon juice

½ tsp rose water

100g pistachios (ground to affine rubble)

100g walnuts (ground to a fine rubble)

Pinch of salt


6 sheets filo pastry

200g melted butter

100g bread crumbs


Syrup

½ cup water

½ cup caster sugar

¼ cup orange blossom honey

1 tsp lemon juice

¾ tsp rose water

tray line with baking parchment


Method

  1. Preheat oven to 200˚C.
  2. Place sugar, water and honey in a pan over high heat and stir until the sugar has dissolved.
  3. Reduce to medium-high heat and allow to simmer for 4-5 minutes until slightly more viscous. Stir in the lemon juice and simmer for 1 minute, then remove from the heat.
  4. Stir the ground nuts, pinch of salt and rose water into the syrup and set aside.
  5. Lay out a sheet of filo pastry lengthways (with the shorter side of the rectangle nearer to you), paint with melted butter and lightly sprinkle with bread crumbs. Lay another sheet on top and repeat.
  6. Cut the layered pastry into 4 long strips. Place a teaspoon of nut mixture at the bottom right hand corner of a strip and fold the corner over to great a triangular pocket.  Keep folding, in triangles until you reach the end of the strip then paint with melted butter and place on baking tray.
  7. Bake in oven for 10 minutes, or until the outside is golden and crisp.
  8. While the baklava are baking, make the syrup by repeating step 2 with the syrup ingredients.
  9. Once baklava are cooked, place on serving plate & drizzle generously with the syrup.

Makes 12

IMG_5964

1 Comment

Raspberry dusted white chocolate coated salted caramel truffles

12 Comments

Raspberry dusted white chocolate coated salted caramel truffles

truffles5 Last weekend Culina was trumpeted into existence…literally, with an evening of jazz, ever-flowing champagne, canapés, desserts & petit fours. It was a wonderful evening of abundance and great company.

truffles2

I had dedicated every evening of the previous week to “truffling” yet all 300 of the white chocolate coated salted caramel truffles disappeared without a trace. Salting caramel has become almost a cliché but there is definitely a reason for that combo: the salt balances the sickly sweetness of the caramel, making the truffles even more moreish.


If you’re short of time, you need not dip the truffles into the white chocolate. Instead, after rolling them into spheres, roll them in cocoa powder, chill in the fridge and serve.

truffles6-682x1024 (2)

truffles4


Ingredients 300g 70% good quality dark chocolate

300g caster sugar

300ml double cream

20g light brown muscovado sugar

20g butter

1tspn vanilla extract

1 tspn salt

450g good quality white chocolate

5 g freeze dried raspberries, crushed or powdered (optional)

100g icing sugar (or 100g cocoa powder if not coating with white chocolate)

toothpicks


(Makes approx. 60)


Method


1. Chop the dark chocolate roughly, and set aside in heatproof mixing bowl. Or if you’re feeling aggressive, smash it against a surface (when still in its wrapper).

2. Place caster sugar in saucepan over medium high heat, and when it starts to melt stir gently with spatula to avoid burning around the edges. Push unmelted sugar into the already caramelised sugar to aid the caramelising process. 3. Once the sugar has turned a rich, dark gold colour, while still on the heat, pour in 150g of the cream whisking all the time. If clumps form, don’t panic: keep whisking over medium low heat, and they will eventually melt. 4. Once the lumps have dissolved, pour in the rest of the cream, the muscovado sugar, butter, vanilla and salt and stir the bubbling mixture on a medium heat for another 2 minutes. 5. Pour the mixture into the bowl of chopped dark chocolate and stir immediately until all the chocolate has melted and the caramel and chocolate are fully combined. 6. To chill more quickly, pour the mixture into a baking tray and place in the freezer for about an hour, or until solidified. 7. Cover a clean baking tray with tinfoil. Use a teaspoon to scoop out the mixture, and roll between palms of hands to form 2cm diameter spheres. Roll the spheres in the icing sugar to finely coat, and then place them on baking tray with space around each sphere to avoid their sticking together. Once all the mixture has been rolled into spheres, place baking tray in freezer for half an hour or until the spheres are firm and cold to touch. 8. Break white chocolate into pieces and place in bone-dry heatproof bowl (any drop of water will make the chocolate seize). Place heatproof bowl over pot of boiling water without the boiling water touching the base of the heatproof bowl. Stir occasionally. Remove pan from heat when the chocolate has melted. 9. Remove dark chocolate spheres from freezer, and one at a time, skewer with a toothpick and coat by spooning over the melted white chocolate. Remove the skewer, replace the coated truffle on the tin foil lined baking tray. Drip enough white chocolate over the truffle to disguise any blemishes the toothpick has made. 10. While the white chocolate is still liquid, sprinkle with the freeze-dried raspberry, if using. 11. Replace the tray in the freezer for half an hour until the white chocolate coating has hardened. The truffles may be kept in the fridge until you wish to serve them. Alternatively, the truffles may be kept in a sealed box in the freezer for a couple of weeks.

truffles3

12 Comments