Viewing entries in
Cookies and Bars

Tipsy Triple Raspberry Macarons

1 Comment

Tipsy Triple Raspberry Macarons

IMG_6464.jpg

Tipsy Triple Raspberry Macarons 
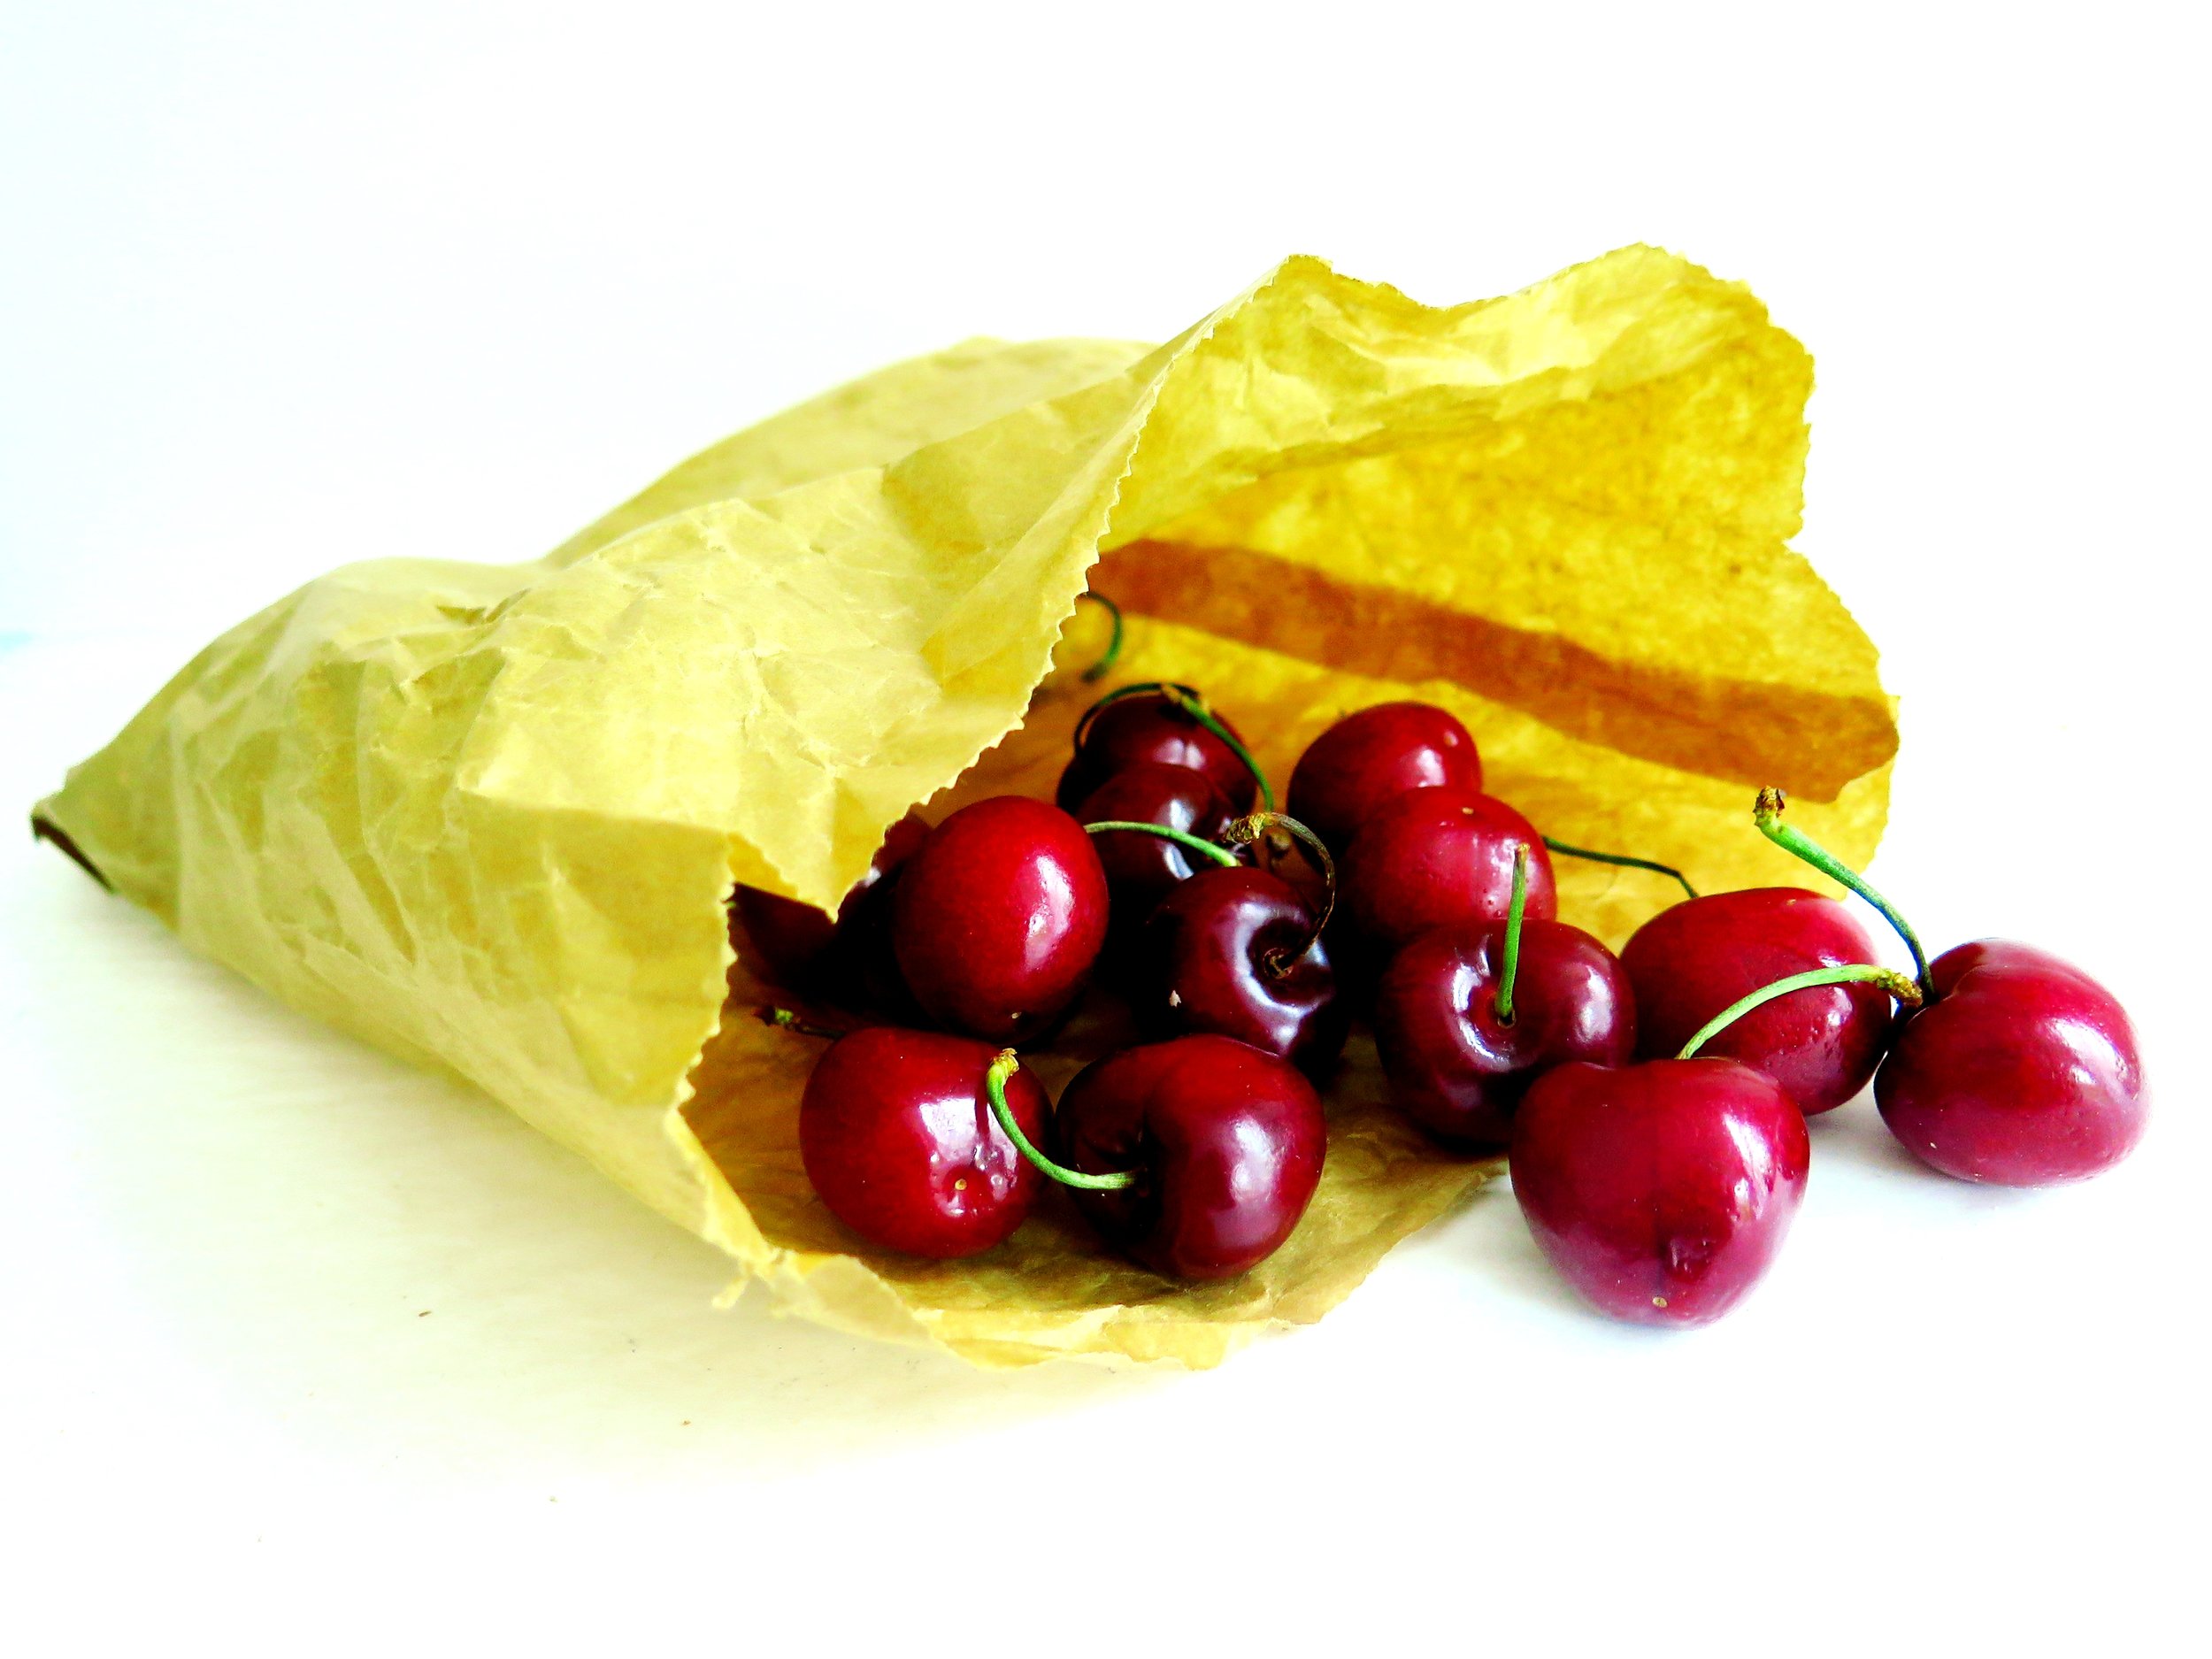
I refuse to believe that the macaron is simply a fad.  Admittedly, there was a craze which saw the opening of several French macaron boutiques in London. I shan’t name names but one of the largest French specialists does not even make them fresh in London. Instead, they import them frozen from France - in a state of hibernation, as they call it.

Tipsy Triple Raspberry Macarons

Tipsy Triple Raspberry Macarons

Despite this, the specialists remain, and the macaron is here to stay. Now that the craze has faded a little, I feel more free to write a recipe as people will be slightly less sick of the sight of the perfect ruffled shells.

Tipsy Triple Raspberry Macarons

Many are intimidated at the prospect of making them, but there really is no need.  The rumour of the challenge in making them may well have been promulgated by the macaron specialists themselves in order to justify their extortionate pricing.

Tipsy Triple Raspberry Macarons

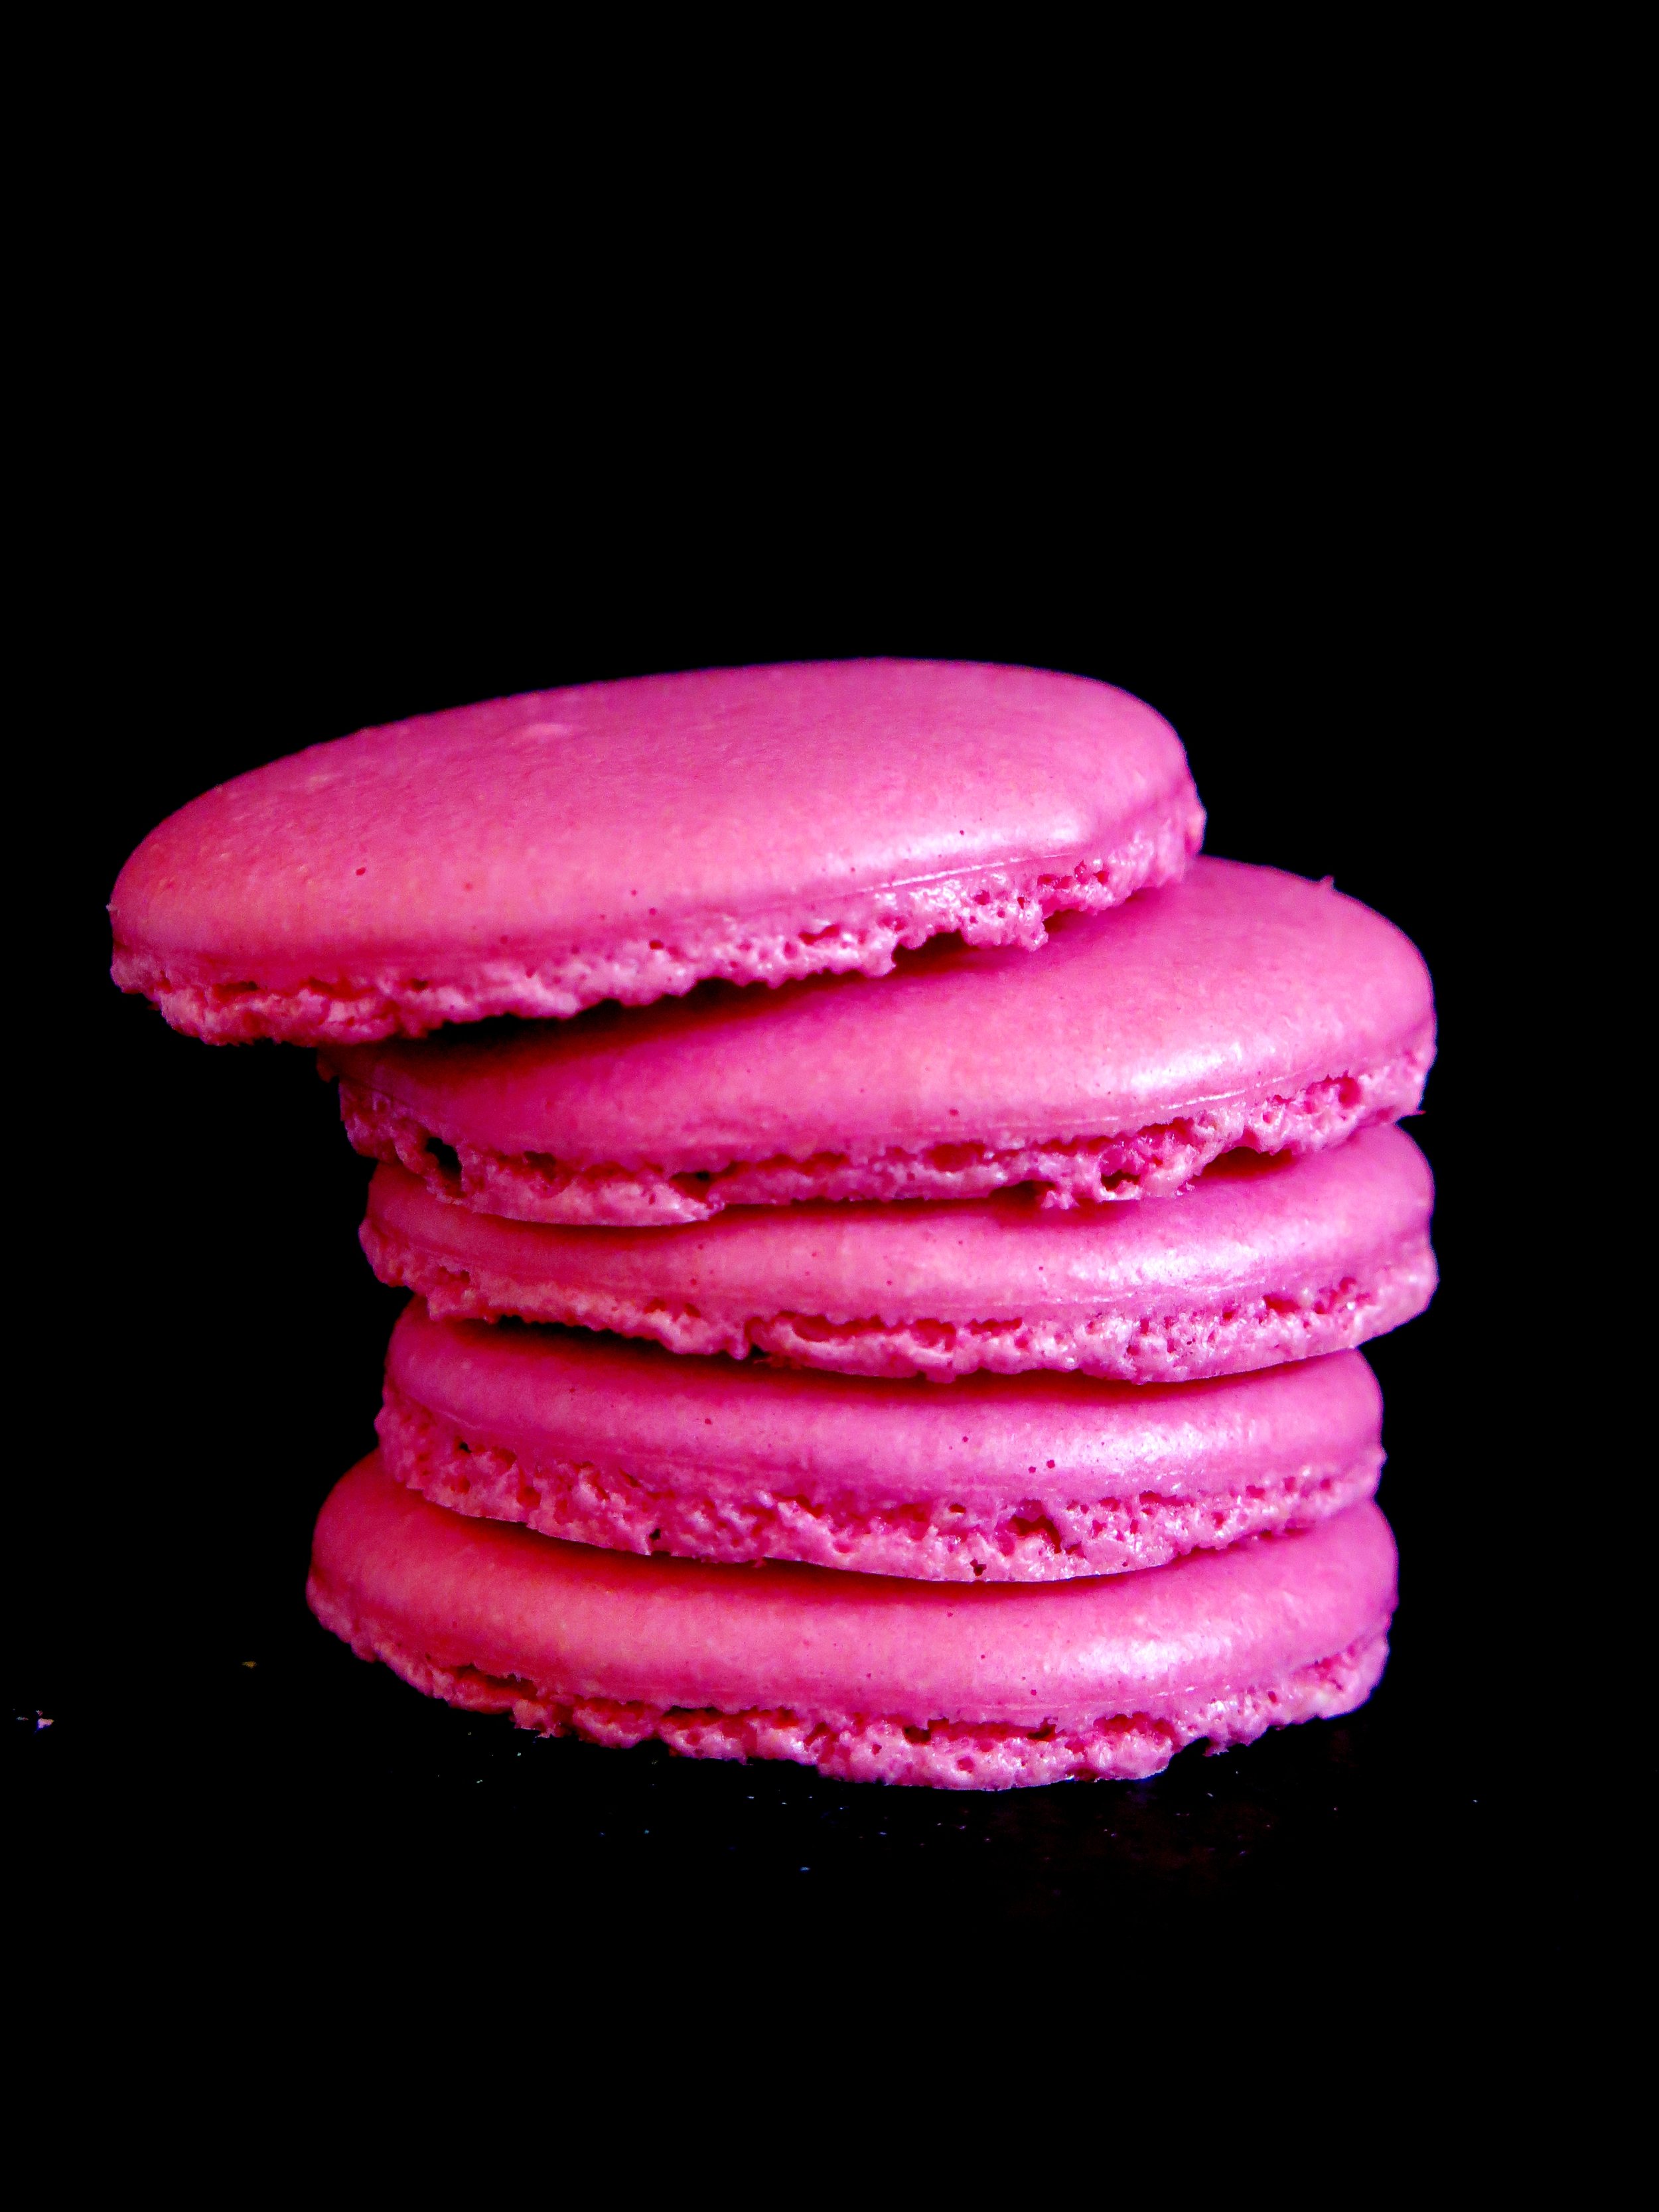
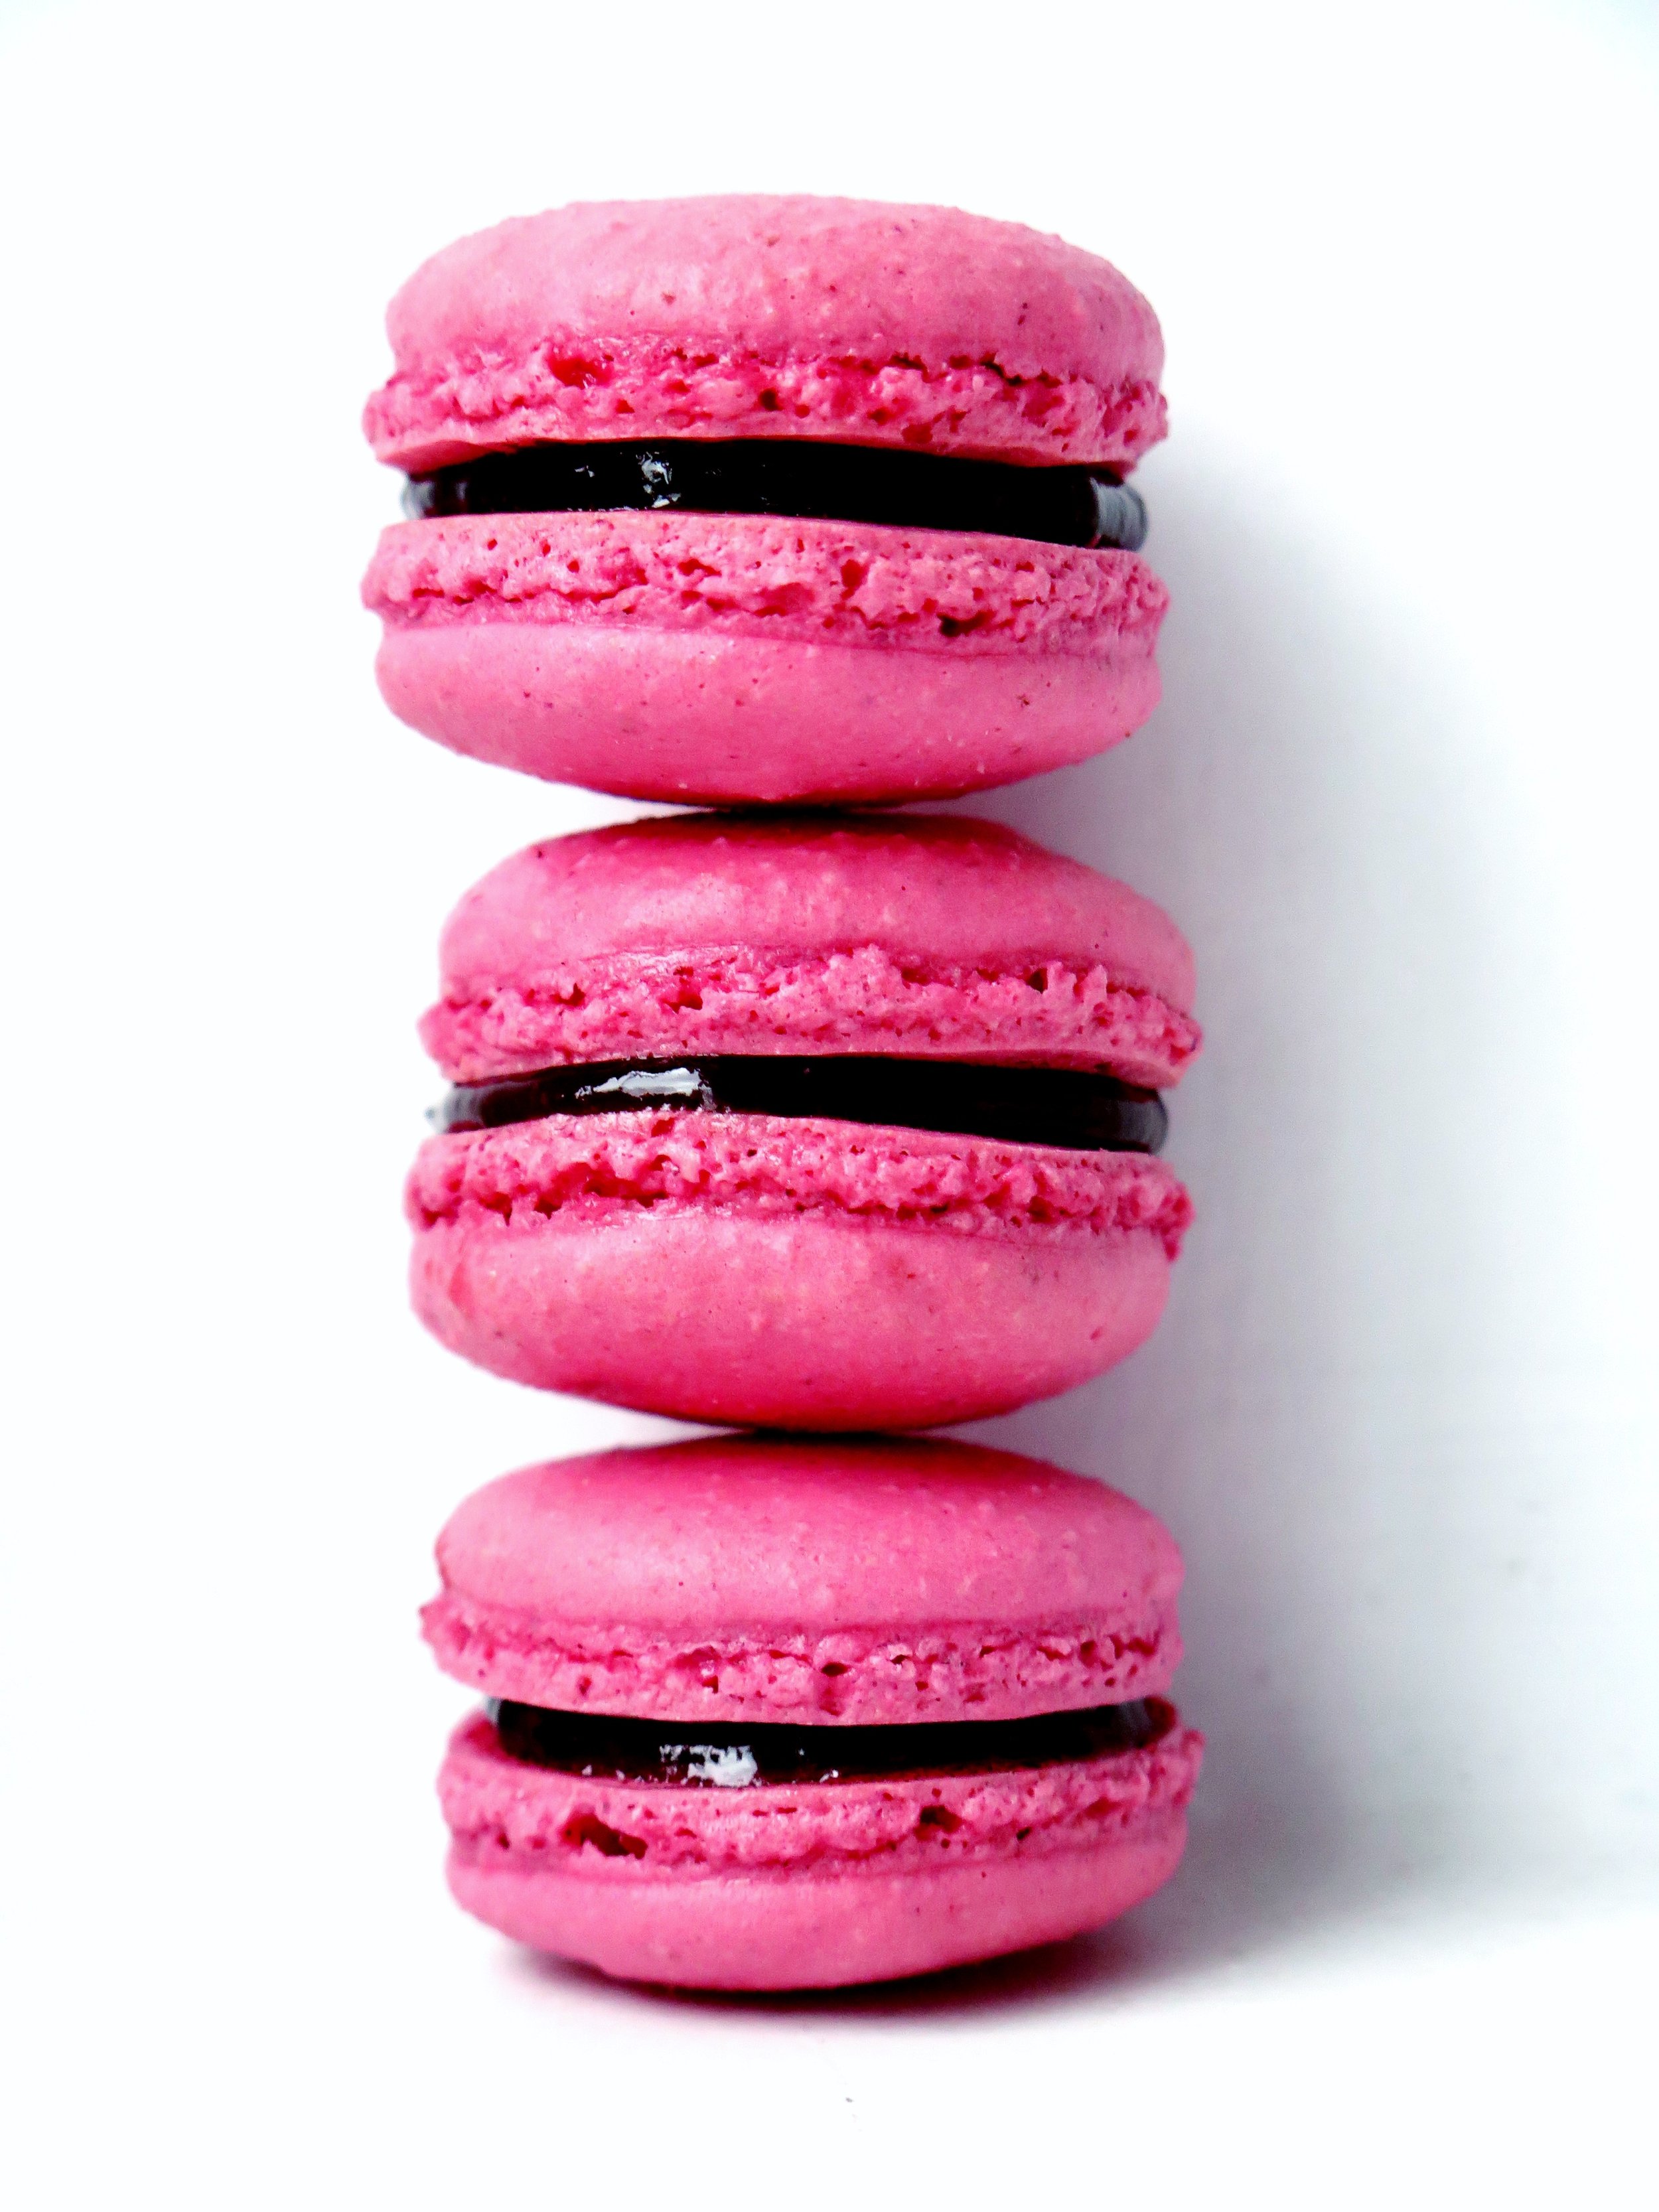
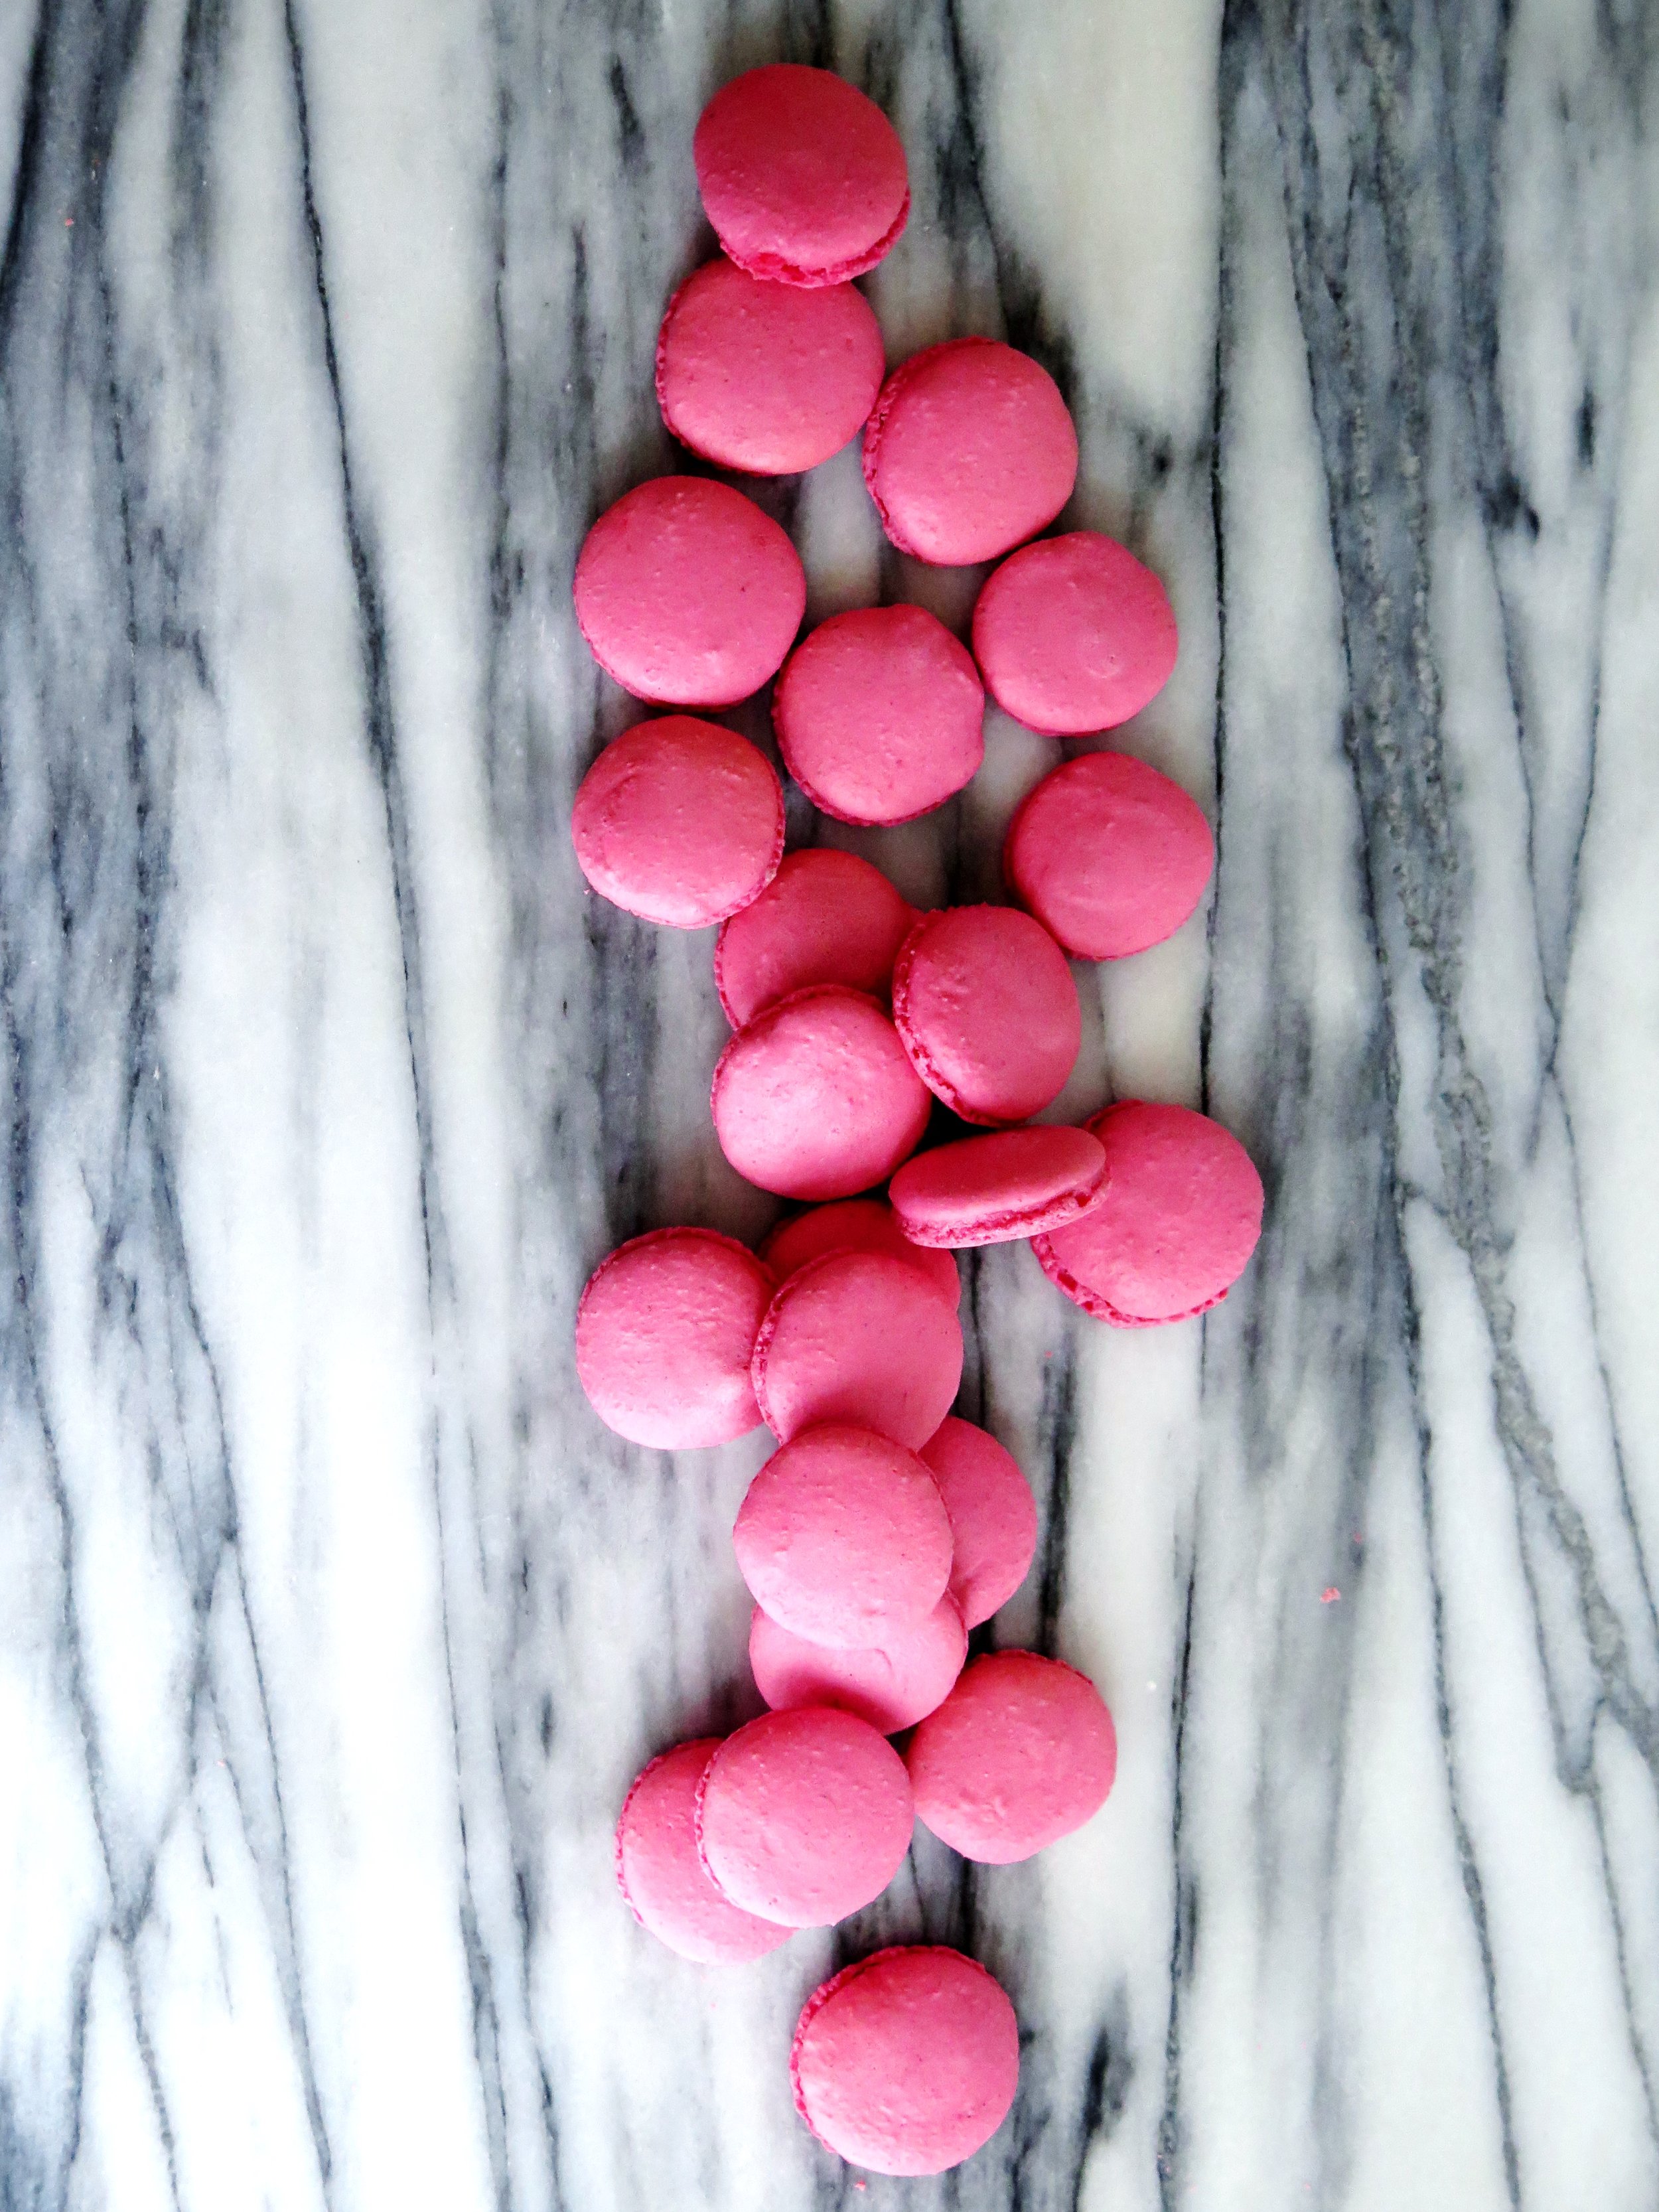
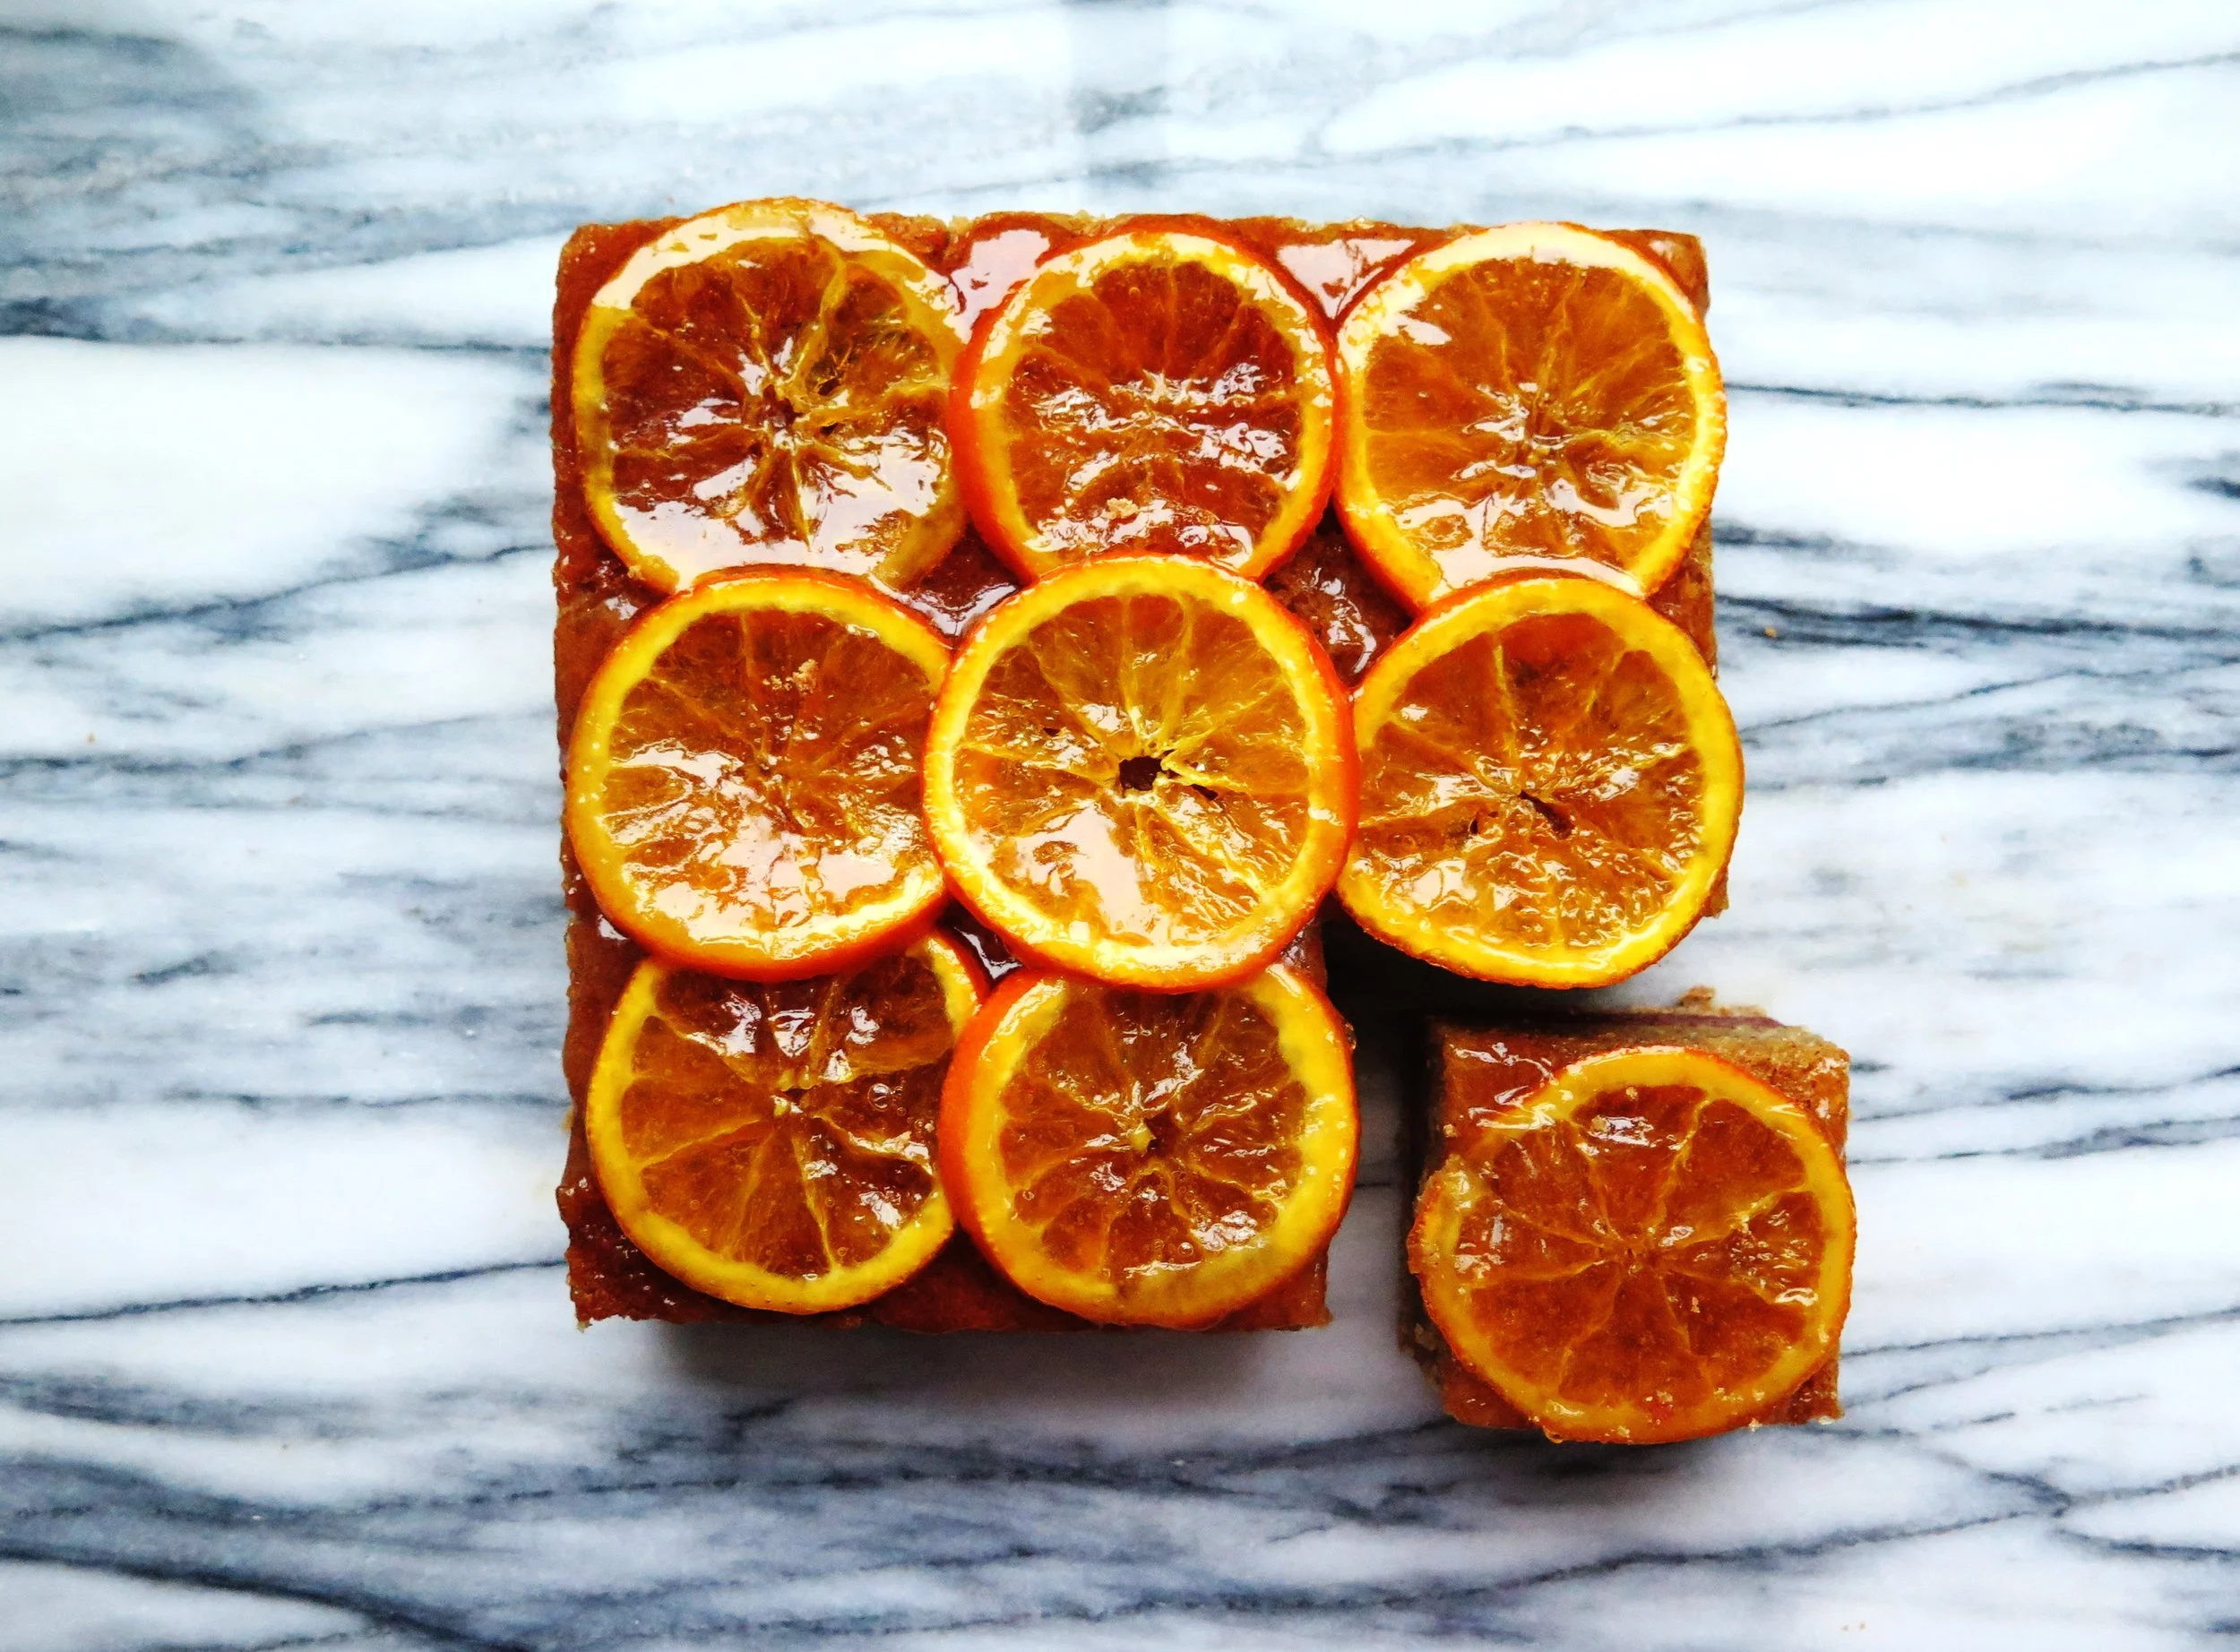
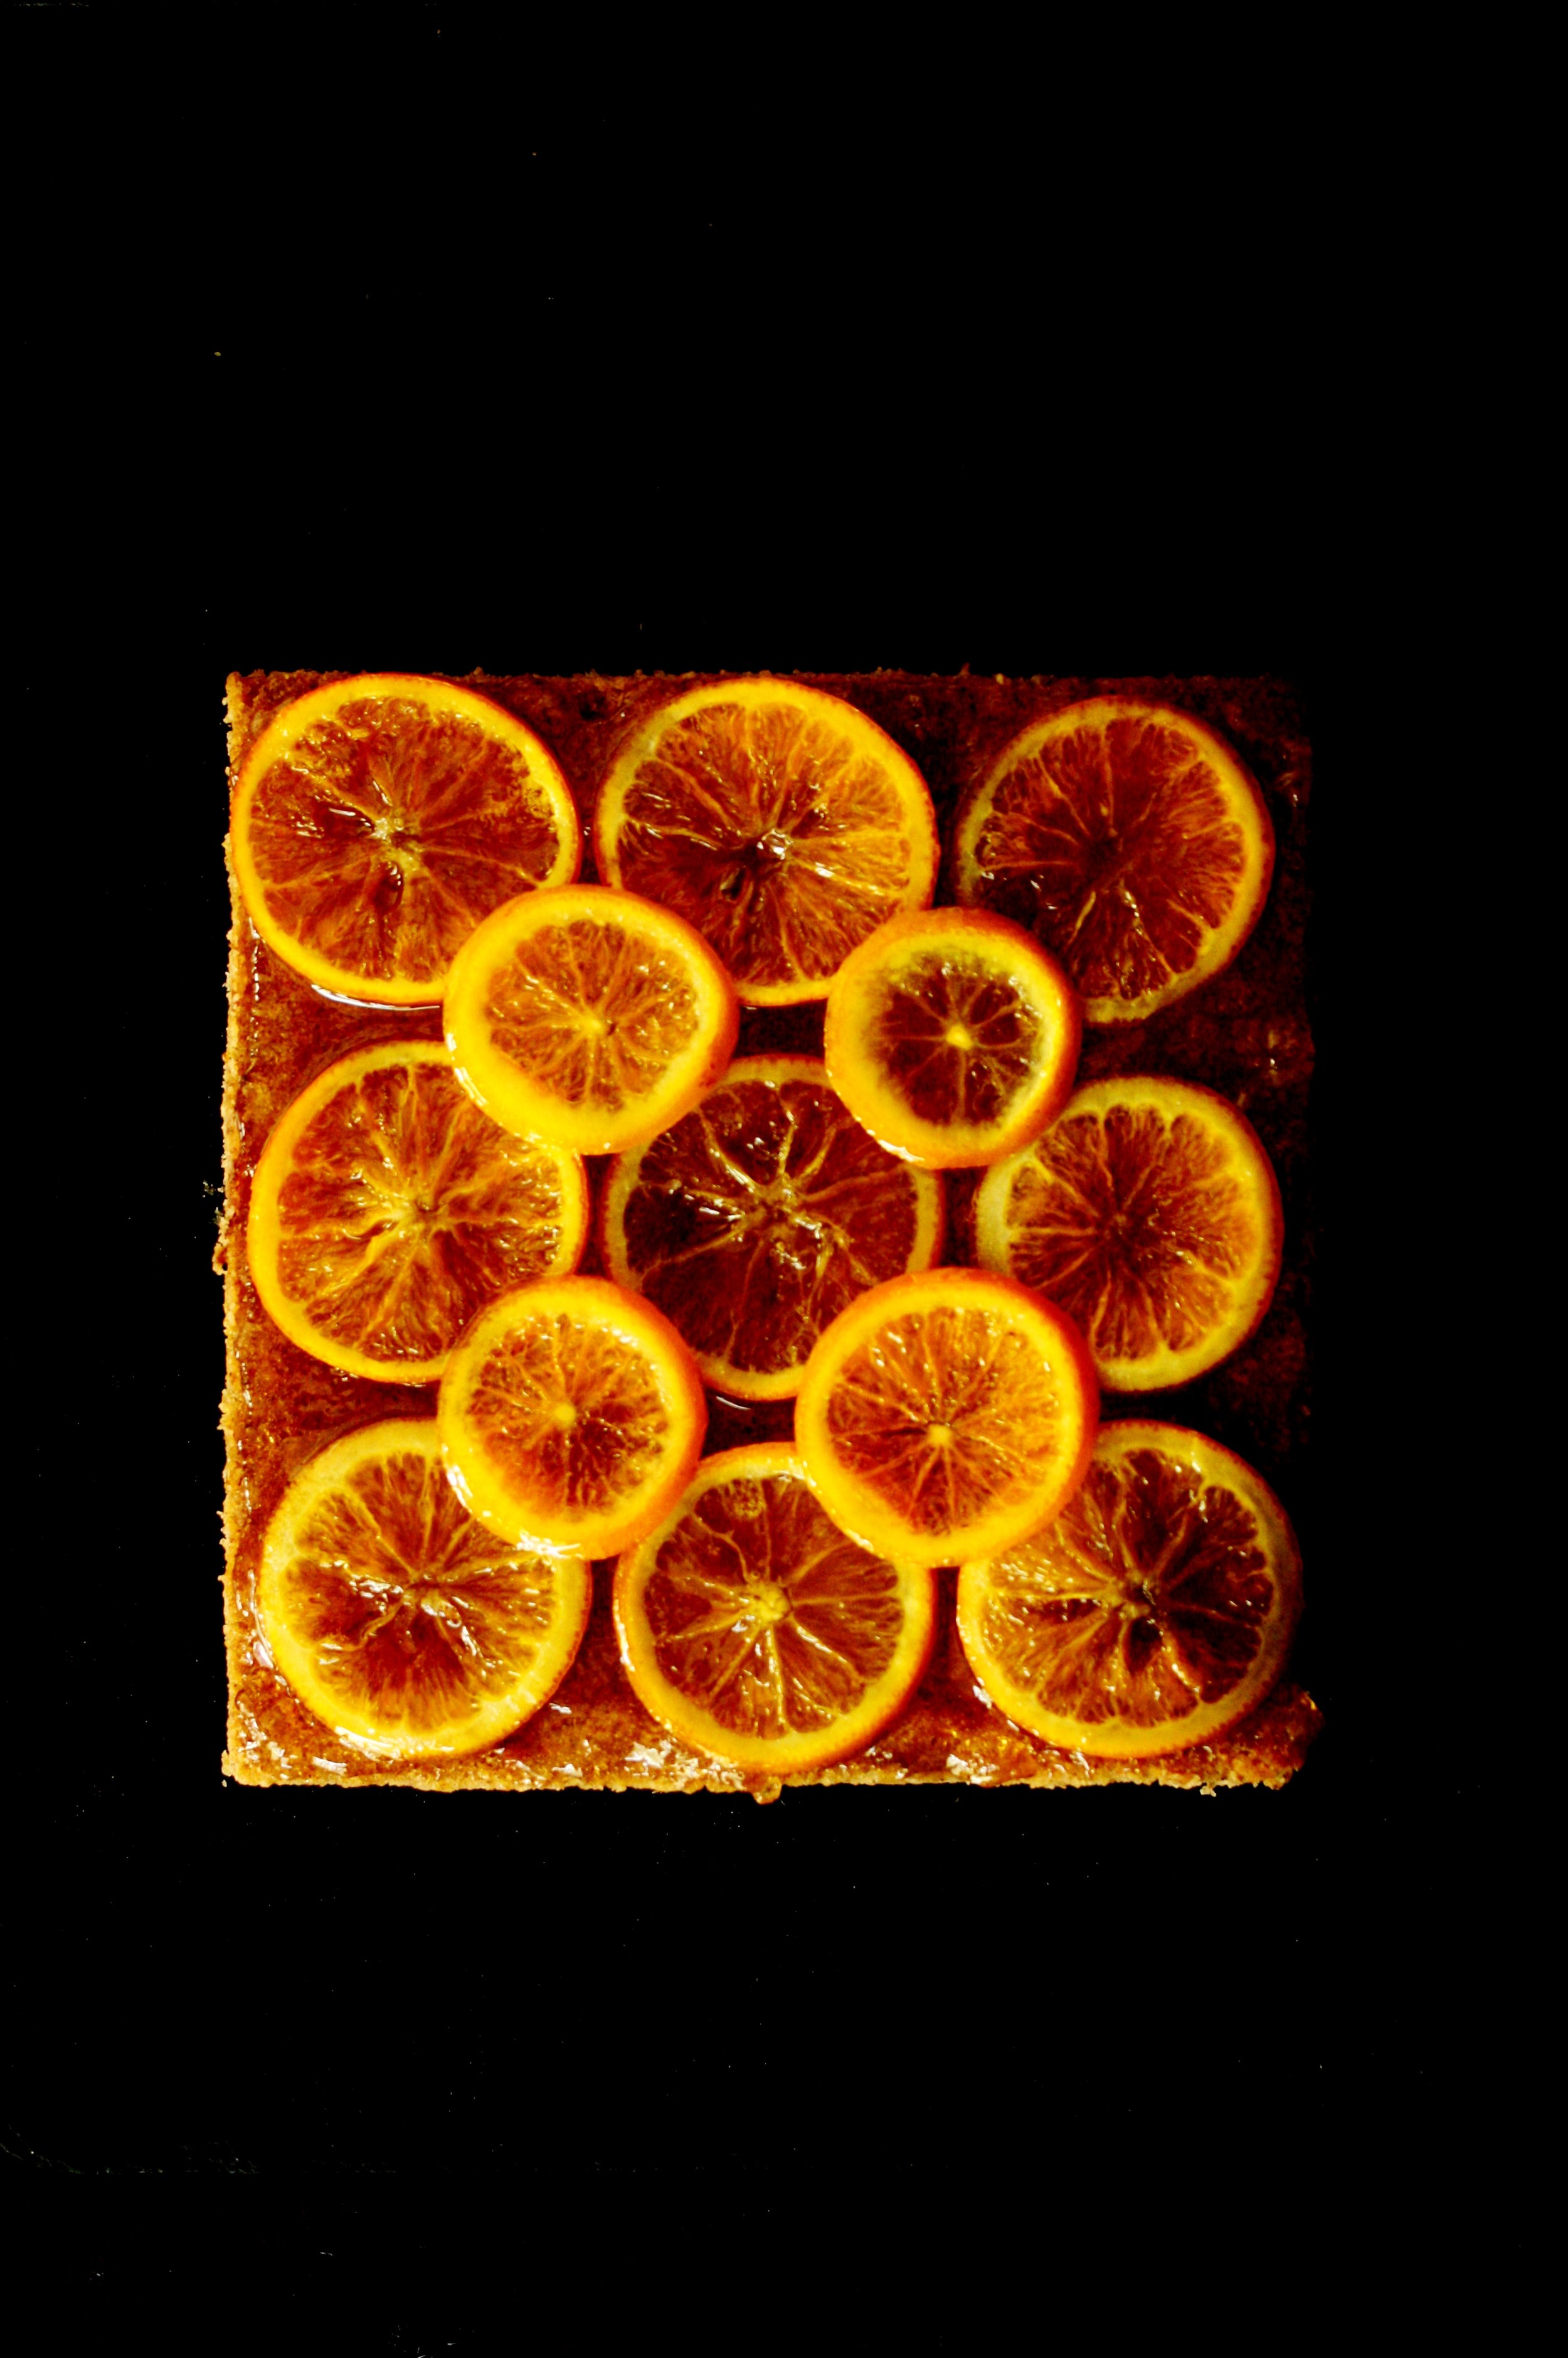
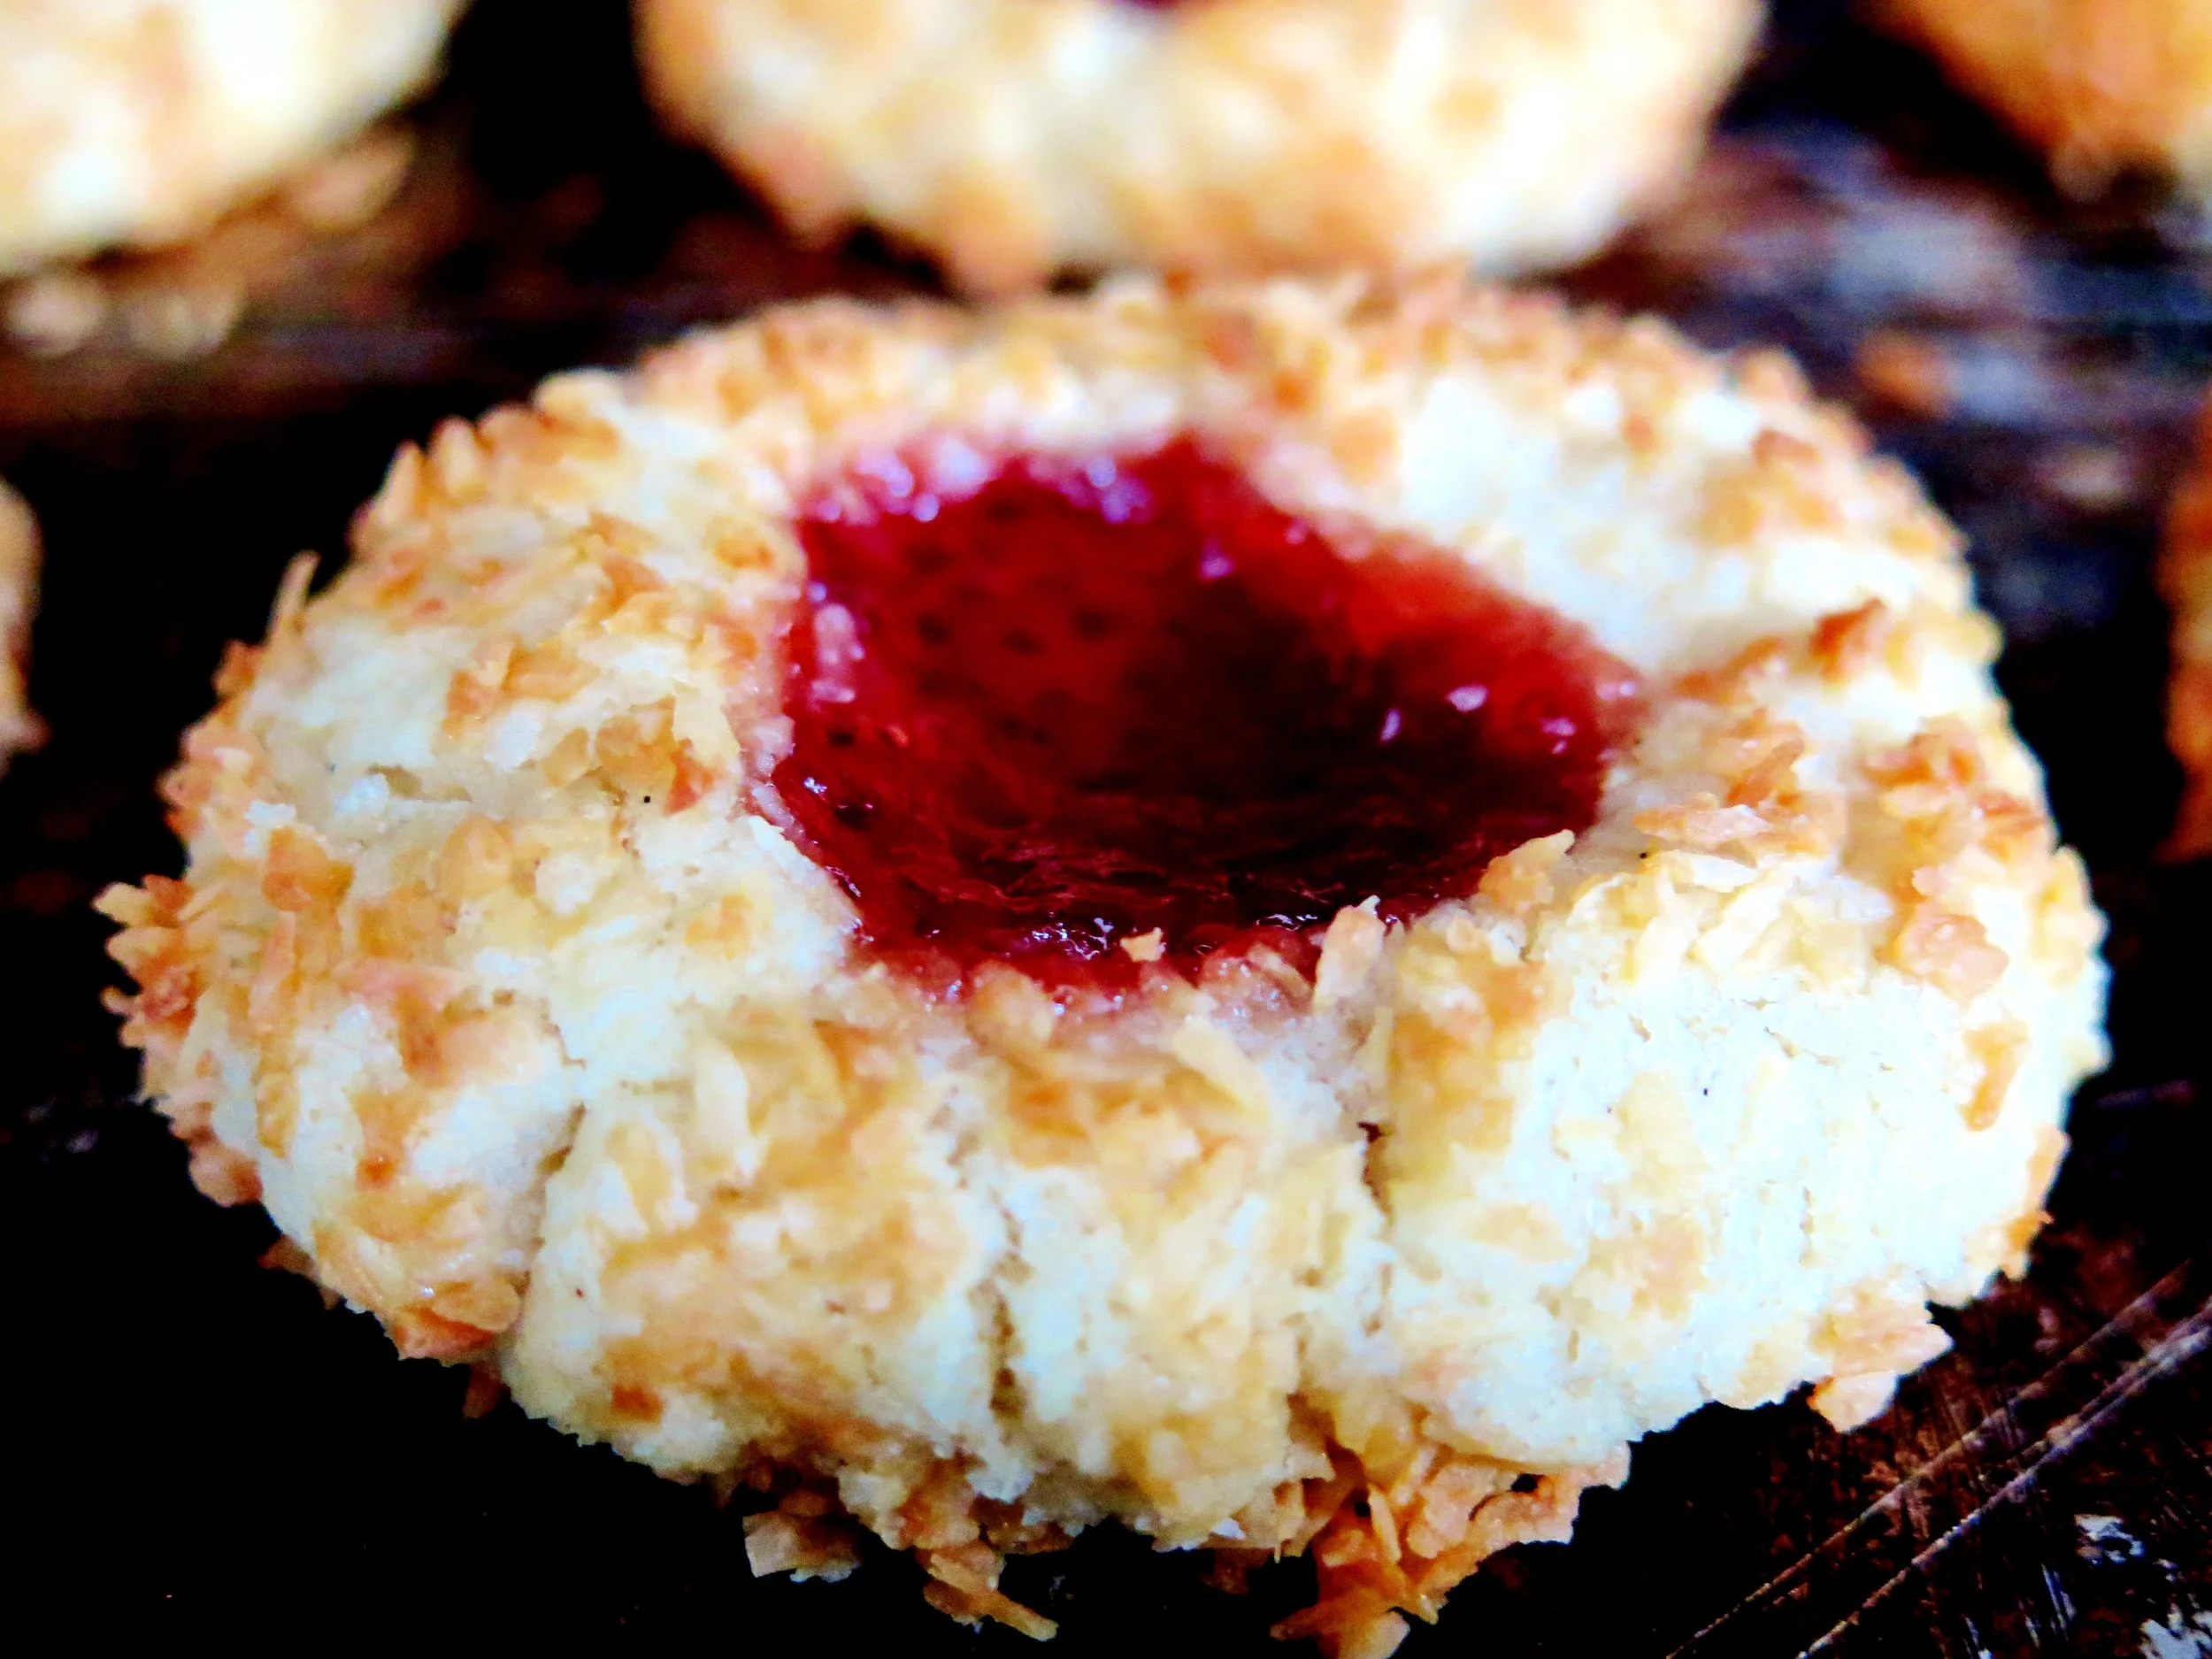
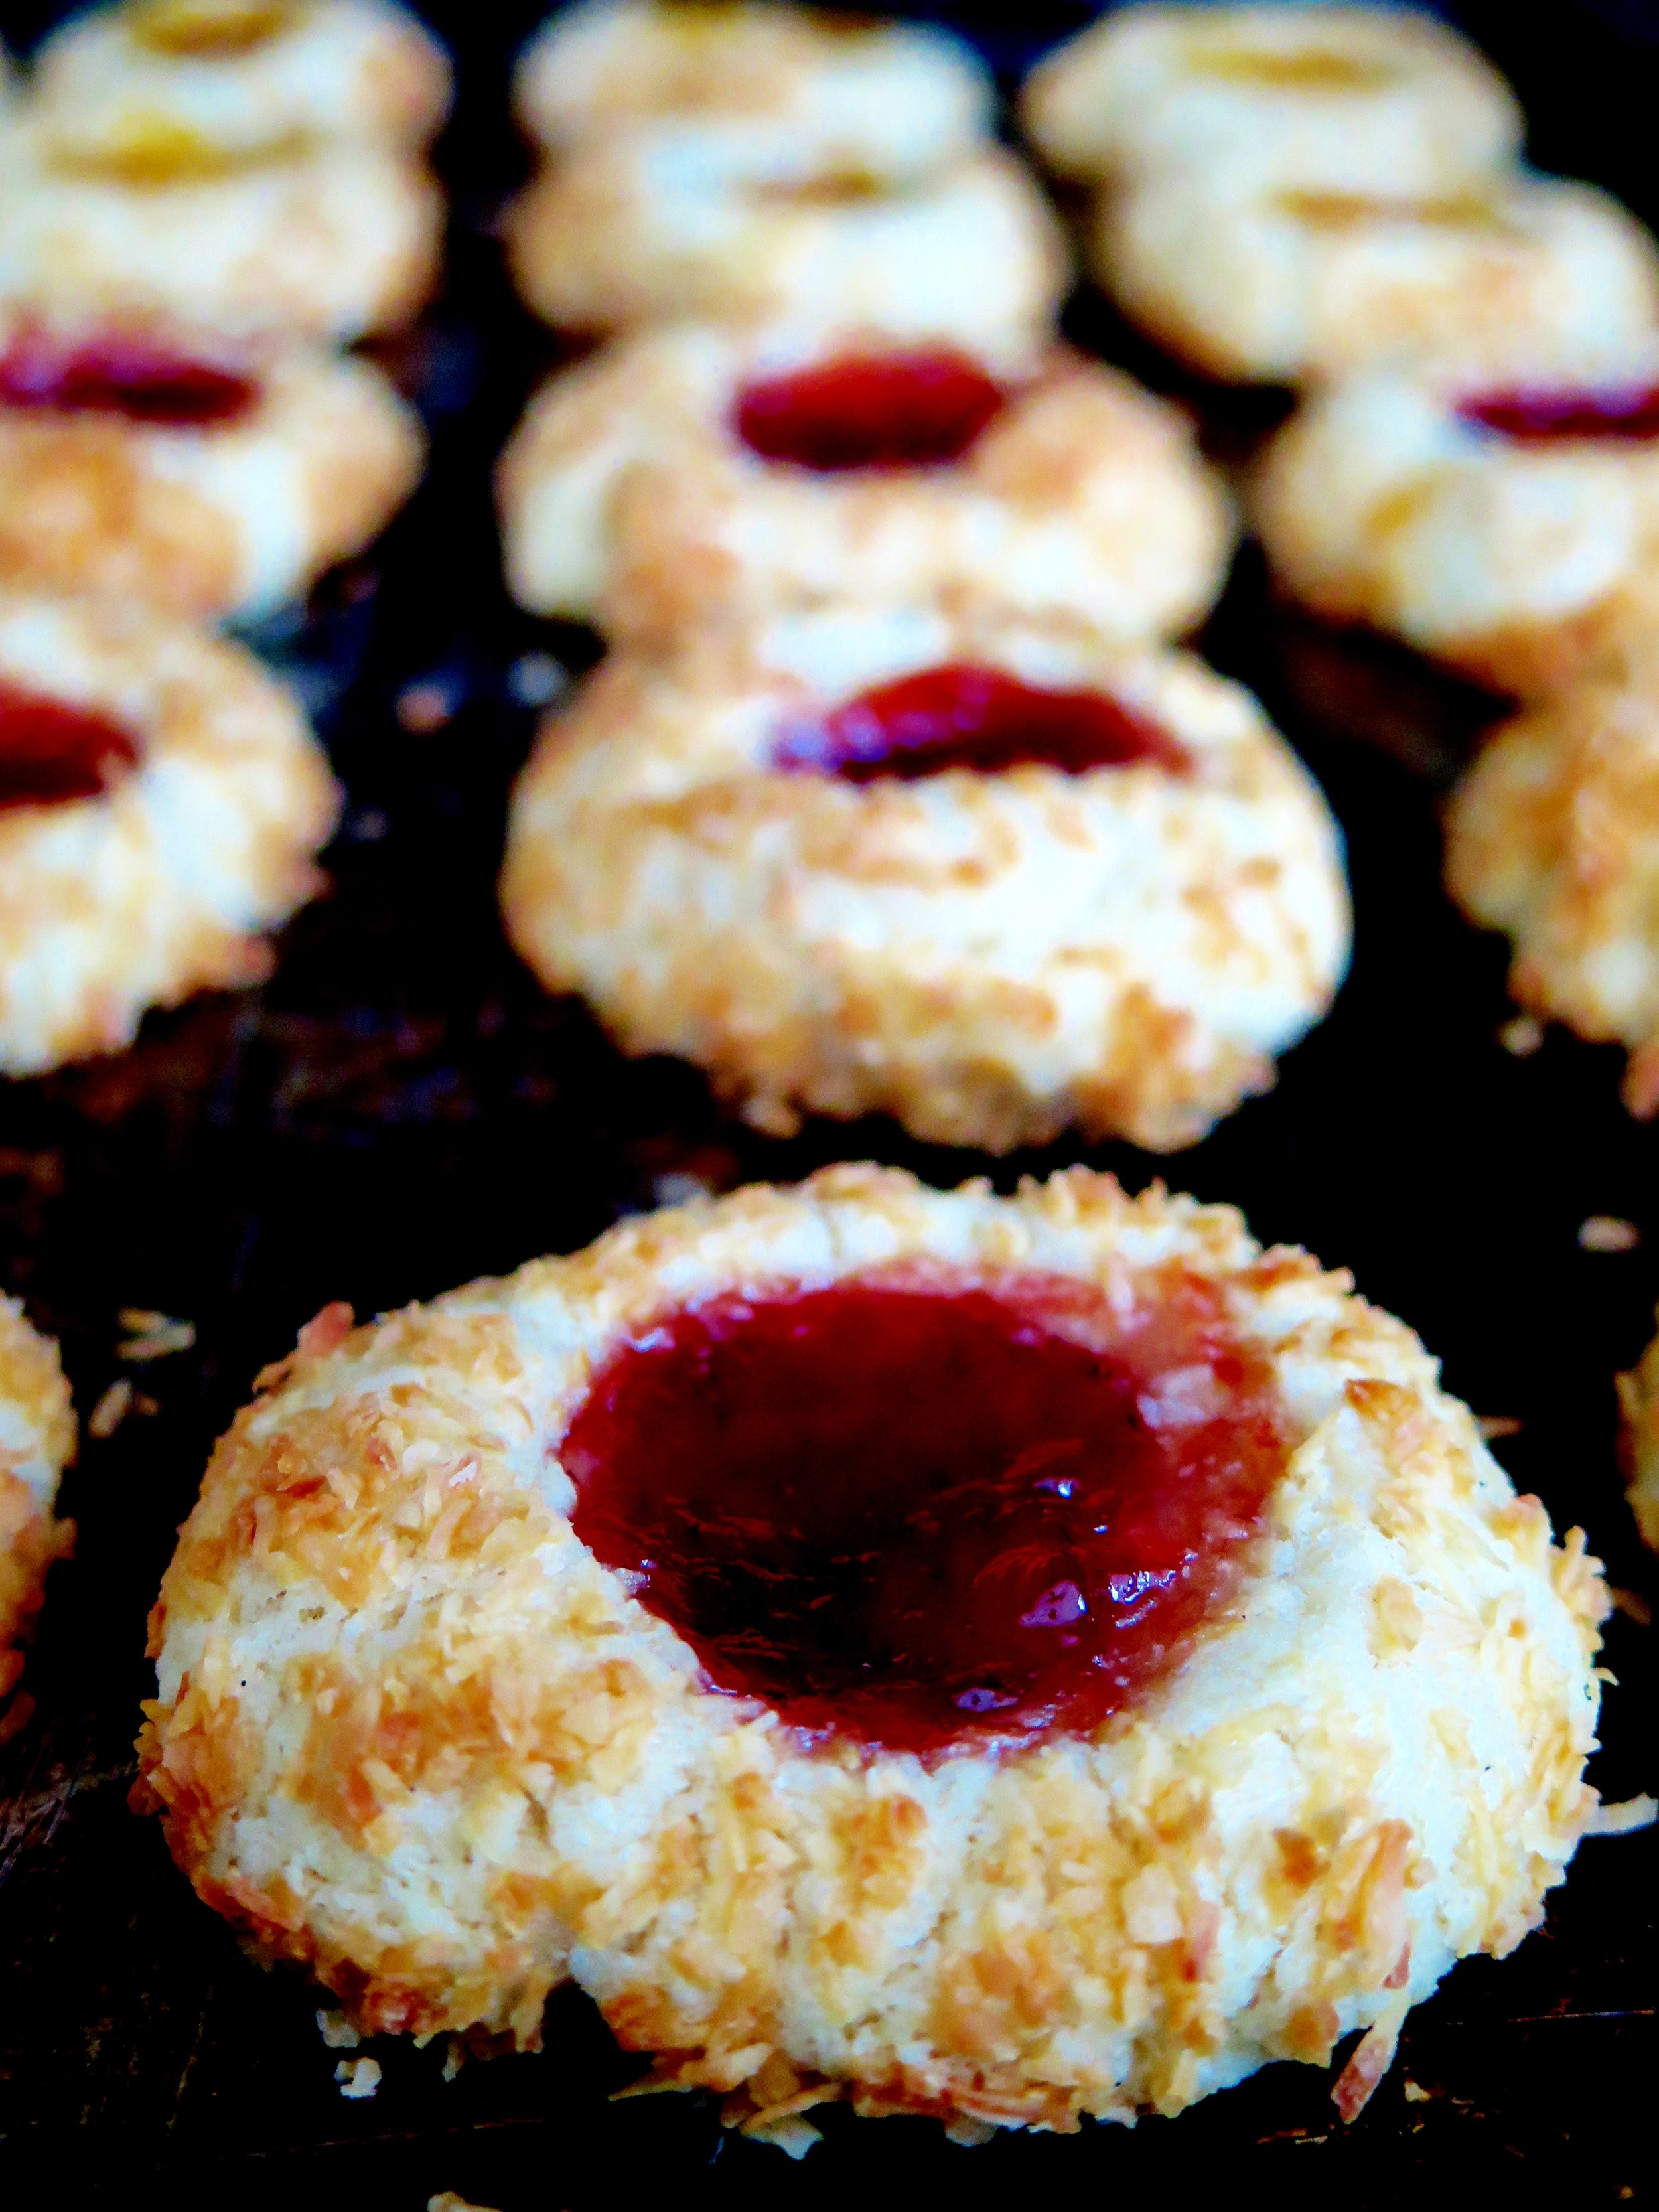
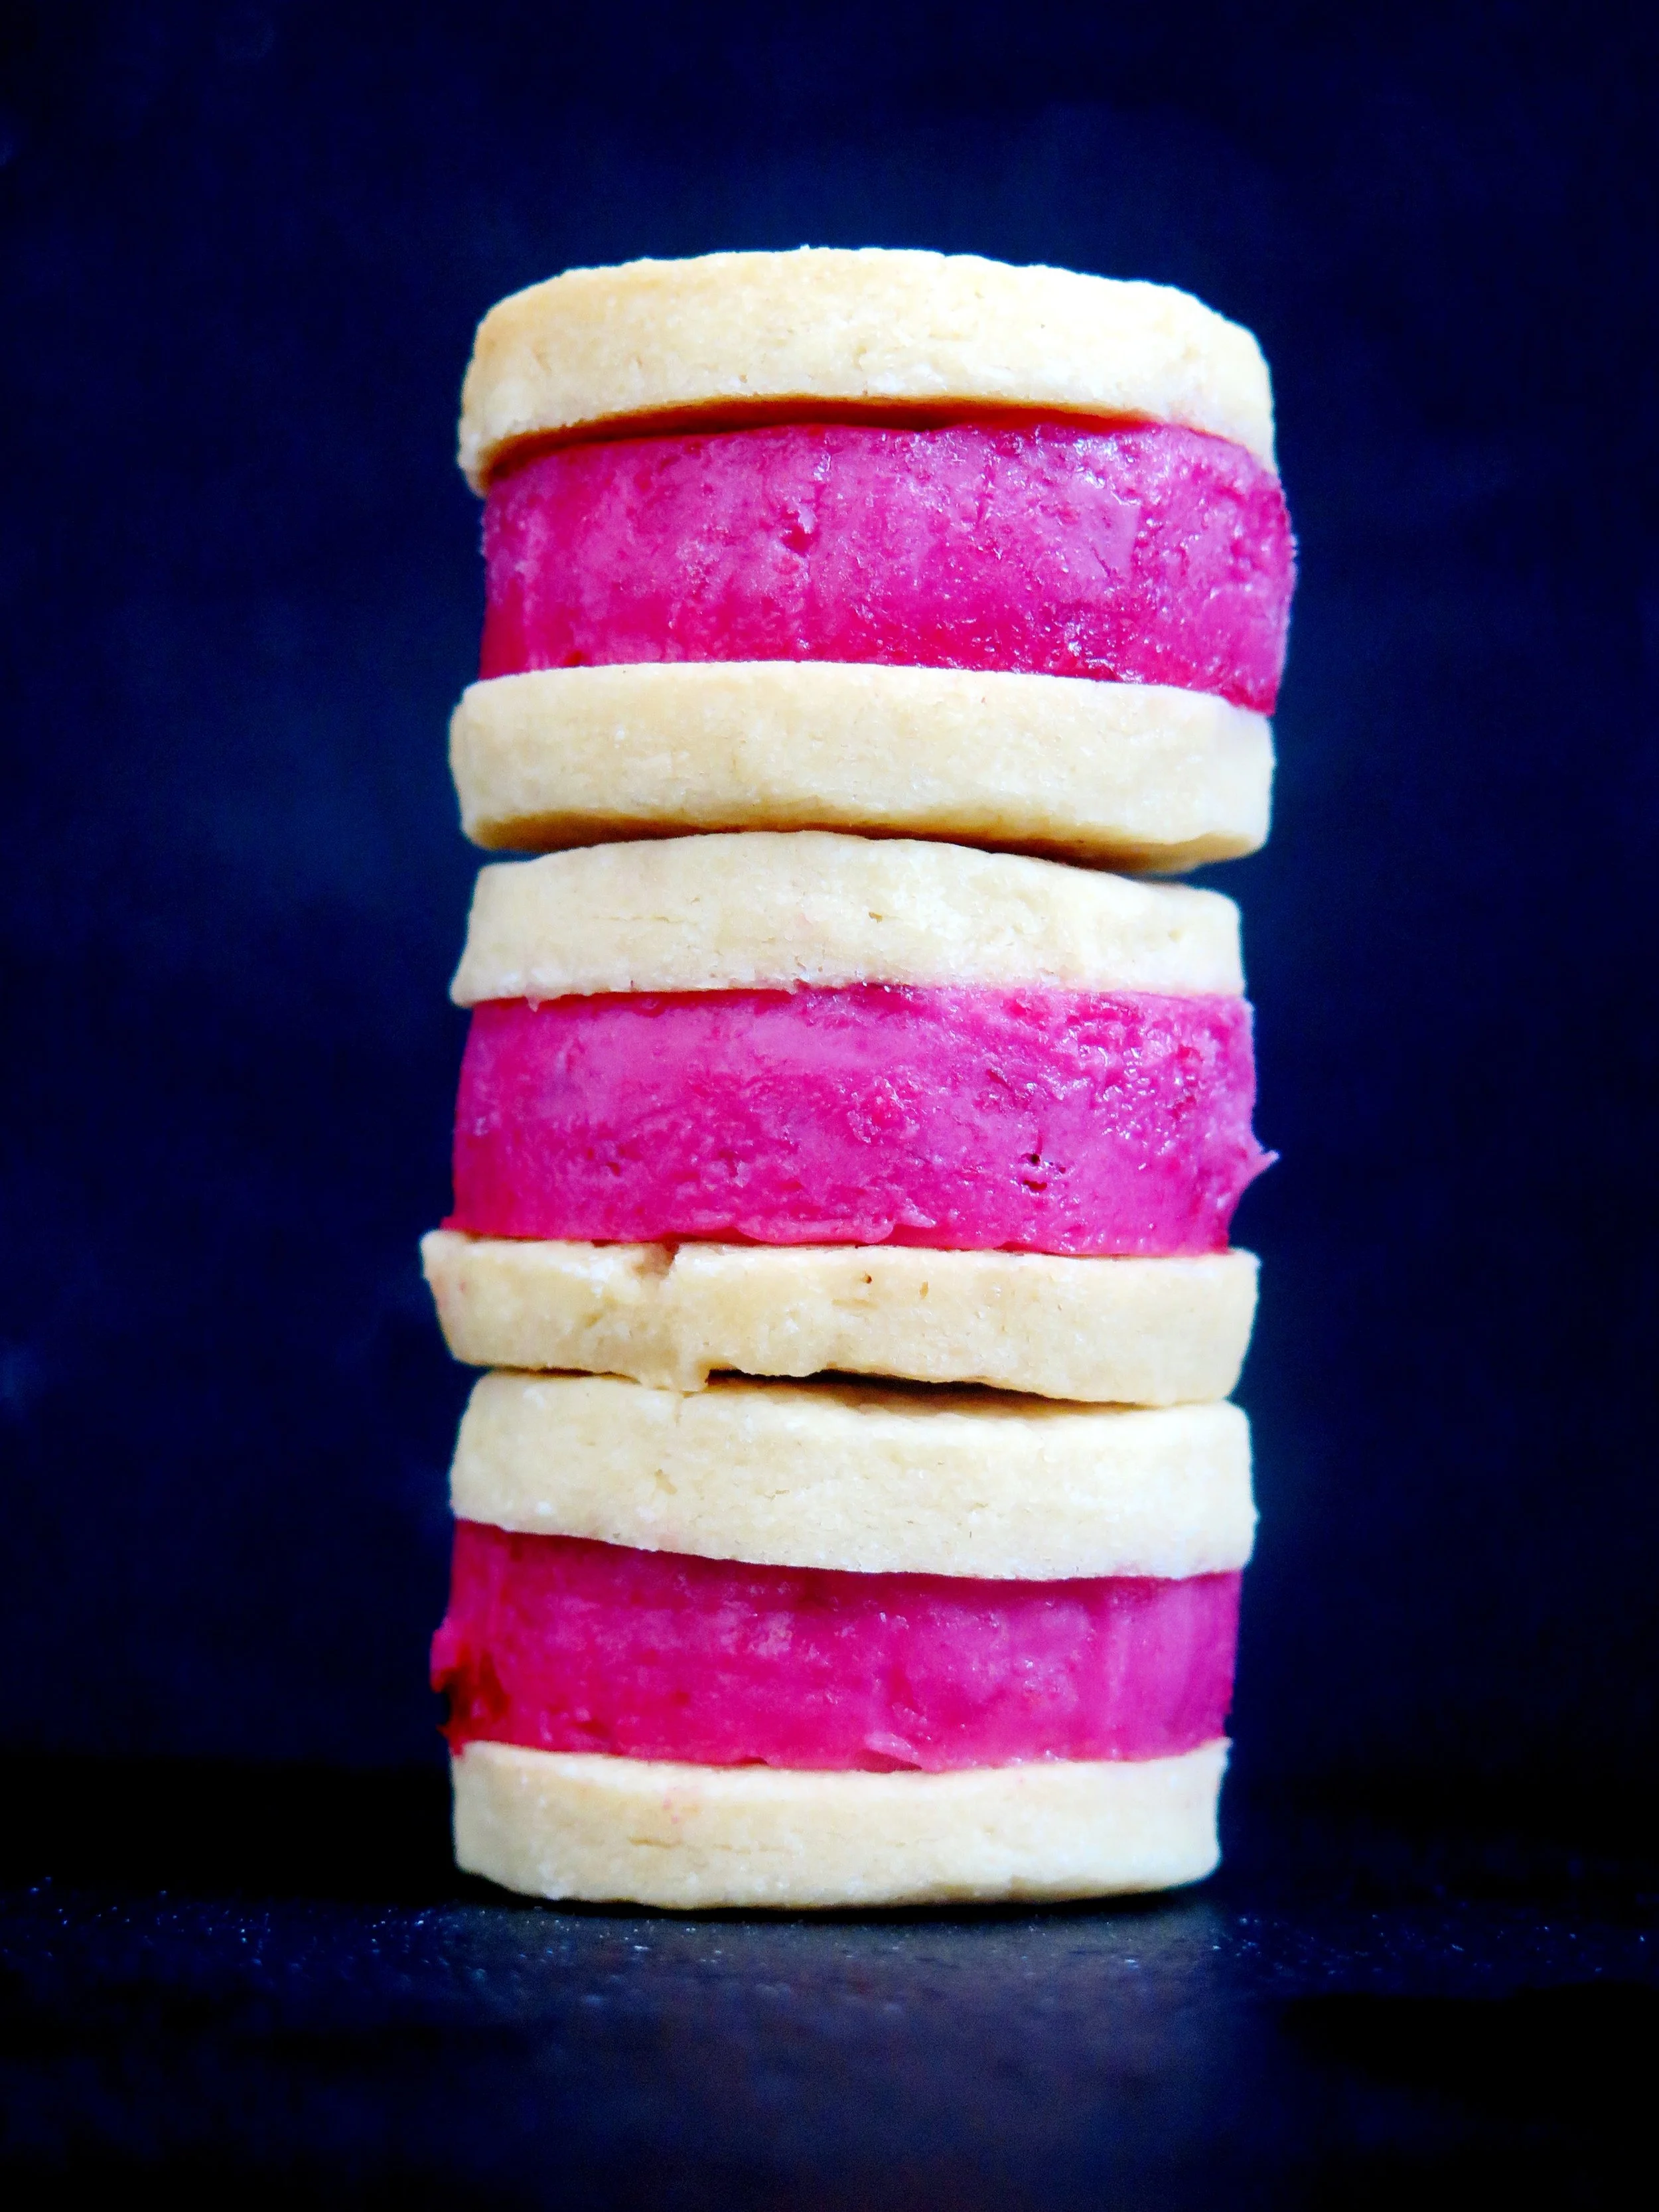
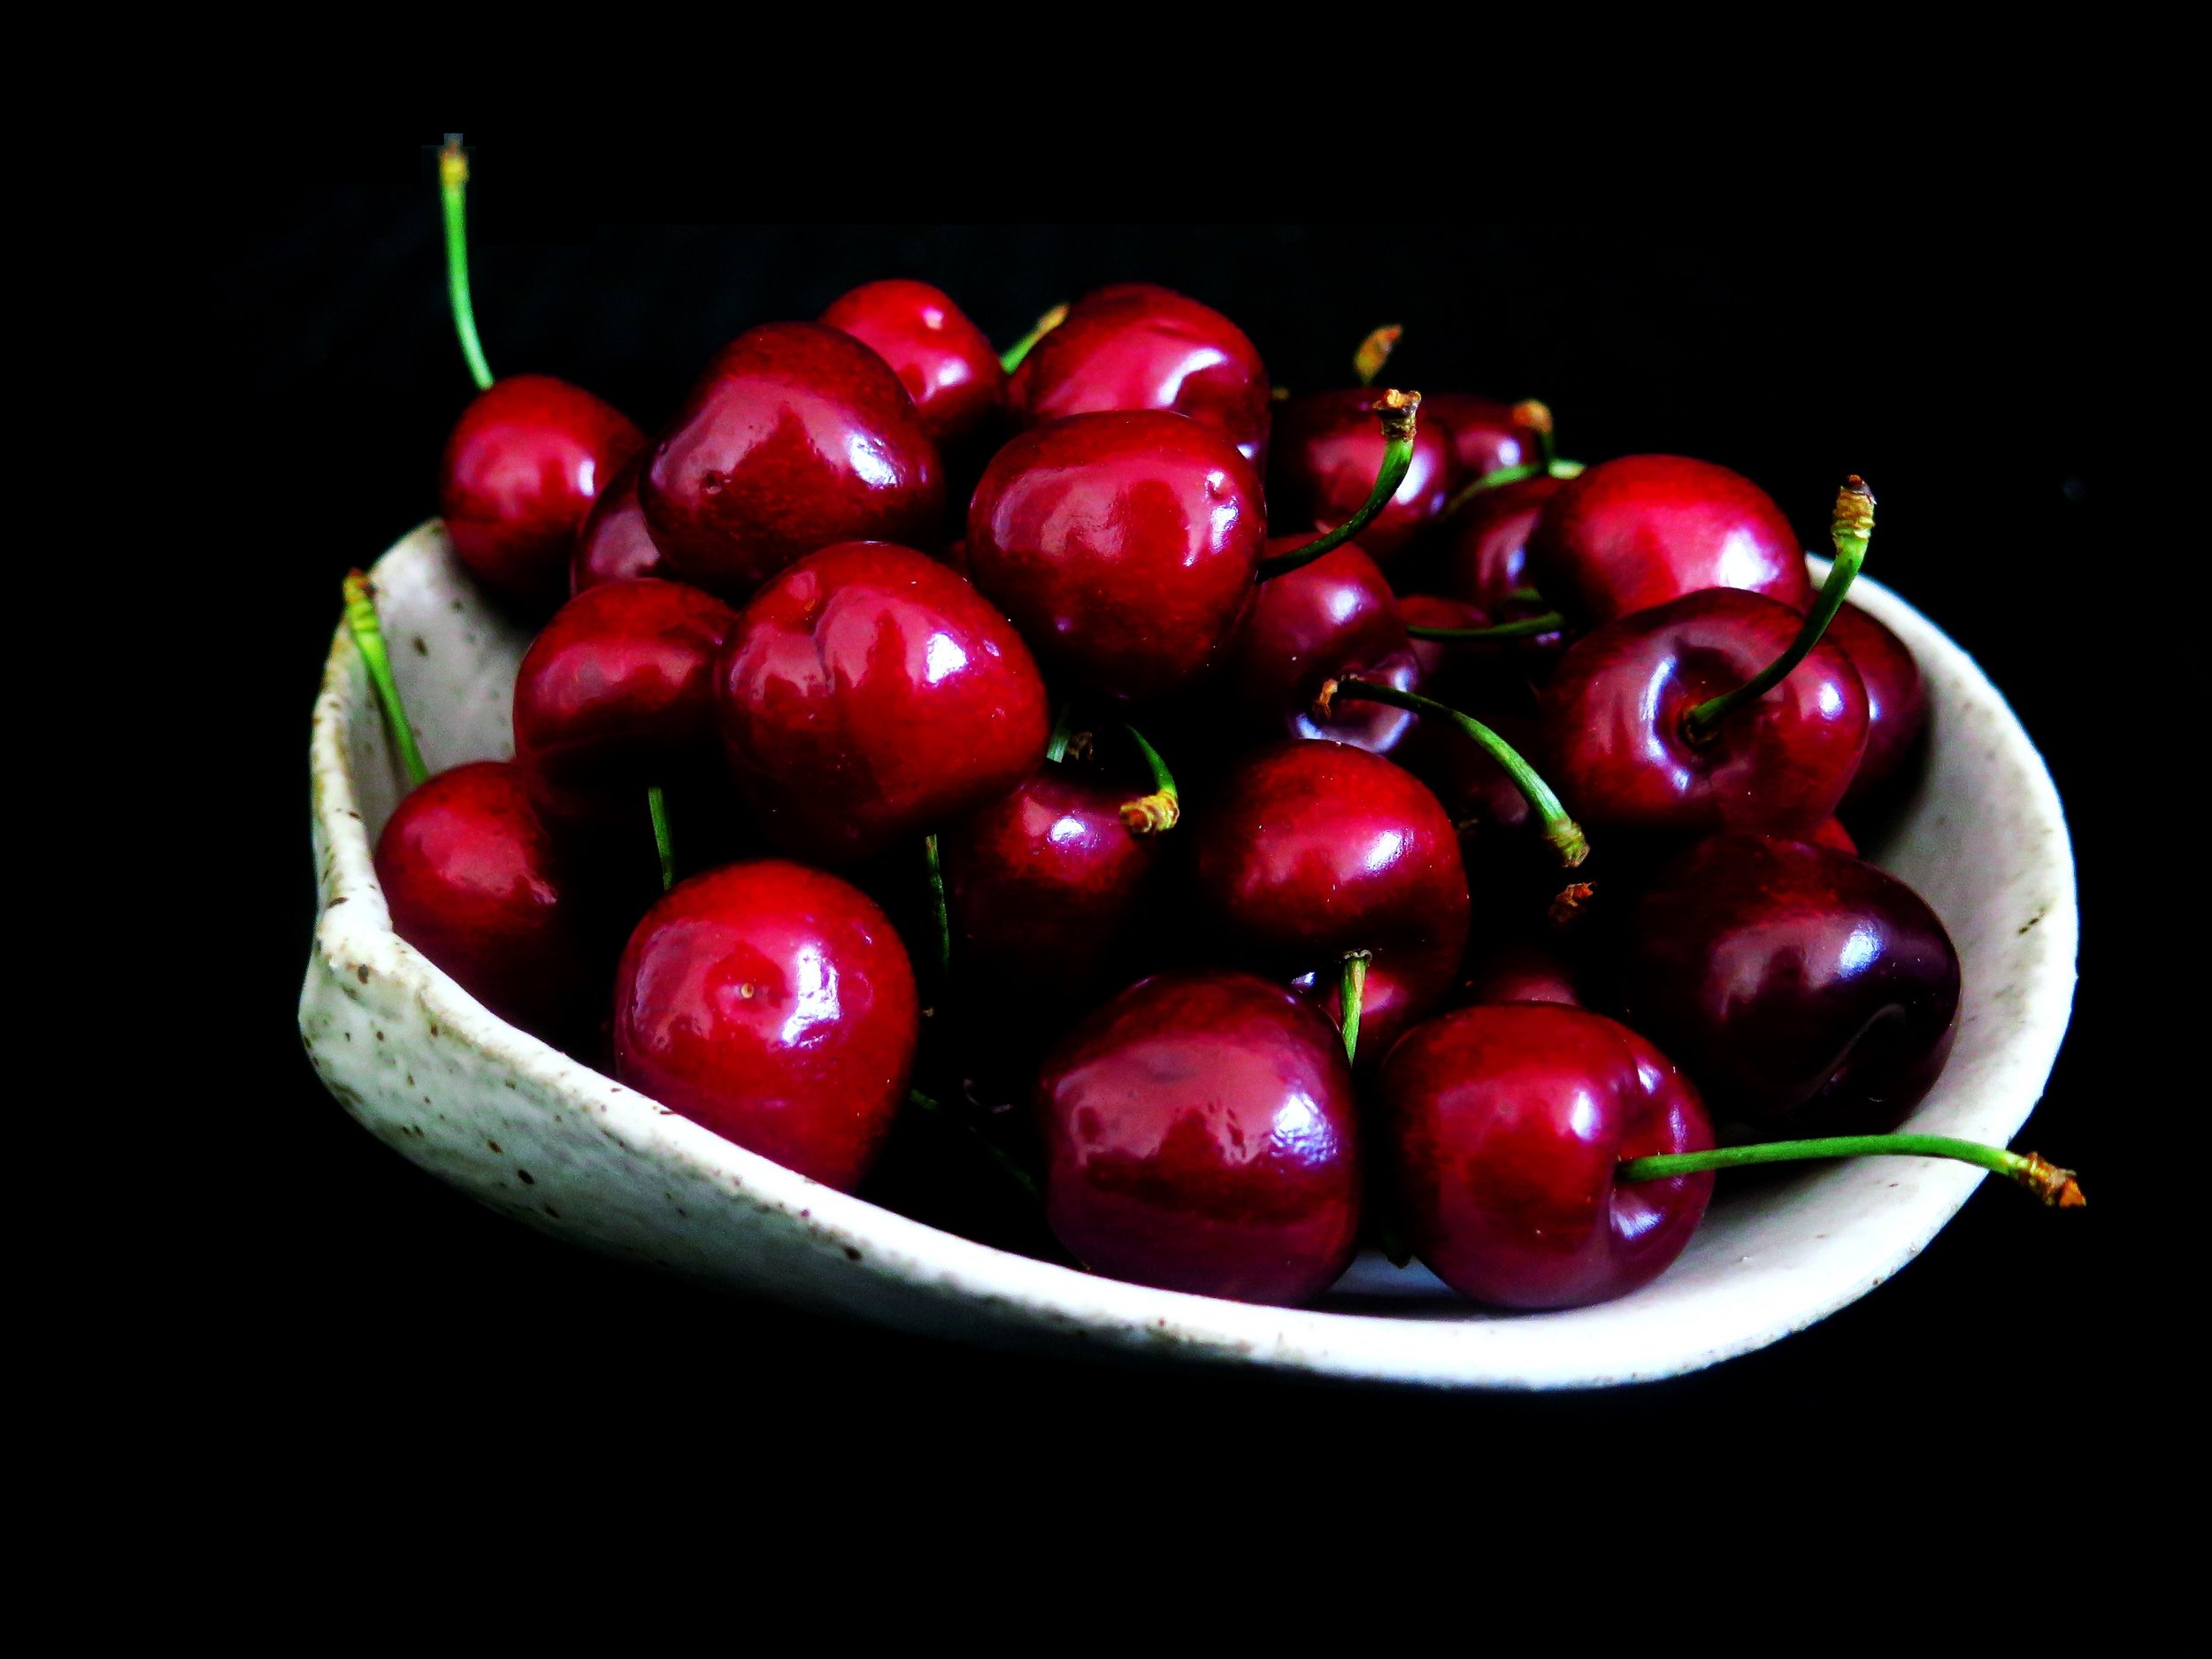
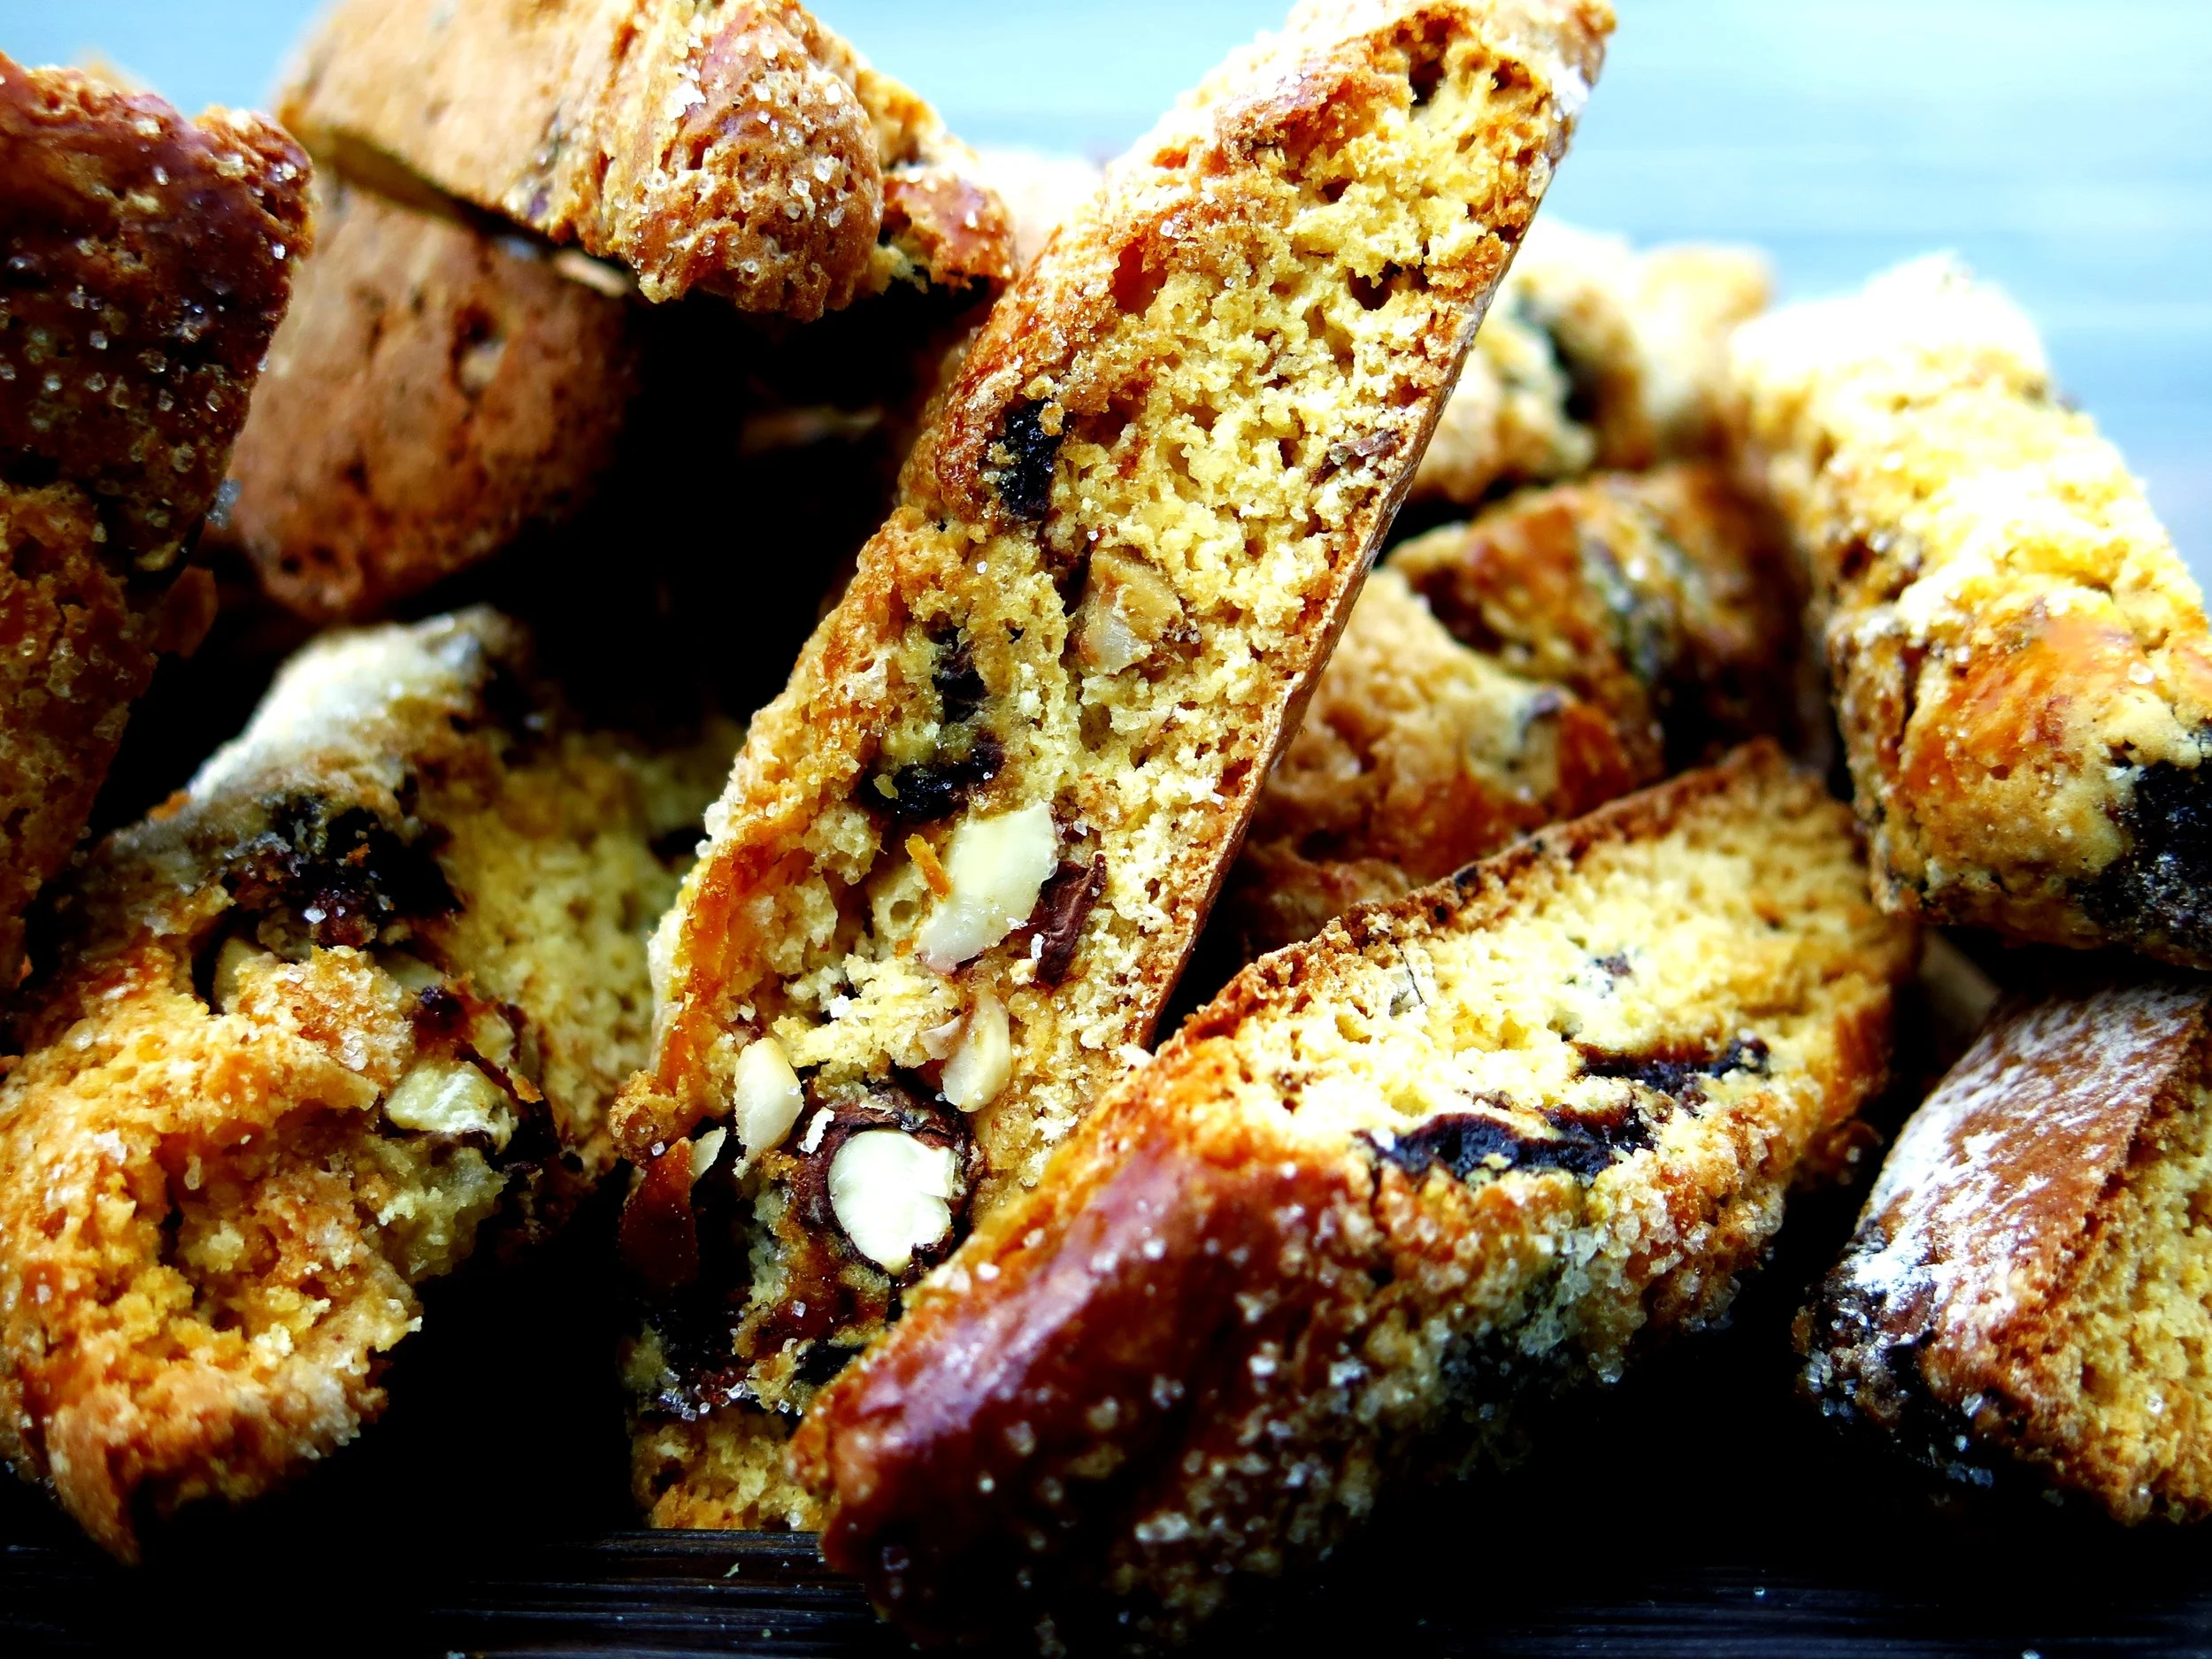
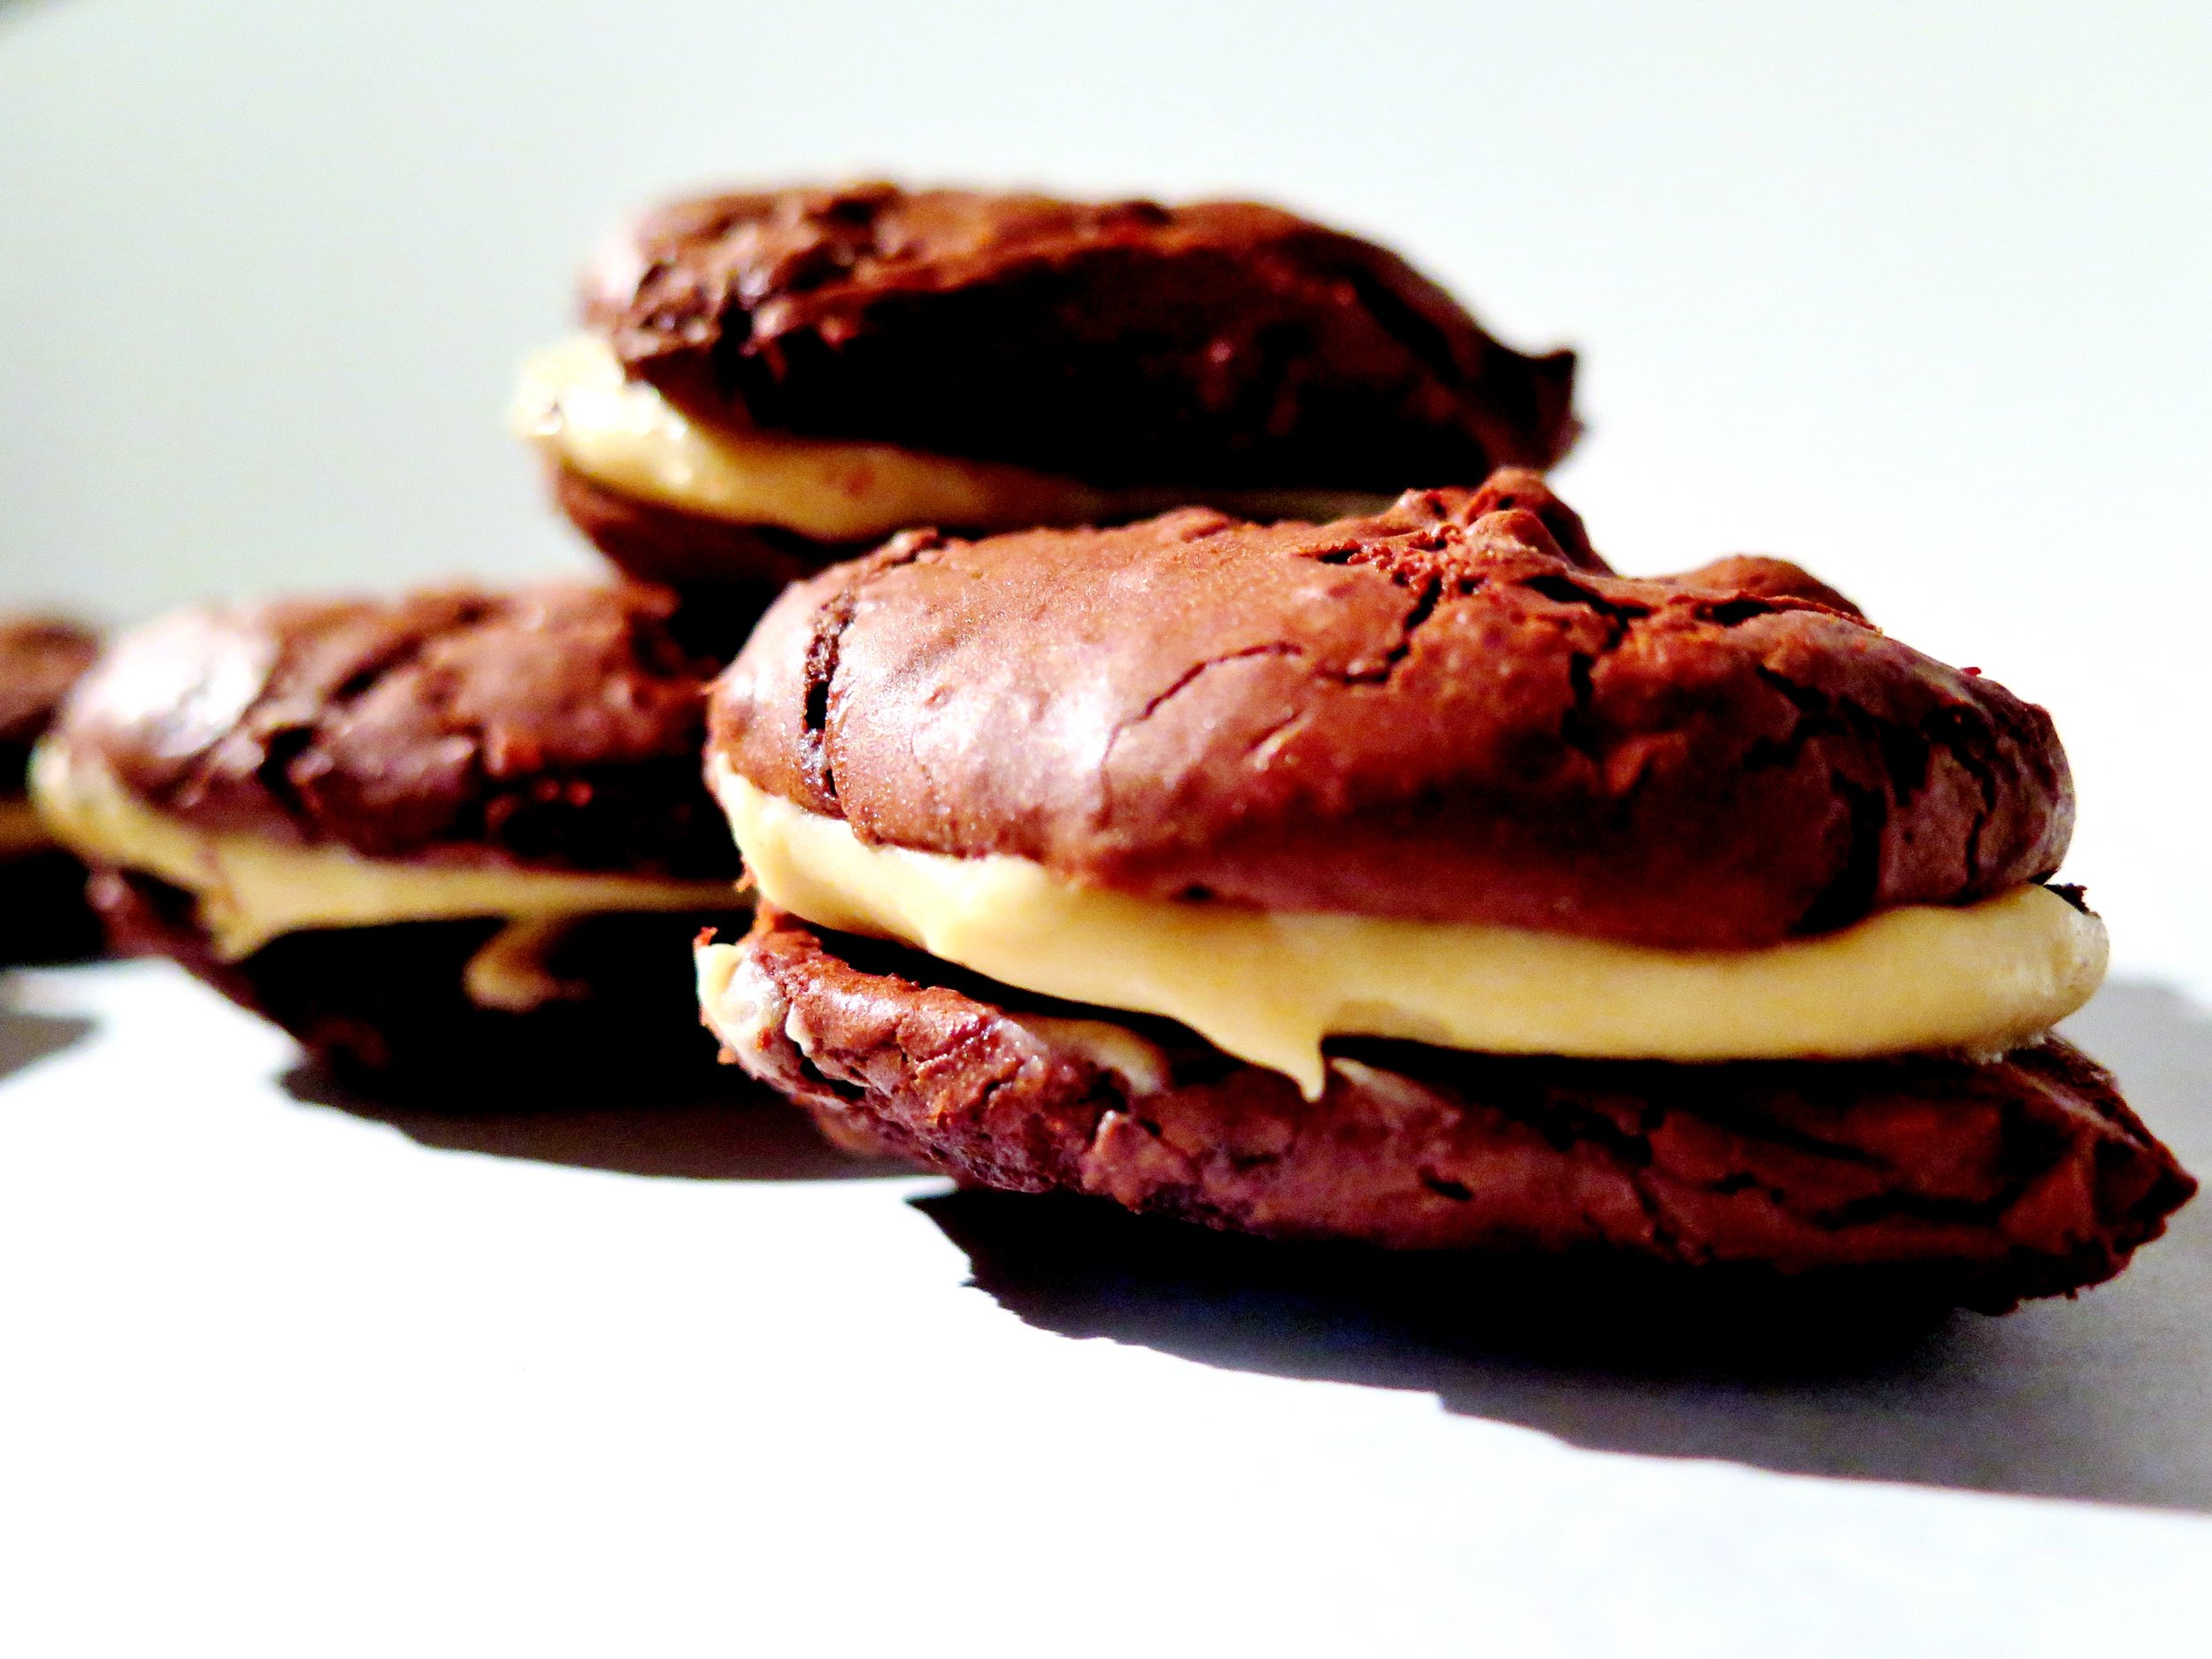
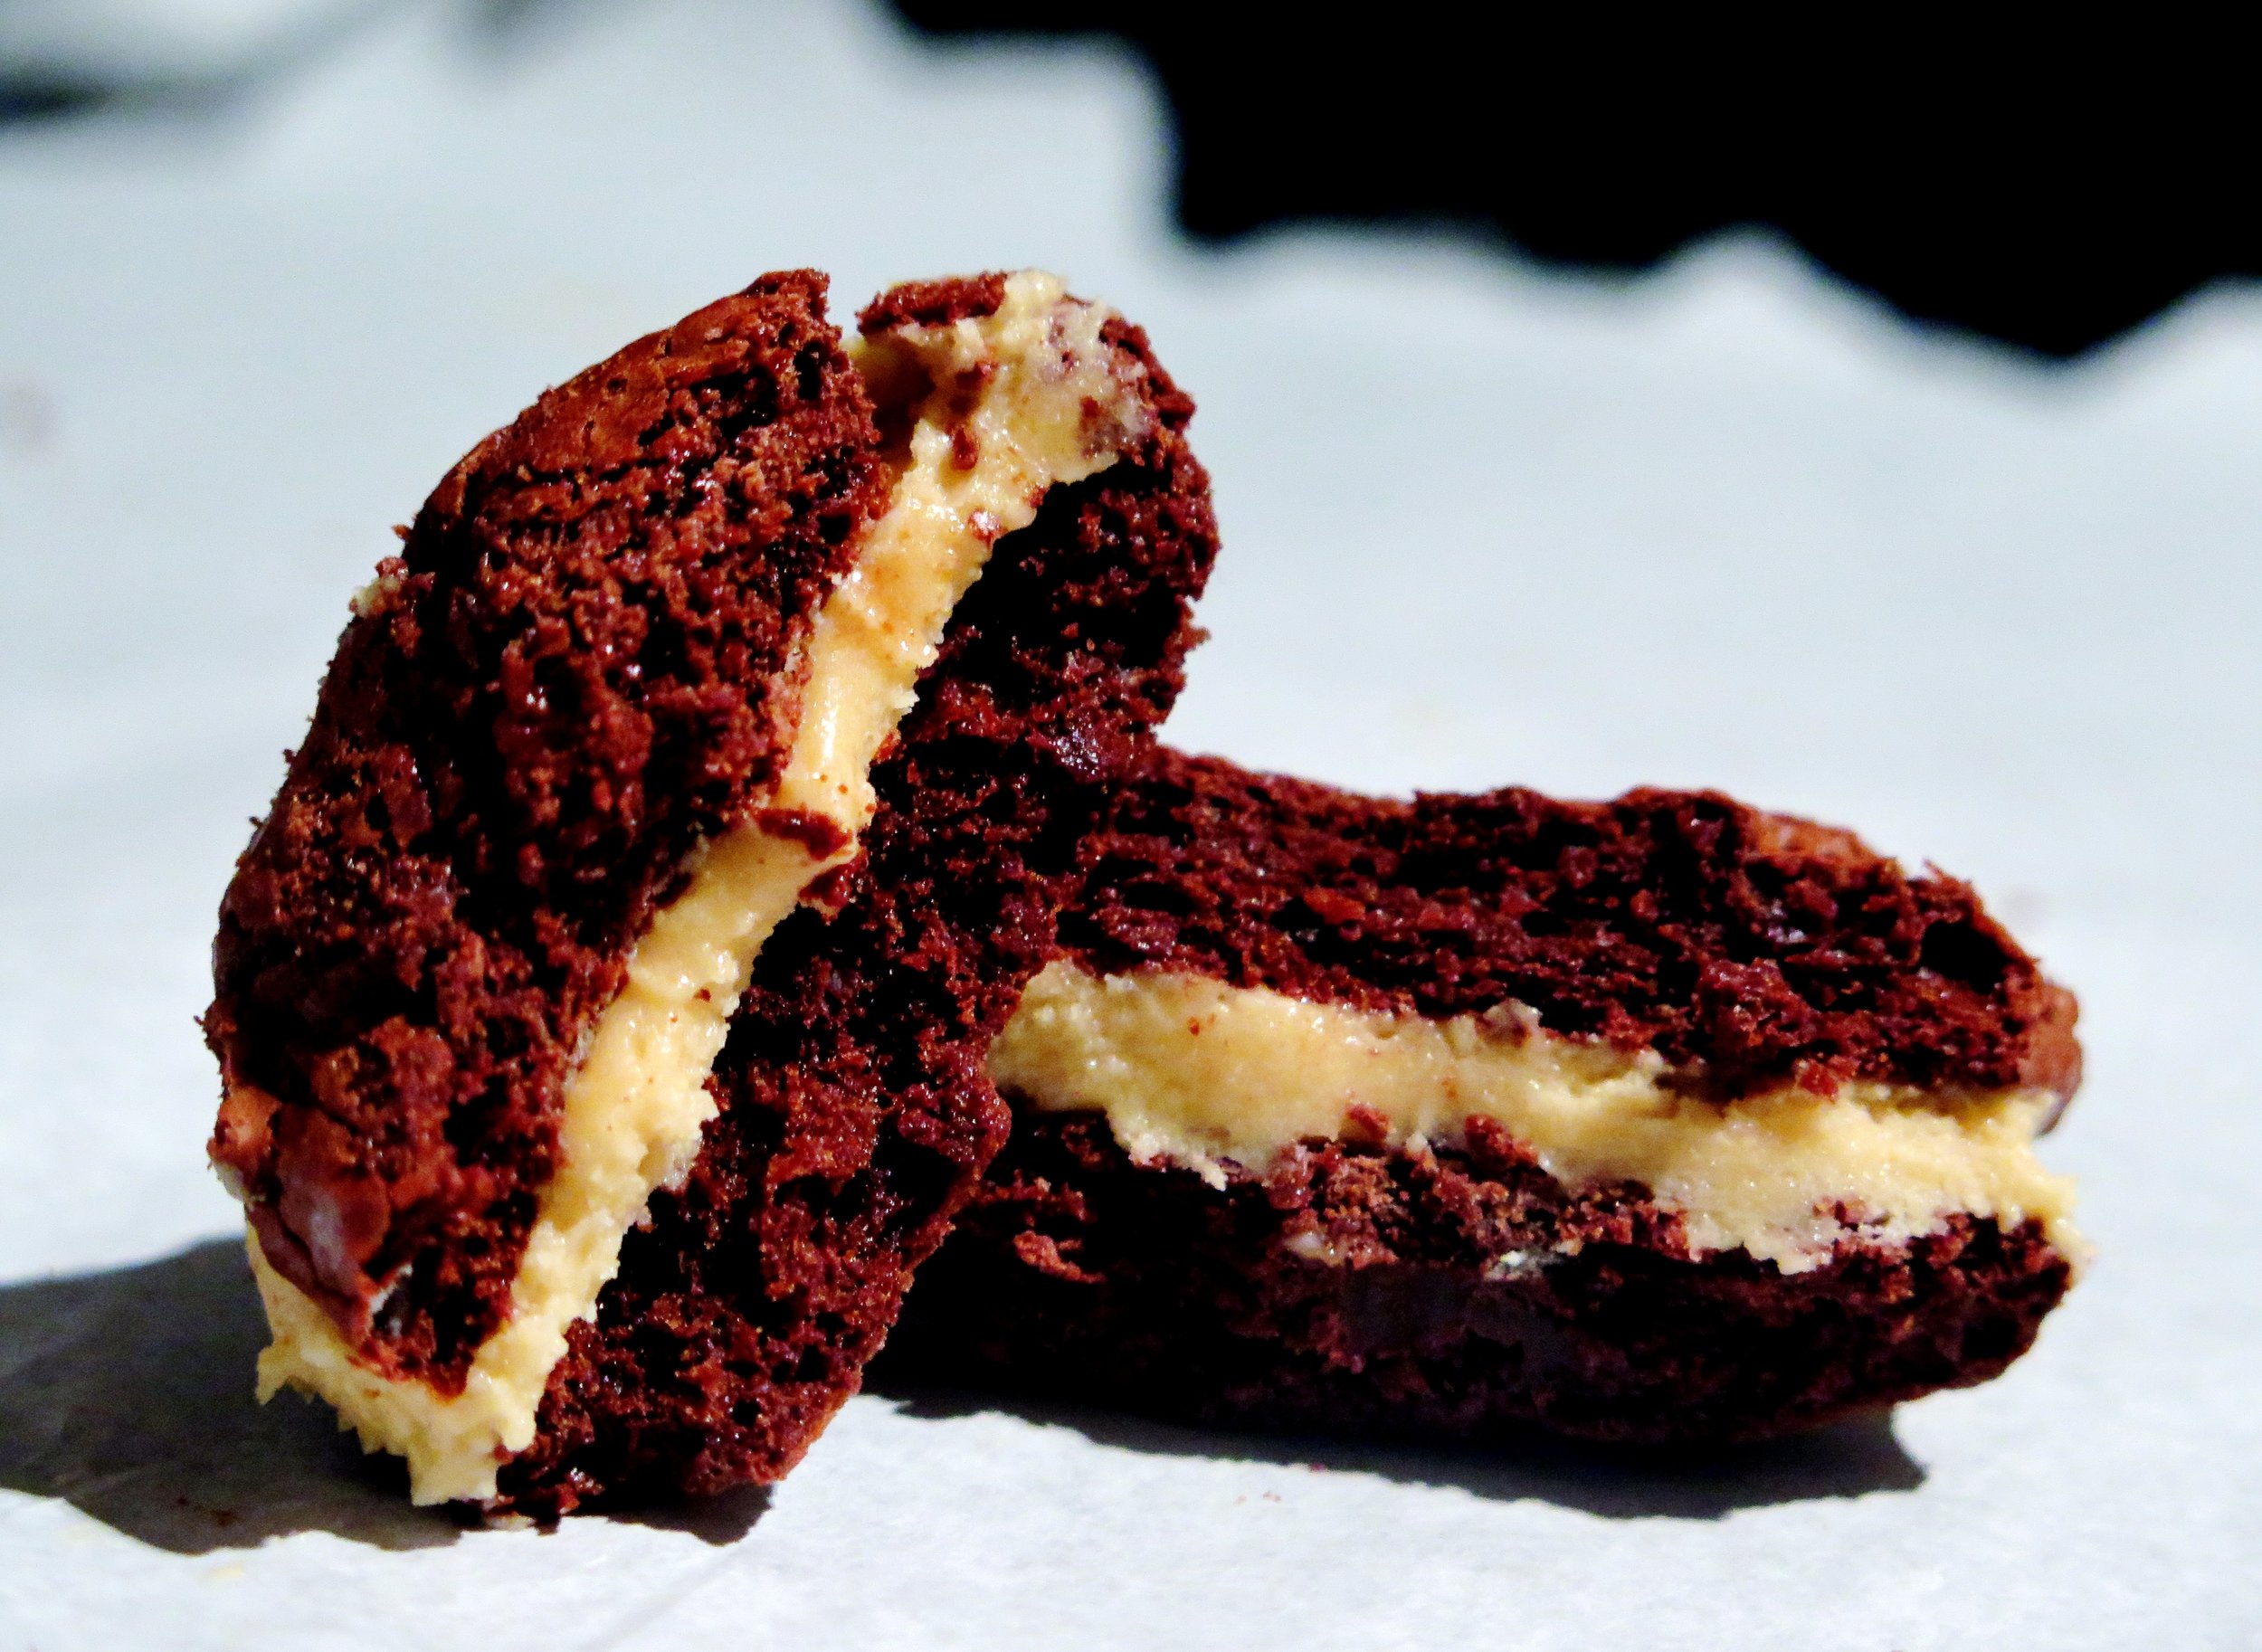
To make them extra tangy and fruity, raspberry is worked into these macarons in three ways: freeze dried raspberries, raspberry jam and raspberry liqueur.  If you can’t get hold of freeze dried raspberries, just omit this element from the recipe.

Tipsy Triple Raspberry MacaronsTipsy Triple Raspberry Macarons

Tipsy Triple Raspberry Macarons

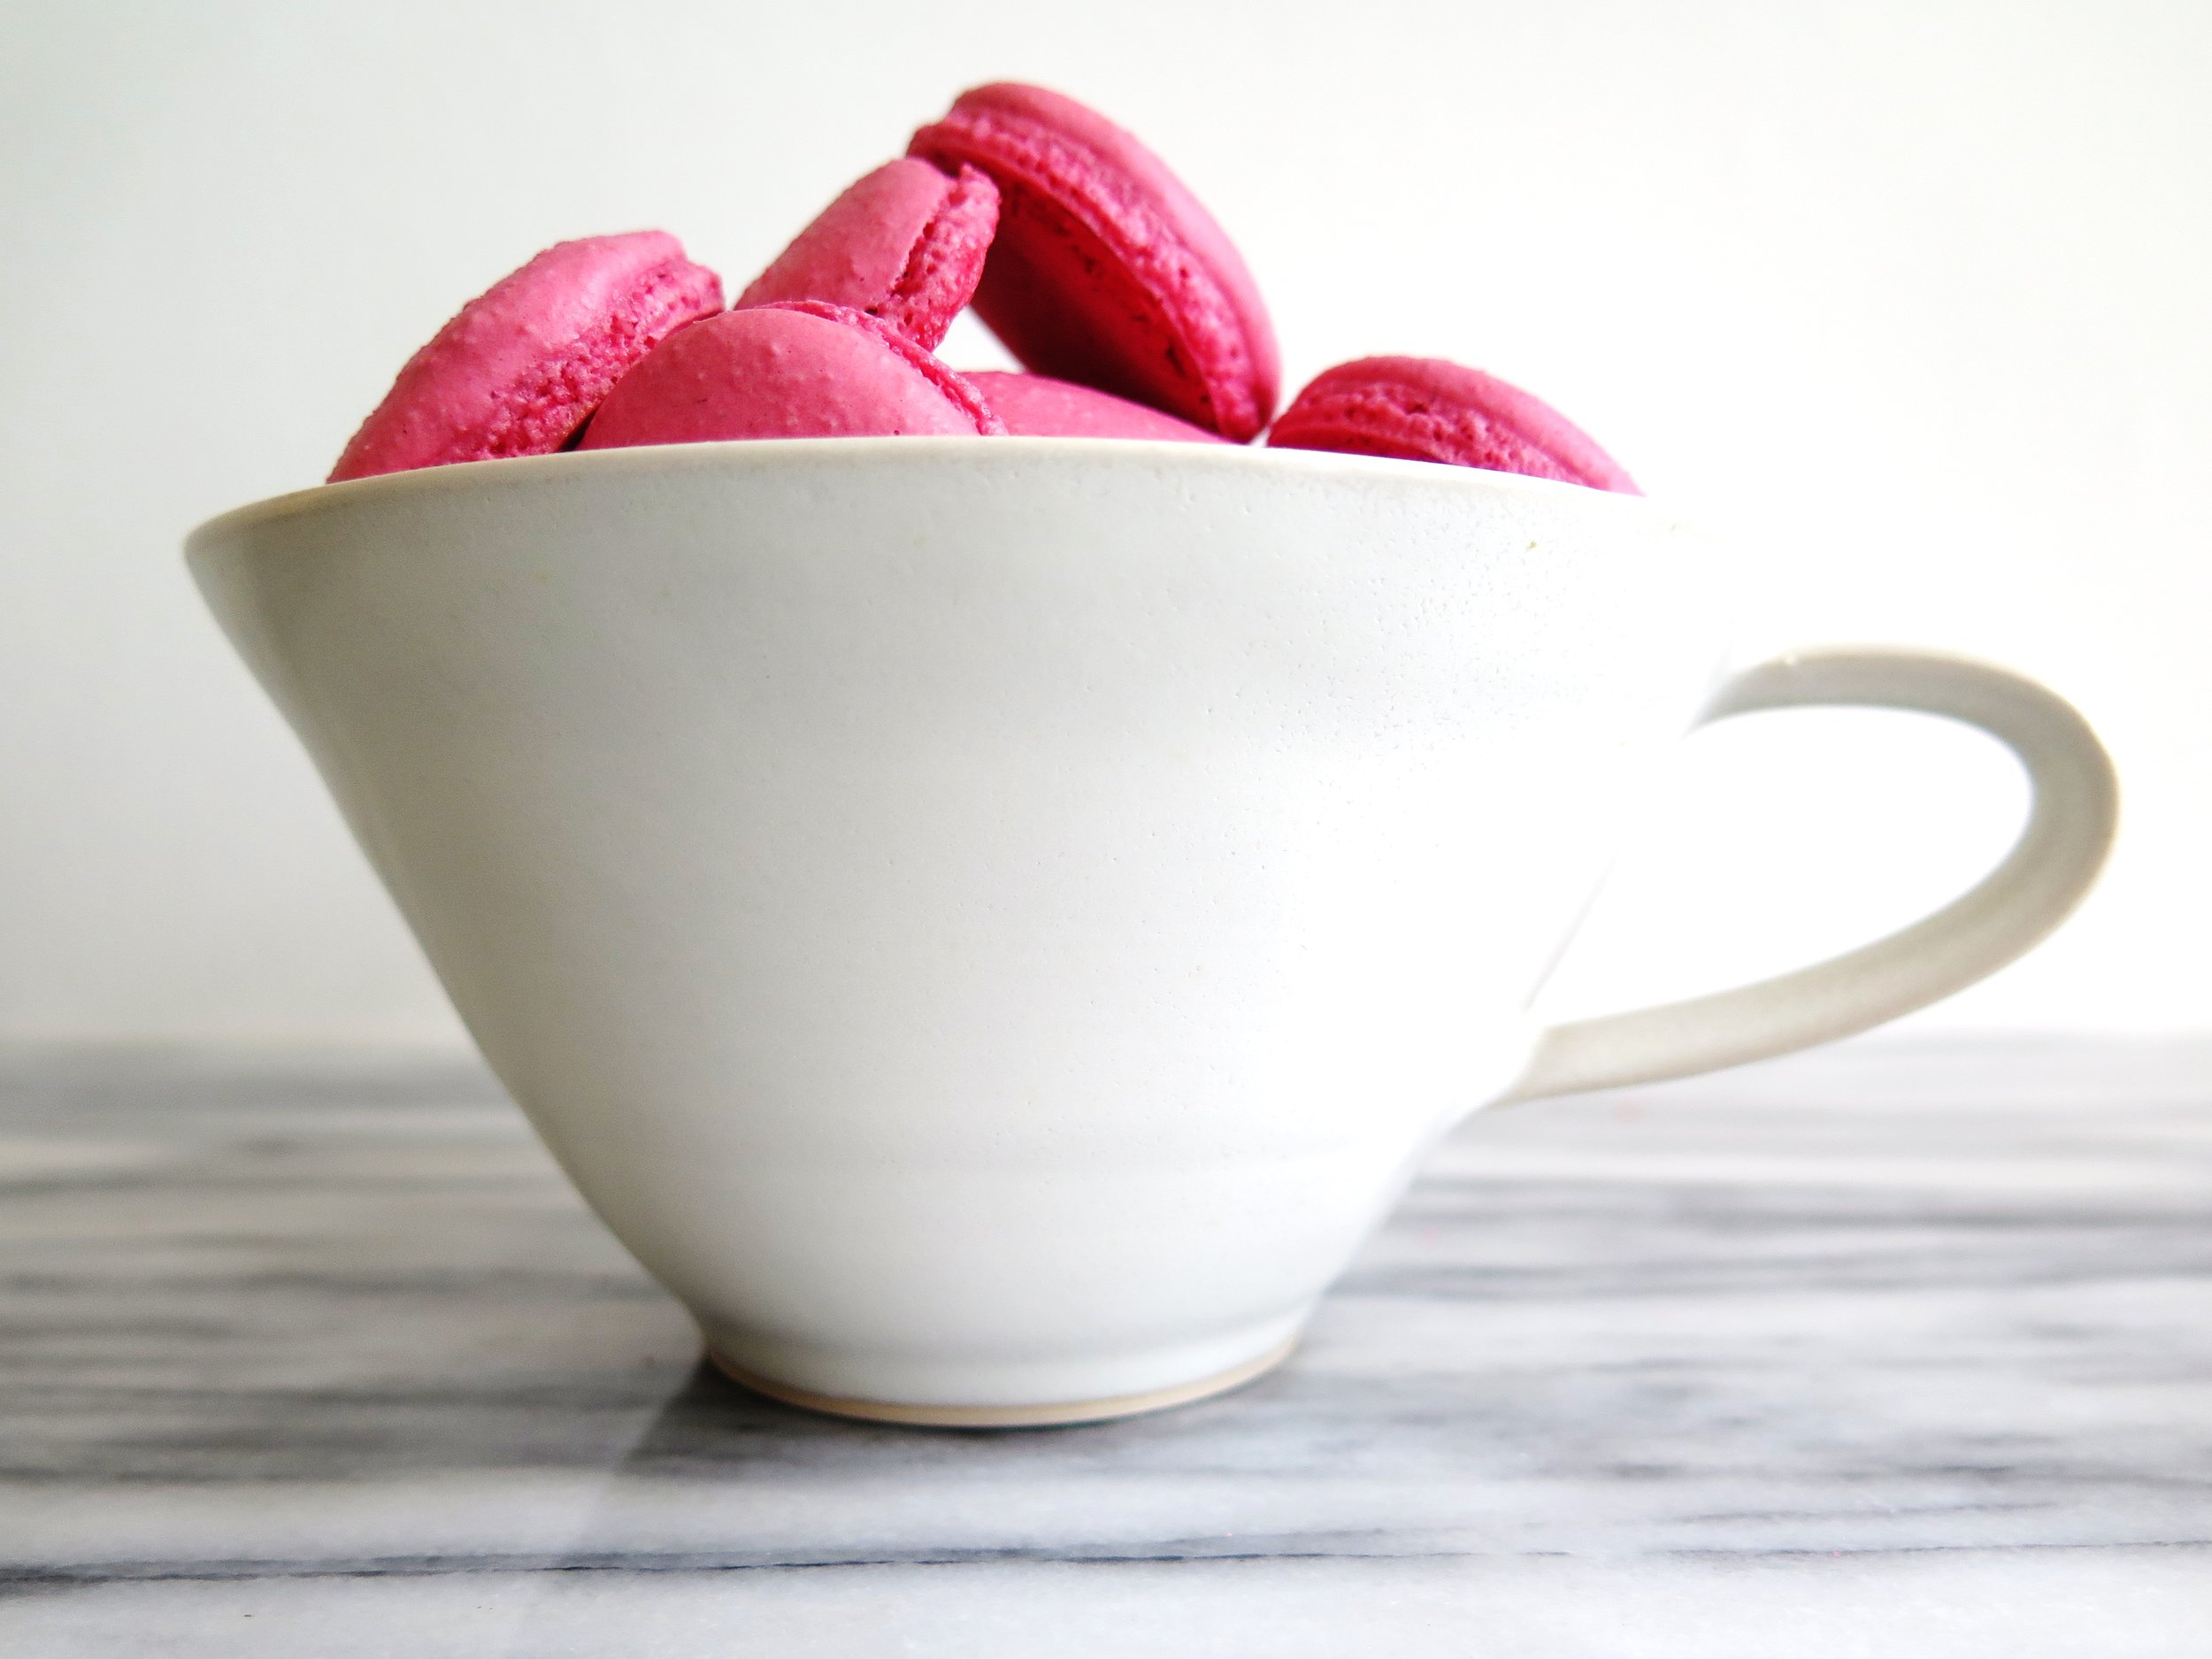
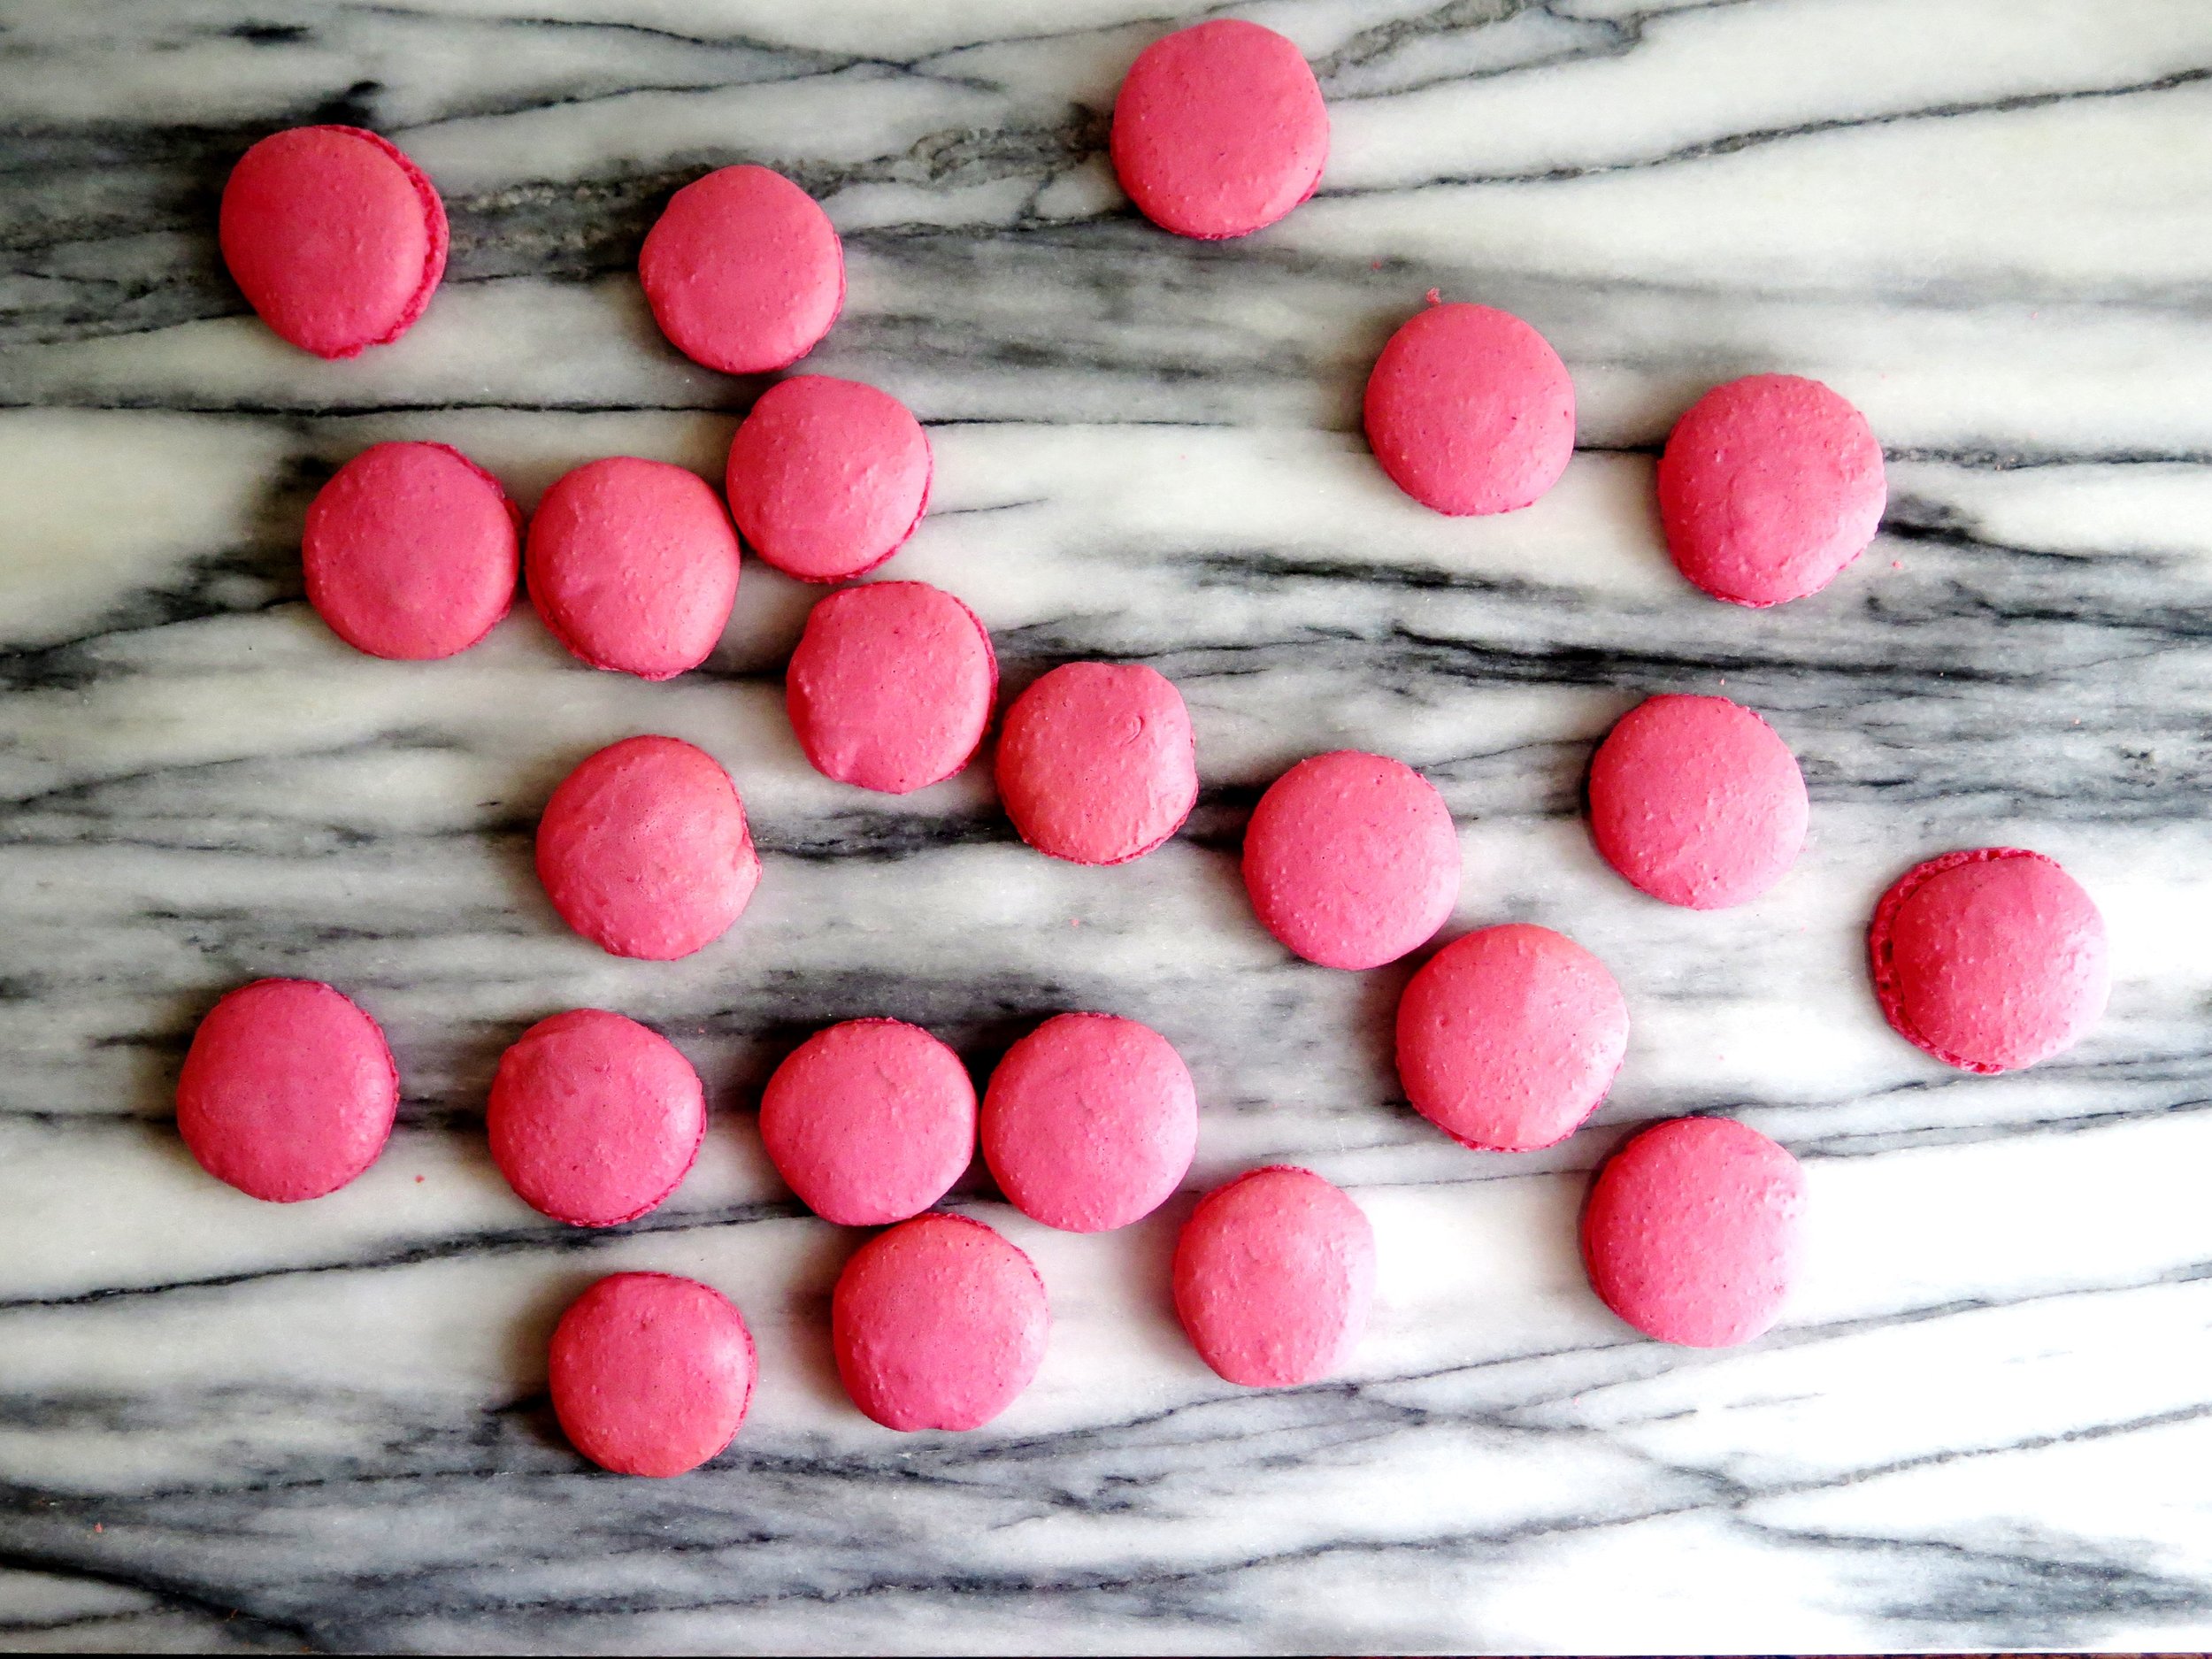
Triple Raspberry Liqueur Macarons 


Makes about 30 small macarons


Ingredients

110g icing sugar, sieved

50g ground almonds, blitzed in a blender to a fine powder, and sieved

5g freeze dried raspberry powder OR 10g freeze dried raspberries, crushed or whole (see below)

60g egg whites (about 2 eggs' worth)

40g caster sugar

A couple of drops of pink food dye (optional)

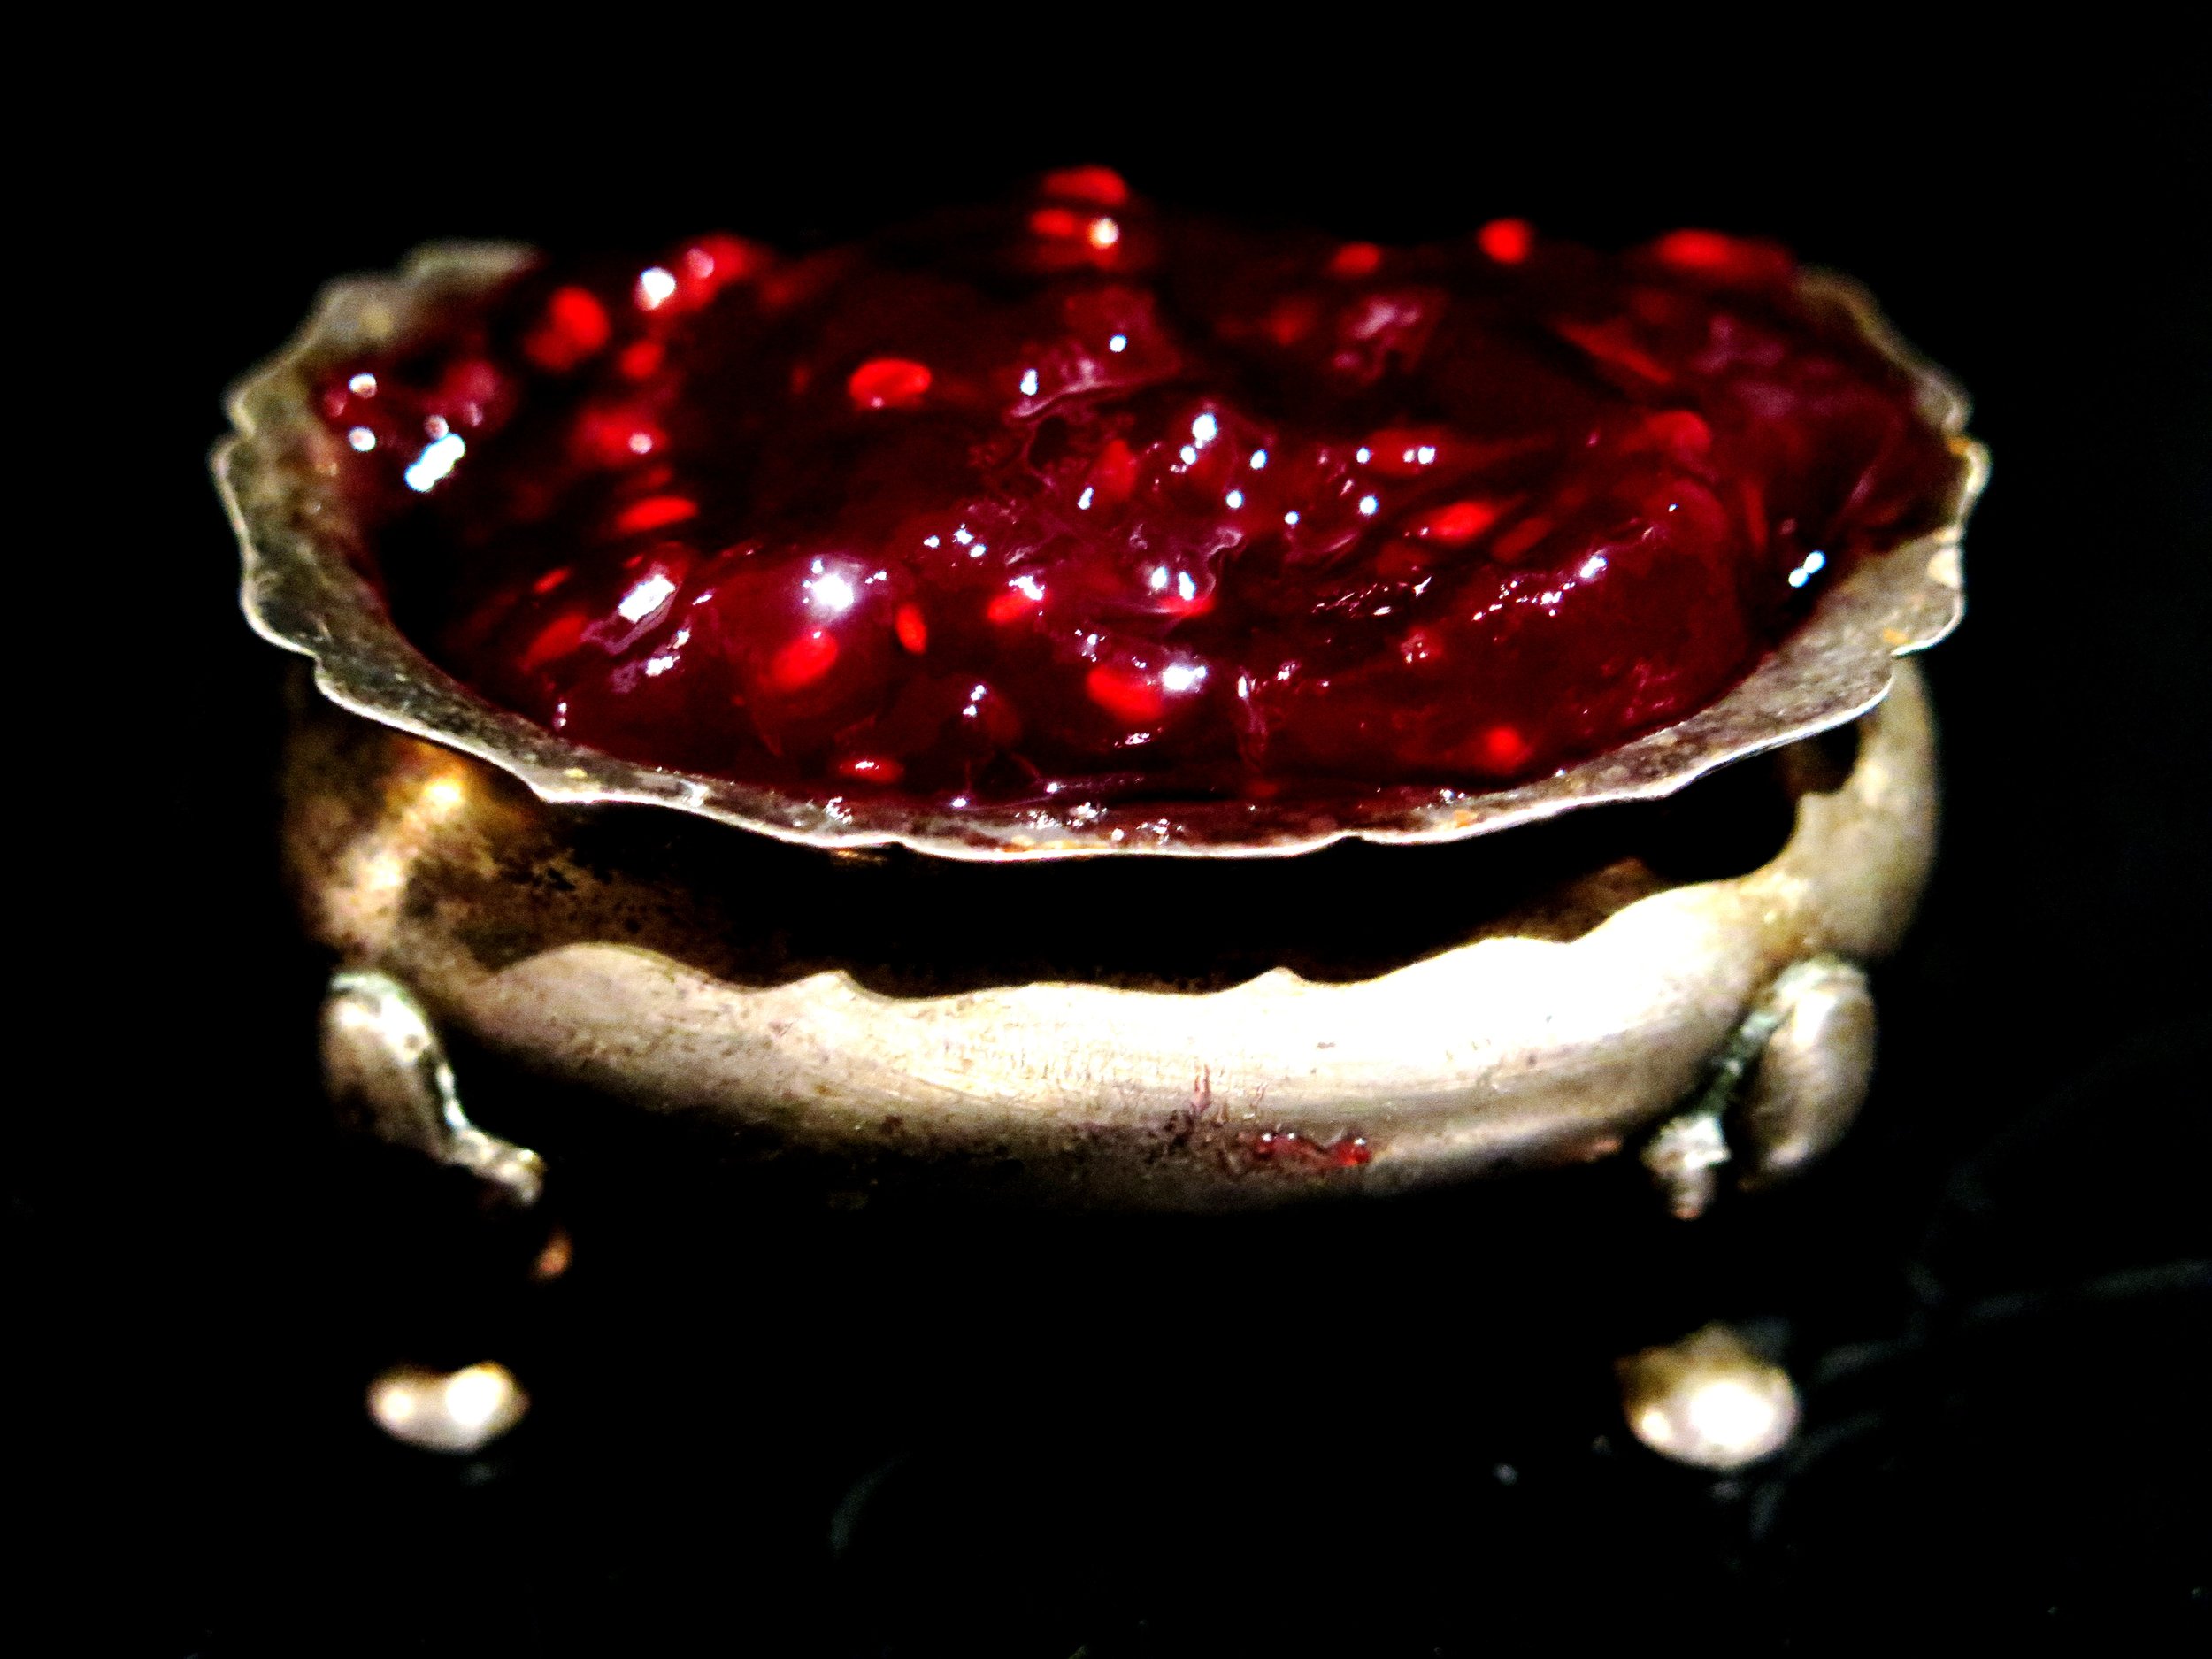
200g seedless raspberry am

4 tbsp Chambord (raspberry liqueur)


2 large baking trays lined with baking parchment – if you wish to achieve perfectly circular macarons, create guidelines for the piping by drawing in pencil round a 4cm bottle lid repeatedly on the greaseproof paper, leaving at least 4cm between each circle.  Flip it over after doing this to ensure that the pencil does not transfer to the macaron


Piping bag fitted with 0.5cm nozzle


  1. In a large bowl, mix together the sieved icing sugar, ground almonds and freeze dried raspberry powder.  If you can only get hold of crushed or whole freeze dried raspberries, place these in a blender and blitz until they are as pulverised as possible, and then sieve to remove the seeds.  You should be left with a fine red dust.
  2. Pour egg whites into the bowl of a bone dry electric mixer fitted with a whisk attachment. Whisk at a high speed until soft, foamy peaks form.  Then, with the whisk still ongoing, add in the caster sugar, a tablespoonful at a time.  Keep whisking until the meringue is glossy and firm peaks form.
  3. Take a third of the meringue and mix it into the dry ingredients.  If the dry ingredients don’t fully combine, stir in another tablespoon of meringue.  At this point you can add a couple of drops of food dye to reach desired colour - anything from baby  girl to schiaparelli pink. The mixture should turn into a thick, smooth paste.  Then, gradually fold in the rest of the meringue, a tablespoon at a time, until the mixture becomes glossy and smooth.
  4. Spoon mixture in the piping bag and pipe little dots directly onto the corners of the baking tray to stick the baking parchment down.  Then pipe the mixture into each circle.  Once finished piping, tap the tray down firmly on a hard surface a couple of times to remove the air bubbles from the macarons. Then set the macarons aside at room temperature for 30 minutes.  This will allow a skin to form and will lead to the creation of the often-elusive but essential “macaron foot”.
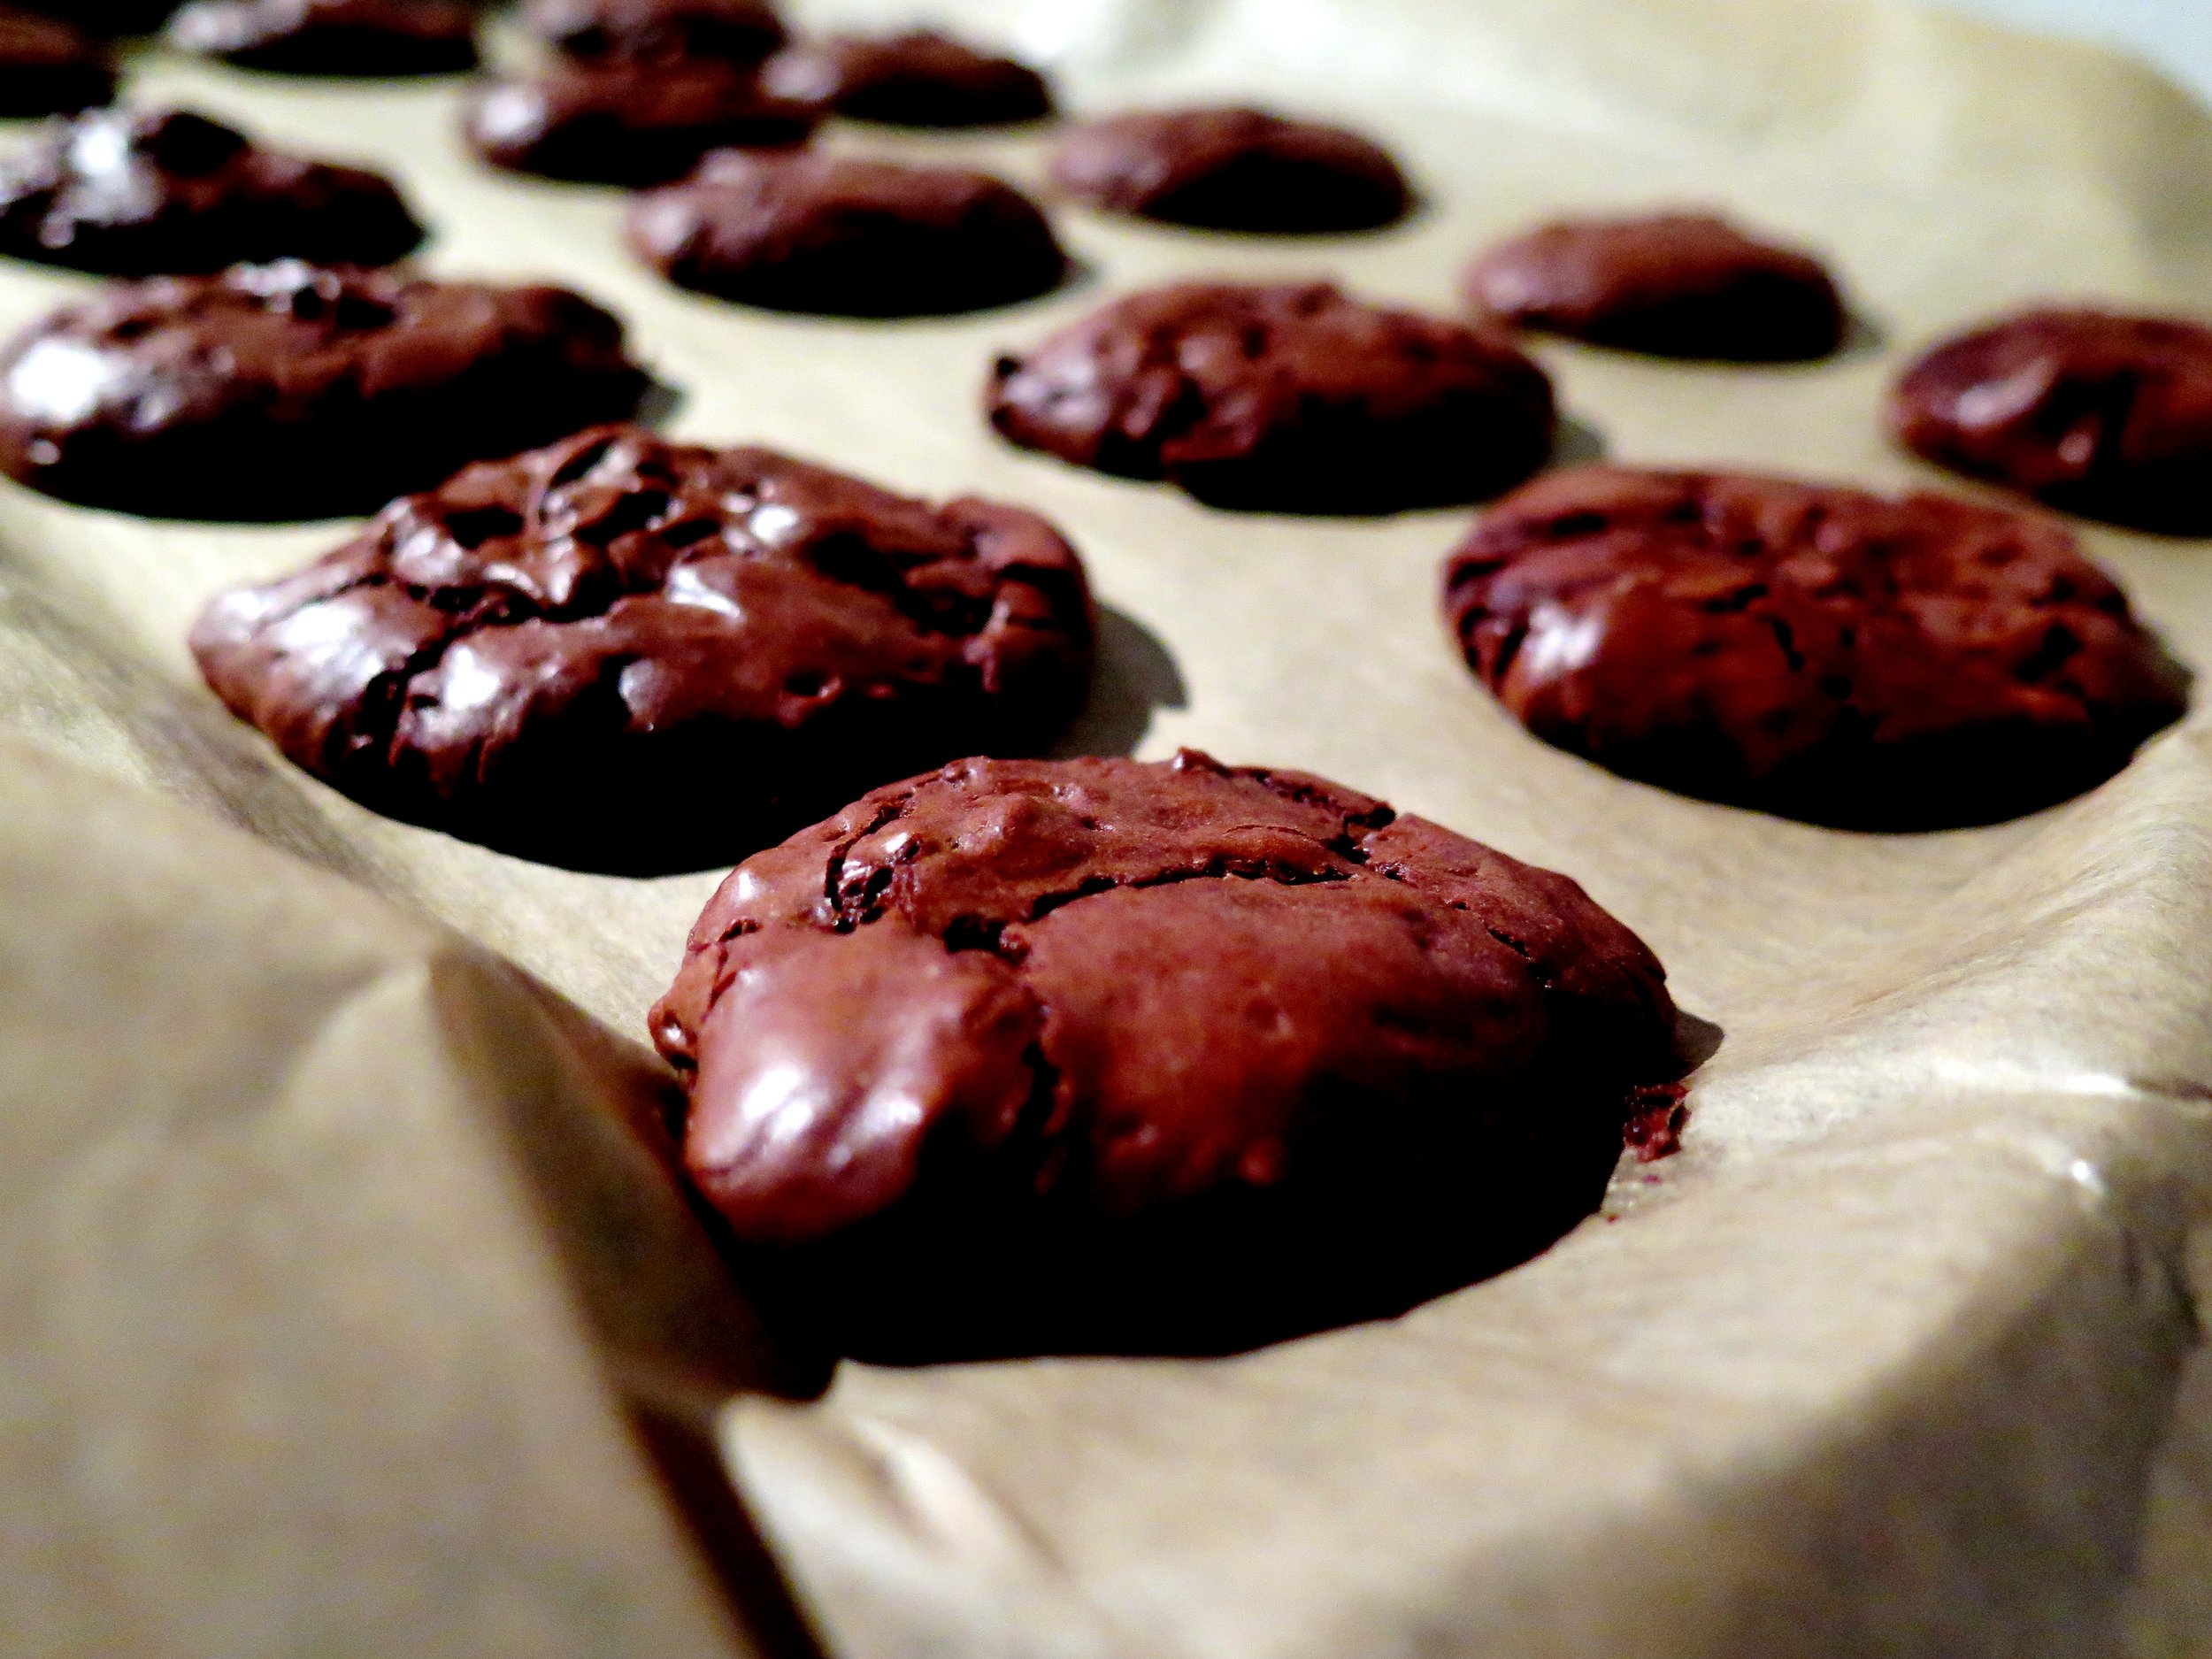
  5. While they are resting, preheat oven to 150˚C. Bake the macarons for 20 minutes or until they can be lifted off the tray cleanly with a pallet knife. Allow them to cool until they reach room temperature.
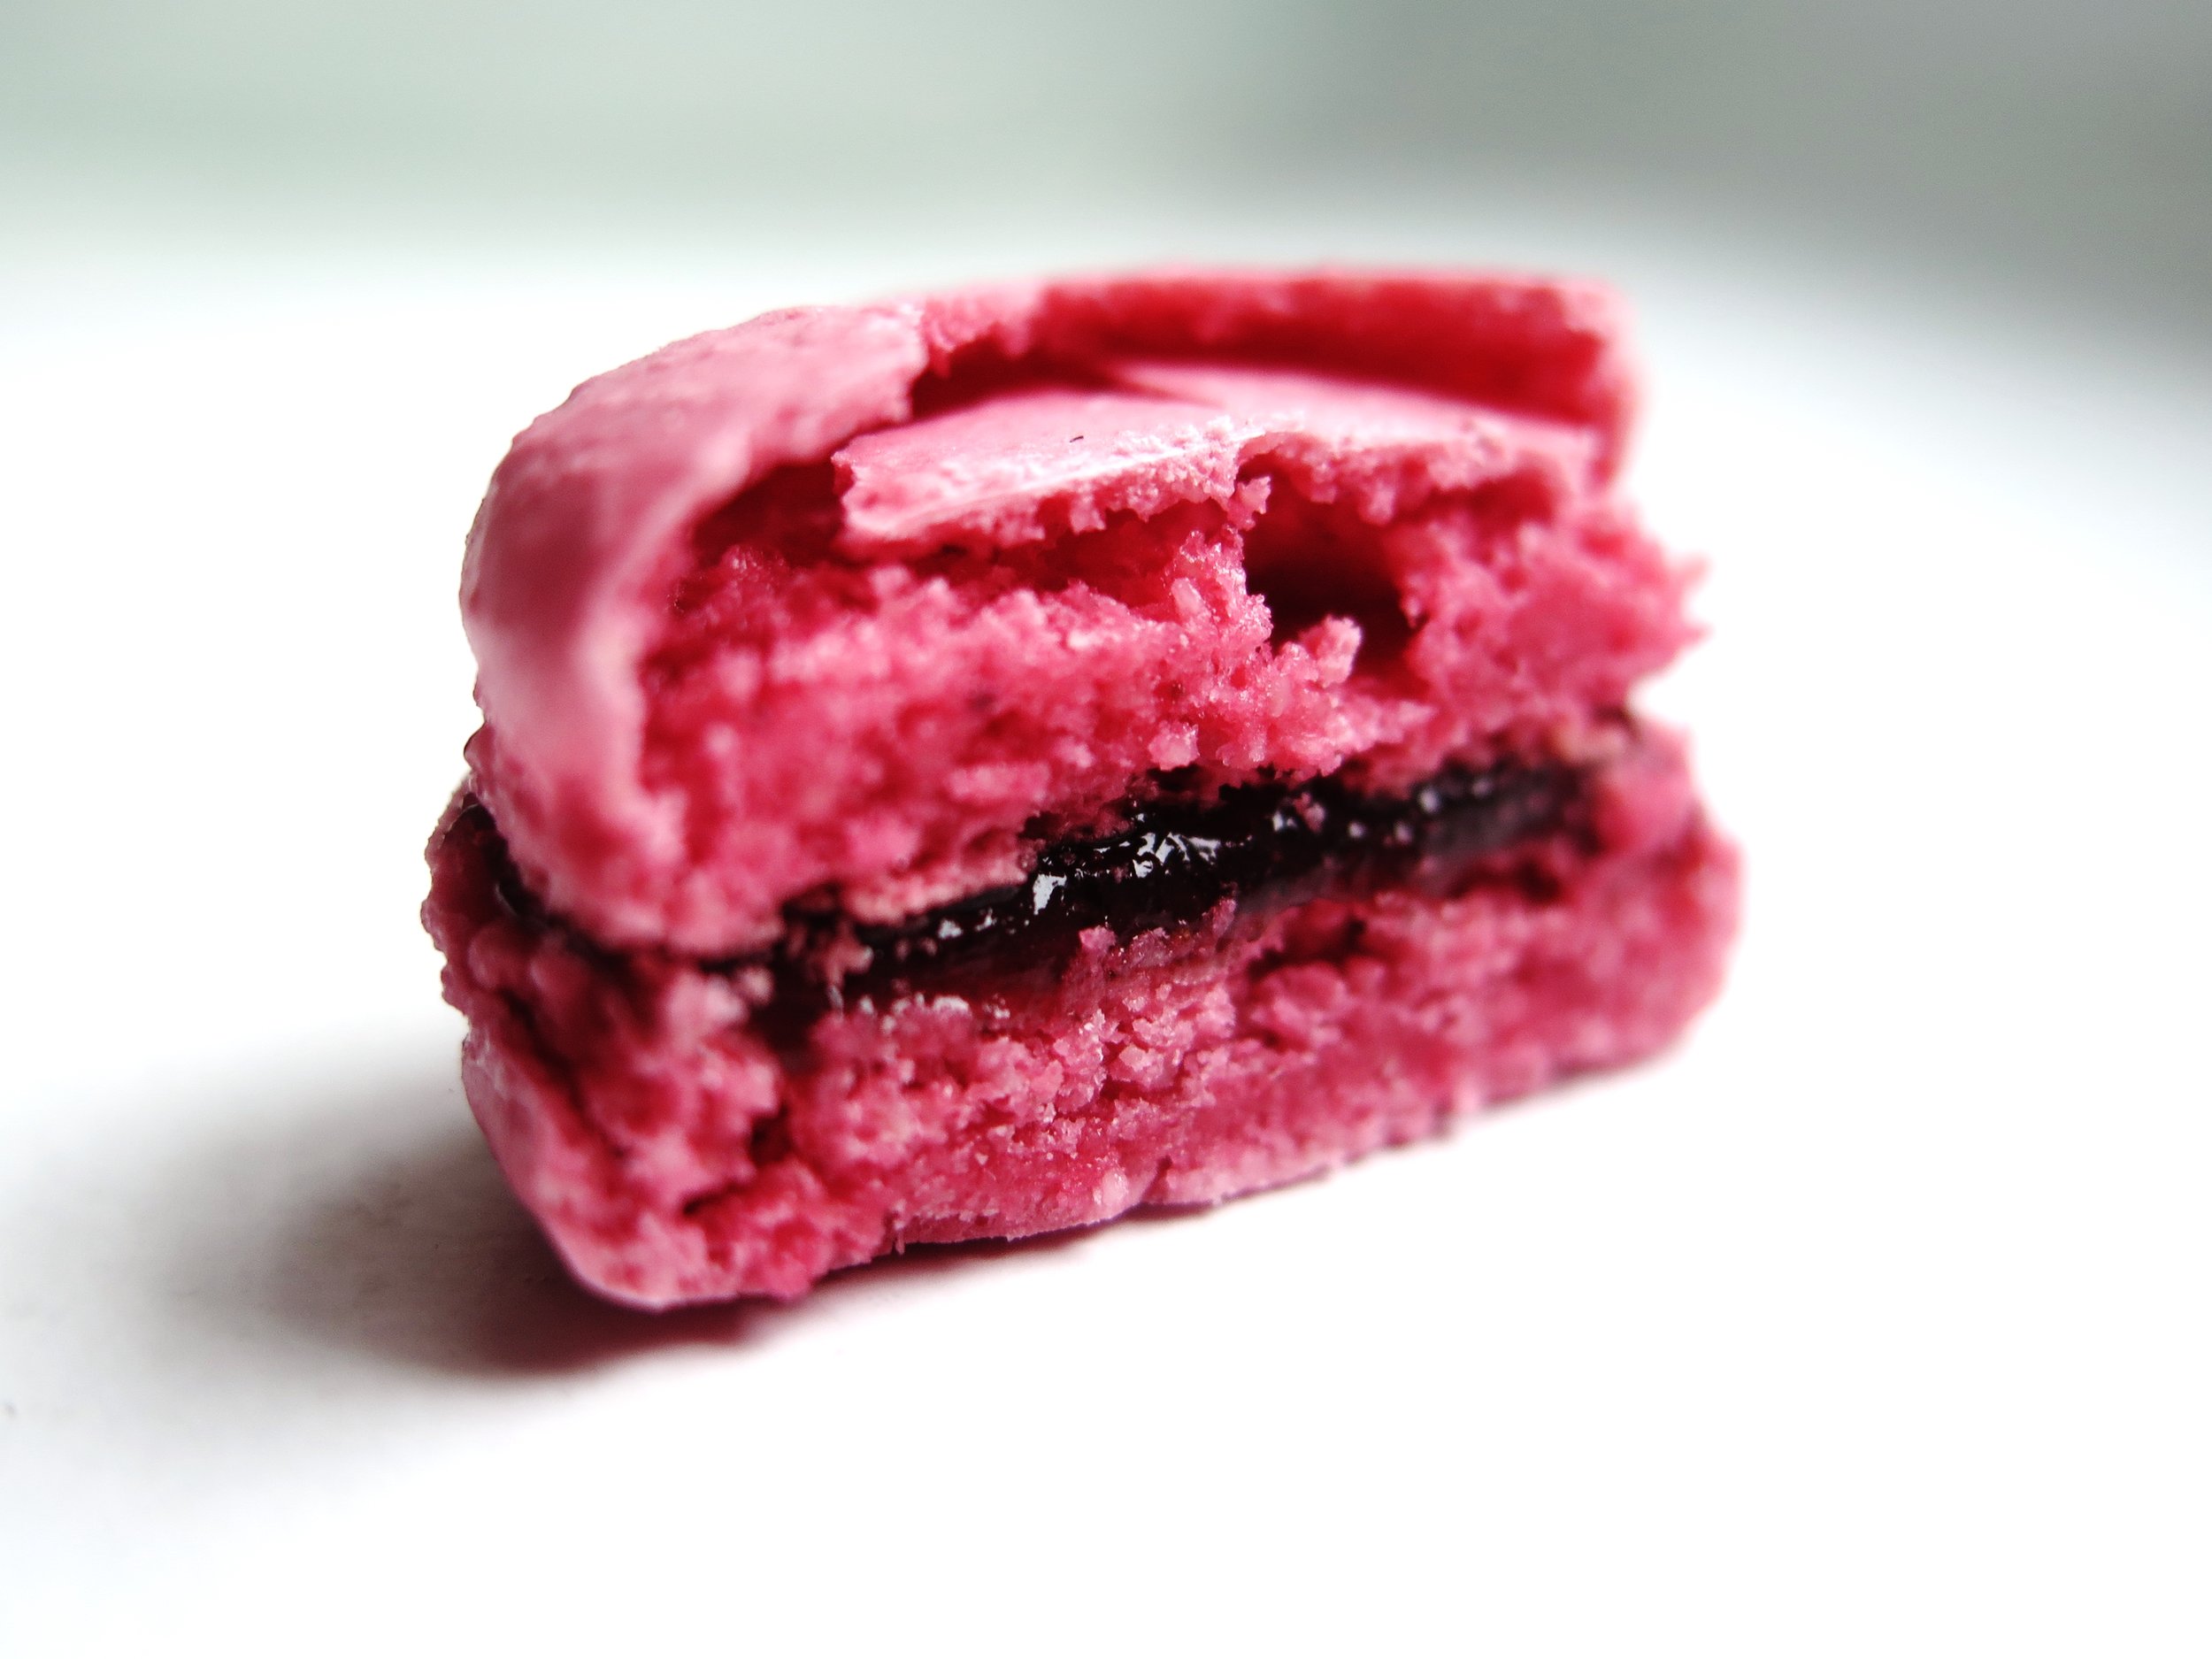
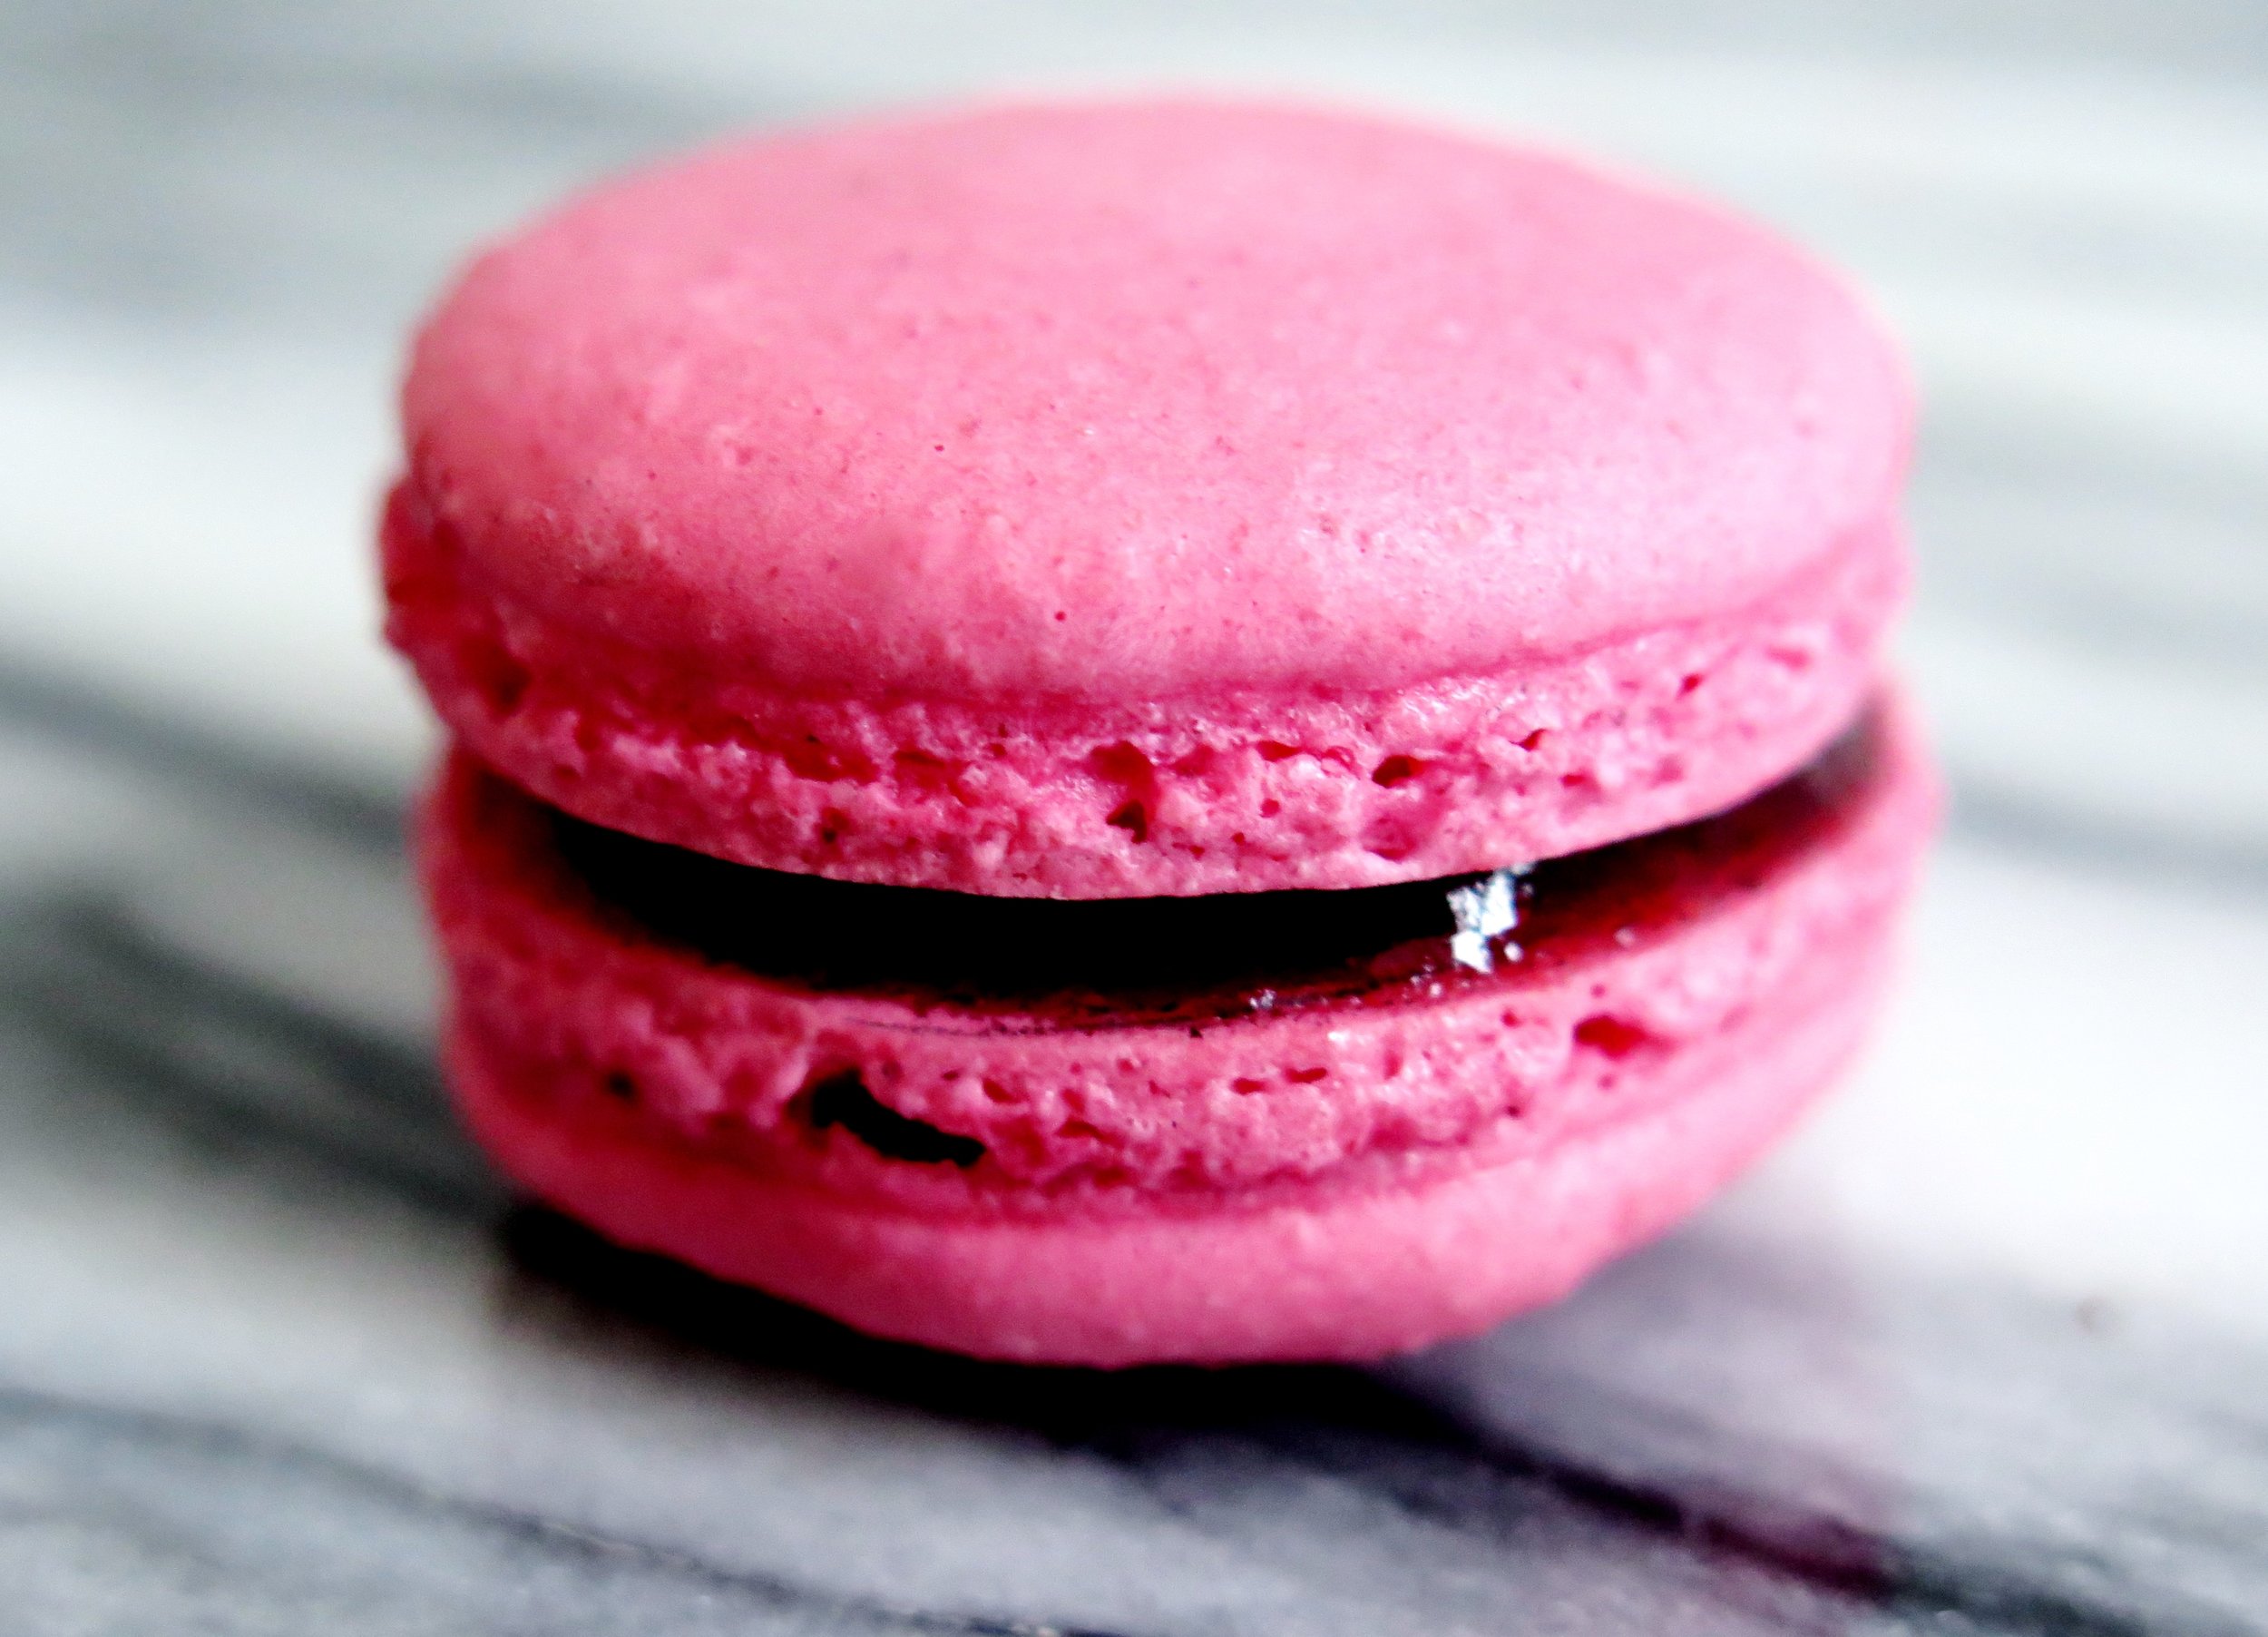
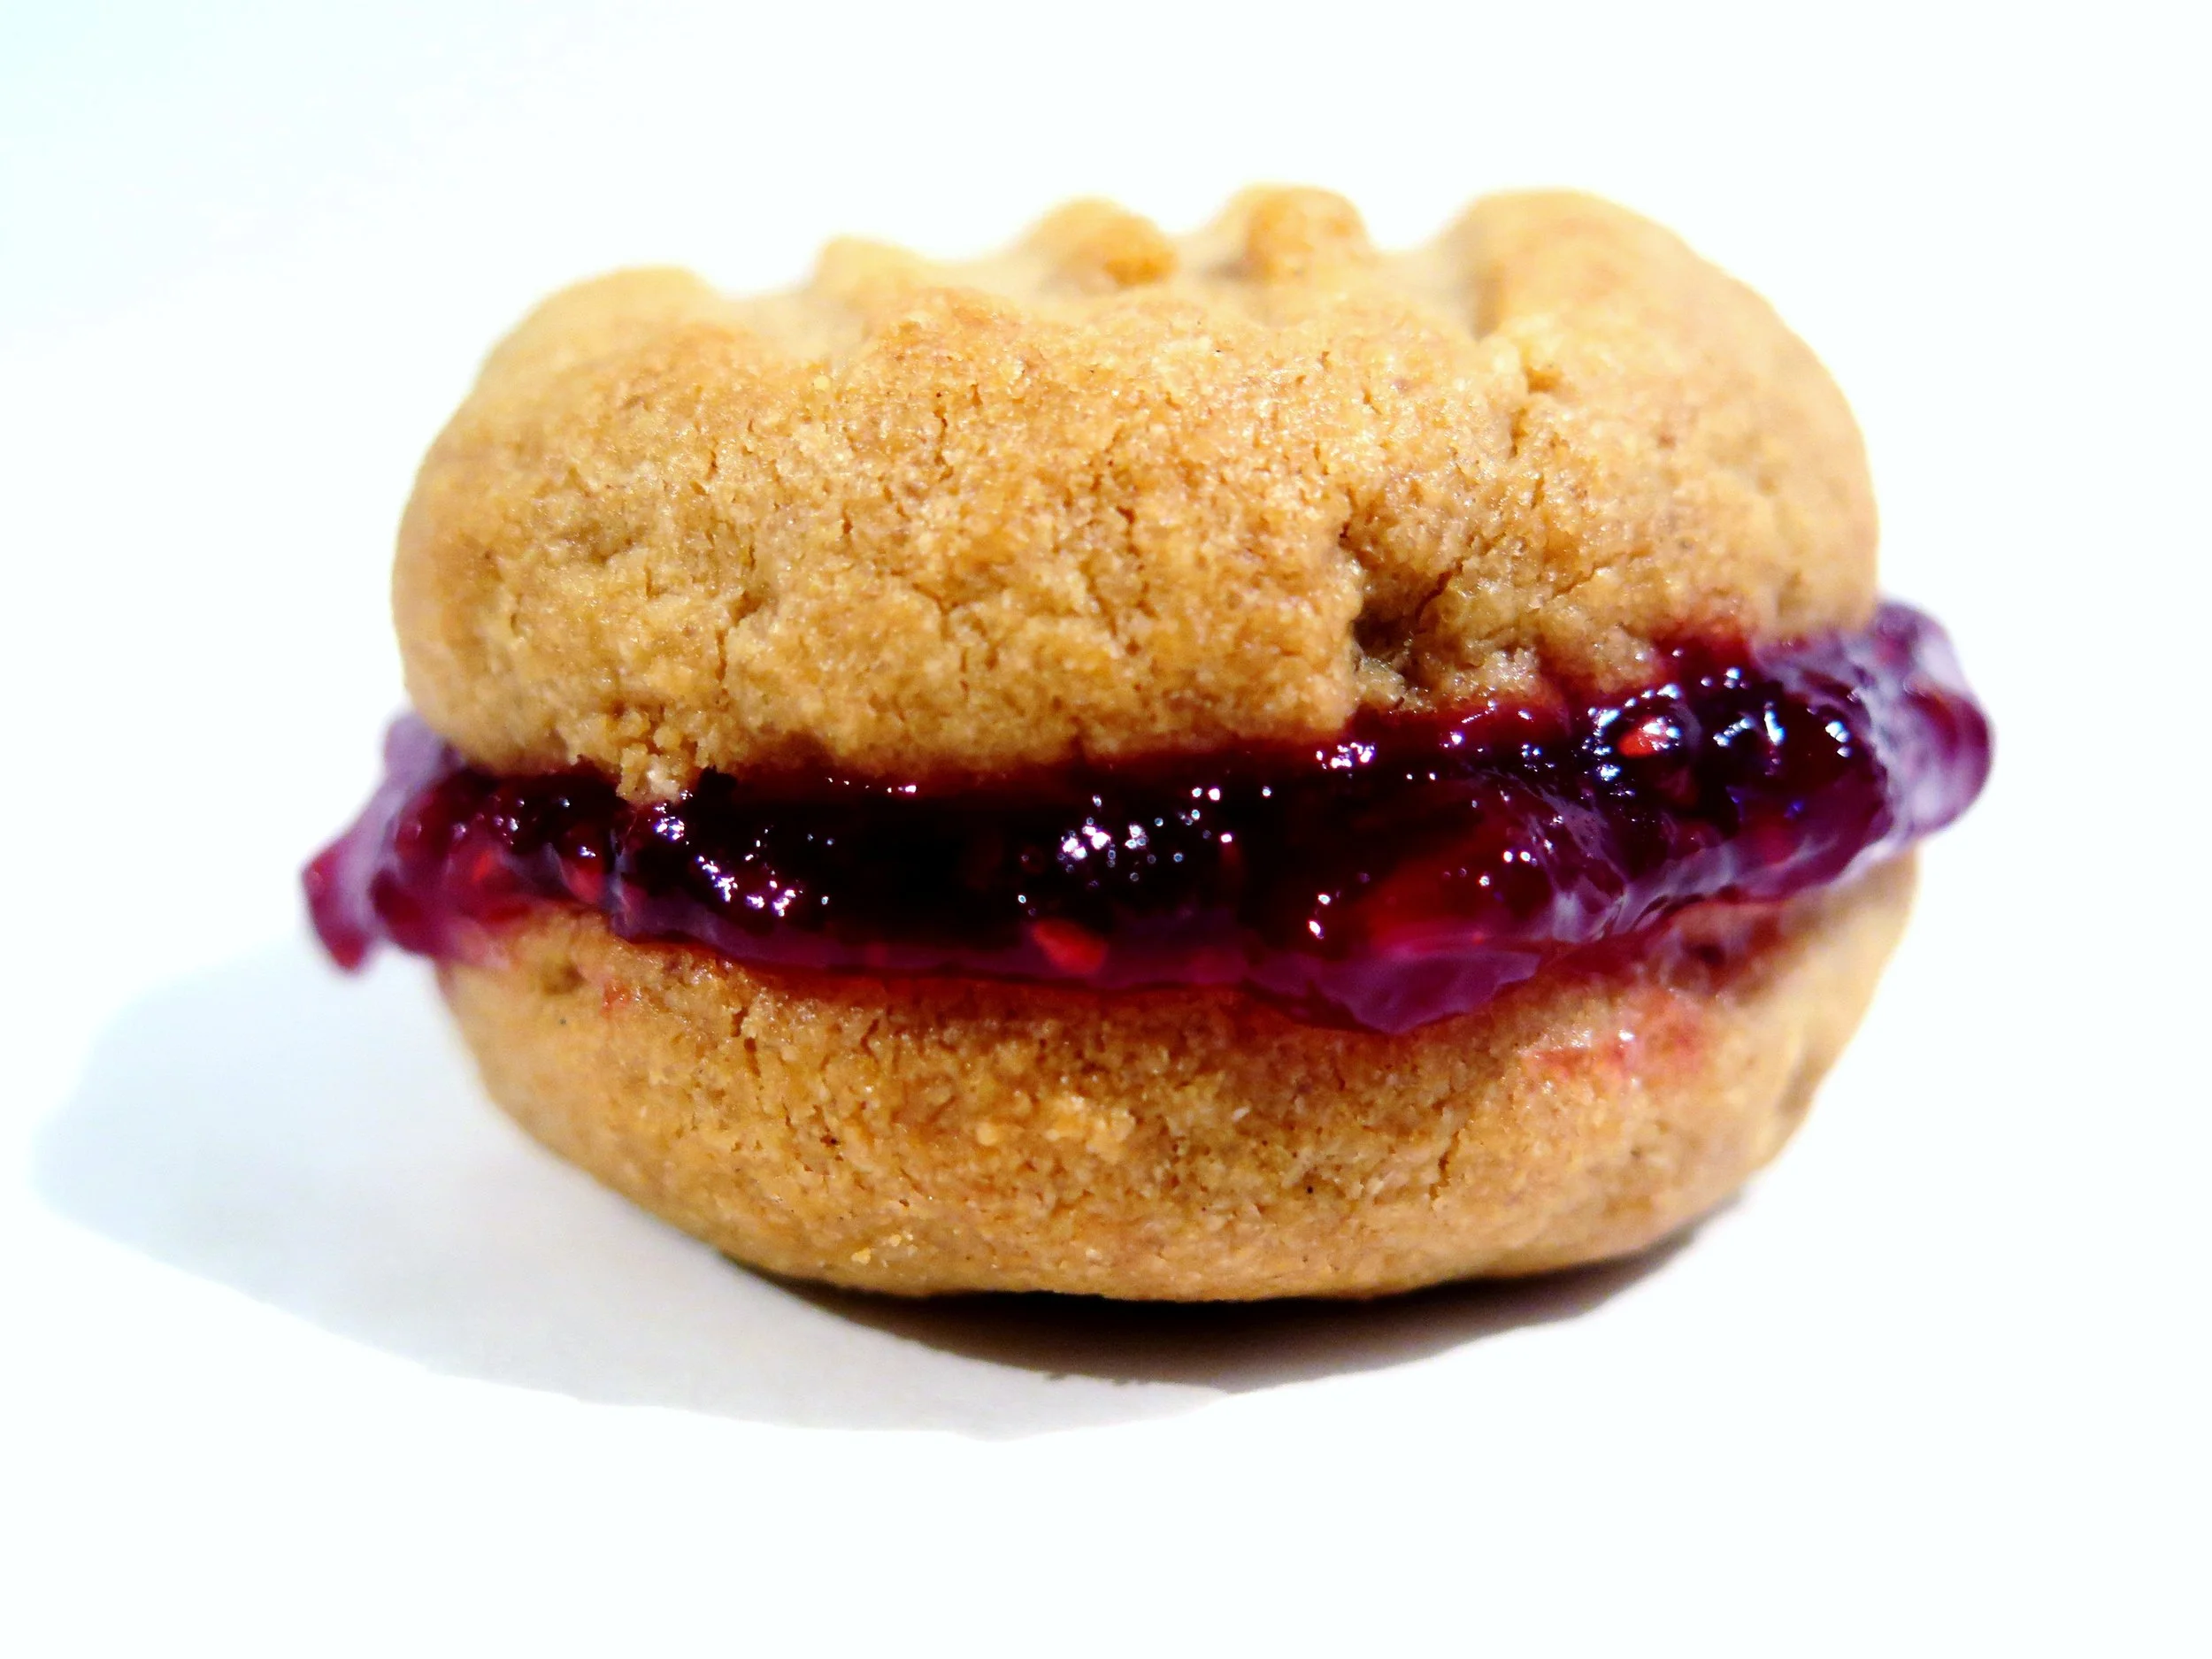
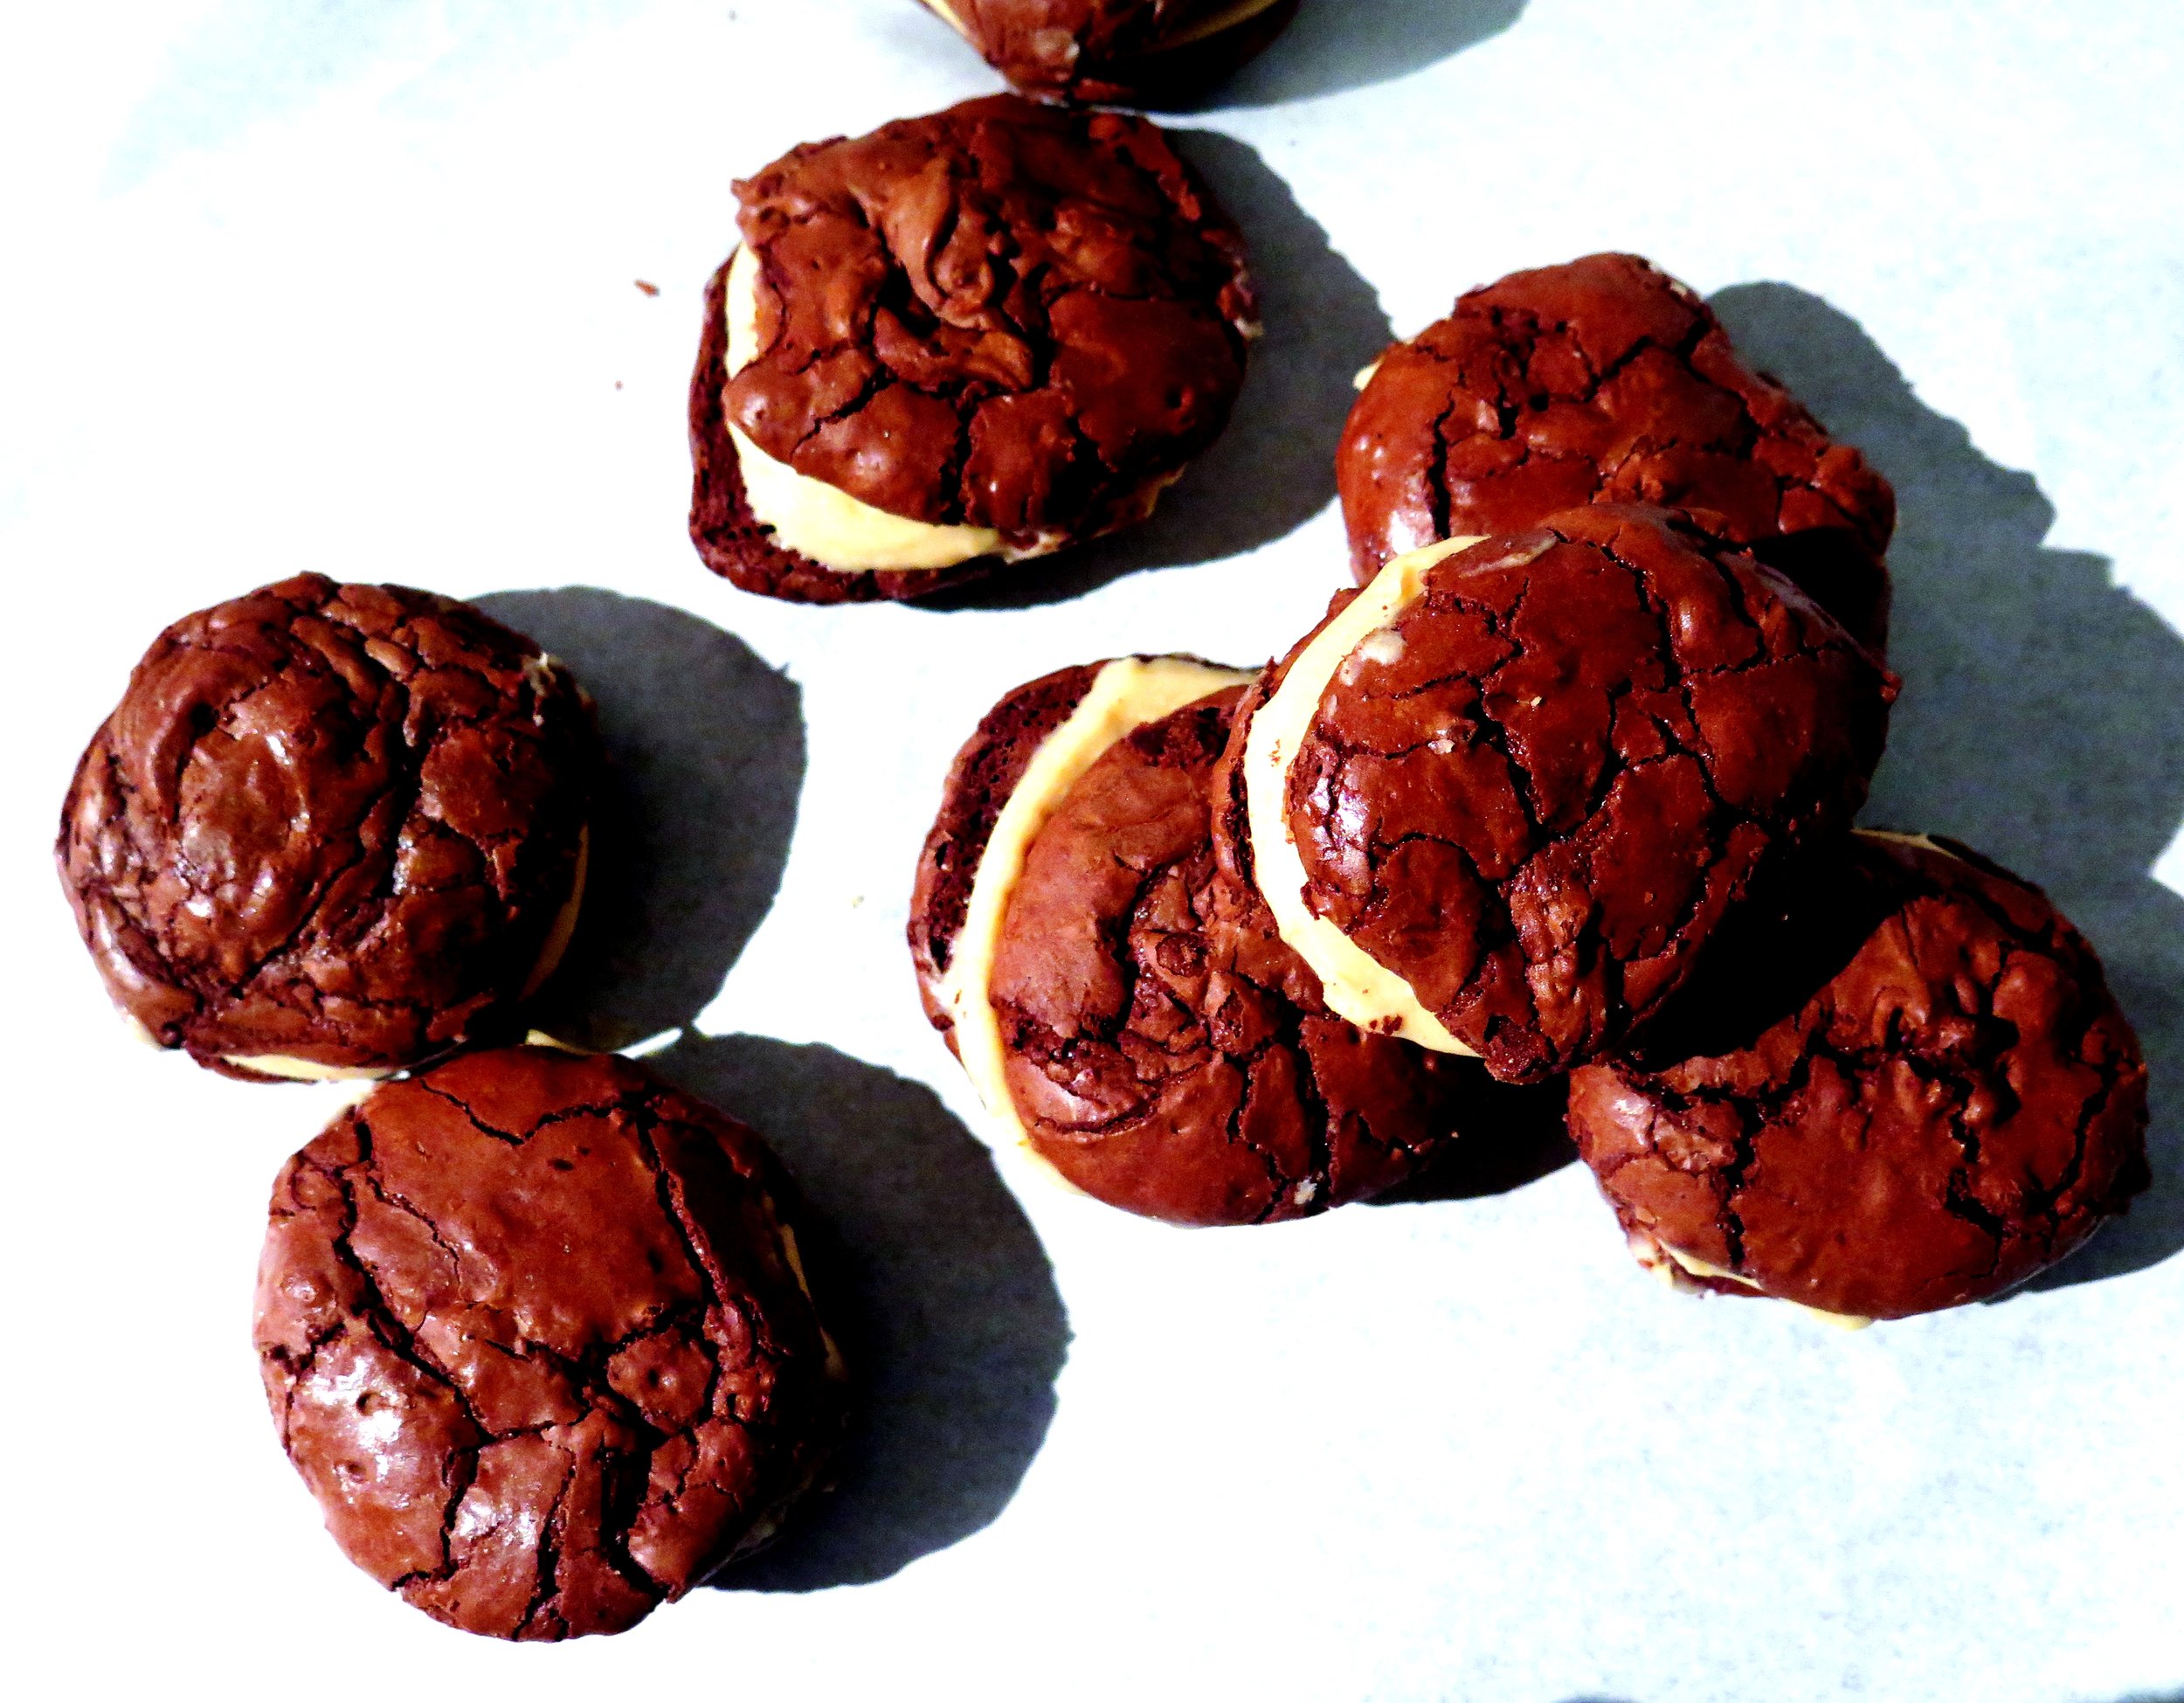
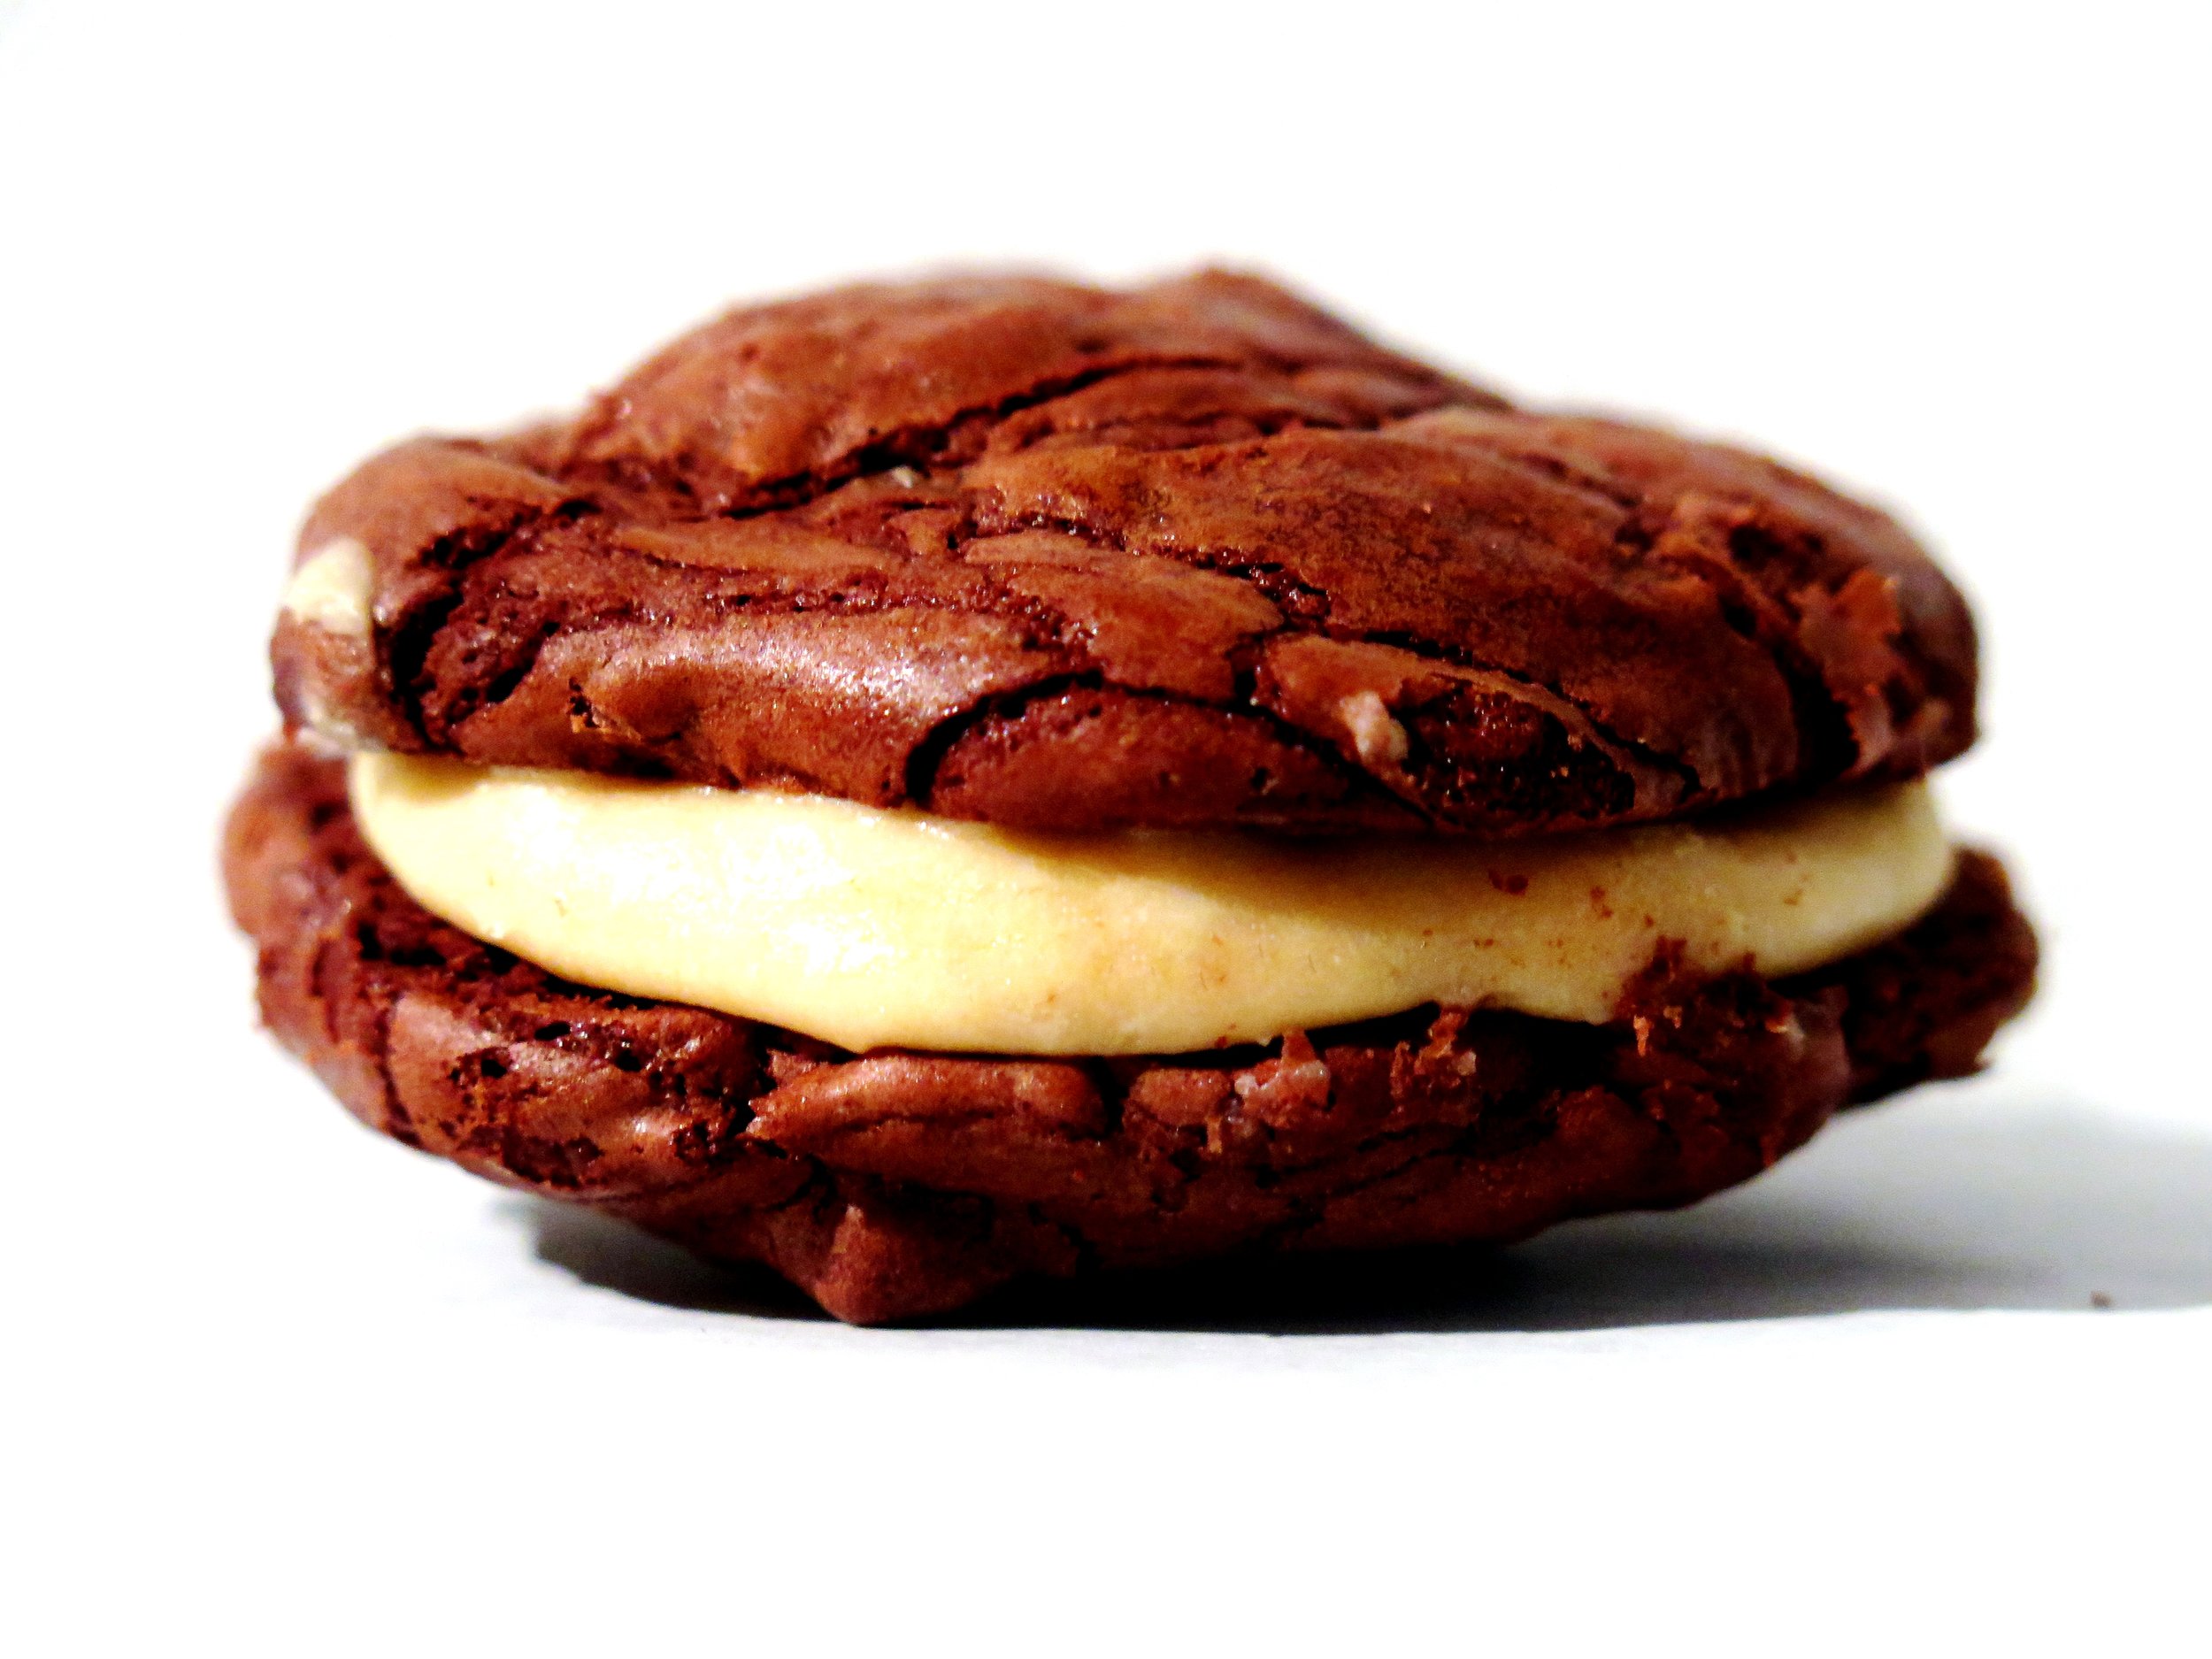
  6. Place raspberrry jam in a small pot over a medium-high heat and stir continuously. After it has bubbled furiously for a couple of minutes, stir in the Chambord.  Allow the mixture to simmer for about 5 minutes,  or until it has become more viscous and thick enough to be able to be dropped off a spoon. Remove from the stove, allow to cool for 5 minutes and then sandwich each pair of macaron shells together with a teaspoon of the mixture.

Tipsy Triple Raspberry Macarons


Tipsy Triple Raspberry Macarons

1 Comment

Tarta de Santiago

3 Comments

Tarta de Santiago

IMG_2892.jpg

When life gives you … quinces Tarta de Santiago


The scent coming from the paper bag was soft and sweet, and old fashioned rose-like, and when I turned out its contents, eight yellow, somewhat misshapen apple-pears tumbled out.

Tarta de Santiago     These quinces were the unwanted fruit of an unappreciated tree in someone else’s garden.  Beguilingly biblical in appearance, their uncompromising hardness metamorphoses into something utterly different after cooking.

Tarta de Santiago

Tarta de Santiago Originally referred to as the Kydonian melon, and mentioned in 6th Century BCE Greek poetry, the quinces we recognise today are believed to have been indigenous to Kydonia on the island of Crete. The Ancient Greeks dedicated the quince to Aphrodite, goddess of love and beauty, who was often represented with the golden apple of Hesperides in her right hand – that apple, in all likelihood, a quince.  Indeed, quinces symbolised love and fertility, and Plutarch refers to the ancient wedding ritual whereby a bride would take a bite from a quince before retiring to the bridal chamber with her husband – possibly to freshen her breath, too.

Tarta de Santiago The path of the wedding procession of Helen and Menelaus was said to have been strewn with quinces, myrtle leaves and crowns woven from violets and roses. The fruit was also said by Pliny to have warded off the malign influence of the evil eye, and its medicinal value as an aid to digestion was also noted.

Tarta de Santiago

The Byzantines made wine from quinces as well as kydonaton, a thick quince jelly, probably the ancestor of French cotignac or condoignac, a delicacy made with honey, wine and spices that was considered a worthy gift for kings.

Tarta de SantiagoApicius, the first extant Roman cookbook writer, of the first century CE, preserved quinces whole in honey diluted with a spiced wine reduction, and also combined them with leeks, honey, and broth in hot oil in a dish known as Patina de Cydoniis. In the 4th Century CE, Palladius, an agriculturist and writer, composed a recipe for baked quince strips, possibly the first stirrings of membrillo, the Spanish quince gel that we know today.

Tarta de Santiago

During the 16th and 17th centuries, cooks in England prepared many variations of quince preserves which they called quidoniac, quiddony or paste of Genoa.  Often the preserve paste was thick enough to be moulded into animal or flower shapes. Nowadays, many cultures use quinces in their cuisine: in India, a quince sambal is made by making a puree out of quinces, onions, chillies, orange juice and salt. In Iran, quinces are sometimes cored and stuffed with minced meat, and Moroccan tagines often include quince along with dried fruit and spices.

Tarta de Santiago

Despite its pertinence in history and mythology the quince has rather fallen out of fashion.  Now the prized aphrodisiac and breath-freshener has been reduced to an unloved (except by the cognoscenti), knobbly peculiarity.  I hereby am starting a quince appreciation campaign and when life gives you quinces, make membrillo, and with the membrillo make Tarta de Santiago.

Tarta de Santiago

Membrillo is the rose-tinted translucent and slightly grainy gel that miraculously results from boiling quinces with water, sugar and citrus.  Its perfumed exoticness makes one think of orange groves and balmy breezes, and when combined with the citrus infused almond cake and pastry layers, one is transported right to the Alhambra.

Tarta de Santiago


Recipe

Ingredients

Pastry

150g white spelt flour (substitutable with any flour of your choice including gluten-free to create a gluten-free dessert)

40g caster sugar

1 ½ tsp ground cinnamon

½ tsp salt

Grated zest of ½ unwaxed orange

100g butter, roughly chopped into small cubes

1 egg yolk

25cm x 25cm square tin (or round tin with similar dimensions) at least 8cm deep, lined with greaseproof paper

Filling

250g quince paste (membrillo)

2 tbsp lemon juice

Grated zest of ½ unwaxed orange

Grated zest of ½ unwaxed lemon

65g ground almonds

Cake layer

150 ground almonds

100g caster sugar

1 tsp ground cinnamon

½ tsp salt

Grated zest of 1 unwaxed orange

Grated zest of 1 unwaxed lemon

150g butter, melted and allowed to cool slightly

100ml triple sec

3 eggs

Optional candied orange decoration

Follow instructions from my recipe for Citrus Syrup-Soaked Cake

Method

  1. In a blender, blitz together sugar, cinnamon, flour, salt and butter until the mixture resembles damp sand. Add in the egg yolk and blitz until the mixture comes together into dough.  Flatten into a disc, wrap in greaseproof paper and chill in a freezer for 15 minutes or refrigerate for ½ hour.
  2. On a well-floured surface, roll the dough out to a 3mm thickness and transfer to the tin to line the base. Refrigerate while you prepare the filling.
  3. Preheat oven to 180°C. To make the filling, place the quince paste (membrillo), lemon juice and zest in a small pan over a medium heat and stir until smooth and fully combined.  Remove from the heat and stir in the ground almonds.  Remove the tin from the fridge and spread the quince mixture evenly over the pastry.  Refrigerate once more.
  4. To make the cake layer, whisk together ground almonds, sugar, cinnamon, salt and zest in a bowl. In a separate bowl, whisk together melted butter, triple sec and eggs.  Pour the wet ingredients into the dry and whisk until combined in a loose paste.
  5. Remove the tin from the fridge and pour the cake layer mixture over the quince layer. Bake in the preheated oven for 35-40 minutes until golden brown, springy to touch and a skewer comes out clean.  Allow to cool before serving.

Tarta de Santiago


3 Comments

Coconut & Strawberry Jam Thumbprint Cookies

10 Comments

Coconut & Strawberry Jam Thumbprint Cookies

IMG_1559.jpg

Coconut & Strawberry Jam Thumbprint Cookies Standing on a dining room chair to reach the kitchen counter top, swamped by my grandmother’s floral apron, and covered head to toe in drifts of white flour, at three years’ old I felt important and grown up. But first my grandparents and I would visit art galleries, going for afternoon tea (lemon cake for me, always), sitting on the top deck of the bus, drawing, painting, drinking more tea, and then, finally, at the end of the day, my grandmother would let me help her bake her oat and ginger cherry-bejewelled cookies – what I knew and still know as “Granny Biscuits”.  They are still in ready supply whenever I visit my grandmother’s house, and are as chewy, oaty and delicately sweet as they’ve ever been.

Coconut & Strawberry Jam Thumbprint Cookies


My grandfather possessed a dangerously sweet tooth, and, as I’ve previously mentioned, was inclined to satisfy this without regard for moderation.  He would sneak into the larder and consume an entire box of glace cherries.

Coconut & Strawberry Jam Thumbprint Cookies

This trait has wound its way down into my family. I name no names, but once the plastic seal has been broken, glace cherries mysteriously disappear at a rapid rate.  Although I admit I have, at several low points in my life, spooned jam without any justifying bread straight into my mouth, the general jam supply in my household is a more reliable presence.

Coconut & Strawberry Jam Thumbprint CookiesSo when recently I came to press the cherries into the Granny Biscuits (an essential step), and found there to be none, jam was a delicious substitute.

Coconut & Strawberry Jam Thumbprint Cookies

This recipe is further adapted with coconut replacing oats to provide a more even coating and a beautiful golden crunch once baked.

You can use whatever jam or marmalade you desire – strawberry and apricot are two of my favourites.

Coconut & Strawberry Jam Thumbprint Cookies

Ingredients (Makes 25-35 approx.)

350g unsalted butter, at room temperature

200g caster sugar

2tsp vanilla extract

Zest of ½ lemon

½  tsp salt

350g white spelt flour

1 egg, beaten with 2 tsp water

200g desiccated coconut

100g strawberry jam

100g apricot jam


2 baking trays lined with baking parchment


Method

1.)    Preheat oven to 180˚C.

2.)    In a food mixer fitted with the paddle, or in a large bowl with a wooden spoon, beat butter, sugar, vanilla, lemon zest and salt together until fluffy and pale.

3.)    Sift in flour and mix together until fully combined and a soft dough is formed.  Flatten the dough into a roughly 2 cm thick disk, wrap in baking parchment, and chill in the freezer for 15 minutes or the fridge for ½ hour.

4.)    Roll the dough into 30g spheres (roughly 3 cm in diameter), dip each one in the beaten egg and then roll in the coconut.  Space the spheres at least 5 cm apart on the baking sheet.

5.)    Press your thumb in the middle of the spheres to create a teaspoon- sized indent.  Fill the indent with a teaspoonful  of the jam of your choice.

6.)    Place in the oven to bake for 15-20 minutes or until cooked through and the coconut turns golden.  Allow to cool and serve.

Coconut & Strawberry Jam Thumbprint Cookies

10 Comments

Cherry & Yuzu Frozen Yoghurt Almond Cookie Sandwich

10 Comments

Cherry & Yuzu Frozen Yoghurt Almond Cookie Sandwich

IMG_6945.jpg

(Affectionately known as Froyo Yoyos) Cherry & Yuzu Frozen Yoghurt Almond Cookie Sandwich

If something becomes a fad, I usually try to avoid it.  Cupcakes were once things of joy, their light, sweet, spongeyness perfuming the house with the scent of birthdays.  And there was always the hope of left over icing, not to mention the ease with which one could convince oneself that the perfectly domed surface was in need of decapitation, just to preview the crunchy golden coated delicate sponge, just in case the cupcakes weren’t guest-worthy.  But now those simple pleasures have been crushed for me as the once-a -year treat has lost its golden hued novelty.

Cherry & Yuzu Frozen Yoghurt Almond Cookie Sandwich

The single-concept shops dedicated to cupcakes are now a graveyard for the dying fad.  I walked past a well-known purveyor of cupcakes in the middle of an airless department store only last week, and watched as the woman behind the counter shuffled the gaudy treats into reverse rainbow order in an attempt to look busy.

Cherry & Yuzu Frozen Yoghurt Almond Cookie Sandwich

Frozen yoghurt is no longer a novelty, but for me at least it has not yet lost its appeal.  Some people (including me) are able to delude themselves that even with the marshmallow, cookie dough, caramel topping it’s a healthier version of their favourite ice cream.

Cherry & Yuzu Frozen Yoghurt Almond Cookie Sandwich

When the clouds deigned to expose a sliver of sunlight for a short while on Saturday, I decided to indulge in a little frozen yoghurt.

Cherry & Yuzu Frozen Yoghurt Almond Cookie Sandwich


Cherry & Yuzu Frozen Yoghurt Almond Cookie Sandwich

The cherries at my favourite fruit monger were so glossy and irresistibly crimson they were begging to be involved in my hoping-for-summer recipe.  I combined them with yuzu juice for a touch of astringency to cut through the sweet creaminess of the yoghurt. Then, to add a childlike allure, I sandwiched the frozen yoghurt between two discs of biscuit which I’d infused with almond extract to bring out the cherry flavour further.

Cherry & Yuzu Frozen Yoghurt Almond Cookie Sandwich

The yuzu juice provides a wonderfully tart citrusy note to the frozen yoghurt.  If you can't find it, substitute it with lemon or lime.

Cherry & Yuzu Frozen Yoghurt Almond Cookie Sandwich

I used an ice cream churner to make the frozen yoghurt smoother and the ice crystals finer, but if you don’t have one this stage can be skipped and the result will still be delicious.

Cherry & Yuzu Frozen Yoghurt Almond Cookie Sandwich

Of course, the cherry and yuzu frozen yoghurt can be enjoyed sans biscuit.  The biscuit is however, rather useful if you wish to turn it into a hand held treat, whether or not the sunshine lingers.

Cherry & Yuzu Frozen Yoghurt Almond Cookie Sandwich

Cherry & Yuzu Frozen Yoghurt Almond Cookie Sandwich


Ingredients  (makes 8-10)

Cherry and Yuzu Frozen Yoghurt

375g cherries, halved and pitted

125g caster sugar

250g full fat natural yoghurt (don’t use Greek)

1 tsp yuzu juice

6 drops of almond extract

1 medium sized (18cm x 28cm approx.) loaf tin, lined with cling film


Almond Biscuit

160g butter, at room temperature

2 egg yolks

10 drops almond extract

210g plain flour

50g sugar

1tsp vanilla extract

¼ tsp salt

1 large baking tray lined with baking parchment

4.5/5cm circular cookie cutter or wine glass


Method

Cherry & Yuzu Frozen Yoghurt

  1. Place cherries and sugar in a small pan over a high heat. Stir occasionally to prevent sugar from burning.  When enough liquid has run out from the cherries to coat the base of the pan and it begins to boil, reduce heat to medium.  Allow to simmer for 10 minutes until the liquid from the cherries has reduced and is just slightly thicker than maple syrup.
  2. Allow the cherries and syrup to cool then blitz them together with the yuzu, almond extract and yoghurt until smooth. If you are using an ice cream maker, chill the mixture and then churn according to the manufacturer’s instructions.  Otherwise, proceed to step 3.
  3. Pour the mixture into the cling film-lined loaf tin, and smooth the surface with a spatula. Place in freezer for 1-2 hours until solid.

Almond Cookies

  1. Beat the butter in a mixer (or by hand) until light and fluffy. Into this, beat the almond extract, vanilla extract and egg yolks.
  2. In a separate bowl, mix together flour, sugar and salt. Stir this into the butter mixture until a dough forms.
  3. Flatten the dough into a disk, wrap in baking parchment and place in freezer for 15 minutes (or fridge for 30 minutes).
  4. Preheat oven to 160˚C.
  5. On a floured surface, roll out the dough to 7mm thickness. Using the cookie cutter, cut the dough into the discs and place on lined tray.
  6. Bake for 7-10 minutes until cooked all the way through but still pale. Allow to cool.

Assembly

Remove the loaf tin containing the frozen yoghurt from the freezer. Using the cookie cutter, cut the frozen yoghurt into discs and sandwich each disc between two almond biscuits.  Store these in an airtight container and return to the freezer until ready to serve.

Cherry & Yuzu Frozen Yoghurt Almond Cookie Sandwich

10 Comments

Seeded Spelt Crackers - Recipe

9 Comments

Seeded Spelt Crackers - Recipe

IMG_5199.jpg

Last week I panic baked.  My usually dependable supply of Dr Karg’s seeded spelt and emmental and pumpkin seed crisp breads had run dry. Only a few sad seeds in the corner of the packet remained, which I ate mournfully, before desperation led me to pulling open drawers in search of the emergency packet I had hidden from myself.

IMG_5211
IMG_5211
Seeded Spelt Crackers - Recipe

My hunt was rewarded with absolutely no trophies.  I must have found them some time before.

Seeded Spelt Crackers - Recipe

Necessity mothered invention: I combined some of my favourite ingredients to make my own version of the crisp breads, and they turned out rather well, perhaps even better than the originals. My family had clearly also been struck by panic, as two batches were devoured in ten minutes…

Seeded Spelt Crackers - Recipe

These crisp breads are ridiculously quick to make, healthy (when you don’t eat the whole batch in one sitting – an almost impossible feat), and delicious.  They’re also versatile – the seeds can be eliminated and/or exchanged for other varieties as desired, and they can be served with hummus, red pepper pesto (see my recipe), guacamole etc.  They can also be made dairy-free by eliminating the cheese.

Seeded Spelt Crackers - Recipe

Ingredients

115g white spelt flour

100g wholemeal spelt flour

¾ tsp salt

30g sesame seeds

15g poppy seeds

30g pumpkin seeds

50g cheddar, grated

50g parmesan grated, + 5g for sprinkling

1 tsp cayenne pepper (optional)

125ml water

1 tbsp olive oil

1 baking tray, overturned, greased with oil and dusted with flour

Method

  1. Preheat oven to 220˚C. In a large bowl mix dry ingredients together. Pour in water and oil and stir until mixture clumps together into quite a dry dough.  You may need to knead it slightly with your hands.
  2. Place dough on overturned baking tray and roll it out until it reaches the edges of the tray. It should be about 3mm thick.
  3. Sprinkle with the extra parmesan, prick the dough liberally with a fork, and score it into your preferred geometric shapes. I like 4cm x 10cm rectangles.
  4. Place in oven and bake for 10-15 minutes until golden, and firm to touch. Leave to cool – they will become crisper as they cool.
Seeded Spelt Crackers - Recipe

9 Comments

Candied Ginger & Orange Hazelnut Biscotti - Recipe

2 Comments

Candied Ginger & Orange Hazelnut Biscotti - Recipe

IMG_0144.jpg

Candied Ginger & Orange Hazelnut Biscotti - Recipe Biscotti, or cantucci, as they are known in Tuscany are crunchy and chewy slivers of twice baked and ridiculously moreish, Italian biscuits traditionally containing almonds, and often an abundance of dried fruit.  They are obligatorily dipped into an immodestly full glass of Vin Santo (Italian sweet wine) and held there until the majority of the wine has been absorbed by the biscuit and there’s every chance it will land in one’s lap before it reaches one’s ready and waiting mouth.

Candied Ginger & Orange Hazelnut Biscotti - Recipe


Unfortunately, biscotti are endangered in Britain.  Their reputation is marred by the imitation biscotti that have taken up residence in the majority of common coffee chains.

Candied Ginger & Orange Hazelnut Biscotti - Recipe

These poor copies of the true Italian post-prandial biscuit are so dry that they react like silica gel to one’s mouth, so stale that you may need to sacrifice a tooth to consume them.

Candied Ginger & Orange Hazelnut Biscotti - Recipe

For this pleasure the coffee chains also charge a trillion percent mark-up on what are the easiest and most inexpensive biscuits to make.  Also, they’re often sold individually – who stops at just one?

Candied Ginger & Orange Hazelnut Biscotti - Recipe

This recipe is very versatile.  I love strong flavours, and so I paired ginger with orange to give the biscuits a tang, and added the toasted hazelnuts for slight smokiness.  However, these ingredients can be substituted with any dried fruit and nut of your choice, or indeed left plain.  Use 200g of the dried fruit, 250g of the nut of your choice and, in place of the orange & ginger syrups, sub in an extra 2 tbsp honey.

Candied Ginger & Orange Hazelnut Biscotti - Recipe

Ingredients

For the biscuit

500g plain flour

350g sugar

3 tsp baking powder

½ tsp salt

3 eggs + 1 egg white + 1 egg yolk for later

2 tsp vanilla essence

3 tsp curaçao (triple sec)

250g roasted hazelnuts crushed into halves or slightly smaller pieces

2 tbsp honey

Zest of 1 orange

2 trays lined with baking parchment

For the candied oranges                                                

2 oranges

1 cup water

3/4   cup sugar

For the candied ginger – or 140g store bought

200g ginger peeled and slices into 1/8 inch disks

4 cups of water

170g sugar


Candied ginger method

  1. Place sliced and peeled ginger in shallow pan with water and bring to boil.  Allow to simmer with the lid on for 25 minutes
  2. Drain the ginger saving 1 cup of liquid and pour in sugar. Bring to medium heat and stir until the sugar is dissolved. Allow to simmer for about 15 minutes until the liquid becomes syrupy and the ginger is translucent.
  3. Place sieve over a bowl and pour the mixture over to drain off the syrup. Reserve both elements for later use.

Candied orange peel method

  1. Slice the peel off the oranges with a knife in thick strips, cutting close to the flesh. Cut the peel into thin 0.5 cm strips and those to roughly 2cm lengths.
  2. Place chopped orange peel, sugar and water in pan and bring to boil. Reduce to medium heat and allow to simmer for 15-20 minutes or until the liquid is mostly evaporated and syrupy and the oranges are translucent and lacking the sourness of their fresh state.

Biscuit method

  1. Preheat oven to 180C. Mix all the dry ingredients together with the toasted hazelnuts in a large bowl.
  2. In a separate bowl separate one egg and place the yolk aside for later use.  Mix together the 3 whole eggs, the egg white of one egg and the other liquid ingredients with the candied orange peel (along with it syrup) and the drained pieces of ginger along with 2 tbsp of the ginger syrup.
  3. Pour liquid mixture into the dry and stir until combined in a stiff dough.
  4. Sprinkle a wooden board with flour and spoon 1/6 of the mixture onto it. Coat your hands in flour and roll the dough out into a 5 cm wide log. Place on tray. Repeat with rest of mixture, leaving a large at least 10cm distance between each piece since it will spread whilst cooking.
  5. Bake for 20 minutes or until deep golden brown. With knife at the ready, take them out and slice diagonally into 3 cm widths and turn them so they’re cut side up.  Turn off the oven and place these back in to dry out for another  10 minutes. Or just leave them in until ready to serve.

Candied Ginger & Orange Hazelnut Biscotti - Recipe

2 Comments

Peanut Butter and Jam Cookies - Recipe

Comment

Peanut Butter and Jam Cookies - Recipe

IMG_4786.jpg

Peanut Butter and Jam Cookies - Recipe Memories of countries and cities I’ve visited are strongly intertwined with my culinary experiences there.   Whenever I’m asked about my trip to Cuba, memories of the music, culture and politics, the beauty of the countryside, the cars, and the buildings are always drowned by the paddies of rice starch dotted with beans which faced me every meal time.  The lone cylinder of “Master Potato Crisps” (lesser Pringles), furry with dust, which commanded an entire shelf in an embargo-challenged grocery store emerged as a perverse highlight.

Peanut Butter and Jam Cookies - Recipe


I will never be able mentally to separate Canada from the oozing, sticky-sweet clasp of a particular Toronto cinnamon bun (it may have been preceded by some, but its superiority has eradicated all past and future competition).  New York is always a complete sensory overload: last year I ate overtime to cram Lebanese, Thai, raw vegan, Chinese, Italian, modern European, American, French, Greek, Mexican, and Brazilian into five days - delicious and, arguably, gluttonous.  Yet, despite this mammoth accomplishment, one of the most outstanding of the culinary delights I’ve sampled there is something rather less exotic: the peanut butter cookie.  It may be humble in name, maybe in appearance too, but it is most certainly not humble in nature.  The source of this ambrosia is the well-established City Bakery, off Union Square, known best for its croissant pretzels, seductively viscous hot chocolate and, of course, its peanut butter cookies -crumbly on the outside and soft and chewy in the interior, with salty and sweet in fine-tuned balance creating an insatiable desire for more.

Peanut Butter and Jam Cookies - Recipe

At brunch a couple of weekends ago, one of my friends confessed her current obsession: sneaking off to her kitchen cupboard armed with a bread stick to pair with that American favourite of jam and peanut butter.

Peanut Butter and Jam Cookies - Recipe

The memory of the palate-coating, salty-sweetness of the City Bakery peanut butter cookies reasserted itself.  Over the next week it took up stubborn residence, so I made up my own.  They worked.  I know this because I made them twice: I left the first batch out to cool, exited the kitchen for 10 minutes, and when I returned, they were gone, my brother unabashedly dusting the last few crumbs off his sweater.  With family members temporarily banished from the kitchen, the second batch survived long enough to be photographed.  Although delicious on their own, I sandwiched mine with raspberry jam to offset the sweet salty nuttiness with a little tang. Julia D. you are to blame for this recipe (and it is, indeed, dedicated to you).

Peanut Butter and Jam Cookies - Recipe

Often cookie recipes frustratingly demand that the dough is chilled before baking.  These can be made, baked and eaten in 20 minutes - no torturous chilling necessary.

Peanut Butter and Jam Cookies - Recipe

Ingredients (makes 34 individual cookies)

115g unsalted butter, at room temperature

190g granulated sugar

60g light brown sugar

¾ tsp salt

250g smooth peanut butter

1 large egg

½ tsp vanilla extract

140g white spelt flour (or plain flour)

150g raspberry jam (optional)

2 baking sheets lined with baking parchment


Method


  1. Preheat oven to 180˚C.
  2. In a mixer (or by hand), cream together butter, granulated sugar, light brown sugar and salt until pale and fluffy. Mix in peanut butter, egg and vanilla extract until fully combined.  Gently stir in the flour.
  3. In the palms of your hands, roll a tablespoon of the mixture at a time to form 4cm spheres. Space them out on the tray.  When the mixture is used up, gently press a fork into the spheres to flatten them and form a criss-cross pattern as pictured.
  4. Bake in oven for 12-14 minutes until slightly golden and still soft to touch. Allow to cool slightly before sandwiching each pair together with a teaspoon of raspberry jam.

Peanut Butter and Jam Cookies - Recipe

Comment

Anti-Valentine's Day Soft & Chewy Hot Spiced Double Ginger Cookies

Comment

Anti-Valentine's Day Soft & Chewy Hot Spiced Double Ginger Cookies

IMG_3475.jpg
IMG_3475.jpg
Anti-Valentine's Day Soft & Chewy Hot Spiced Double Ginger Cookies

Every year the bile-inducing  pink and fluffy over-commercialised day of dictated love comes about. And unsurprisingly, due to their arguable aphrodisiac qualities, sales of oysters peak.  Well as you or your date slurp these down on your Valentine’s date, think of this: oysters are related to slugs.  Why not grab a few from your garden, douse them with some Tabasco with buttered bread on the side and gulp these instead – cheaper and more plentiful (this is not actually a recipe).

Anti-Valentine's Day Soft & Chewy Hot Spiced Double Ginger Cookies

Something a little more acceptable as an anti-Valentine’s day recipe might be this: soft & chewy hot spiced double ginger nut cookies.  They’re not red, not cloying-sweet and they’re not heart shaped.  They even have a little rebellious kick to them if you choose to add the cayenne pepper, which as a spice addict, I love.  But if you prefer something a little milder, leave it out.  If you want to shake off a stalker add more (roughly 5x stated quantity) and deliver gift wrapped.

Anti-Valentine's Day Soft & Chewy Hot Spiced Double Ginger Cookies

Makes about 35 cookies

Ingredients

200g unsalted butter, softened

440g self-raising flour

125g caster sugar

3 tbsp ground ginger

1 1/2 tsp bicarbonate of soda

1/4 tsp cayenne pepper (optional)

1/4 tsp salt

100g stem ginger (;preserved in syrup), finely chopped

2 tbsp ginger syrup (from the preserved ginger)

180g golden syrup

30g treacle

1 tsp vanilla extract

2 baking tray lined with baking parchment

Method

1.)Preheat oven to 160°C.

2.)Place butter, flour, sugar, ground ginger, bicarbonate of soda, cayenne pepper (if using) and salt in a blender and blitz until thoroughly mixed and is like damp sand.

3.) Warm chopped ginger, ginger syrup, golden syrup, treacle and vanilla extract in a pan over a low heat for a couple of minutes until the mixture becomes less viscose.  Pour this into the dry ingredients and pulse until combined into a dough.

4.) Roll the dough into 3cm wide spheres and space them out on the baking trays  as they will spread whilst baking.

5.) Place in preheated oven and bake for 7-10 minutes until golden and slightly crisp on outside and very soft on the inside.  They should seem slightly under-baked as they will continue to cook as they cool and this will make them deliciously soft and chewy.

Anti-Valentine's Day Soft & Chewy Hot Spiced Double Ginger Cookies
Anti-Valentine's Day Ginger Cookies - Recipe

Comment

Salted Caramel-filled Chewy Chocolate Brownie Cookies

3 Comments

Salted Caramel-filled Chewy Chocolate Brownie Cookies

IMG_9341.jpg

Salted caramel-filled chewy chocolate brownie cookies I blame salted-caramel for my short-sightedness.  At the end of morning assembly, when I was five years’ old, the headmistress would read a prayer.  Every one of us would dutifully lower her head and shut her eyes.   I pressed mine tightly closed with my hands until, like some computer generated visualiser, semi-hallucinogenic patterns appeared.  Well, mainly one pattern: a recurrent drop of molten gold slipping seductively into its glistening pool, creating ripples that seemed to extend to the corners of dark space behind my eyelids.  I found the effect narcotic, and would do this without fail every morning.

I now realise that the real-life equivalent to that voluptuous liquefied gold is salted caramel: fudgy, creamy slick, viscous and dangerously addictive, I’m obsessed.

Salted caramel-filled chewy chocolate brownie cookies

Too often it drenches and drowns all other culinary thoughts and ideas I have, but to resist its ambrosial pull is futile.  So, instead, I have decided to partner it with its already well-established acquaintance - chocolate.  That’s not to say that these cookies are in any way ordinary.

Salted caramel-filled chewy chocolate brownie cookies

Most shop bought packets of chocolate cookies are filled with empty promises, often dry, floury, over sodium bicarbonated, and rock solid.

Salted caramel-filled chewy chocolate brownie cookies

I have a friend who has developed and perfected the “cookie-pinch”.  Her forefinger and thumb clamp down on unsuspecting biscuits in their paper wrapping.  The motion is swift and discreet, but in that split second the pads of her well-attuned digits estimate the freshness of the cookie to the nearest hour.

Salted caramel-filled chewy chocolate brownie cookies

Salted caramel-filled chewy chocolate brownie cookies

These chocolate biscuits, however, are crisp, rich, chewy and soft, and cushioned by their silky smooth salted caramel filling, rendering my friend’s admirable skill totally redundant.

Salted caramel-filled chewy chocolate brownie cookies

Salted caramel-filled chewy chocolate brownie cookies

Ingredients

Cookie

200g dark chocolate, chopped

40g unsalted butter

2 eggs

150g caster sugar

1 tsp vanilla extract

35g plain flour, sifted

¼ tsp baking powder, sifted

¼ tsp salt


Salted caramel frosting

165g white caster sugar

60ml water

125ml single cream

150g unsalted butter, chopped

250g icing sugar, sieved

1 tsp vanilla extract

½ tsp salt


2 baking trays, lined with baking parchment

Cookies

  1. Preheat oven to 180˚C
  2. Melt chocolate and butter together in a small pan over a low heat until only just melted and smooth, stirring frequently. Set aside to cool.
  3. In an electric mixer, whisk together eggs, sugar and vanilla for about 10 minutes or until the mixture becomes smooth and slightly thicker.
  4. Gently fold in the cooled chocolate and butter mixture.  Once combined, fold in the sieved flour, baking powder and salt until just combined and let stand for 10 minutes.
  5. Drop the mixture, 1 tablespoon per biscuit on to the baking trays leaving 5cm between them as the mixture will spread.
  6. Bake for 8–10 minutes or until shiny and cracked. Allow to cool on trays.

Salted caramel icing

  1. Stir together sugar and water in a pan over a high heat until sugar has dissolved. Allow to bubble up for about 5-10 minutes until it turns a deep burnished gold.  Don’t be afraid to let it turn quite rusty in colour – the deeper in colour you dare to go (without it burning) the more depth of flavour.
  2. As soon as it gets to the above stage pour in cream and butter and whisk immediately and continuously over the high heat until fully combined. If the sugar crystallises, don’t panic.  Keep whisking over a high heat until it melts once more.
  3. Remove from heat and let it cool. You can place it in fridge, or freezer, or, if you’re greedy and impatient, you can place the pan in an ice water bath and stir until cool.  I opt for the latter option.
  4. Beat together caramel, icing sugar, vanilla and salt until combined.
  5. Sandwich the cookies together using 2 tbsp of the icing (or more depending on how caramel-crazed you are).

Salted caramel-filled chewy chocolate brownie cookies


(adapted from Donna Hay)

3 Comments

Tarte Aux Nectarines

Comment

Tarte Aux Nectarines

IMG_8024.jpg

Tarte Aux Nectarines - Recipe I’ve been asked several times in the last couple of weeks what my blogs are about, what my angle is, which niche I am filling, what the selling point is.  So here it is: there is no niche.  Niches are overcrowded and limited places in which to write.  To me, food is a form of communication, even, to some extent, representative of character.  So  why should I pin myself down to some of the so-called niches in which other bloggers have incarcerated themselves?


Tarte Aux Nectarines - Recipe

Healthy cooking blogs, for example, seem to be proliferating at the moment, or so they call themselves, but what they are promoting is not cooking, nor is it necessarily healthy (or particularly interesting) – I’ve seen enough versions of green smoothies to make me want to down a packet of muscovado sugar (it tastes really good on its own, by the way).

Tarte Aux Nectarines - Recipe

I’m also sick of reading and hearing about avocado-based baking.  You can try to convince yourself that it tastes good. It does not.  It tastes rubbery, and bland, and makes me want to retch.  Another example is cauliflower pizza.  If you want pizza HAVE IT.  If you’re worried about its calories/fats/sugars/carbs/GI/salt, then don’t eat it.  If you’re desperate, have it in moderation. And if by mistake on purpose you eat the whole thing and it was really delicious, and you feel guilty, then just don’t do it again for a while.  Do not try to replace that experience with cauliflower as it simply does not work.  I’ll tell you the truth now: cauliflower does not equal bread. It doesn’t matter how small you grind the cauliflower, how tightly and agonisingly you squeeze out the liquid, and how densely you pack it into a tin, it does not turn into bread. Plus the amount of mozzarella you have to add to make it hold together undermines the whole attempt at making it “healthy”.

Tarte Aux Nectarines - Recipe

Baobab dust, acai capsules, psyllium husk powder - these are not what cooking and baking are about.  They will not be included in my recipes unless they add flavour. And even then, at £10-£15 for a thimbleful, it’s not worth it.

Tarte Aux Nectarines - Recipe

Turn away now if you’re looking for a fad.  As I have said before, gluten-free baking is for coeliacs only. Just because it says “free” doesn’t mean that it liberates you or your spare tyre. In fact, you’re probably adding another one by eating it as it shoots blood glucose levels sky high, above even those of wheat.

Tarte Aux Nectarines - Recipe

So to conclude, I’m not going to slot into any niche like the Priapus statue in Newby Hall.  The blog is to be viewed in the round and the recipes are for bold, modern and flavoursome cuisine.

Tarte Aux Nectarines - Recipe

This recipe destroys the common misconception that pastry is hard to make, and combines with the nectarine topping just a hint of Triple Sec  to add subtle tang.  Very little effort is involved, but the result is impressive.

Tarte Aux Nectarines - Recipe


Ingredients

Pastry

280g plain flour

1 tbsp sugar

½ tsp salt

170g cold unsalted butter, diced

125ml cold water


Topping

4 nectarines, halved, destoned & sliced horizontally to 3-4mm thickness

100g caster sugar

60g cold unsalted butter, diced

¼ tsp salt

½ cup of smooth apricot jam

2 tbsp Triple Sec


Sheet tray lined with baking parchment


Recipe adapted from Ina Garten


Pastry Method

  1. Blitz flour, sugar and salt in a blender to combine, then add the butter and pulse briefly about 10 times until the mixture turns to pea-sized pieces.
  2. Pour in water and blitz until the dough begins to come together.
  3. Make it into a chunky disk and wrap in clingfilm/baking parchment. Place in freezer for half an hour

Construction method

  1. Preheat the oven to 200˚C.
  2. Roll out the pastry to a roughly 25x35cm rectangle, slicing off the edges to make it a clean rectangle.
  3. Arrange the nectarine slices, slightly overlapping, in a diagonal down the middle of the tart then continue with rows on either side.
  4. Sprinkle the cubed butter and sugar and salt over the nectarine slices and bake in centre of an oven for 40 minutes or until crisp and golden. Check about half way during the baking time whether the pastry has become puffy. If so, simply cut slits in it to let the air escape.
  5. Once the tart is ready, heat the apricot jam together with the Triple Sec and brush it all over the tart, including all the nude sections of pastry.

Tarte Aux Nectarines - Recipe

IMG_8061 - Copy

Comment

Carb-free, Sugar-free, Gluten-free Fruit & Seed Bars

7 Comments

Carb-free, Sugar-free, Gluten-free Fruit & Seed Bars

gluten-free.png

Carb-free, Sugar-free, Gluten-free  Fruit & Seed Bars When you get the 4 o’clock slump, moderation is at an all-time low and chocolate bars are winking at you, reach for one of these carb-free, sugar-free, gluten-free fruit & seed bars instead.  They are high in protein, vitamin rich, low GI, ridiculously easy to make (no baking), yet despite their virtuousness, they are irresistibly delicious.

Carb-free, Sugar-free, Gluten-free  Fruit & Seed Bars

Carb-free, Sugar-free, Gluten-free  Fruit & Seed Bars

Carb-free, Sugar-free, Gluten-free  Fruit & Seed Bars


Ingredients

500g mixed seeds (I use pumpkin, sunflower, sesame)

40g ground almonds (optional)

3 tbsp chia seeds (optional)

3 tsp vanilla bean paste (use vanilla extract if not available)

200g medjool dates

200g dried figs

Pinch of salt

20x25cm baking tray, greased


Makes about 30, depending on size

Method

  1. Pre-heat the oven to 180˚C.
  2. Spread out the mixed seeds on a large baking tray (not the pre-greased one) and place in centre of oven to toast for 5 minutes until they are beginning to turn golden. To achieve the same result without an oven, toast them in frying pan over a medium heat and stir continuously for about 5 minutes.
  3. Blend together figs, dates, vanilla bean paste and salt until they turn to a smooth paste.
  4. In a large bowl mix together toasted mixed seeds, ground almonds, chia seeds and the fig-date paste until thoroughly combined.
  5. Press the mixture into the pre-greased baking tray and slice into bars of desired size.
  6. Wrap the tray with clingfilm and place in freezer for at least an hour, or leave overnight in fridge to set. The bars will last for several weeks.

7 Comments

1 Comment

Baklava

IMG_5989.jpg

baklava 
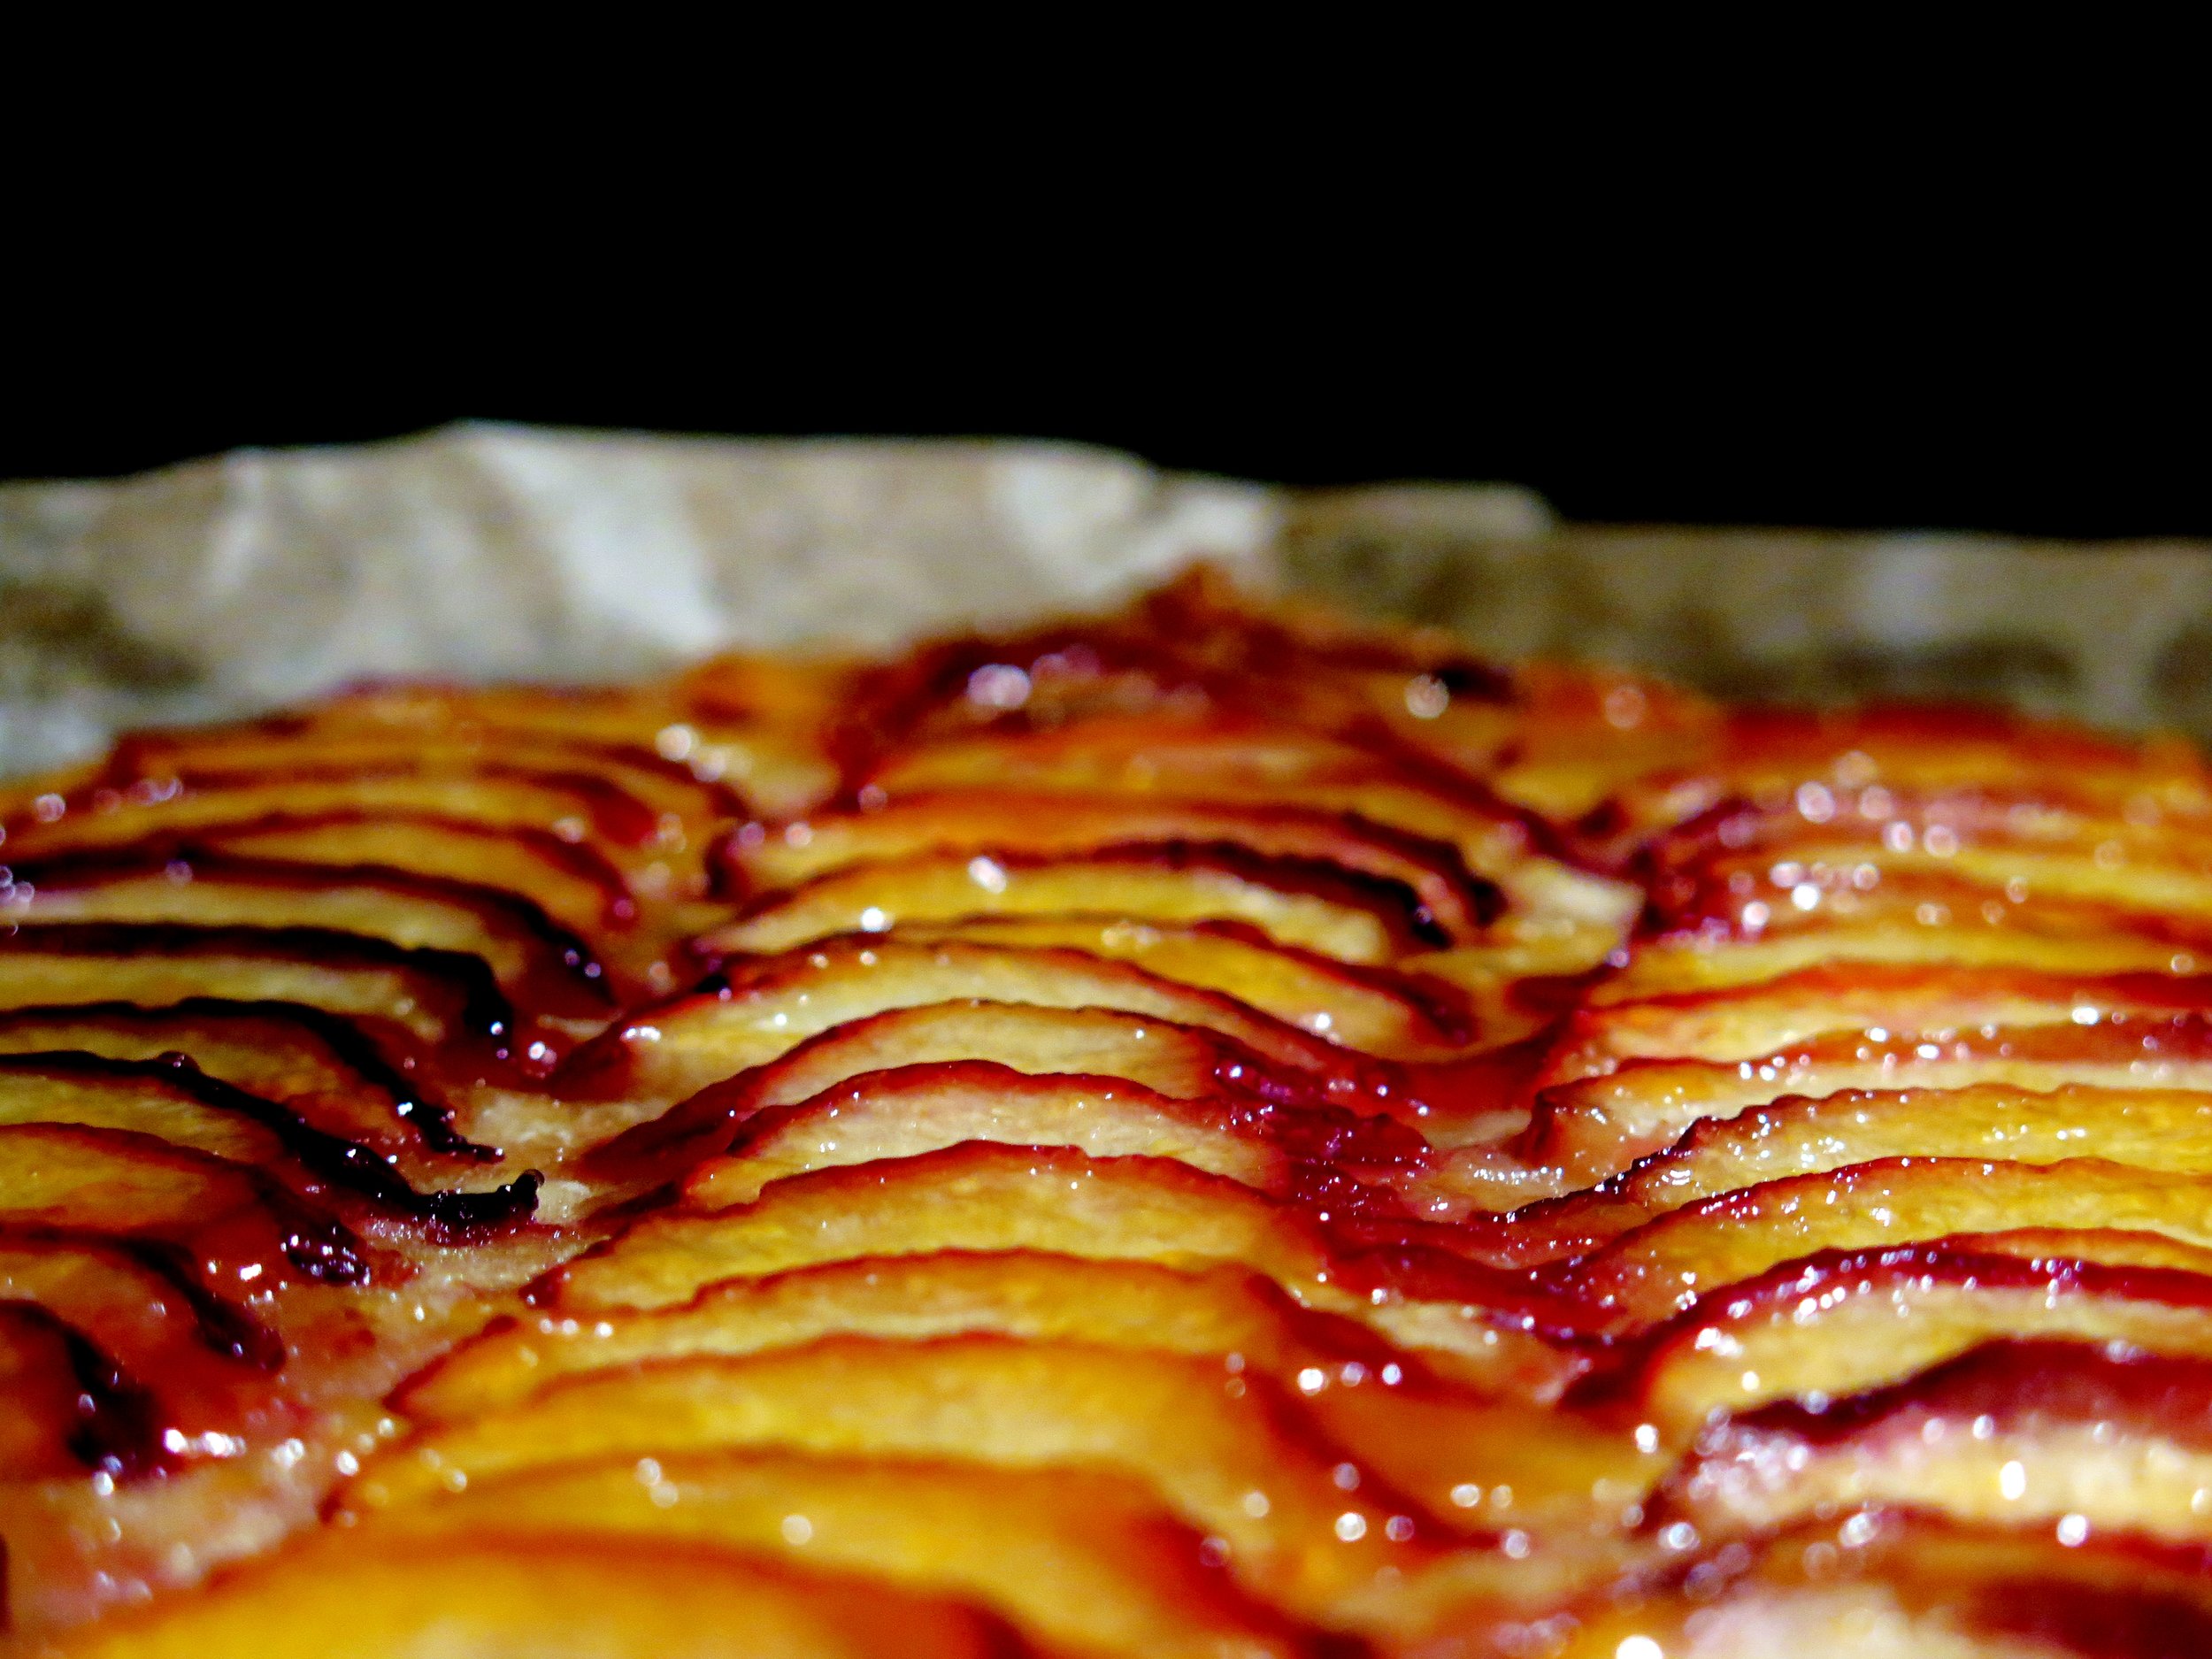
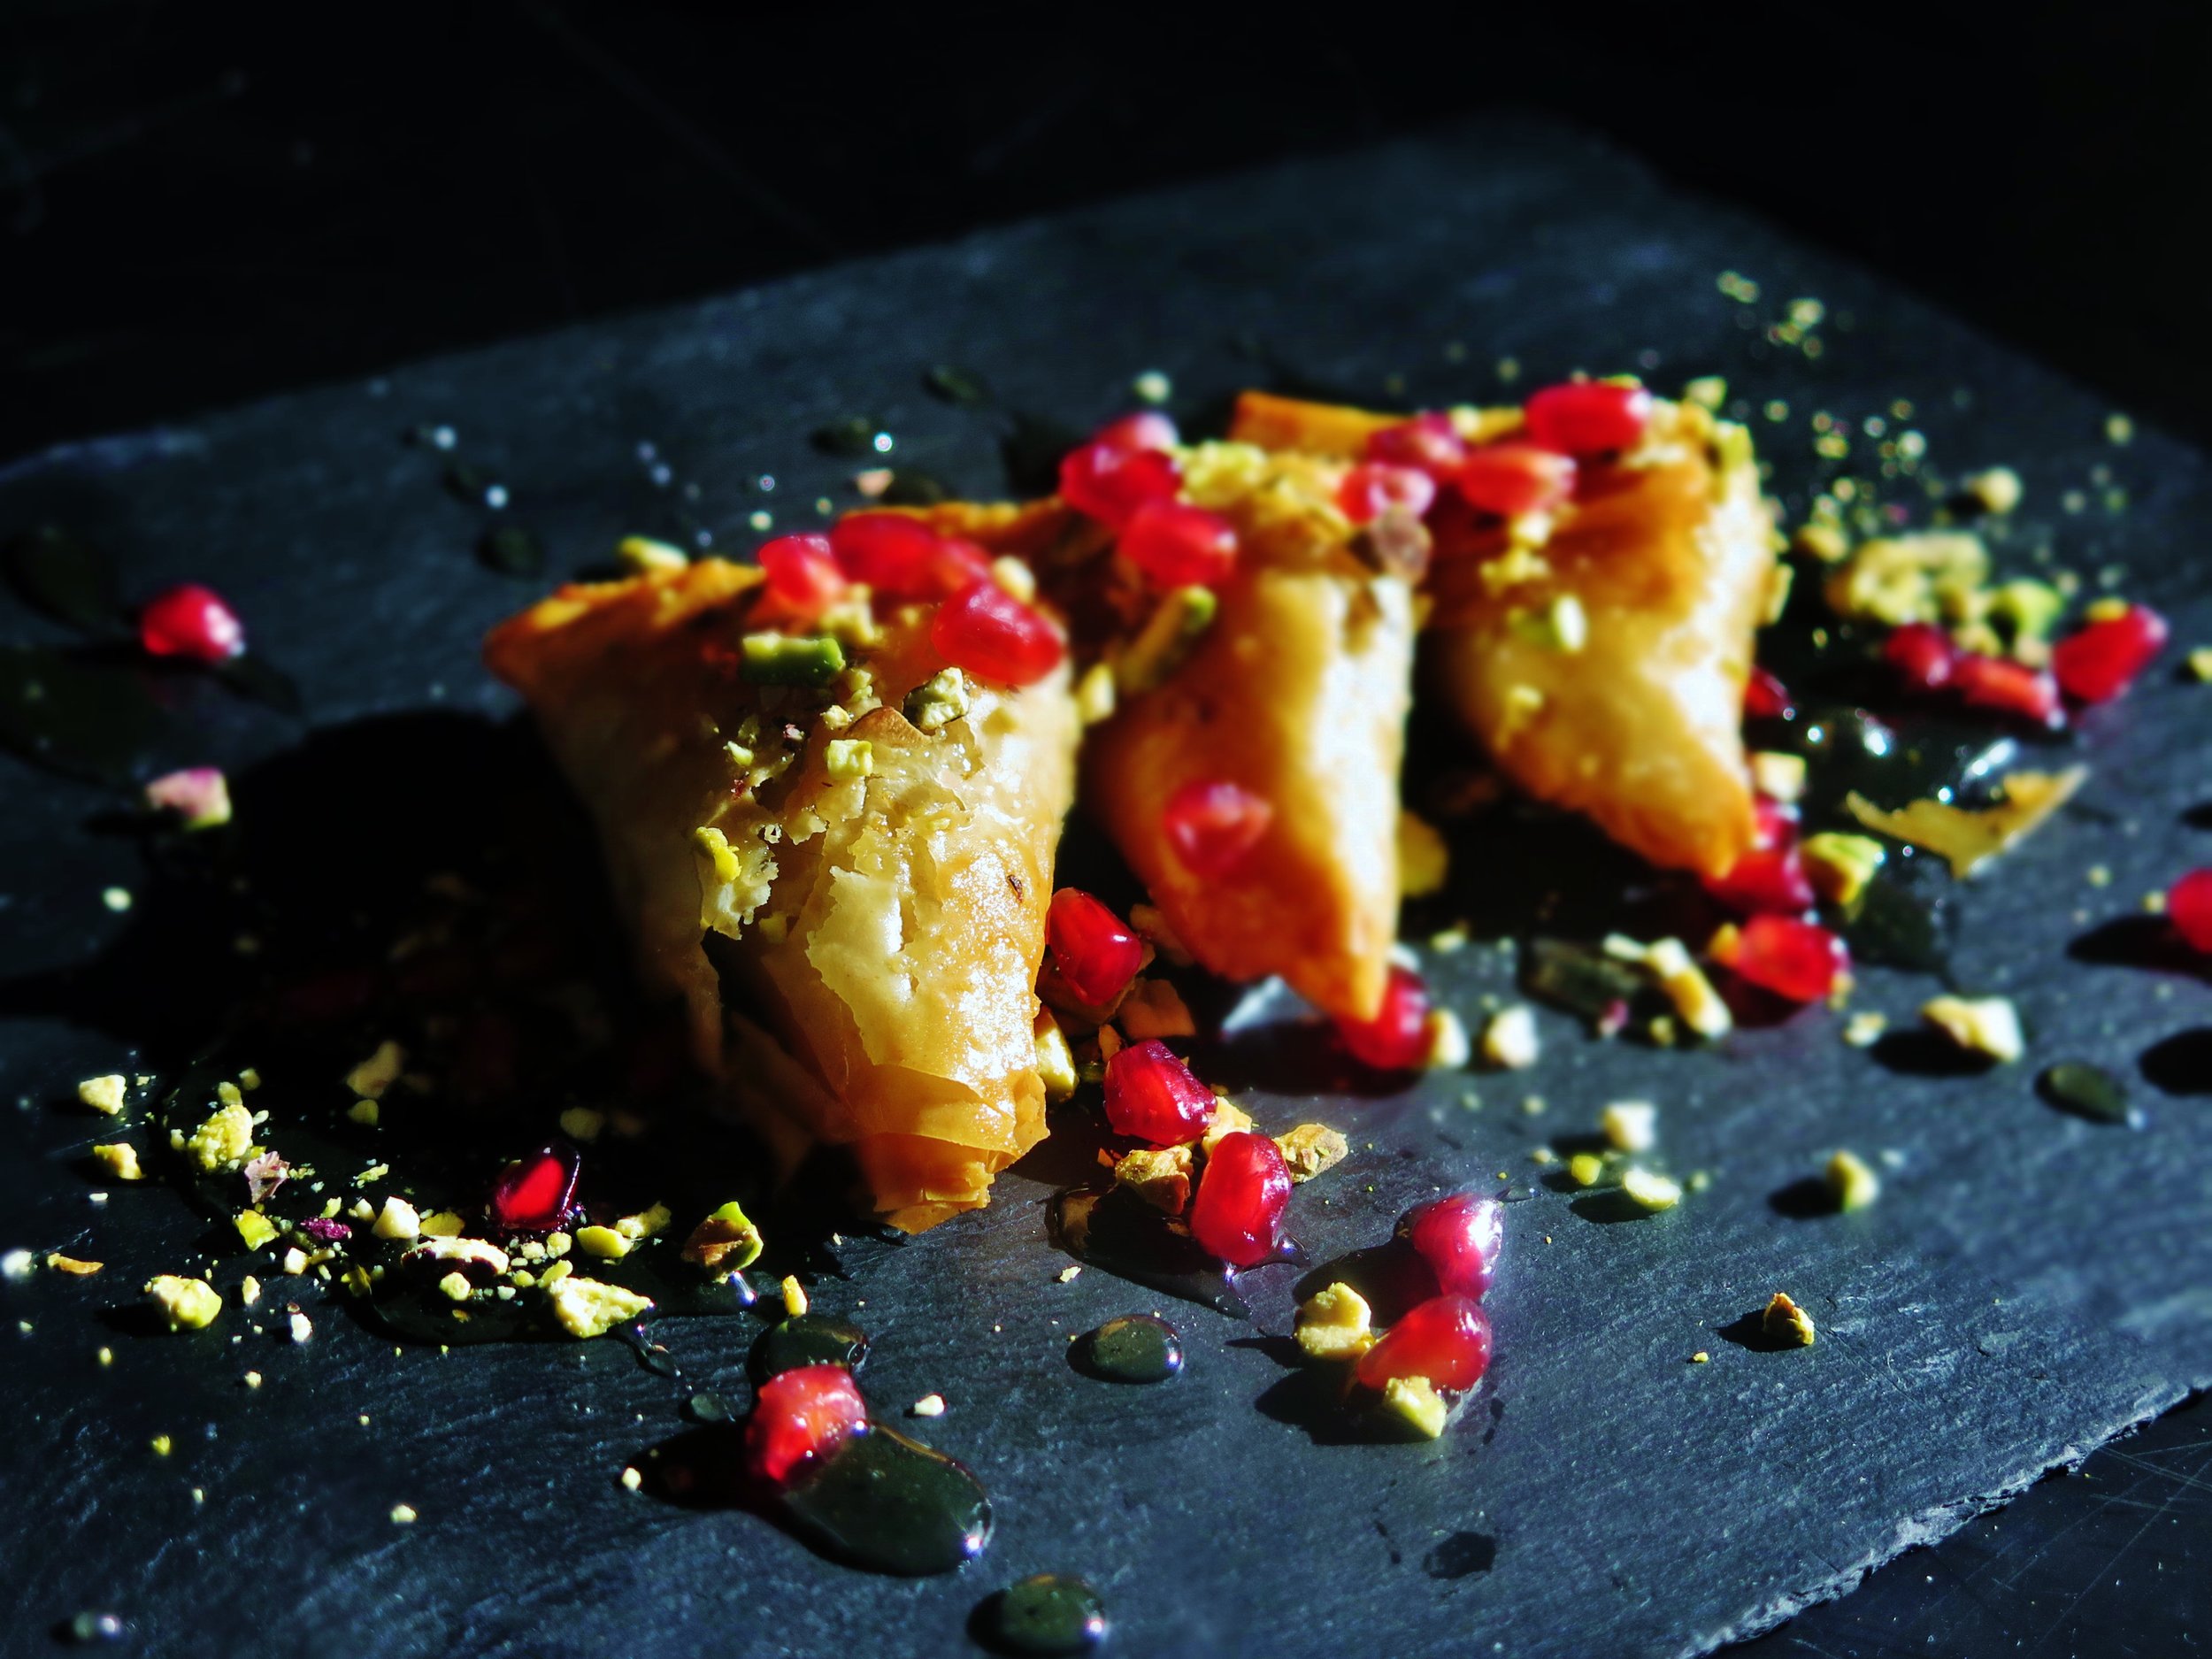
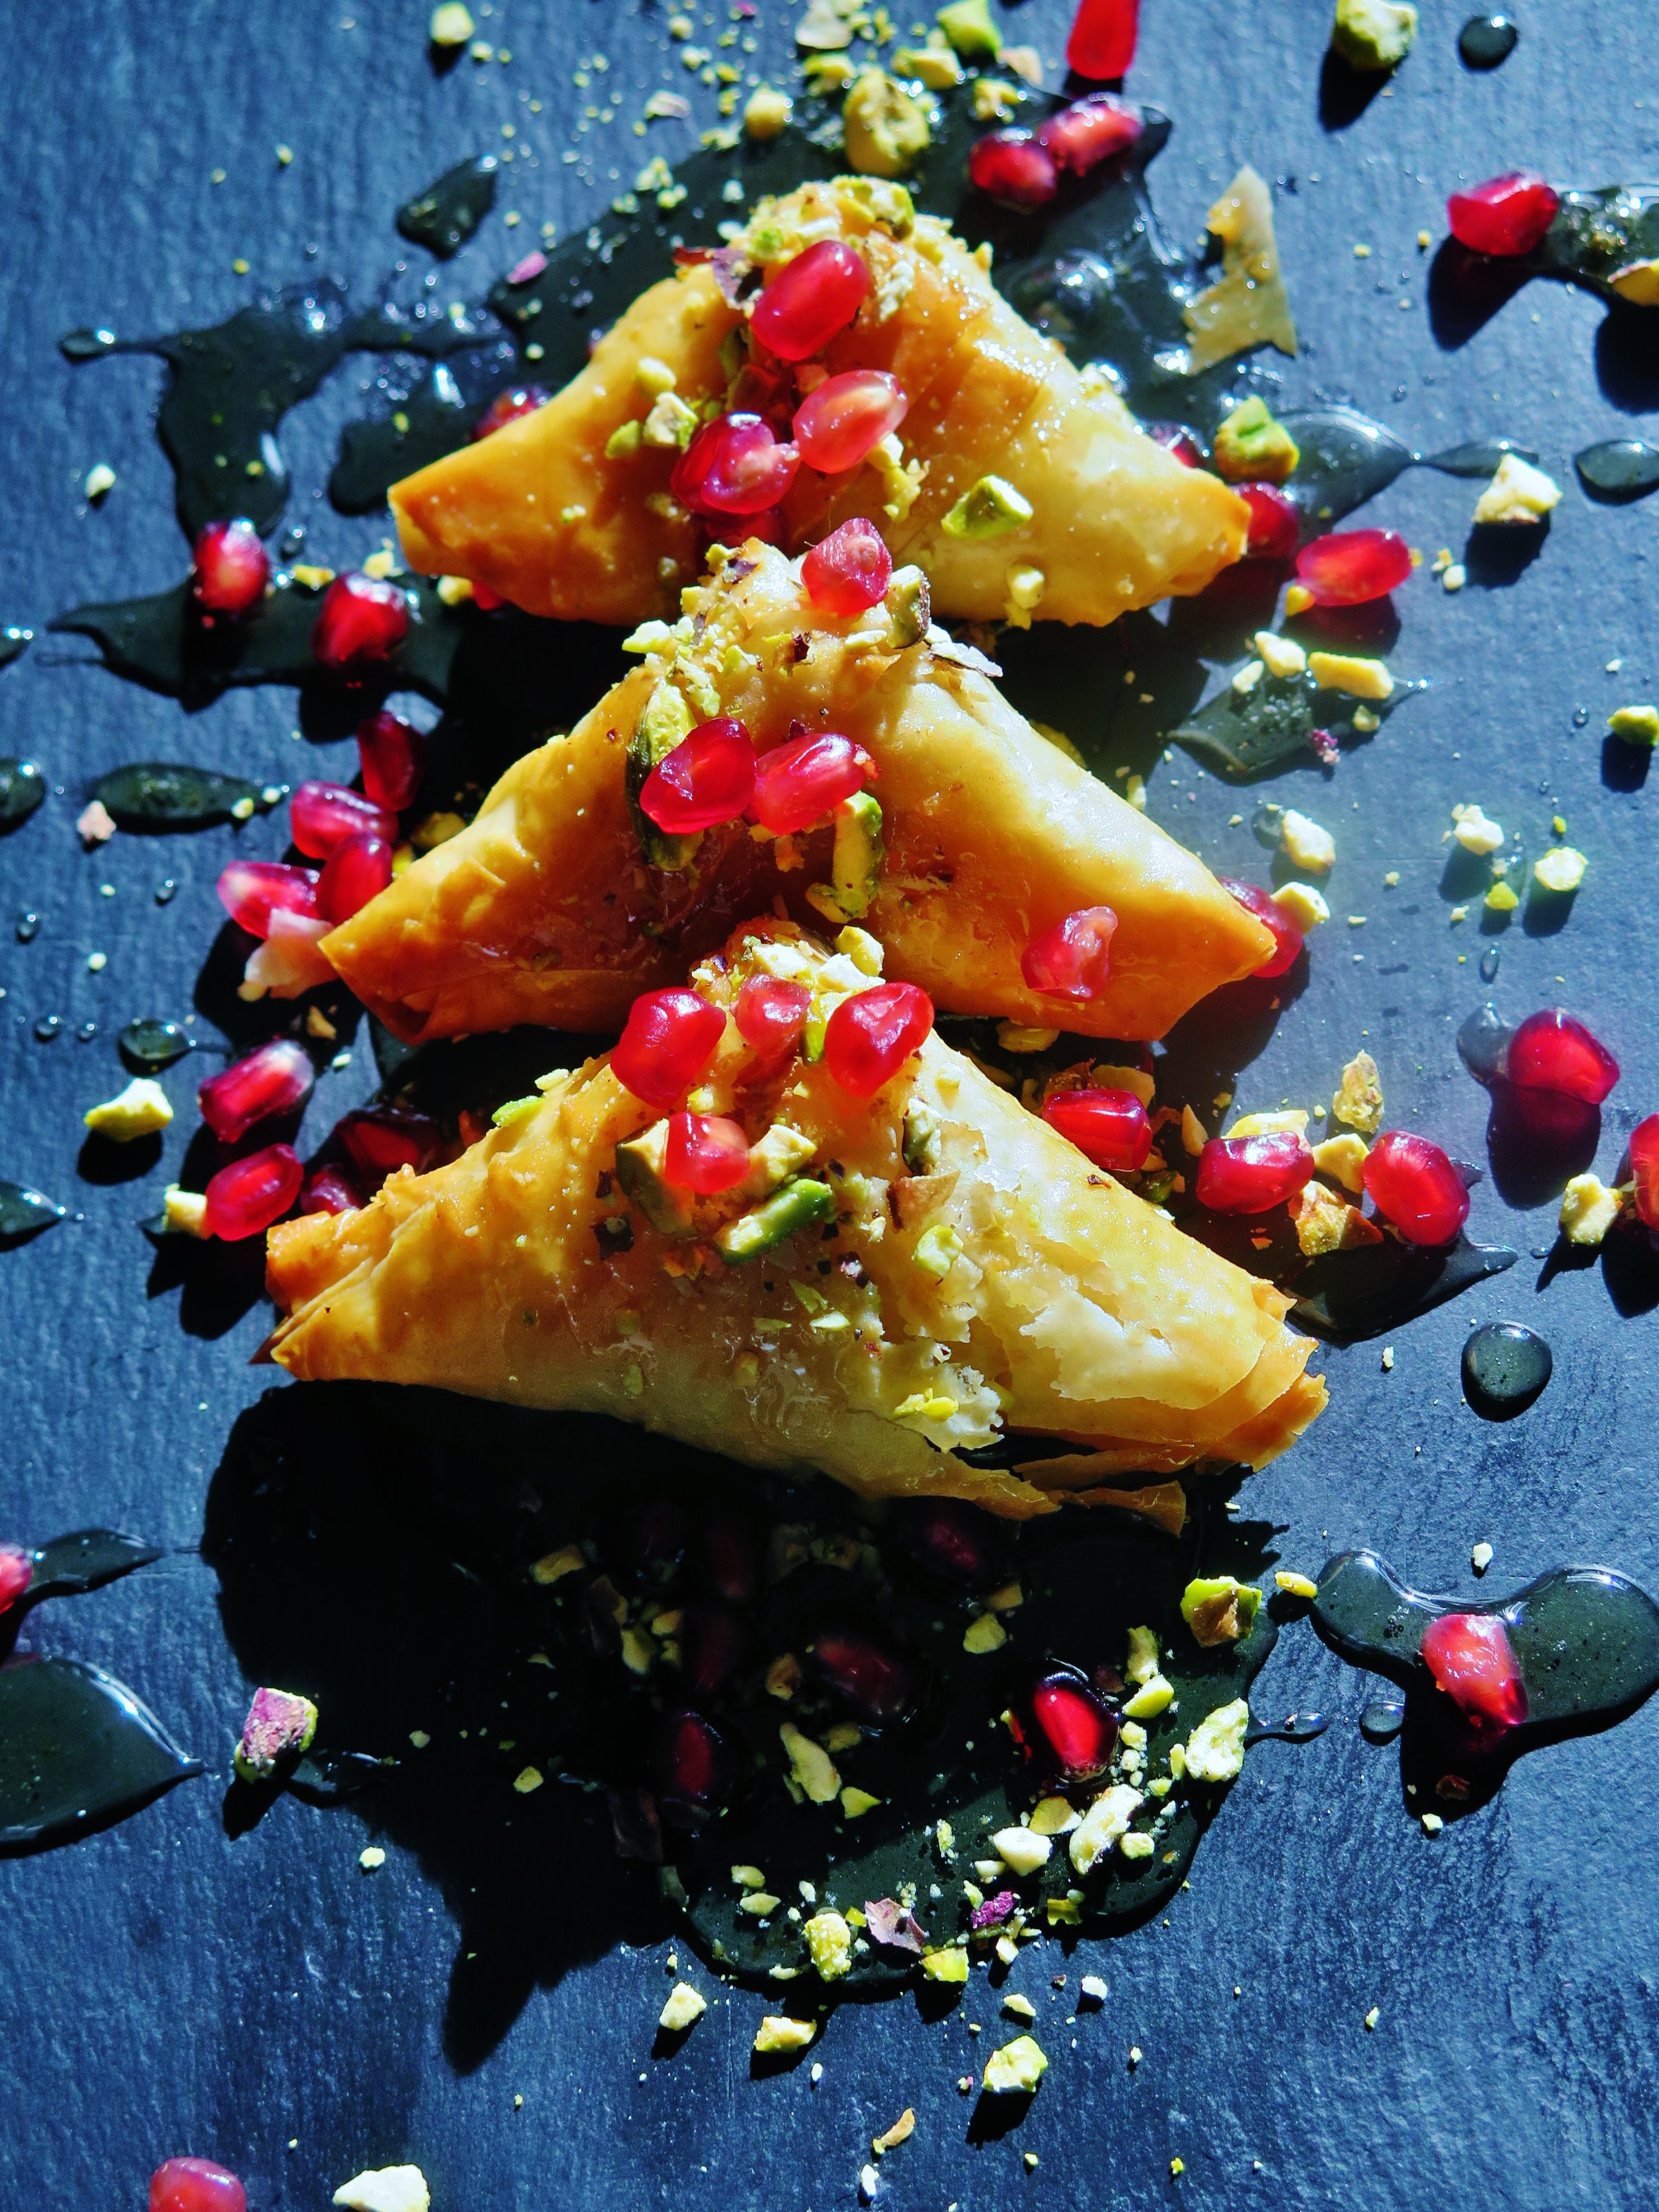
Its origins lie as either  Central Asian Turkic traditional layered breads, or traditional Roman desserts from Istanbul the capital of the Eastern Roman Empire (I favour the latter option).  Breakfast, afternoon tea, dinner – these golden perfumed sweets are appropriate at any time of the day in may book and they are way simpler & quicker to make than you might think.

baklava with ground pistachio & pomegranate

baklava

Many recipes call for the pastry to soak for 8 hours or more – I came up with a recipe that can be made and cooked (and eaten) in less than half an hour.


IMG_5955

baklava

Ingredients


¼ cup caster sugar

¼ cup water

¼ cup orange blossom honey

1 ½ tsp lemon juice

½ tsp rose water

100g pistachios (ground to affine rubble)

100g walnuts (ground to a fine rubble)

Pinch of salt


6 sheets filo pastry

200g melted butter

100g bread crumbs


Syrup

½ cup water

½ cup caster sugar

¼ cup orange blossom honey

1 tsp lemon juice

¾ tsp rose water

tray line with baking parchment


Method

  1. Preheat oven to 200˚C.
  2. Place sugar, water and honey in a pan over high heat and stir until the sugar has dissolved.
  3. Reduce to medium-high heat and allow to simmer for 4-5 minutes until slightly more viscous. Stir in the lemon juice and simmer for 1 minute, then remove from the heat.
  4. Stir the ground nuts, pinch of salt and rose water into the syrup and set aside.
  5. Lay out a sheet of filo pastry lengthways (with the shorter side of the rectangle nearer to you), paint with melted butter and lightly sprinkle with bread crumbs. Lay another sheet on top and repeat.
  6. Cut the layered pastry into 4 long strips. Place a teaspoon of nut mixture at the bottom right hand corner of a strip and fold the corner over to great a triangular pocket.  Keep folding, in triangles until you reach the end of the strip then paint with melted butter and place on baking tray.
  7. Bake in oven for 10 minutes, or until the outside is golden and crisp.
  8. While the baklava are baking, make the syrup by repeating step 2 with the syrup ingredients.
  9. Once baklava are cooked, place on serving plate & drizzle generously with the syrup.

Makes 12

IMG_5964

1 Comment