Viewing entries tagged
caramel

The Ultimate Chunky Chewy Triple Chocolate Caramel Cookies

Comment

The Ultimate Chunky Chewy Triple Chocolate Caramel Cookies

In my dictionary definition of cookie, I’m going to be demanding. It needs to be thic(ccc)k so that each mouthful contains some of the promised flavours, be they chocolate, nut, or candy. I want it crisp on the outside so that when broken, it gives way to a chewy cookie-dough goo. If there’s chocolate or caramel, they need to be molten. They also need to have enough salt to balance the sweetness and add depth of flavour. 

And, after years of trials, the quest to create the perfect cookie becoming increasingly Sisyphean, I’ve done it. And you need to make them ASAP.

Comment

Salted Caramel & Peanut Chocolate Tart

Comment

Salted Caramel & Peanut Chocolate Tart

I wanted chocolate. I wanted peanuts. I wanted caramel. And so came together three revered ingredients to make this simple but deeply luscious dessert. I admit to a glimmer of inspiration from the Season 11 contestant of RuPaul’s Drag Race contestant, the drag queen with the moniker Silky Nutmeg Ganache. But apart from that, I attribute this recipe to greed.

Comment

Pear & Speculoos Caramelised Cookie Magic Cake

Comment

Pear & Speculoos Caramelised Cookie Magic Cake

IMG_0123.jpg

Maybe they think that all the gluttony and swollen stomachs affect our ability to digest information, that all the turkey/mince/fruit/chocolate/stuffing becomes blinding and we are no longer able to read paragraphs of text.  Instead, we have to have things numbered so as to reassure us that whatever we are reading won’t detract too long from the Christmas stasis.  

IMG_9965.jpg

Every newspaper or magazine clearly has some greedy journalist on its team who takes it upon him or herself to rate every mince pie out there to save us all the hard work. Then the subjective lists are compiled and played back to us year after year, despite the foods remaining the same, in the identical, consumable, numbered format.

In response to this, and inspired by an affront to my eyes when opening the newspaper magazine this weekend, I thought I would do a light review of the food adverts themselves:

IMG_0052.jpg

WAITROSE

Apparently, it’s for fruit lovers: congealed, glistening and with blood/jam trickling through its rivulets. But what is it? Depends how you like your desserts, but I’ll pass.

1/5

IMG_0079.jpg

SAINSBURY’S

I know Christmas is supposedly about family and coming together, but the picture of “grandma” with a prawn coming out of her head doesn’t conjure up any feelings of warmth for me 

1/5

IMG_0100.jpg
IMG_0113.jpg
IMG_0133.jpg

BOURSIN

I’ve caught members of my family spooning Boursin directly into their mouths. I was cynical at first about their Christmas rebrand with the addition of the “merry” epithet. But somehow, heady with garlicky creaminess, it has caught on in my household – we are now asking each other whether we’d like some “Merry Boursin” on our toast.

4/5

IMG_0045.jpg


LIDL

Lidl has gone down the particularly salivating route in showing us the turkeys pre-slaughter. They are relaxing free range by a bale of hay with the sun shining to stained glass effect through the translucent wattles. Delicious.

0/5

IMG_0147.jpg

Anyway, with all this Christmas “magic” abounding (and as a remedy for all this gaudiness), we might as well move on to an actual “magic” cake. Making a cake is magical enough, but there is a childlike joy when you put a homogeneous mix into the oven and it emerges, burnished, in perfectly ordered layers. This particular magic cake is like a perfectly formed French entremet, but without the effort.  All it requires is eggs to be separated and whisked and somehow it all falls into place. When making the speculoos topping, I would advise making a bit extra to allow some innocent “sampling” during the process (it’s ambrosial).

IMG_0099.jpg


Ingredients


Speculoos layer

300g Speculoos cookies + 100g for decoration

220ml unsweetened condensed milk

¼ tsp salt


Cake

3 eggs, separated

75g caster sugar

90g unsalted butter

50g plain flour

¼ tsp salt

300ml milk

4 small pears, peeled, cored and diced into 1cm cubes


21cm square cake tin (or round tin with similar area) fully lined with baking parchment.  It doesn’t matter if the tin is marginally larger or smaller


Method

1)    Preheat the oven to 150°C

2)    Put all the ingredients for the speculoos layer into a blender and blitz until smooth, and set aside.

3)    Melt the butter and set aside to cool. In a bowl (if doing by hand) or electric mixer beat the sugar with the egg yolks until thick and pale. Pour in the butter and 150g of the Speculoos layer and gently combine. Then sieve in the flour and salt and fold to combine. Pour in the milk and combine.

4)    In the bone-dry bowl of an electric mixer or by hand, whisk the egg whites vigorously until they thicken and hold their shape in stiff peaks. Very gently fold them into the batter, taking care to preserve the aeration.

5)    Scatter the diced pear evenly on the bottom of the cake tin, then gently pour the batter on top. Smooth the surface with a knife and place in the oven to cake for 35 minutes. The cake will still be soft when you remove it from the oven but this is how it is meant to be. Put it onto a rack to cool to room temperature, then place in the fridge for an hour to set.

6)    To serve, lift the cake out of the tin on the serving plate using the baking parchment and remove baking parchment. I choose to slice off the cake edges in order to better expose the layers. Spread the remaining speculoos layer on top and over it crumble the decorative speculoos cookies.

IMG_0001.jpg

Recipe adapted from "Magic Cakes" by Christelle Huet-Gomez

Comment

Triple Coffee & Caramelised Walnut Cake

1 Comment

Triple Coffee & Caramelised Walnut Cake

IMG_4523.jpg

 How to bake and stay (reasonably) in shape. Triple Coffee & Caramelised Walnut Cake

I am often asked how it is that I am not obese.  I am by no means super skinny, but people wonder how I avoid rolling around the place when I am seemingly baking the whole time and have little resistance to delicious things.  So, here’s my secret.  Have a go.

Triple Coffee & Caramelised Walnut Cake


What I need: a running machine; a radio; an oven; a timer

Triple Coffee & Caramelised Walnut Cake

What I do:

Pour the batter into the cake tin, lovingly smooth the surface over with a spatula. One lick of the spatula before it goes in the sink (just a little indulgence). Carefully open the oven door, and bend down slowly so that the batter remains level.  Place the cake tin tenderly on the rack. Set the oven timer.  22 minutes.  Then GO.

Triple Coffee & Caramelised Walnut Cake

Run up the stairs, two at a time.  That’s one minute either side to rush back down.  Turn up the radio. Leap on to the treadmill, and run. 10 mph minimum. 20 mins to go.  Sweat, pound, sweat.  15 mins.  Beyoncé’s screaming.  Oven beeps.  Run back down (Beyoncé’s mumbling). Open oven door, skewer the cake.  Damn - not cooked. Rip out a sheet of tin foil. Cover the cake.  Burn hand.  Set timer: 7 mins more.  Repeat process until skewer comes out clean.  Place cake on rack and allow to cool.

Stretch and shower.

Hover over the cake with a knife.

Triple Coffee & Caramelised Walnut Cake

You can make the cake sans-icing by simply halving the recipe and, before serving, dusting with a little icing sugar.Triple Coffee & Caramelised Walnut Cake


Ingredients

Cake

200g butter, at room temperature

170g caster sugar

30g light brown muscovado sugar

2 tbsp ground coffee

¼ tsp salt

70g toasted walnuts, ground to a fine sand

4 large eggs, beaten

1 tsp vanilla extract

1 ½ tsp instant coffee, dissolved in as little hot water as possible to make a smooth paste

240g self-rising flour, sieved

2 x 8 inch cake tins, greased and with bases lined with a circle of baking parchment


Coffee Syrup

40g golden syrup

50g caster sugar

2 tbsp instant coffee

100ml boiling water


Coffee Icing

300g butter, at room temperature

450g icing sugar

1 ½ tsp vanilla

2 tbsp instant coffee dissolved in as little hot water as possible to make a smooth paste

¼ tsp salt


Caramelised walnuts

60g walnuts

2 tbsp caster sugar

3 tbsp water

Method

  1. Preheat oven to 180˚C. Using an electric mixer, or with a vigorous hand, in a large bowl beat together the butter, caster sugar, muscovado, ground coffee and salt until light and fluffy.
  2. In a separate bowl, beat together the eggs, vanilla and dissolved instant coffee. Beat this into the butter-sugar-coffee-salt mix.  Once combined, stir in the ground walnuts.
  3. Finally, gently fold the sieved flour into the mixture, being careful not to overbeat. Divide the mixture between the two tins and place in the oven to bake for 25 minutes (checking after 20) or until a skewer comes out clean.
  4. While the cakes are baking, make the coffee syrup. Dissolve the instant coffee in the water and pour into a small pan along with the syrup and sugar.  On a medium high heat, stir until the sugar has dissolved, then allow to simmer for 5 minutes or until it thickens slightly to the consistency of maple syrup.
  5. Remove cakes from oven. Stab them all over with a cake tester or skewer, and spoon the syrup equally over the two cakes.  Set aside on a rack and allow to cool.

Icing

  1. Beat together butter and icing sugar. Once combined, beat in the vanilla, coffee and salt.
  2. Remove the cakes from tins, place one on the serving plate and spread ¼ of the icing on its surface. Place the other cake on top and spread the icing evenly over the cake.

Caramelised Walnuts

  1. In a shallow pan, over a medium-high heat, stir together water and sugar until the sugar has dissolved. Then pour in the walnuts, and continue to stir and coat them until all the water has evaporated.  Decant them on to a sheet of baking parchment, and allow them to cool.
  2. Once cool, chop roughly, and scatter as desired over the cake.

Triple Coffee & Caramelised Walnut Cake

1 Comment

Passion Fruit & Coconut Truffles

Comment

Passion Fruit & Coconut Truffles

IMG_4223.jpg

Passion Fruit & Coconut Double Chocolate Truffles IMG_4217

My household has recently been beset by a typical problem. My mom rather enjoys pressing the "+”button when ordering from Ocado.  Whereas last week this resulted in a glut of cherries, this week it was passion fruit.   Even after days of bisecting the plum-coloured orbs and slurping up the tangy yellow spawn (sans spoon, and only in the most ladylike way, obviously), the supply remained steady.

IMG_4163

IMG_4135

IMG_4237Clearly, truffles were the solution.  Most truffle recipes create a molten ganache centre by simply combining melted chocolate with the flavour/ingredient of choice and a dribble of cream.  Easy?  Perhaps.  Zero depth of flavour? Indeed.  I make a caramel base to add a darker, nuttier complexity.

IMG_4215

This is poured over the dark chocolate to melt it, and the golden toasted coconut is then swirled in with the fresh and tangy passion fruit juice.

IMG_4126

I recommend using good quality dark chocolate – the results are worth it.  The tangy molten ganache is then frozen, later to be formed into spheres.  These are encased in a crisp white chocolate and coconut shell to add a touch of sweetness and contrast of textures.

IMG_4225

The name “passion fruit” does not, as you might assume, come from any aphrodisiac qualities of the fruit.  Rather, it comes from the shape of flower which resembles a crown like that that of thorns around Jesus’ head – thus, passion derives from the "passion of Christ”.  Indeed, these truffles are rather ambrosial – you could even say that eating them is a religious experience.

IMG_4219

IMG_4157


Ingredients (makes 50 - halve if strapped for time)

For the Ganache

150g 70% dark chocolate (good quality)

150g caster sugar

150g double cream

10g unsalted butter

10g light brown muscovado sugar

½ tsp salt

70g desiccated coconut

8 passion fruits, sieved to extract about 90ml of juice.

100g icing sugar, sifted


Large tray lined with baking parchment


For the shell

500g white chocolate

200g desiccated coconut

Pair of surgical gloves (optional)

  1. Chop the dark chocolate roughly, and set it aside in a large heatproof mixing bowl.
  2. To toast the coconut (70g), place a medium frying pan over a medium-high heat, pour the coconut in and stir continuously for 5 -8 minutes until the coconut turns a light golden colour. Add this to the dark chocolate.
  3. Place the caster sugar in saucepan over medium high heat, and when it starts to melt, stir gently with a spatula to avoid the sugar burning around the edges. Push unmelted sugar into the already caramelised sugar to aid the caramelising process.
  4. Once the sugar has turned a rich, dark gold colour, while still on the heat, pour in the cream, whisking all the time. If clumps form, don’t panic: keep whisking over medium low heat, and they will eventually melt.
  5. Once the lumps have dissolved, whisk in the muscovado sugar, butter, vanilla and salt and stir the bubbling mixture on a medium heat for another 2 minutes.
  6. Pour the hot mixture into the bowl of chopped dark chocolate and coconut and stir immediately until all the chocolate has melted and the caramel and chocolate are fully combined. Pour the passion fruit juice into the mixture, and stir to combine fully. Pour this into a shallow tray, and place in the freezer for an hour to set slightly.
  7. Once it has become slightly more solid, remove the tray of mixture from the freezer. Use a teaspoon to scoop out dollops, and roll each between the palms of your hands to form 2cm diameter spheres. Roll the spheres in the icing sugar to coat them finely, and then place them on a baking tray with space around each sphere to avoid their sticking together. Once all the mixture has been rolled into spheres, place the baking tray in the freezer for half an hour or until the spheres are firm and cold to touch. You may need to do this in batches as the ganache mixture melts very quickly.
  8. Break half the white chocolate (250g) into pieces and place in a bone-dry, heatproof bowl (any drop of water will make the chocolate seize). Place the bowl over a pot of boiling water (without the boiling water touching the base of the heatproof bowl), and stir occasionally until the chocolate is melted.
  9. Remove the dark chocolate spheres from the freezer, and one at a time, skewer with a toothpick and coat by spooning the melted white chocolate over each frozen chocolate sphere. Remove the skewer, replace the coated truffle on the baking tray, and replace in the freezer for 10 minutes for the first layer to set.

Melt the rest of the white chocolate (using the same method as before), and place the desiccated coconut (200g) in a bowl. Remove the truffles from the freezer. If you don’t want to get too messy, wear surgical gloves to do this stage. With one hand, roll the truffle in the melted white chocolate. Then, drop it into the coconut and with your other hand roll it to coat it. Once the batch is complete, place back in the freezer for a minimum 10 minutes to set.

IMG_4216


Comment

Double Chocolate Salted Caramel Tart

5 Comments

Double Chocolate Salted Caramel Tart

IMG_3775.jpg

I never caught on to the Disney hype – I endured a few of the films when I was younger but was never enthralled by its saccharine princesses and unrealistic princes. I rejected the dressing up stage of childhood, and have none of the nostalgia that is awakened in many when hearing or singing the songs.  My only knowledge of Lion King is from Cindies (arguably the stickiest night club in Cambridge) which is played for 30 seconds without fail every Wednesday evening to excite the Disney addicts and to jolt inebriated students out of their drunken kisses.

What I did love was the sugar-glazed brutality of the original Charlie and the Chocolate Factory film.

I adored the Chocolate Room, and my six year old self spent a lot of time fantasising about edible wallpaper and edible TV adverts. However, the first scene, where Augustus Gloop falls into the ‘chocolate’ river, is almost too painful to watch.

It was concocted using 150,000 gallons of water, real chocolate and real ice cream, yet despite its authenticity, its watery thinness is more the stuff of sewers than of dreams.

If I were going to bathe in chocolate it would need to be velvety, glossy and thick… and after 15 years of dwelling on this I’ve come to terms with the fact that this tart is probably the closest I will get to doing that.

Double Chocolate Salted Caramel Tart

Ingredients

Chocolate pastry

225g plain flour

30g cocoa

150g unsalted butter, chopped into cubes

110g white caster sugar

3 egg yolks

¼ tsp salt

1 tsp vanilla extract

1 tbsp ice water

baking beads/uncooked rice/dry beans

4 fresh figs, halved (optional)

12 x 36cm tart tin, greased and dusted with flour

Salted caramel chocolate ganache

300g 70% good quality dark chocolate

300g white caster sugar

300ml double cream

20g light brown muscovado sugar

20g butter

1tsp vanilla extract

1 tsp salt

Pastry Method

  1. Preheat the oven to 200˚C
  2. Blitz all the ingredients in a blender. Pulse until into turns into a damp sand texture. Tip out on to a surface and press it so that it clumps together into dough.   Wrap the dough in baking parchment and put it in the fridge for an hour, or in the freezer for 15 minutes.
  3. Dust a surface with flour and roll the pastry out in a rectangle to a thickness of 0.5cm. Any excess can be frozen and used within 2 months. Transfer the pastry to the greased and floured tin to line it. Don’t panic if it crumbles in the transition, just patchwork it together in the tin. Place a sheet of baking parchment or tin foil over the pastry, and fill it with the baking beads to weigh it down to prevent the pastry from shrinking as it cooks.
  4. Place it in the oven to bake for 10 minutes. Remove from the oven and remove the baking parchment and baking beads. Reduce the oven temperature to 150˚C, and place the pastry back in to bake for a further 10-15 minutes until it is fully cooked. Set aside to cool.

Salted Caramel Chocolate Ganache Method

  1. Chop the dark chocolate roughly, and set it aside in a heatproof mixing bowl.
  2. Place the caster sugar in a saucepan over medium high heat and, when it starts to melt, stir gently with a rubber spatula to avoid it burning around the edges. Push any unmelted sugar into the already caramelised sugar to aid the caramelising process.
  3. Once the sugar has turned a rich, dark gold colour, while still on the heat, pour in the cream whisking all the time. If clumps form, don’t panic: keep whisking over medium low heat, and they will eventually melt.
  4. Once the lumps have dissolved, whisk in the muscovado sugar, butter, vanilla and salt, and stir the bubbling mixture on a medium heat for another 2 minutes.
  5. Pour the mixture into the bowl of chopped dark chocolate and stir immediately until all the chocolate has melted and the caramel and chocolate are fully combined.
  6. Pour into the tart shell, smooth the surface over with a palate knife, and place this in the fridge for an hour (or freezer for half an hour) to set. Decorate with sliced figs to serve.
Double Chocolate Salted Caramel Tart

5 Comments

Caramelised White Chocolate Cheesecake

5 Comments

Caramelised White Chocolate Cheesecake

IMG_1368-Copy.jpg

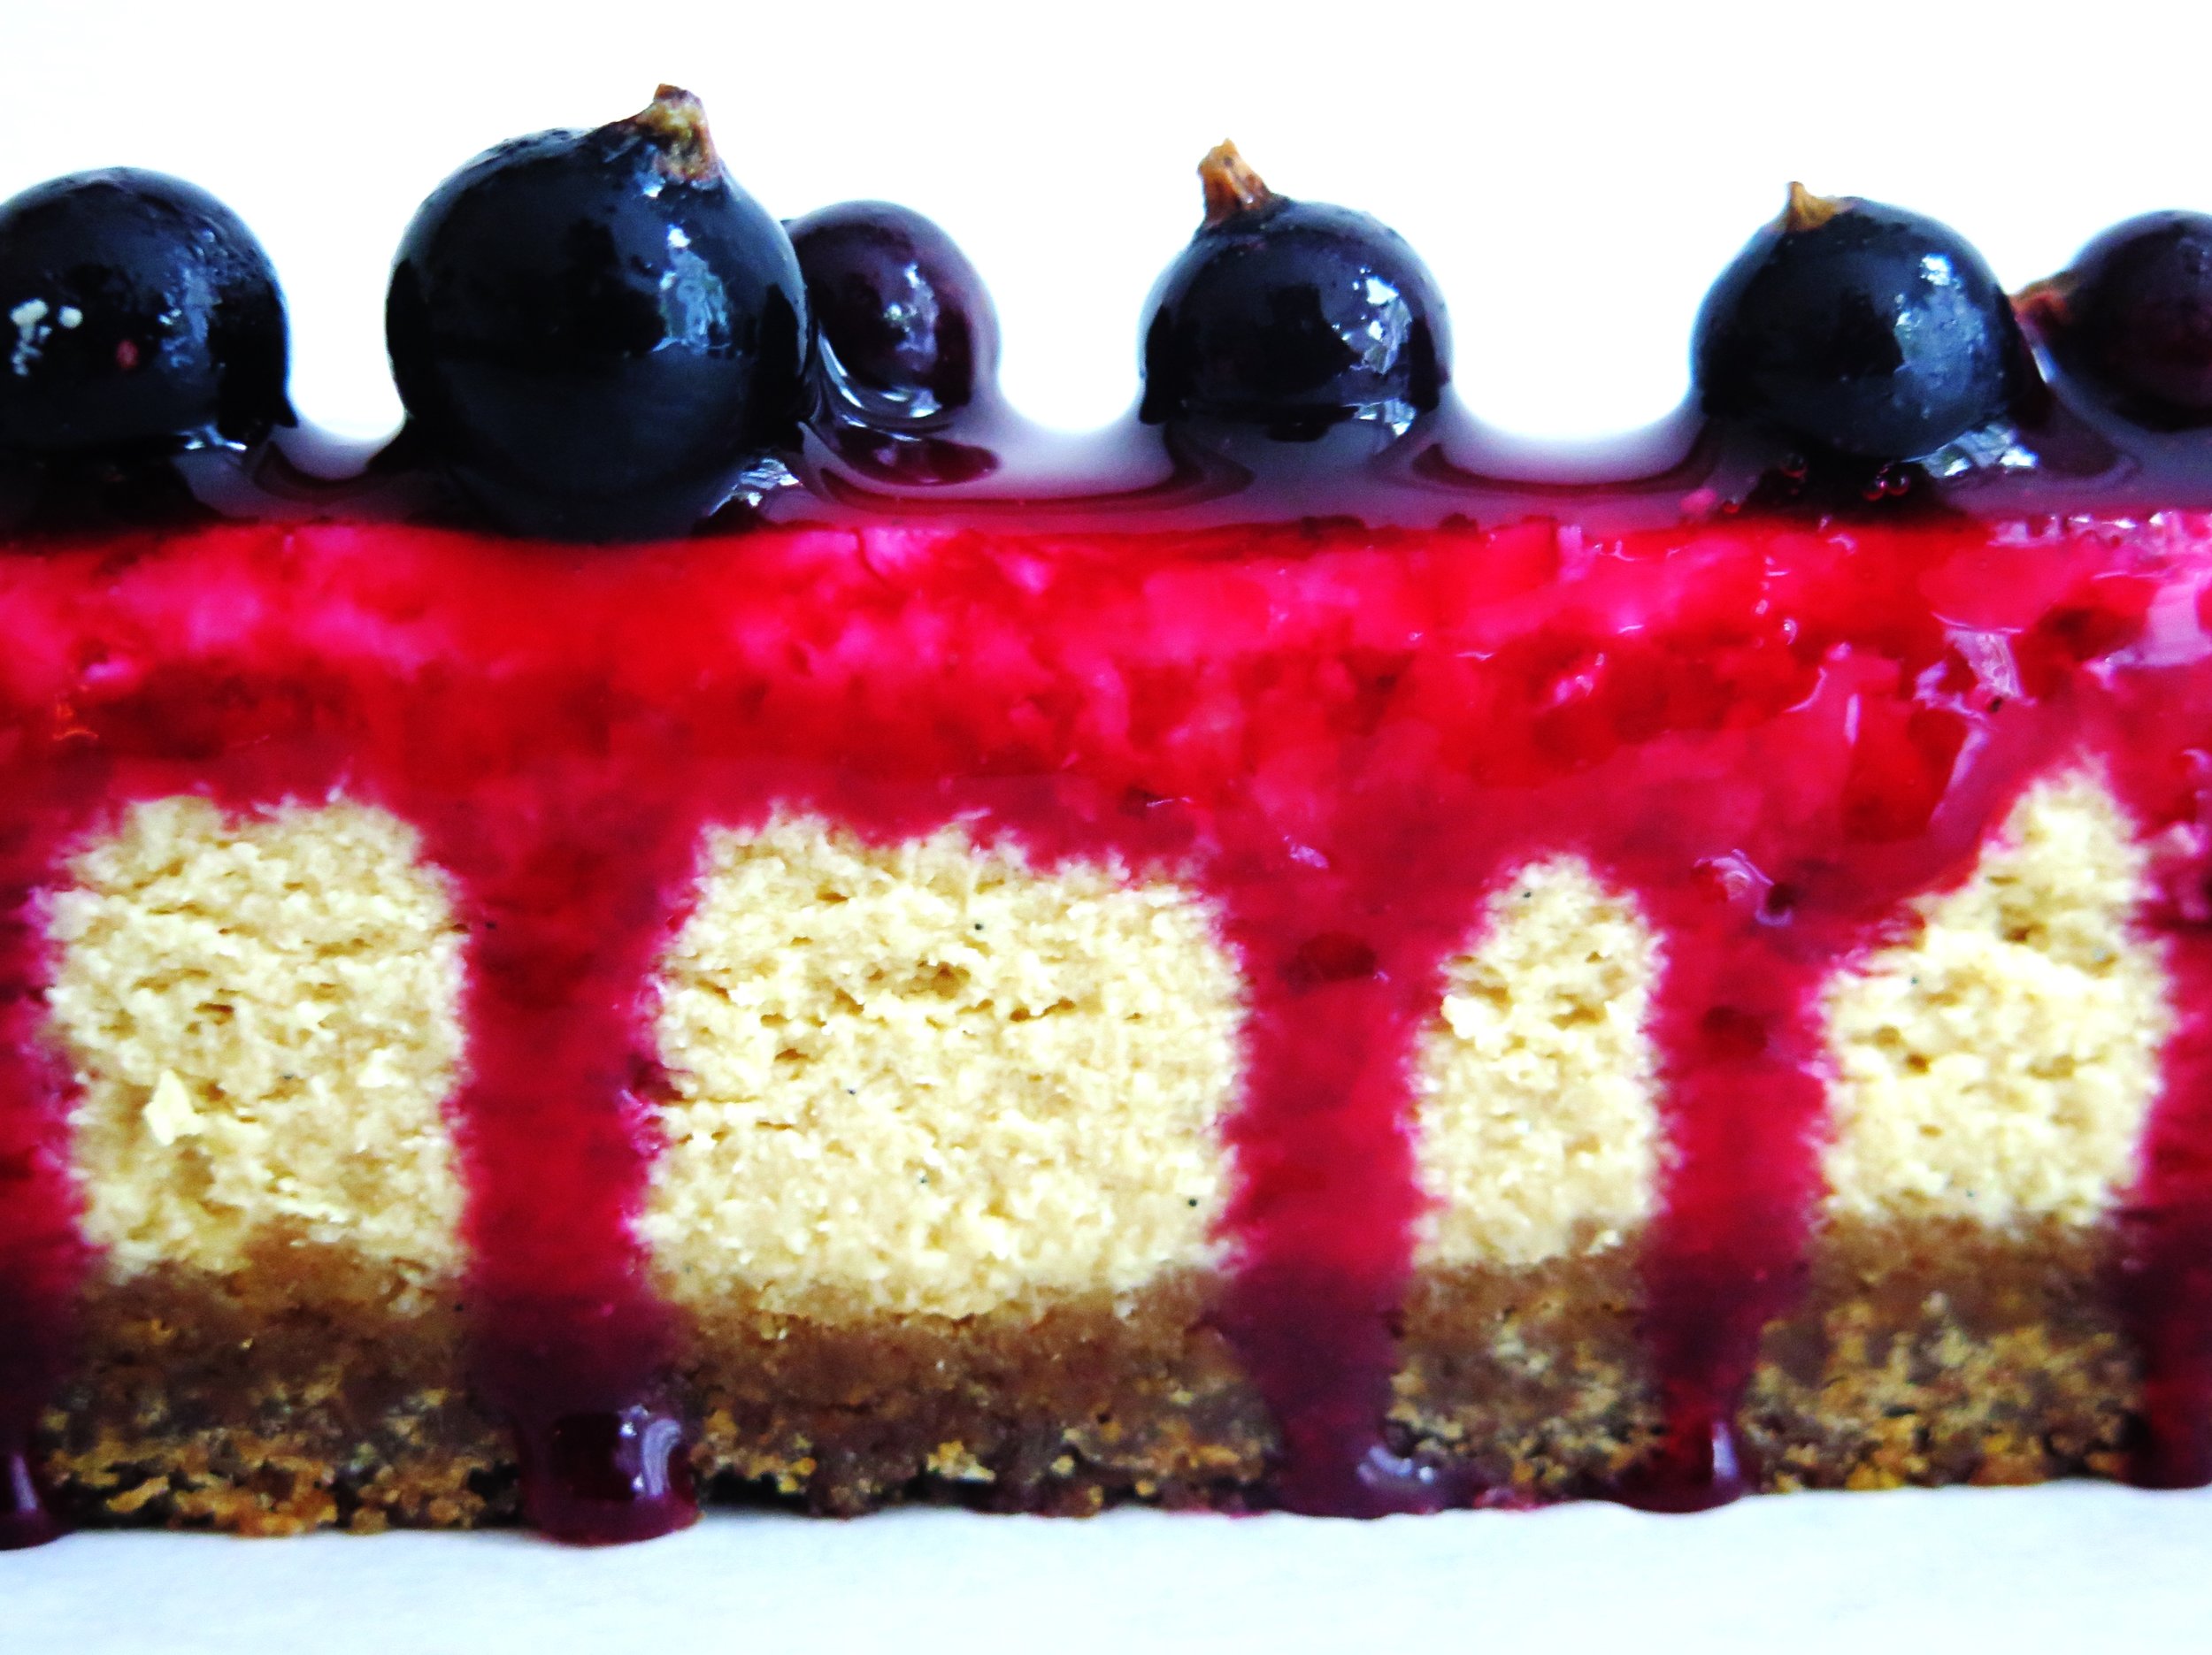
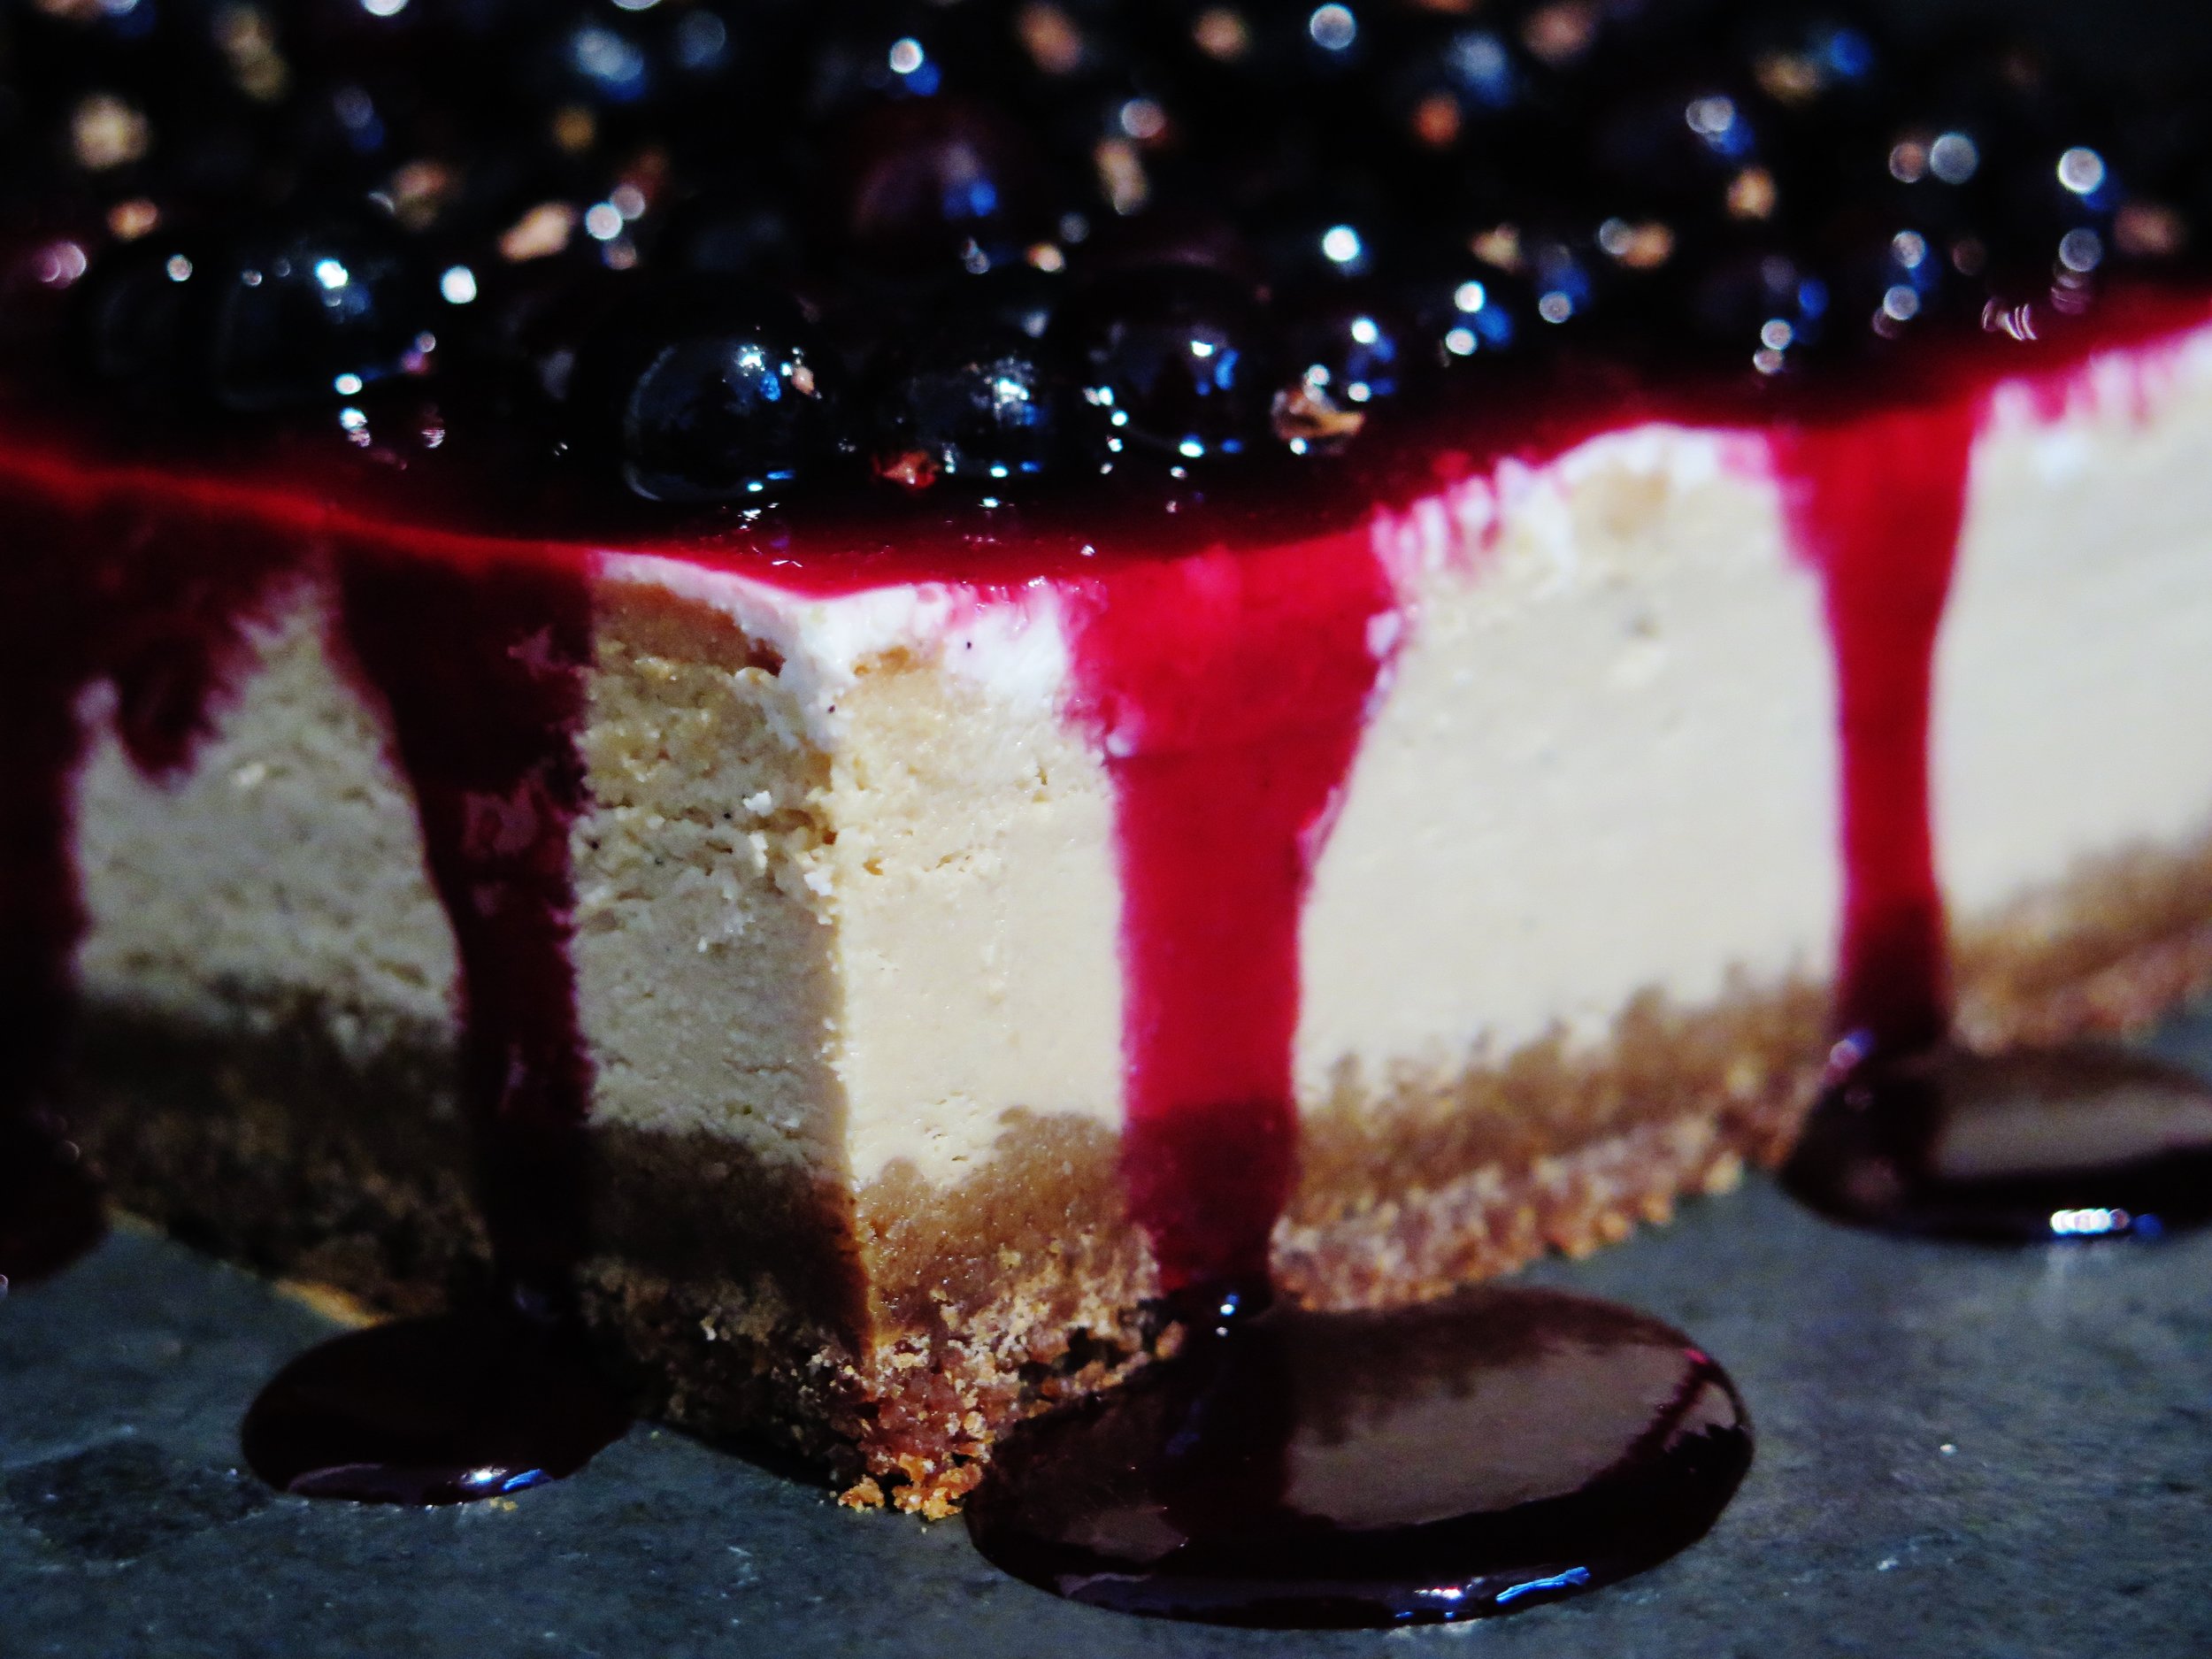
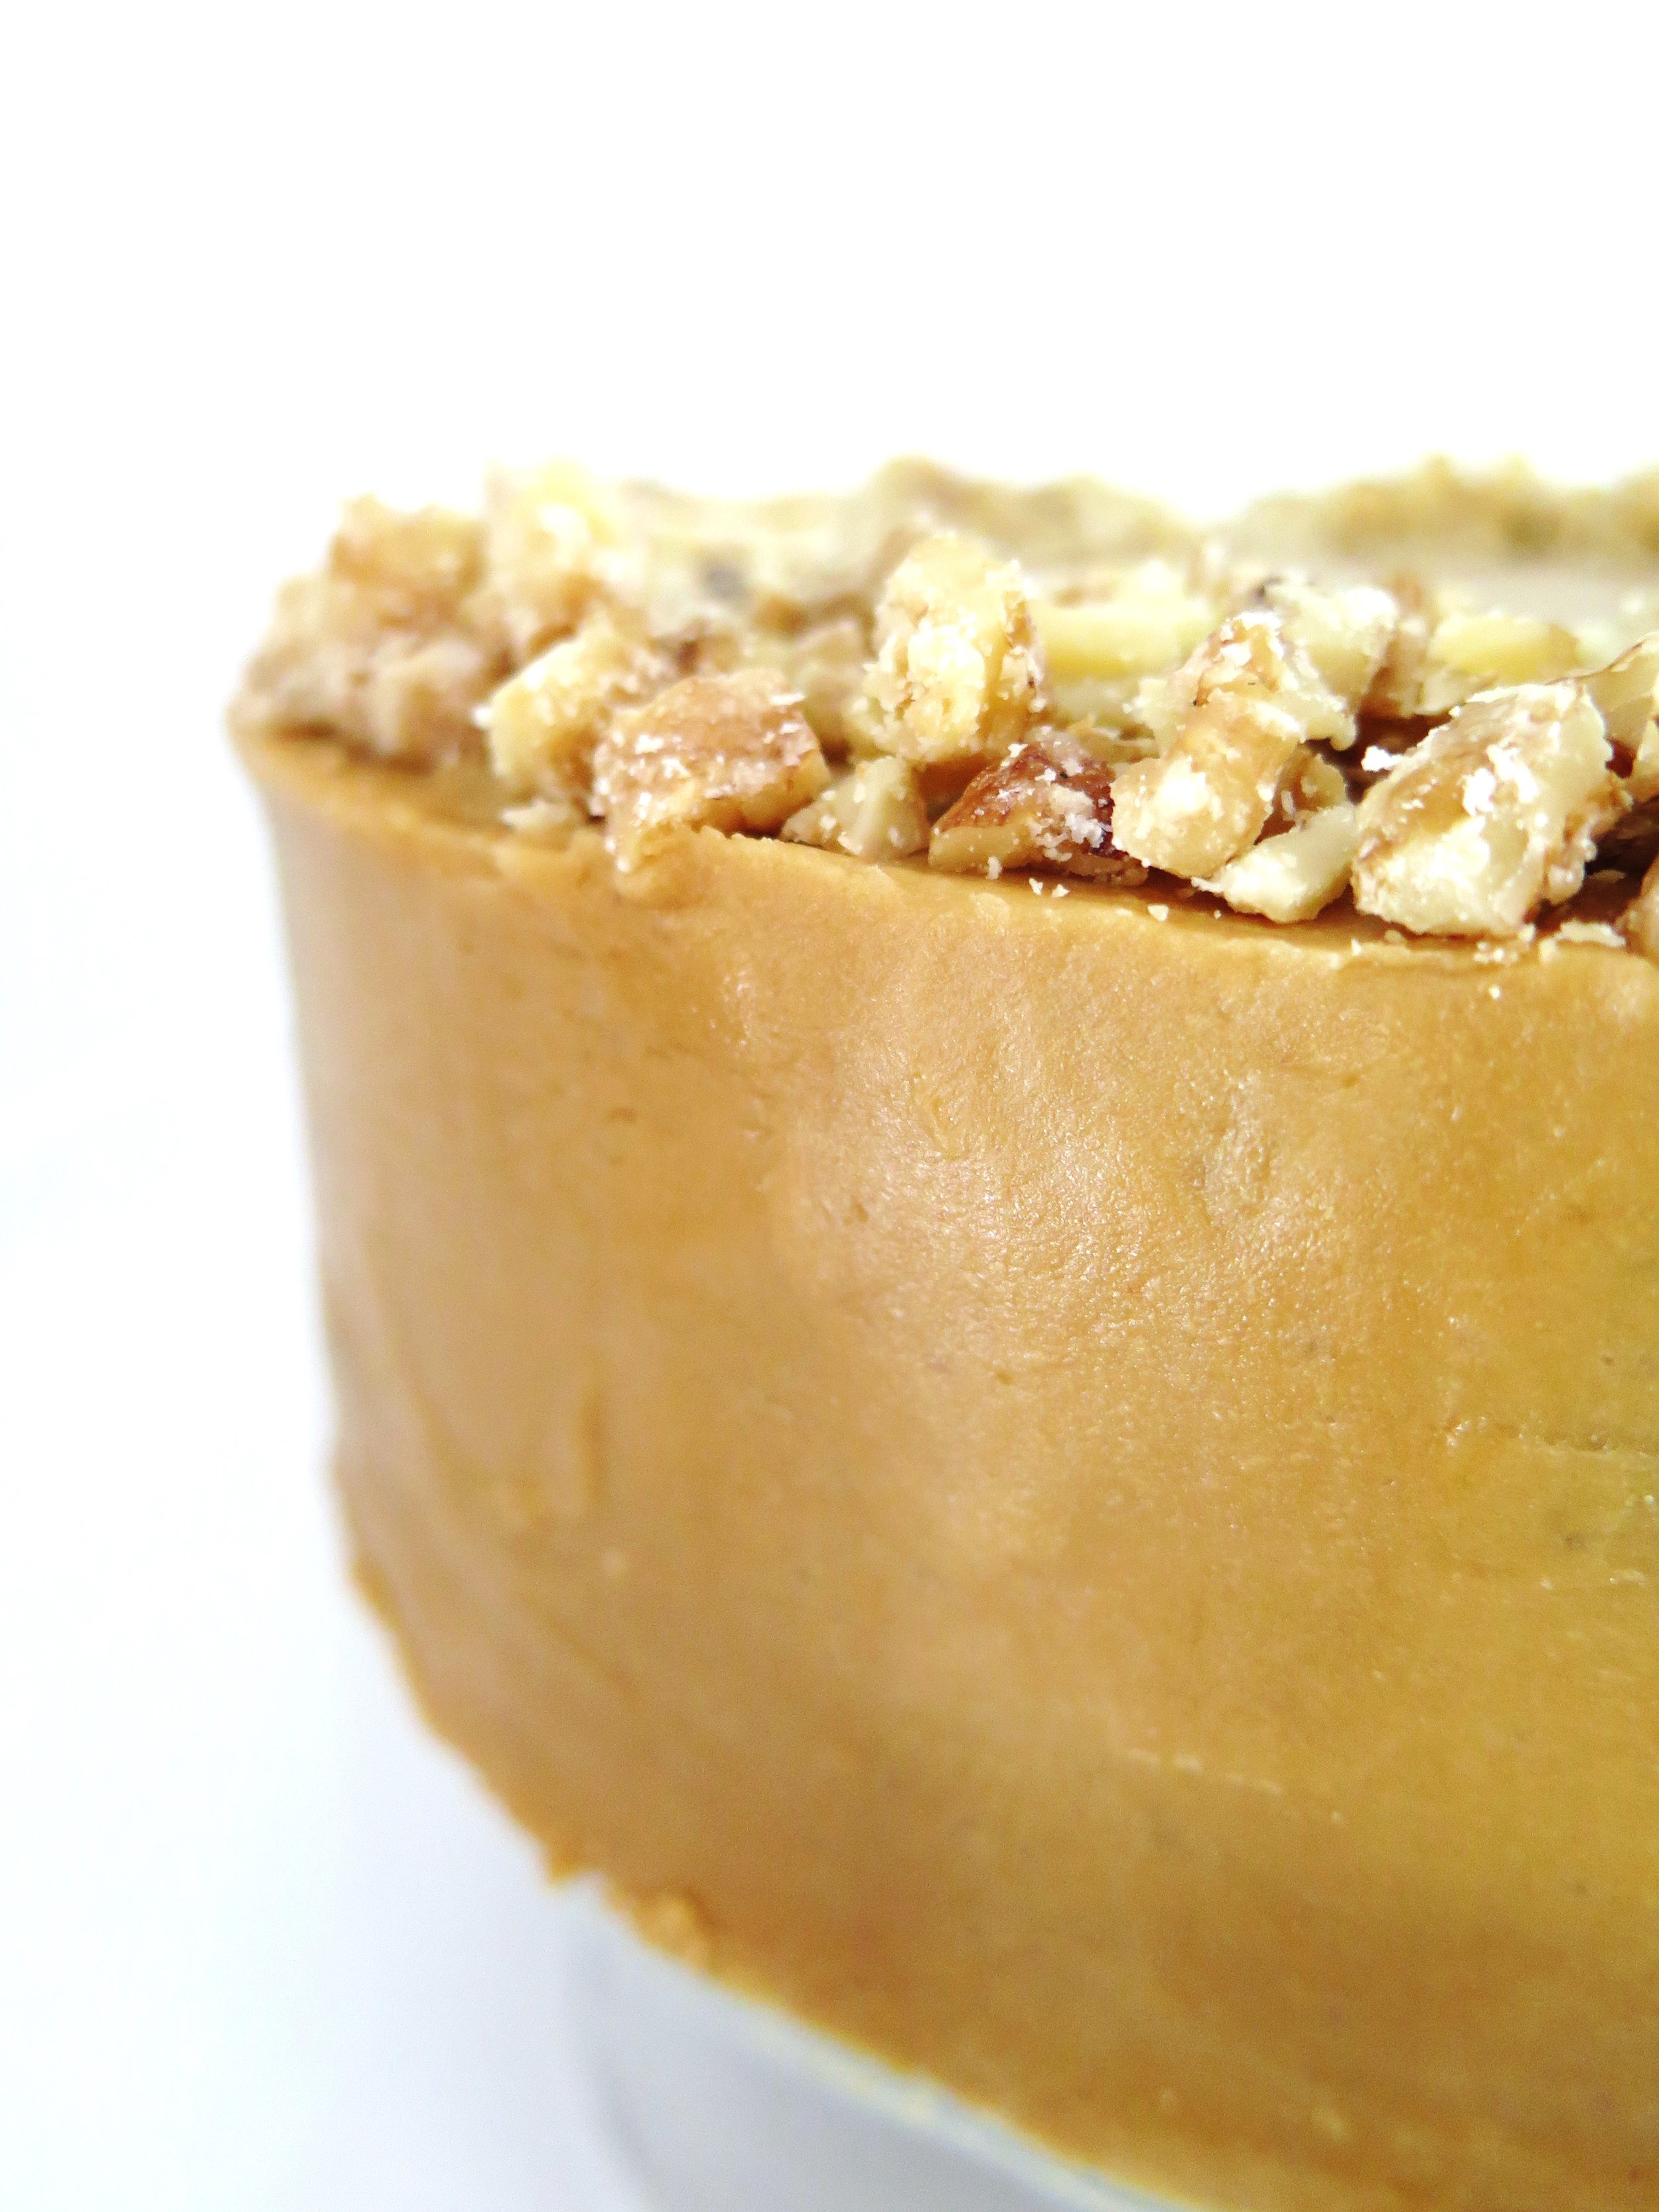
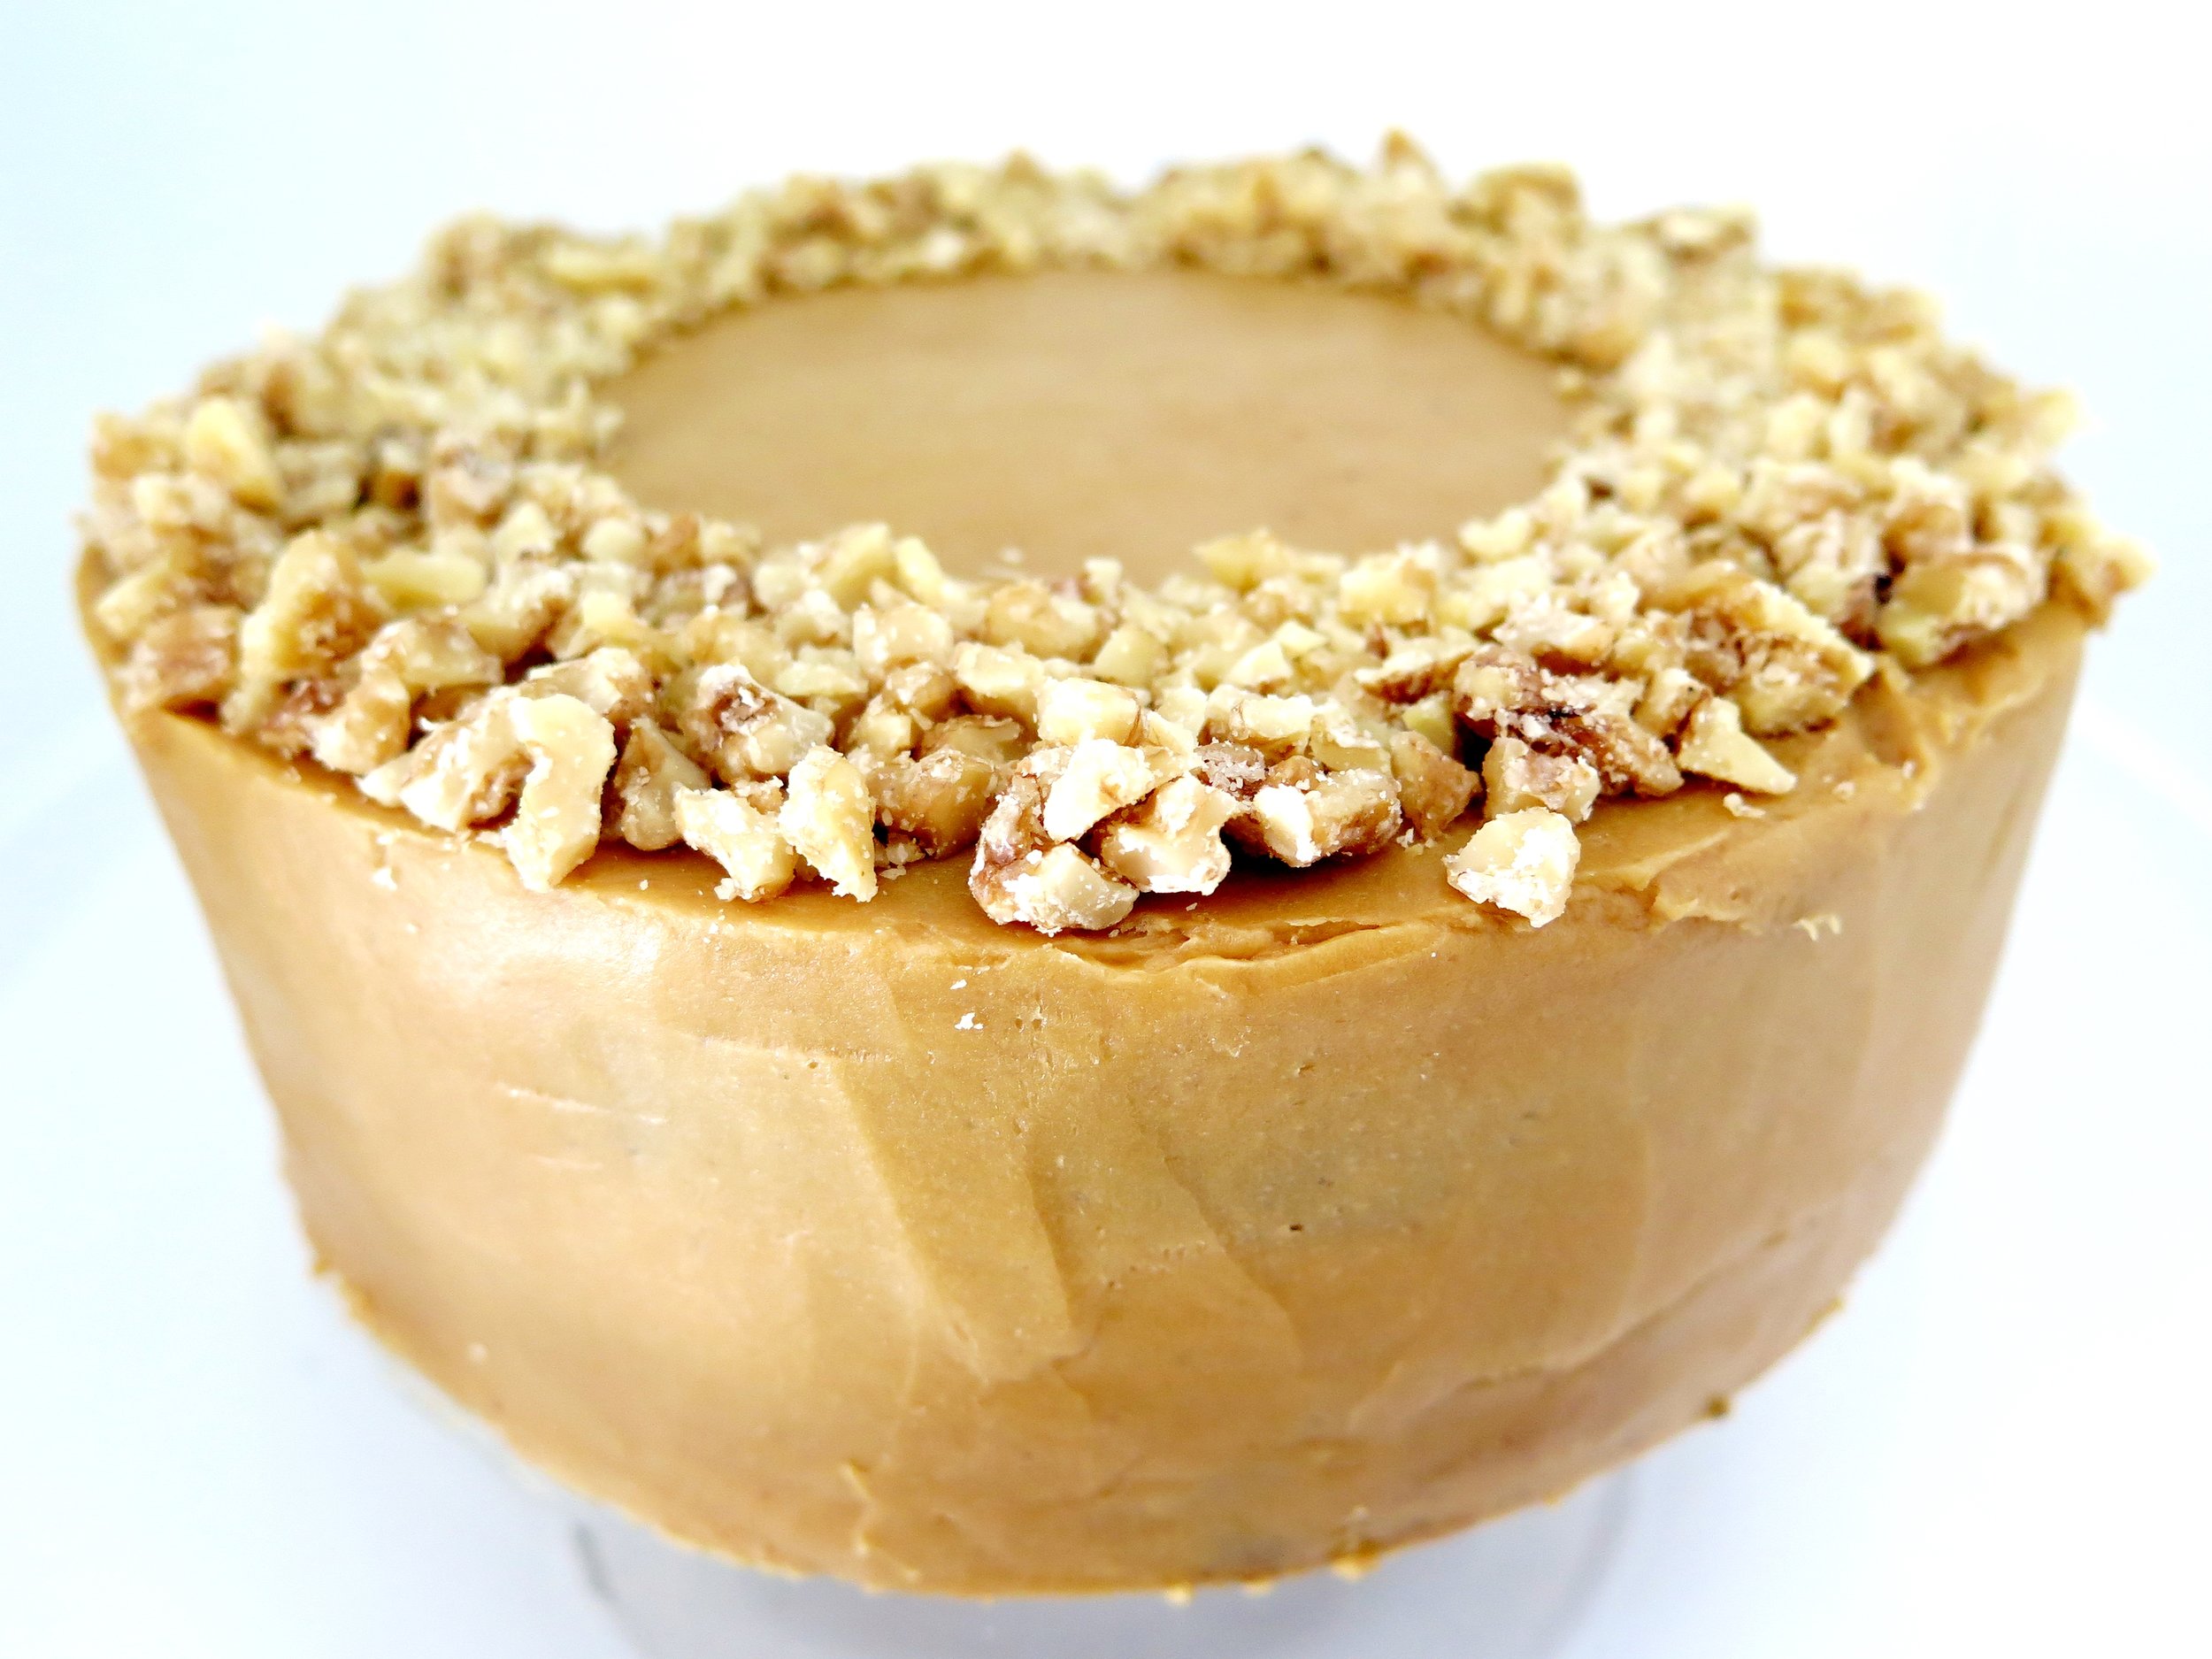
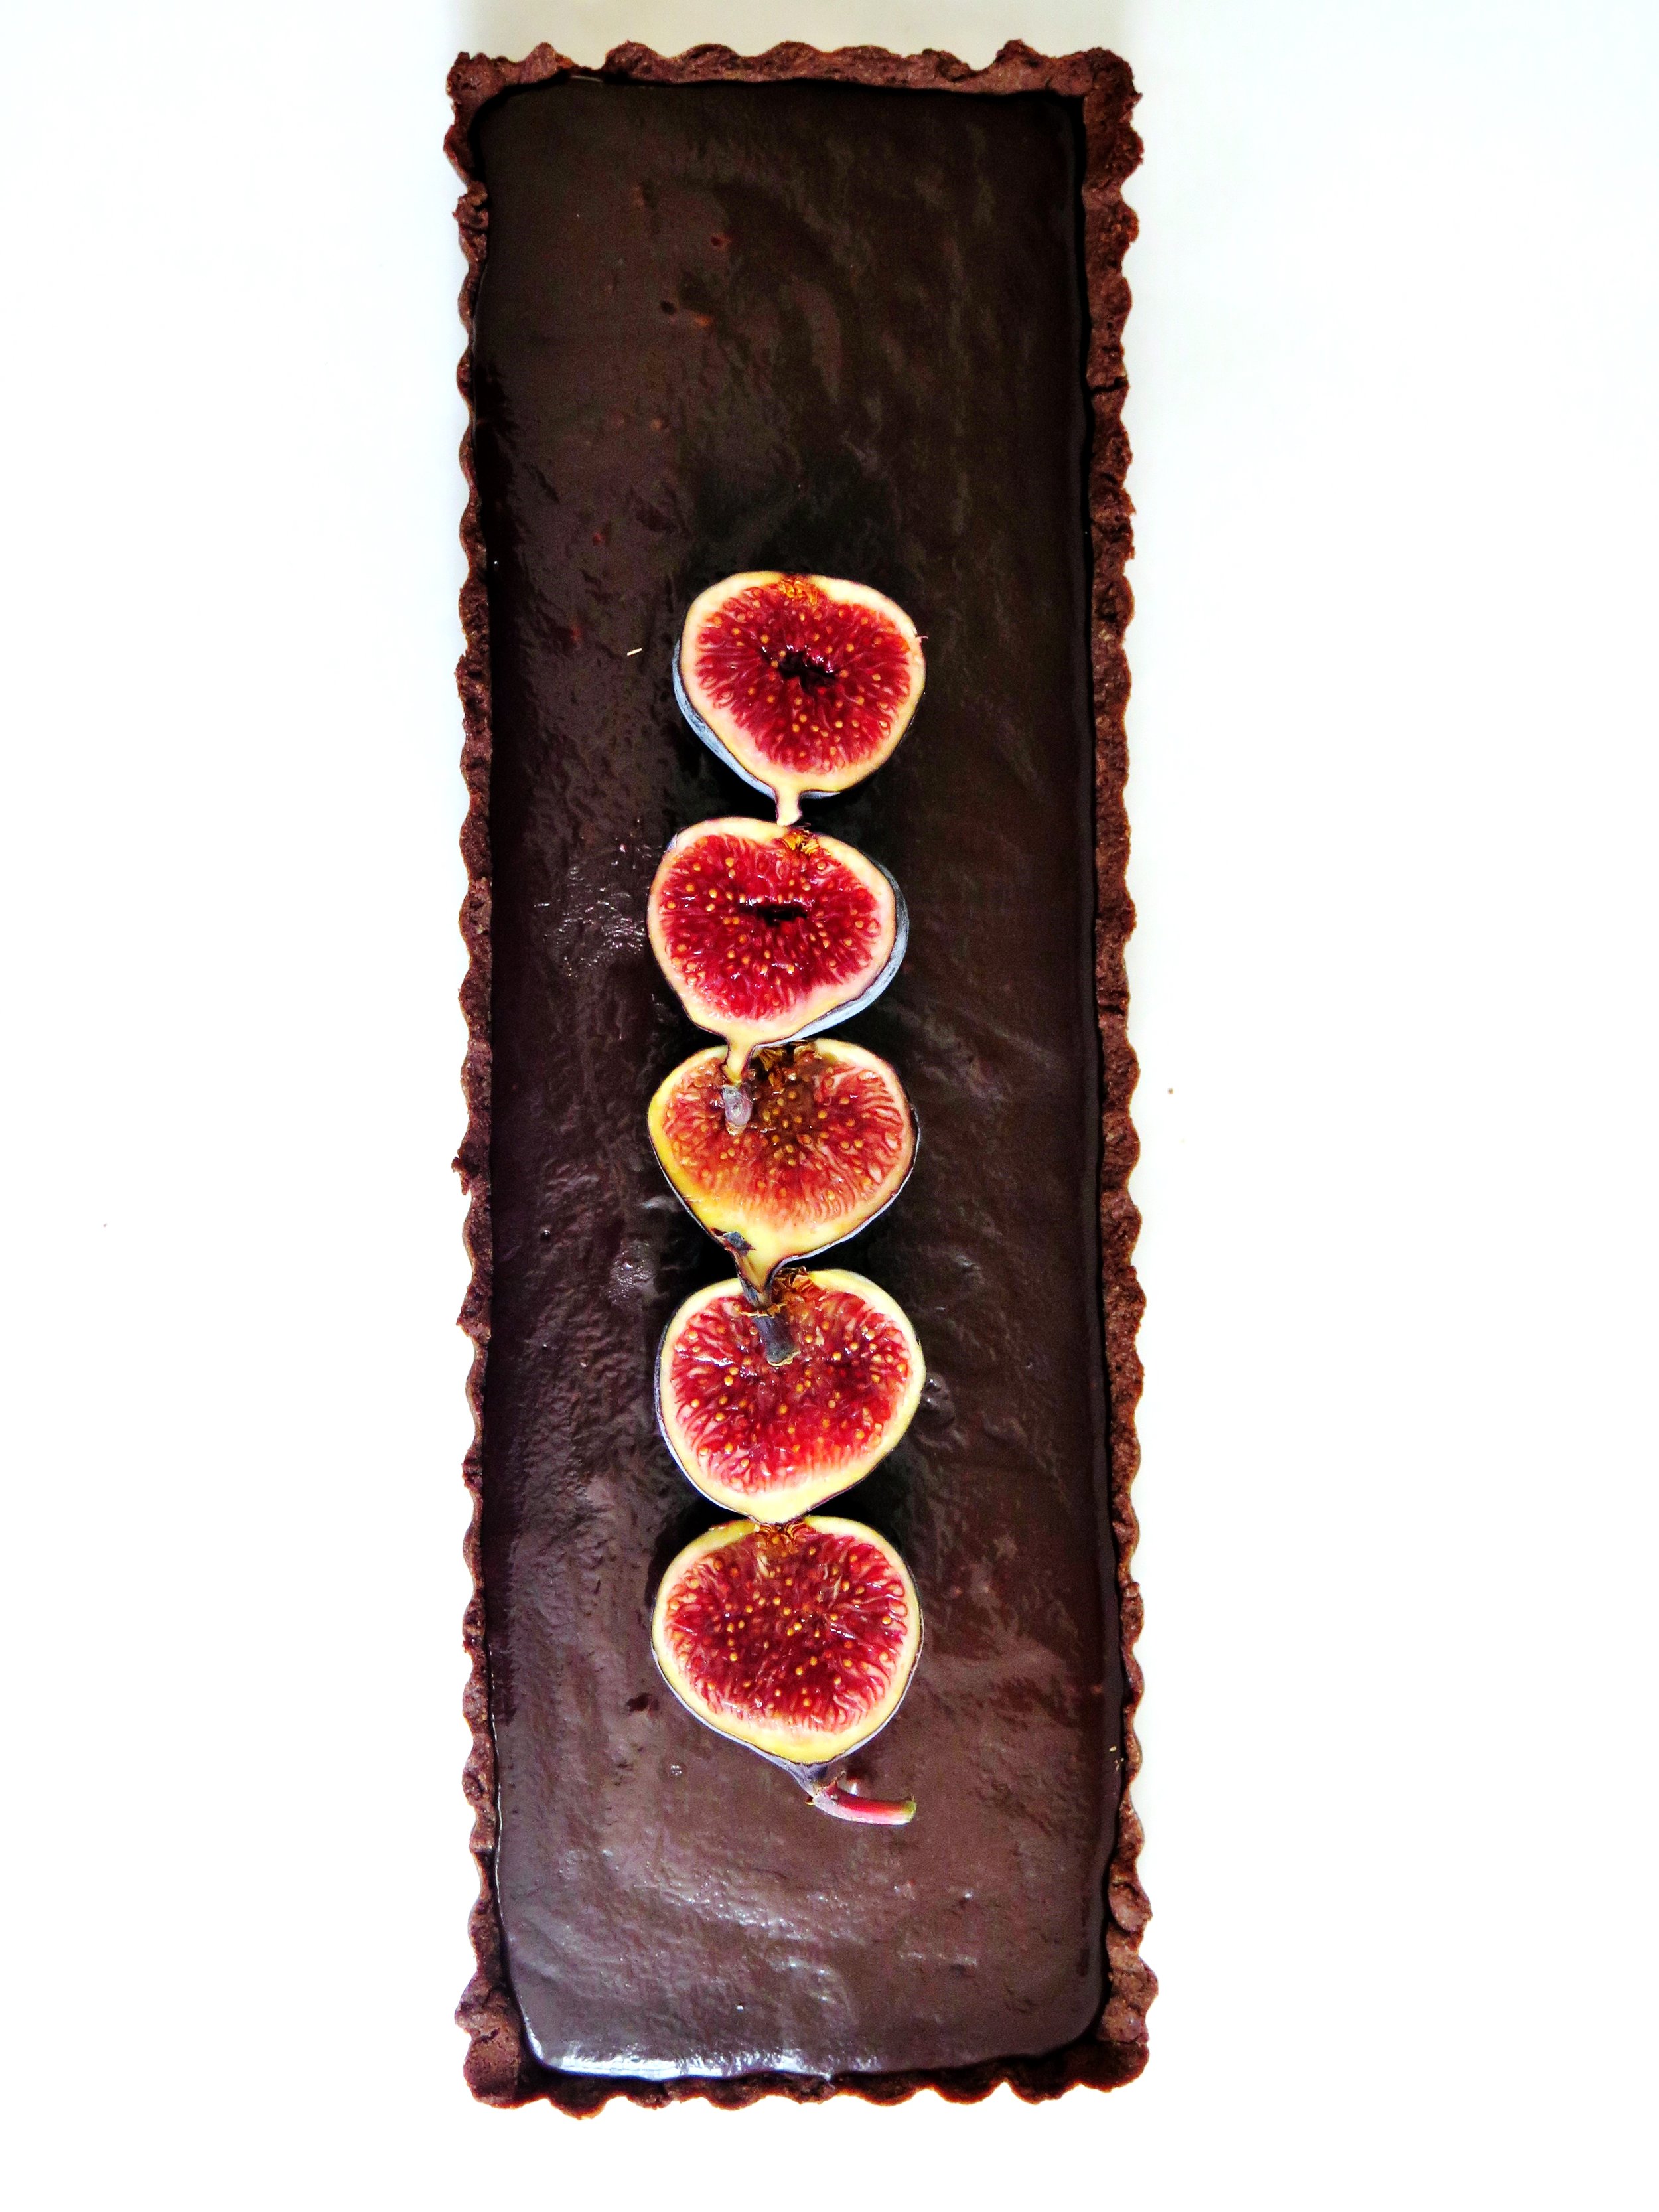
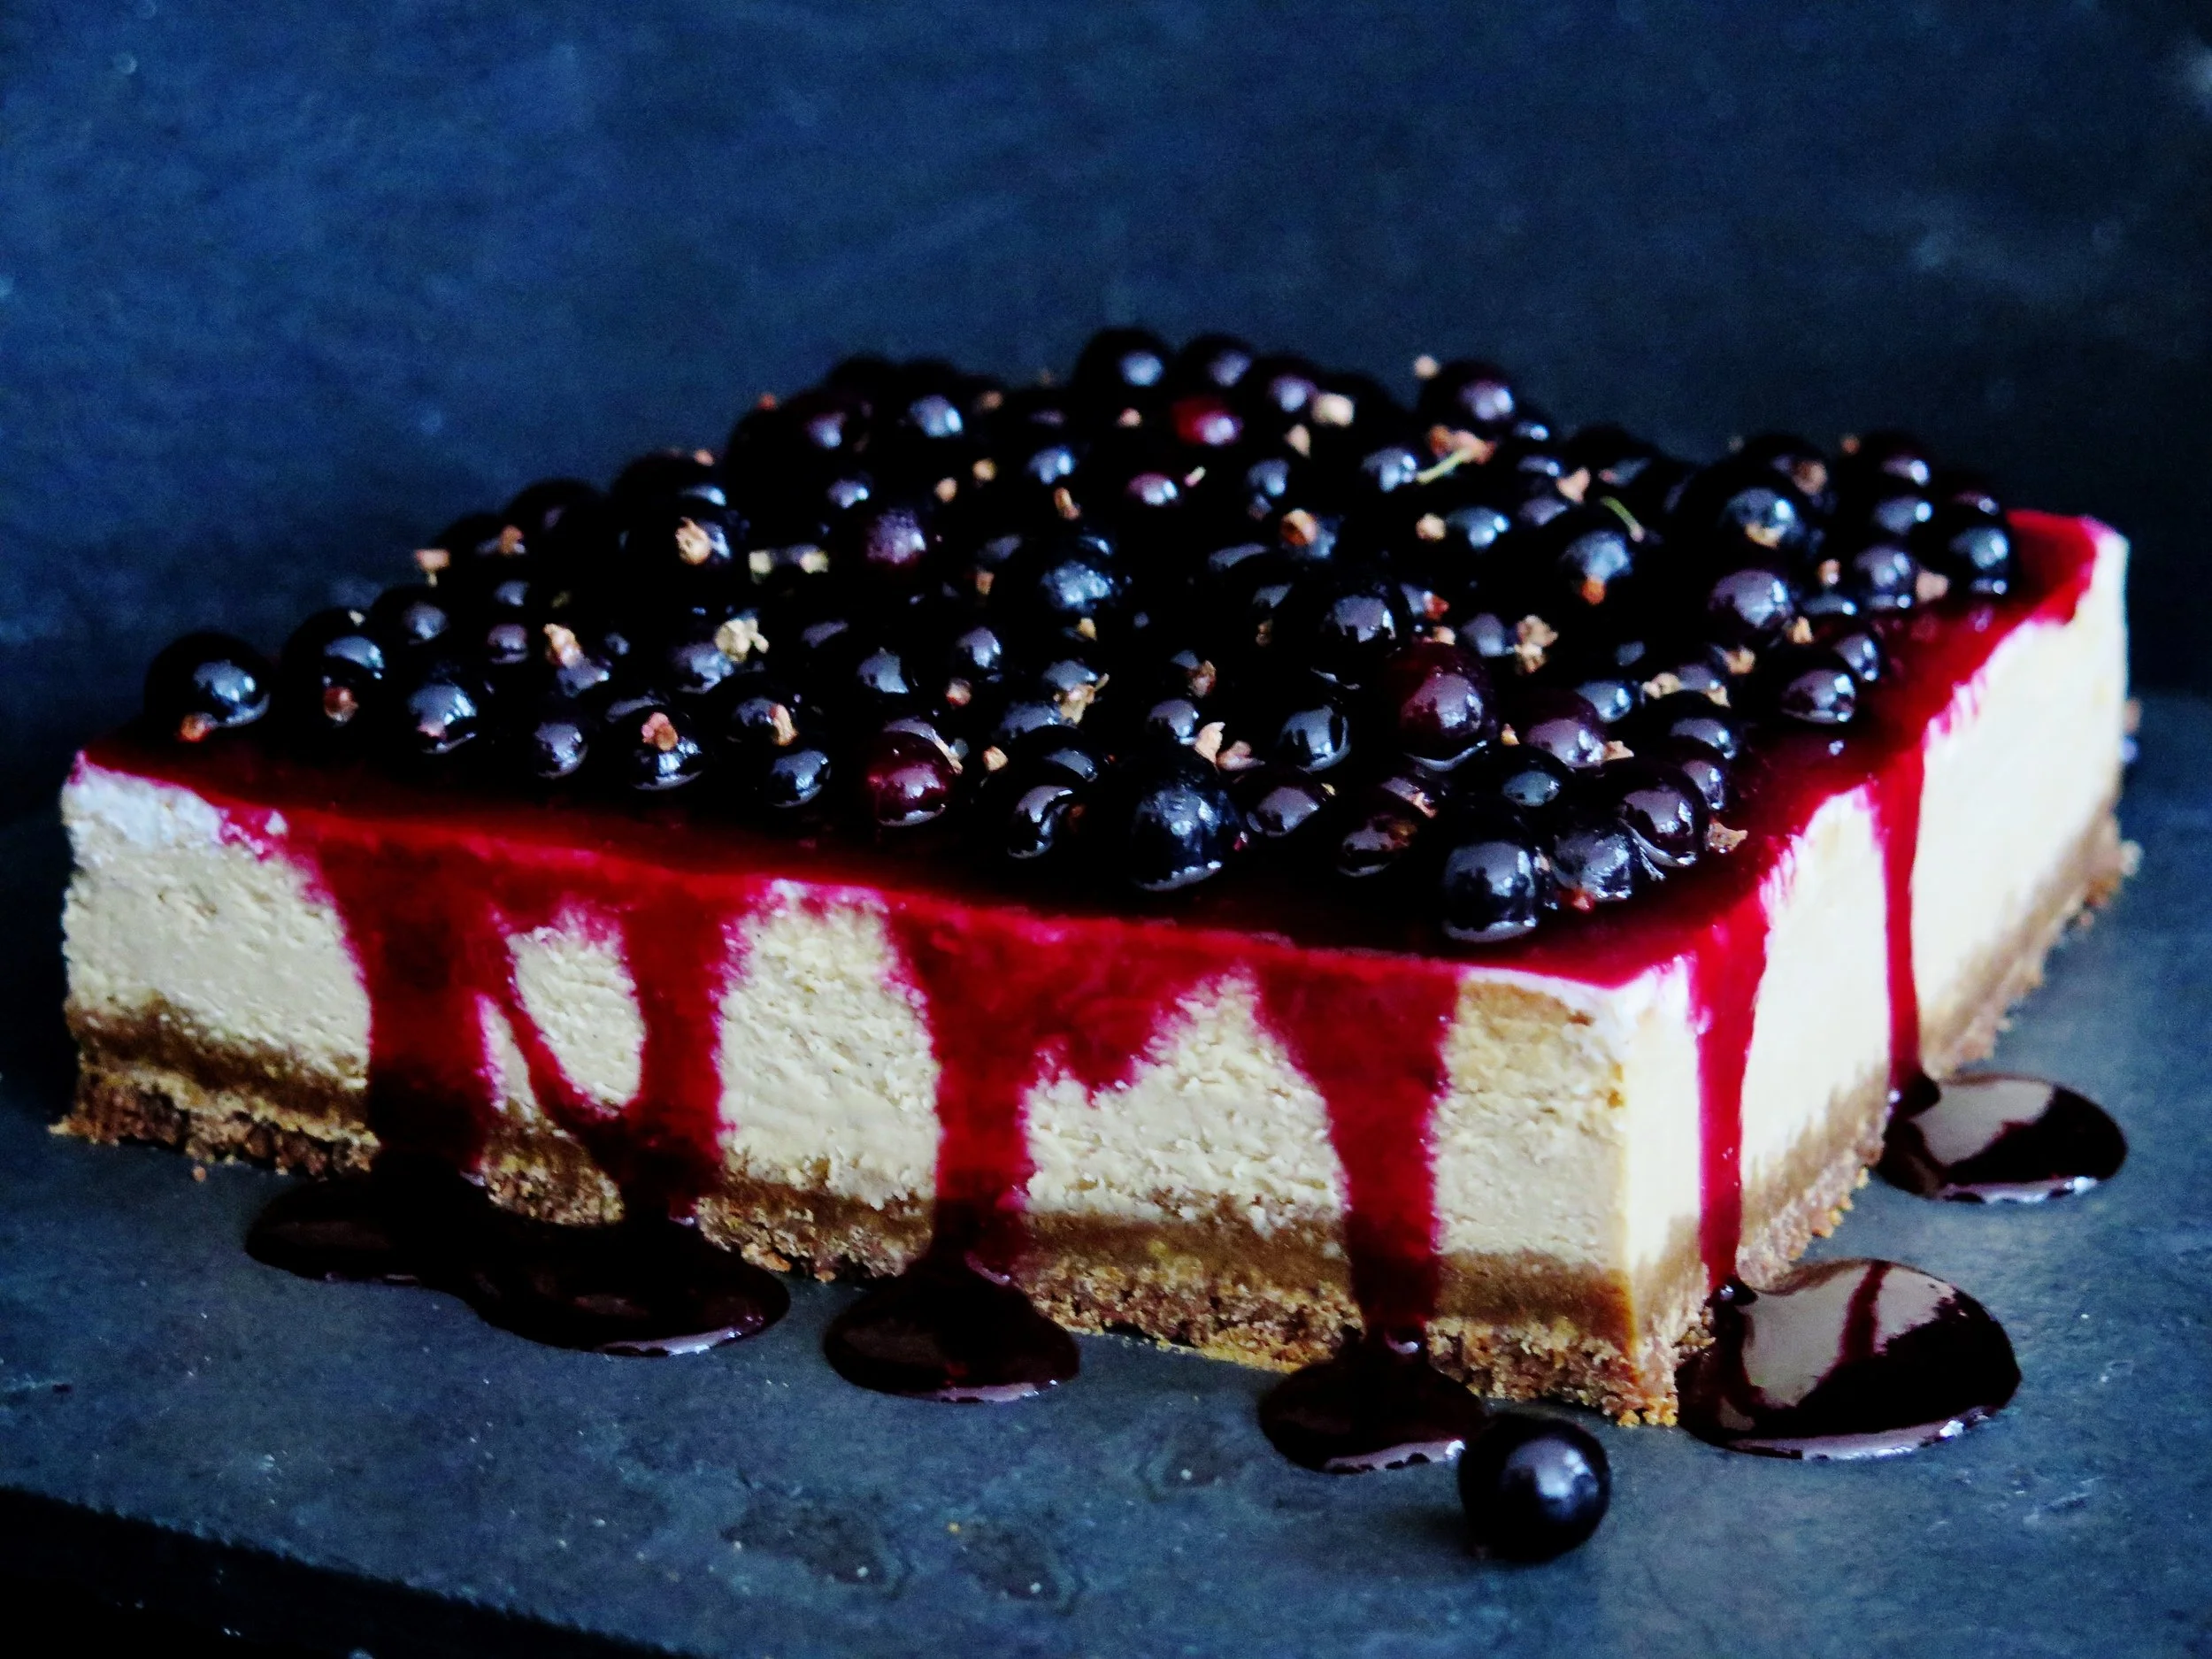
  Caramelised White Chocolate Cheesecake with Salty-Sweet Fudgy Biscuit Base & Blackcurrant Glaze

Caramelised White Chocolate Cheesecake


I’m at risk of sounding like one of those mindless click-bait buzzfeed articles when I say this, but I mean ever word: you’ve been eating white chocolate incorrectly your whole life.

Caramelised White Chocolate Cheesecake


Would you believe me if I told you that the innocent Milky Bar Kid’s saccharine white cocoa butter chocolate has a deeper, darker, more seductive side?

Caramelised White Chocolate Cheesecake

The corruption process is simple.  All you need is:

- heat

- good quality white chocolate

-a tray

Caramelised White Chocolate Cheesecake

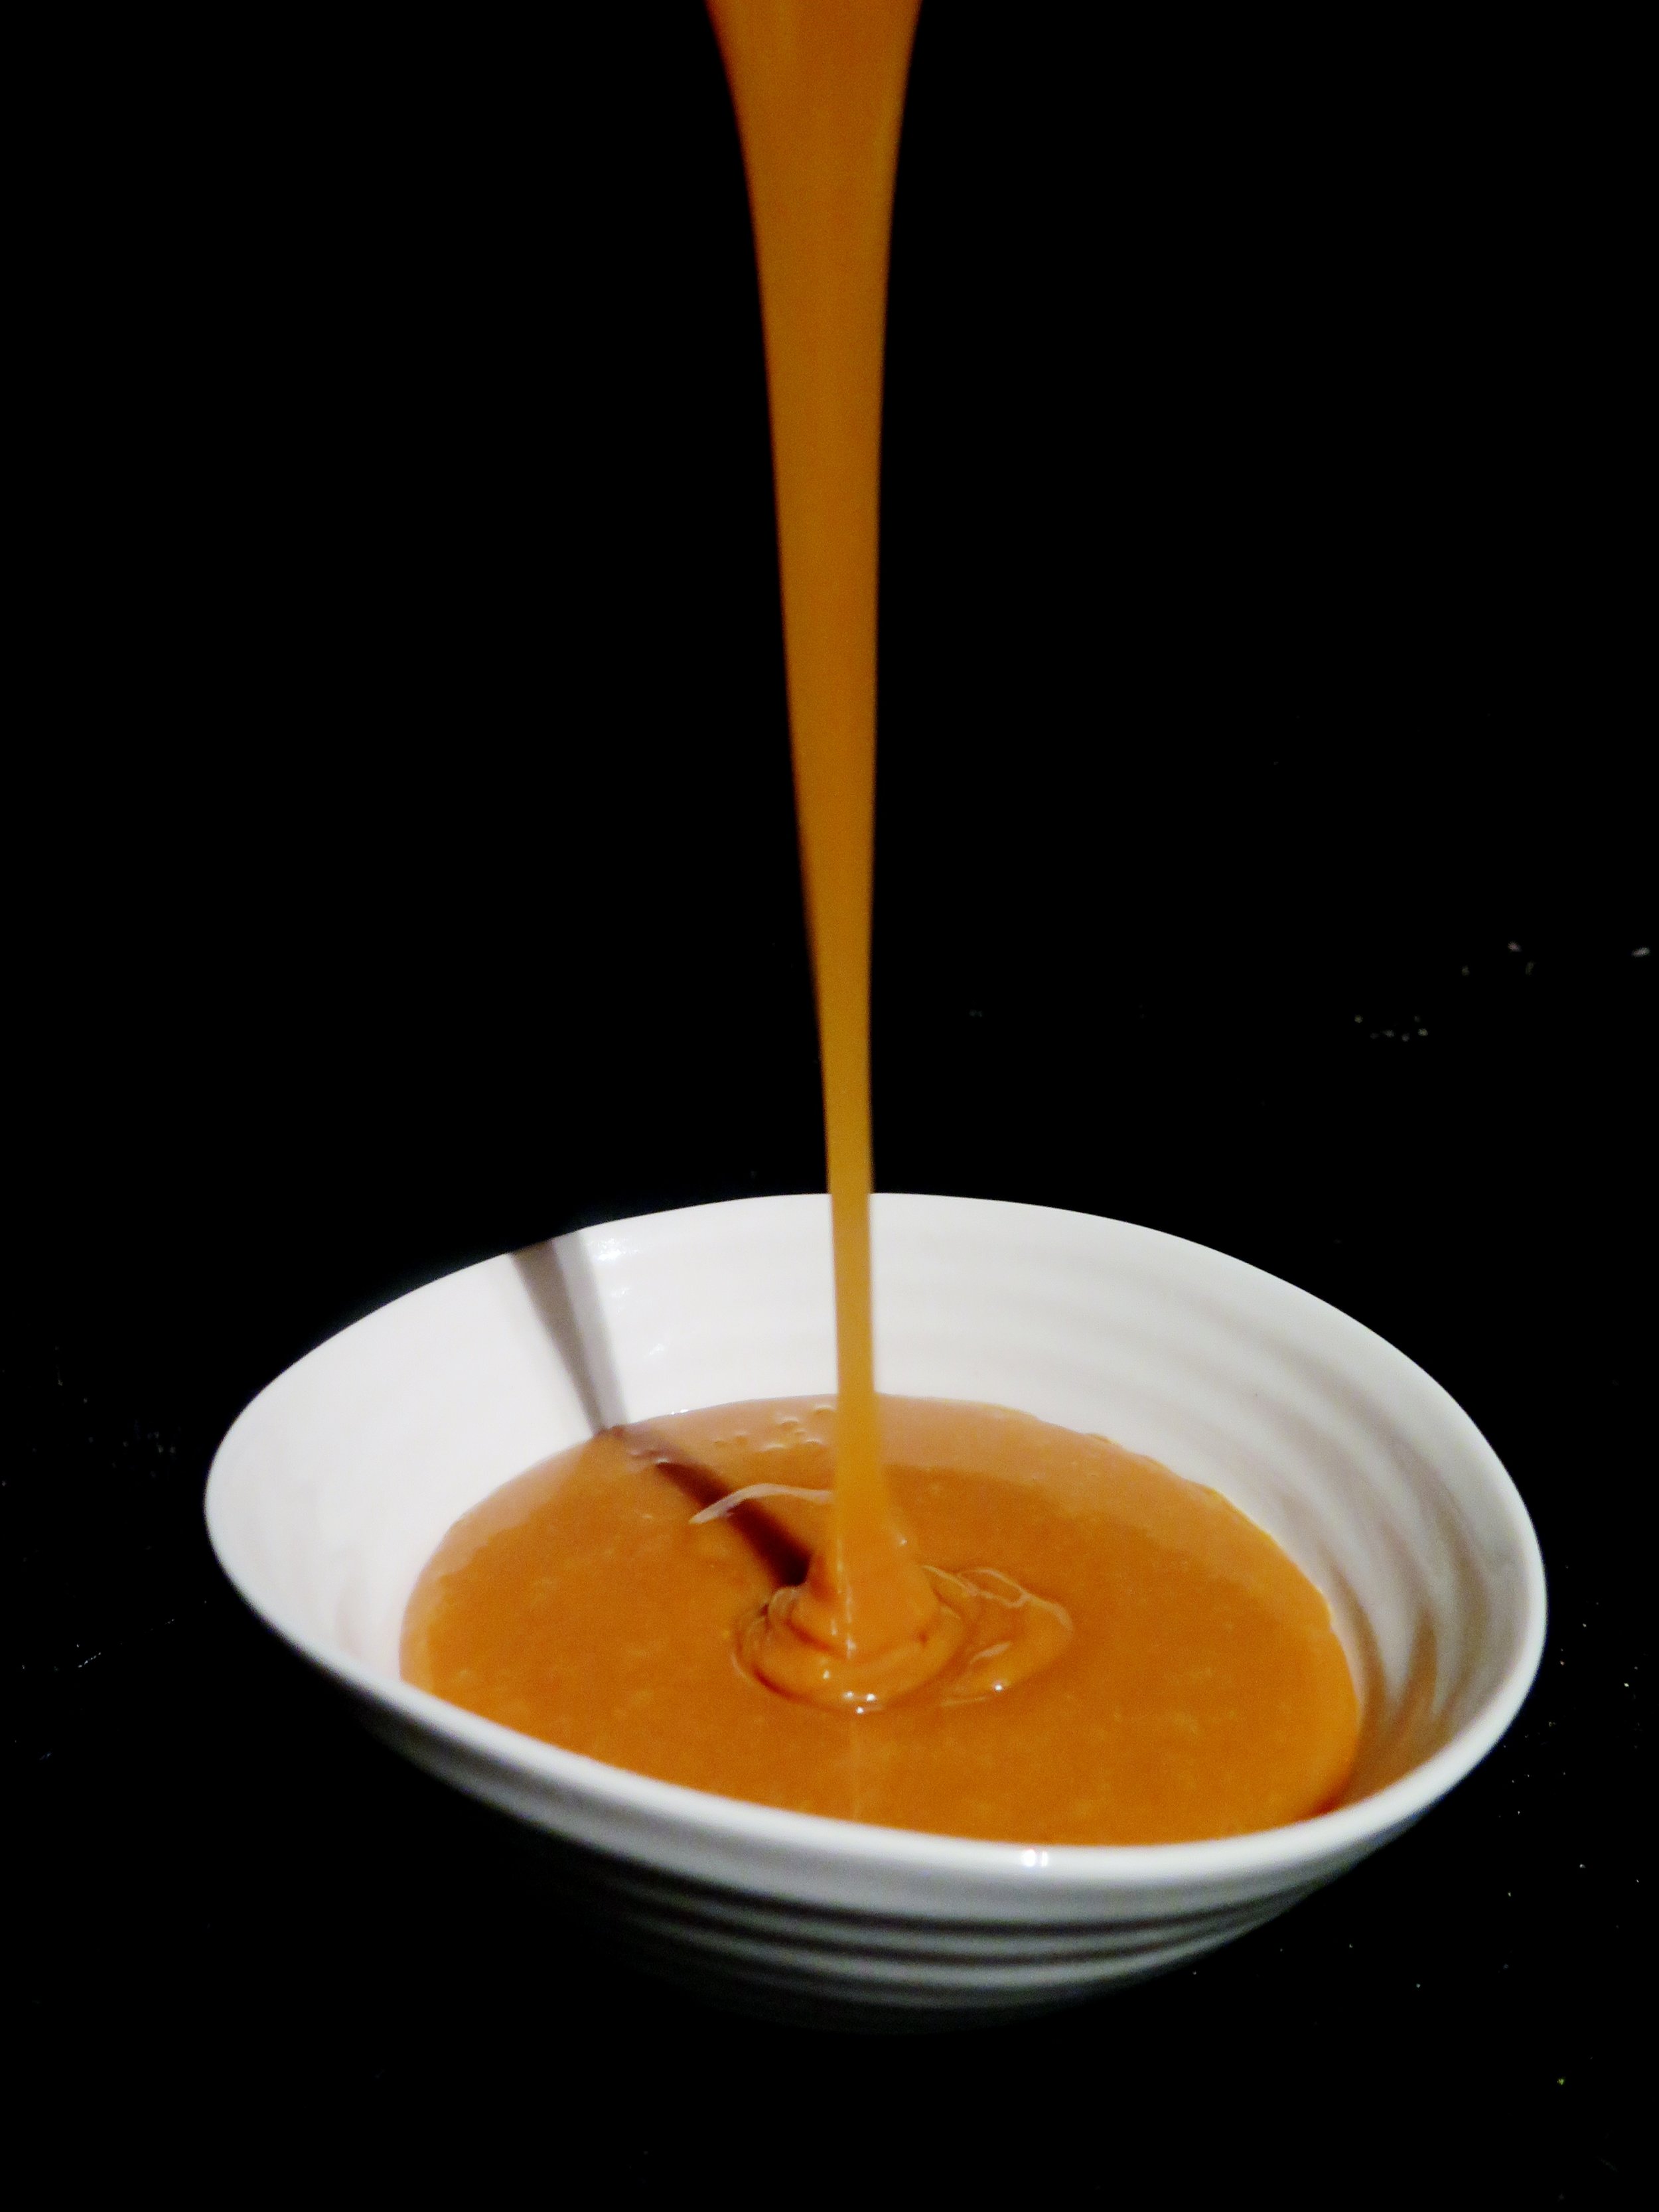
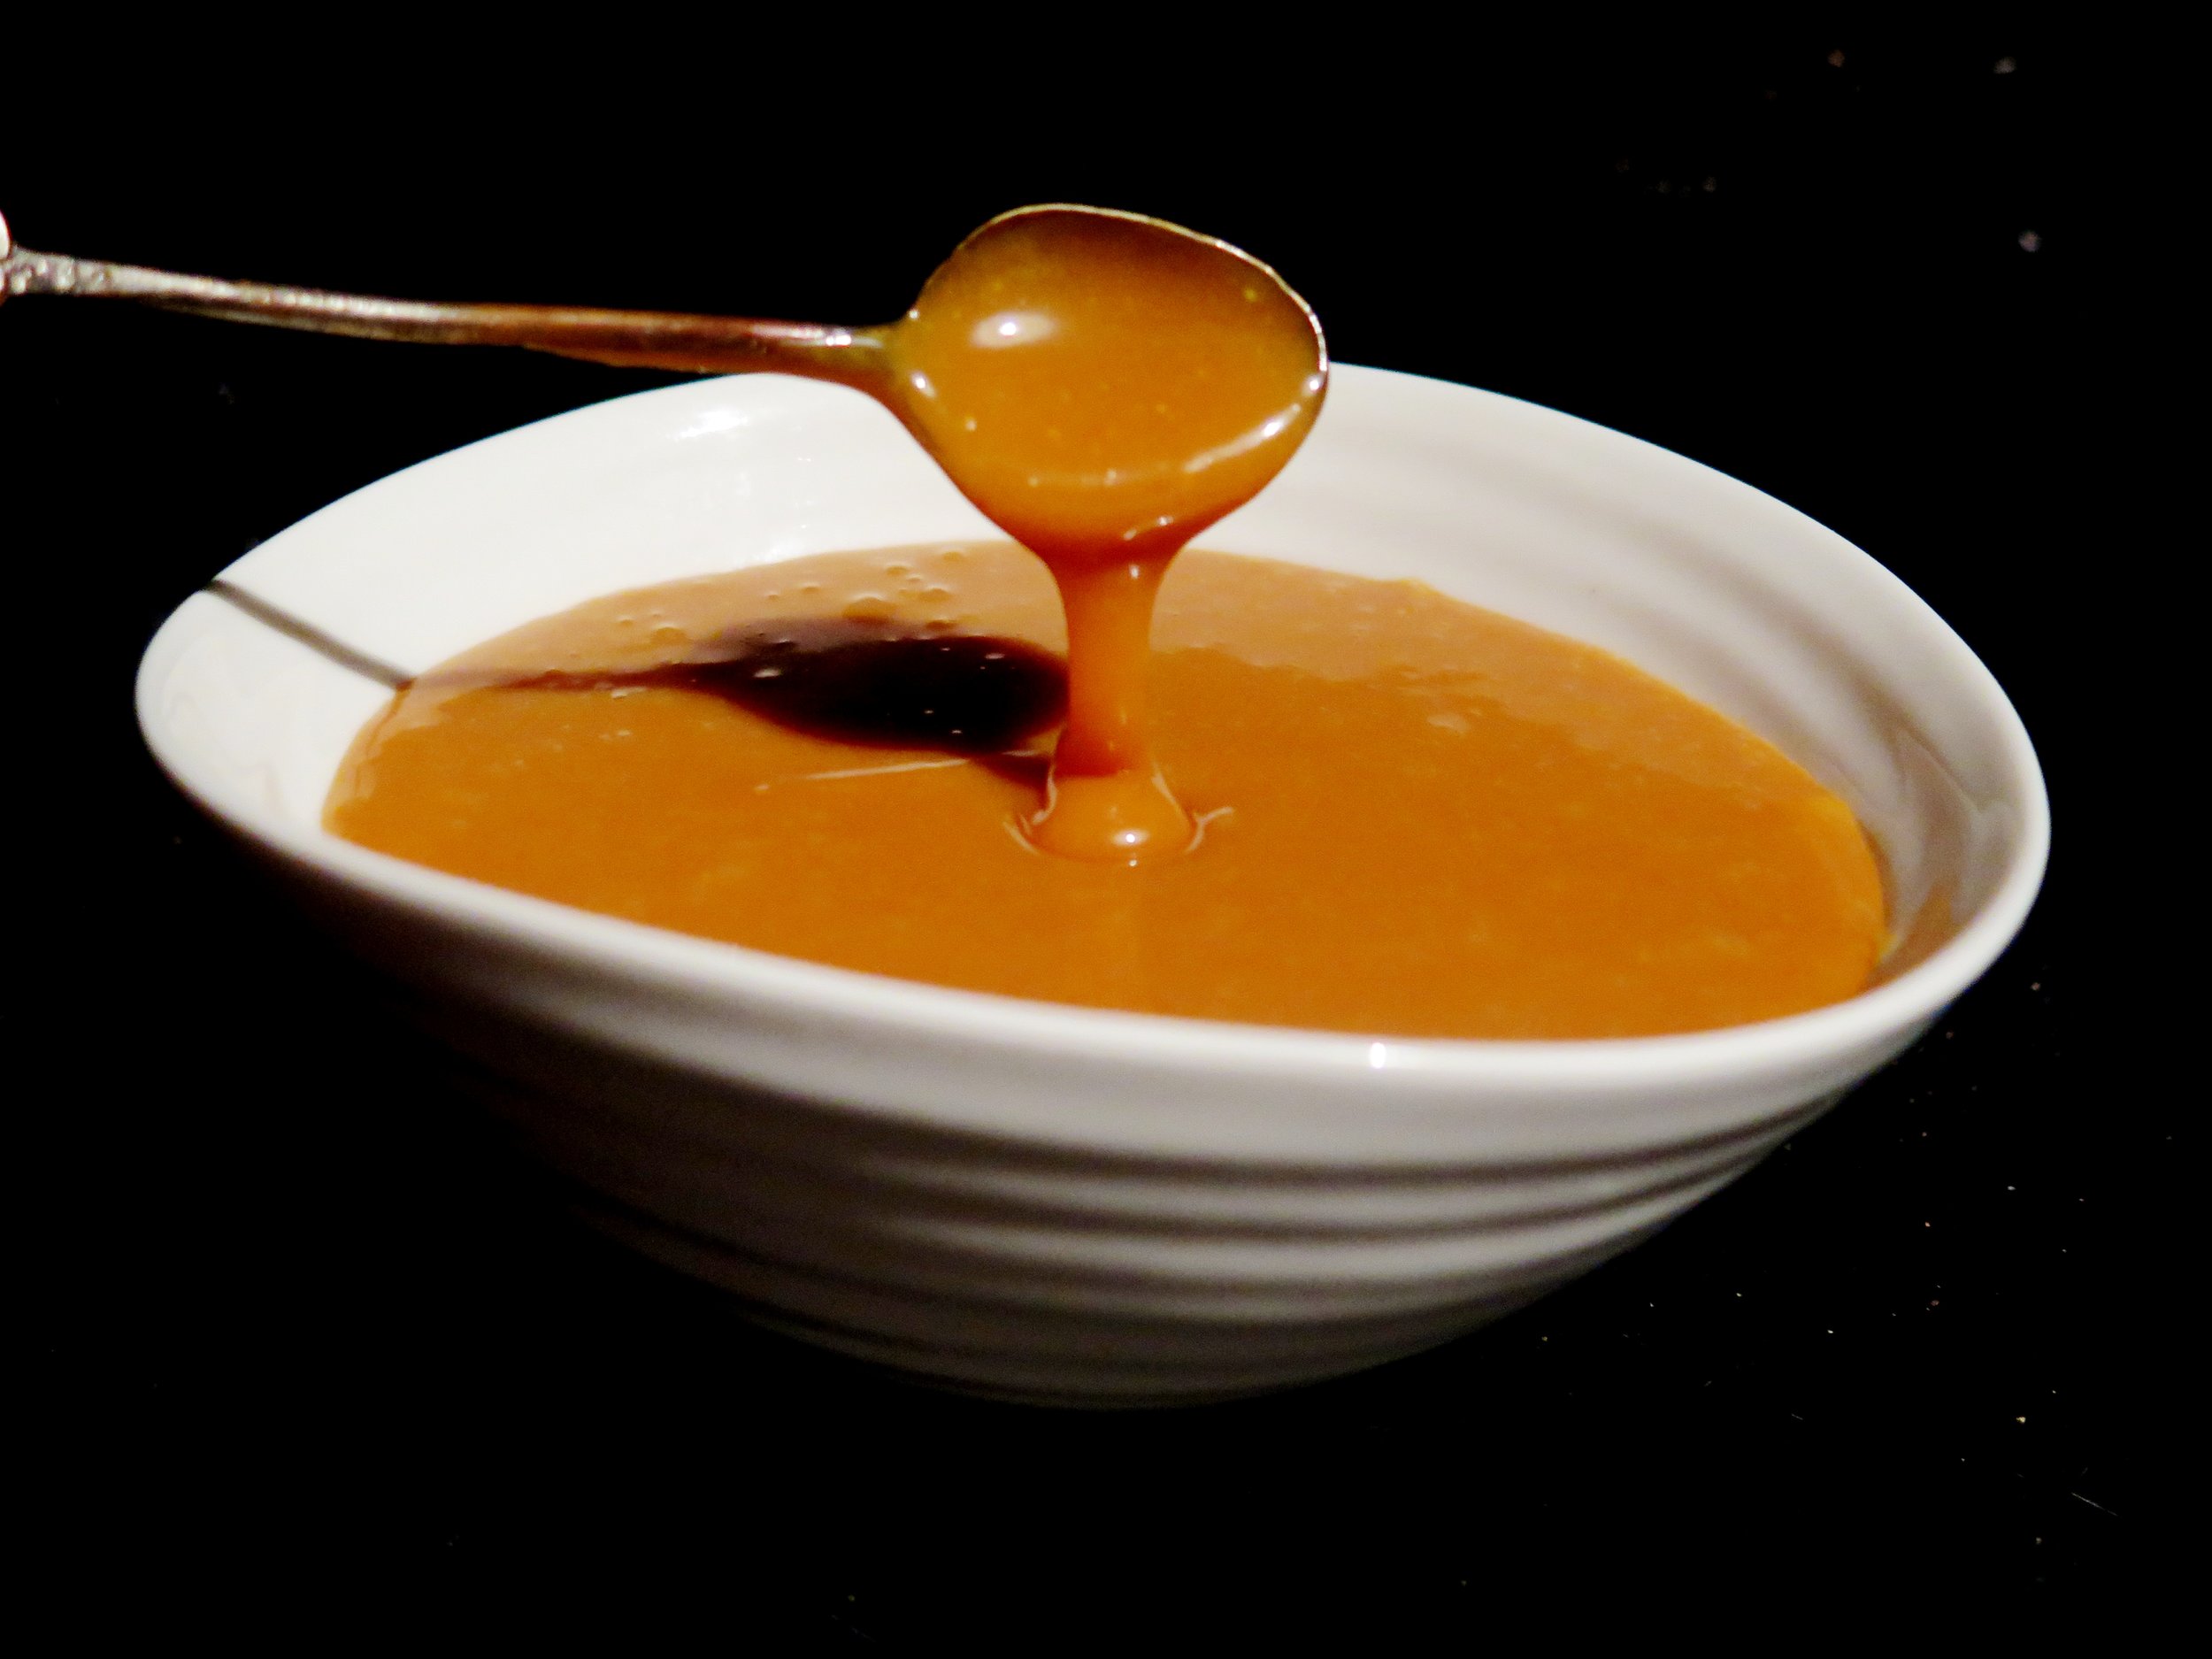
After about 20 minutes, the heat will begin to convert the pool of glossy molten cocoa butter into white chocolate’s luscious evil sister.  I dare you to try it.

Caramelised White Chocolate Cheesecake

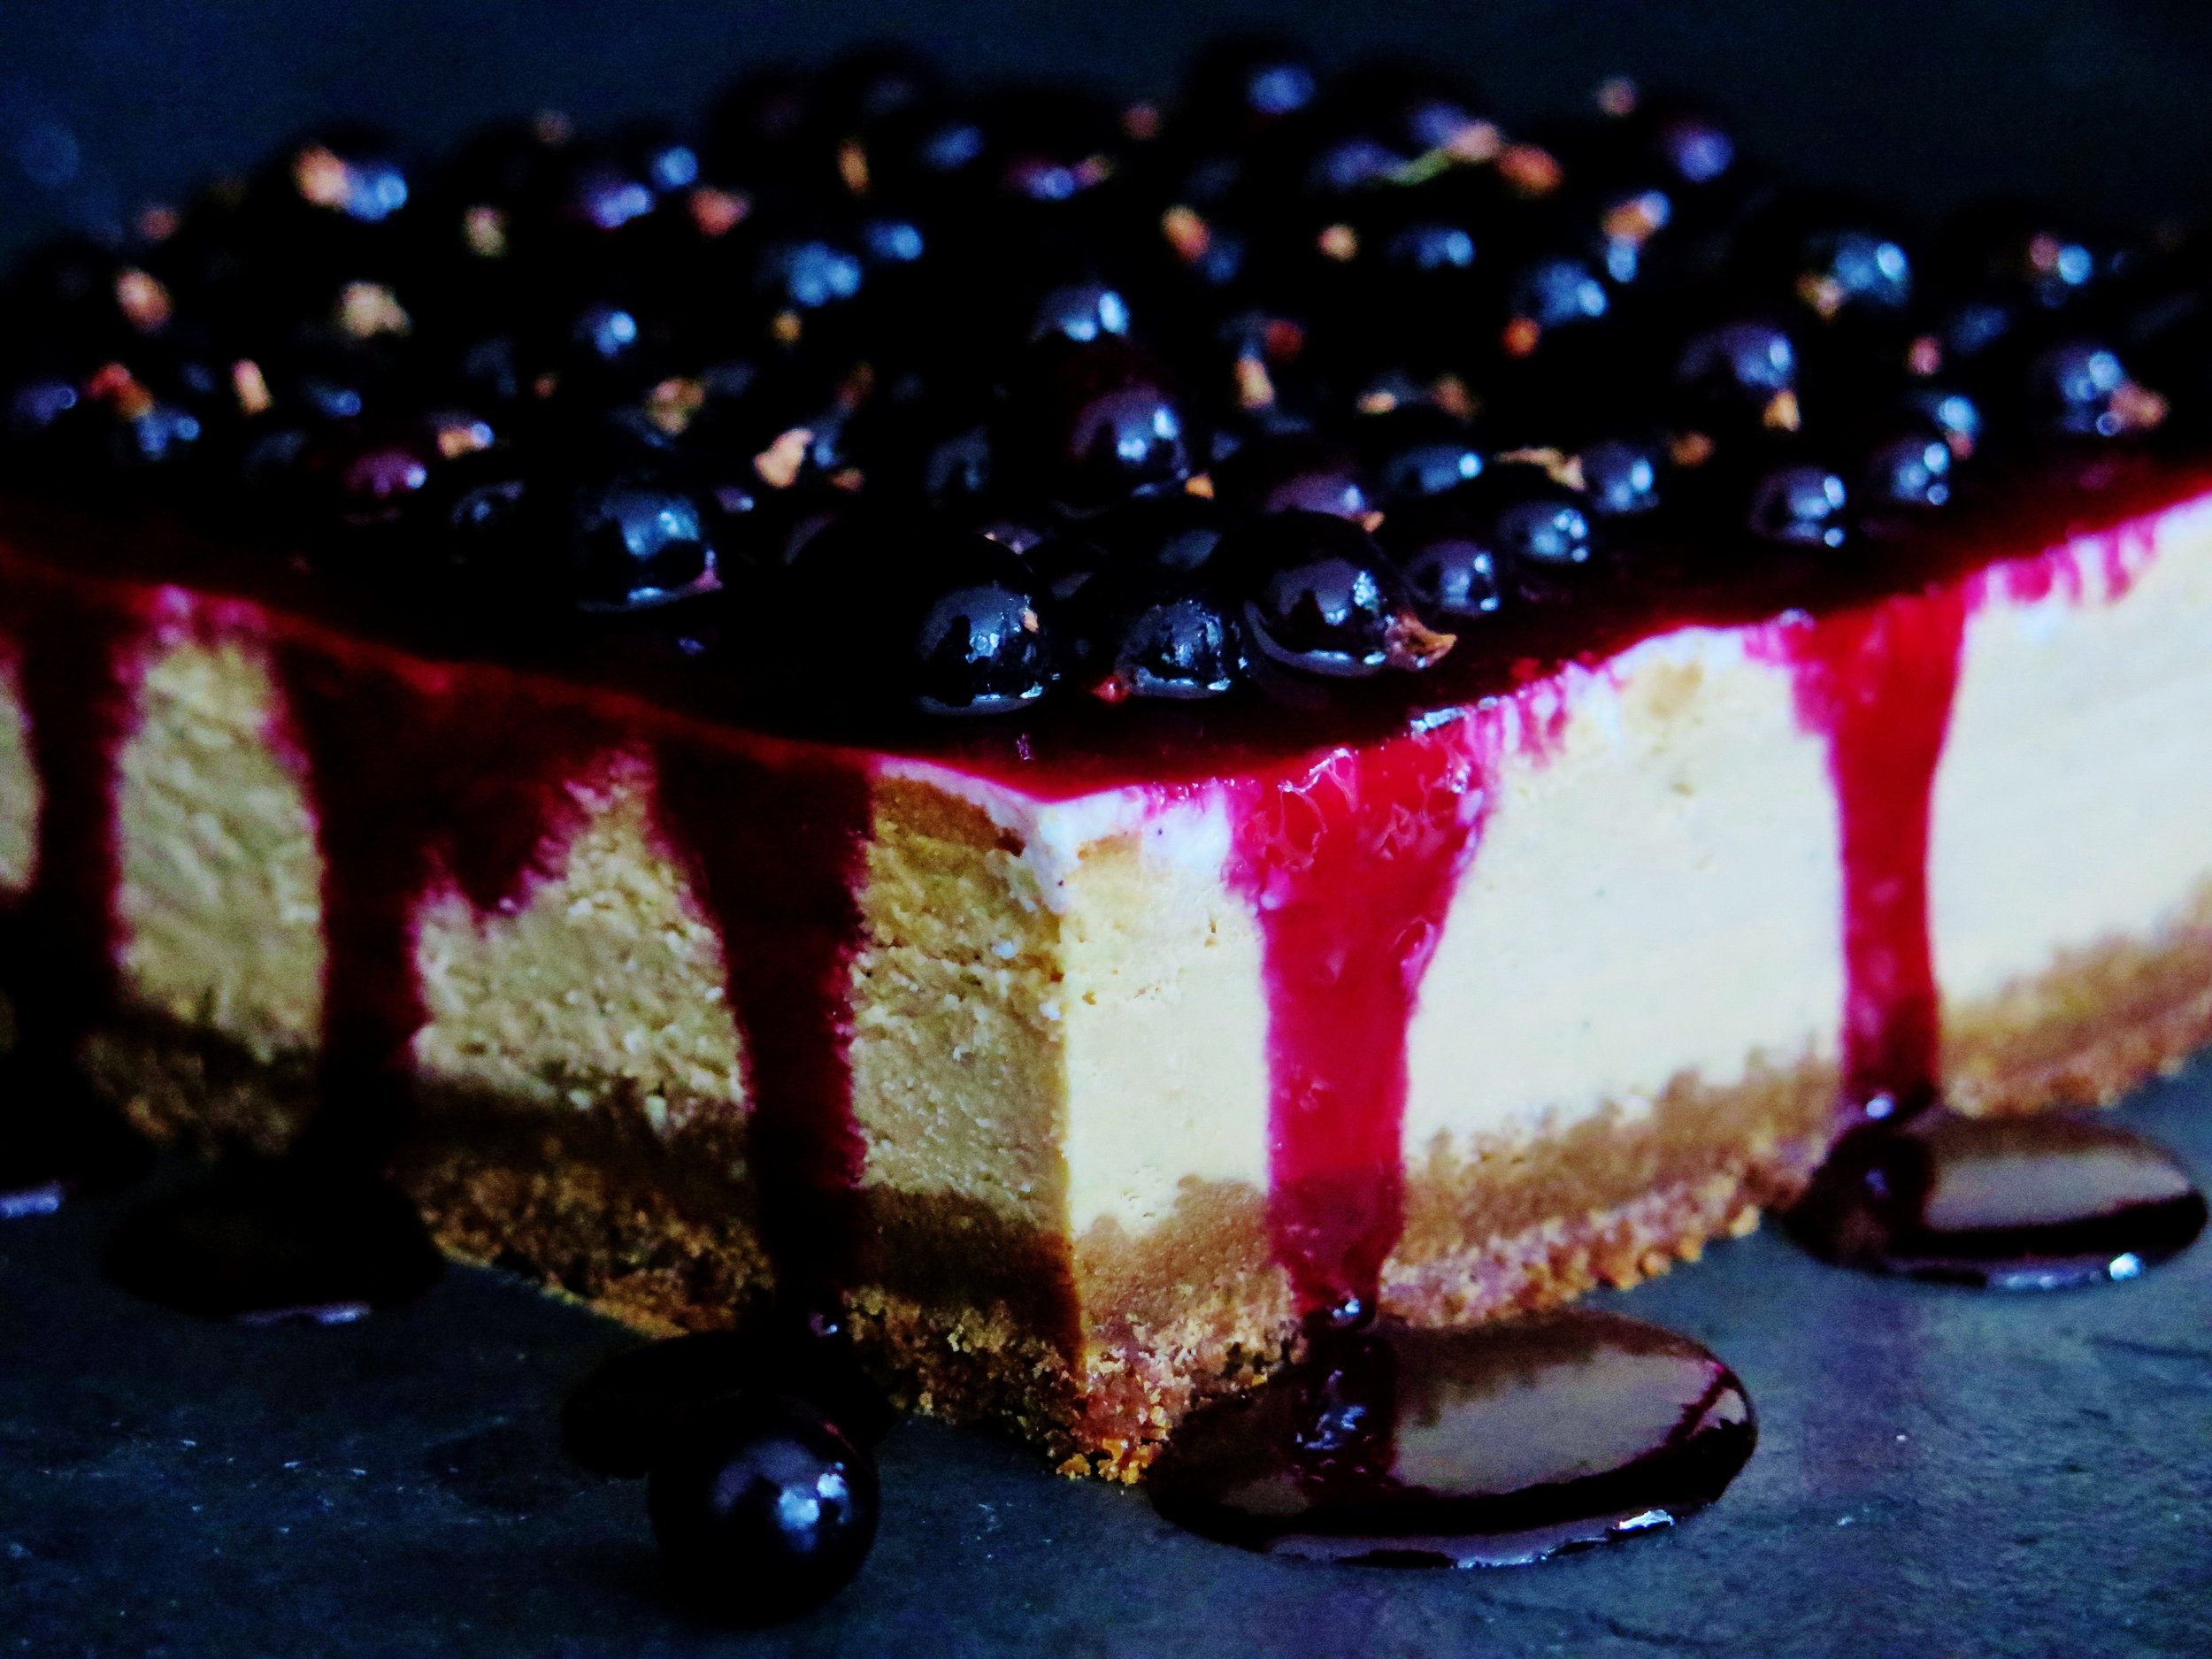
It’s pretty sublime on its own but, if you can resist eating it all, it works deliciously well in a cheesecake.  I pair it with a fudgy, salted, graham cracker-style base and an astringent blackcurrant glaze to cut through the sweetness.

Caramelised White Chocolate Cheesecake

Often cheesecakes call for a base simply made out of crushed store-bought cookies.  I’m no stranger to doing this myself, but I’m always left with a pang of guilt for cheating.  Not only does homemade biscuit base taste better, it’s chemical-free and you have much more control over the flavour balance – this one’s especially fudgy.

Caramelised White Chocolate Cheesecake

However, if you’re feeling lazy you can make the base using 400g digestive biscuits blitzed into crumbs with the 120g browned melted butter.  If you are a coeliac just use gluten-free digestive biscuits.

Caramelised White Chocolate Cheesecake

You can also use non-caramelised white-chocolate.  It will still taste delicious, just not anywhere near as ambrosial.

Caramelised White Chocolate Cheesecake

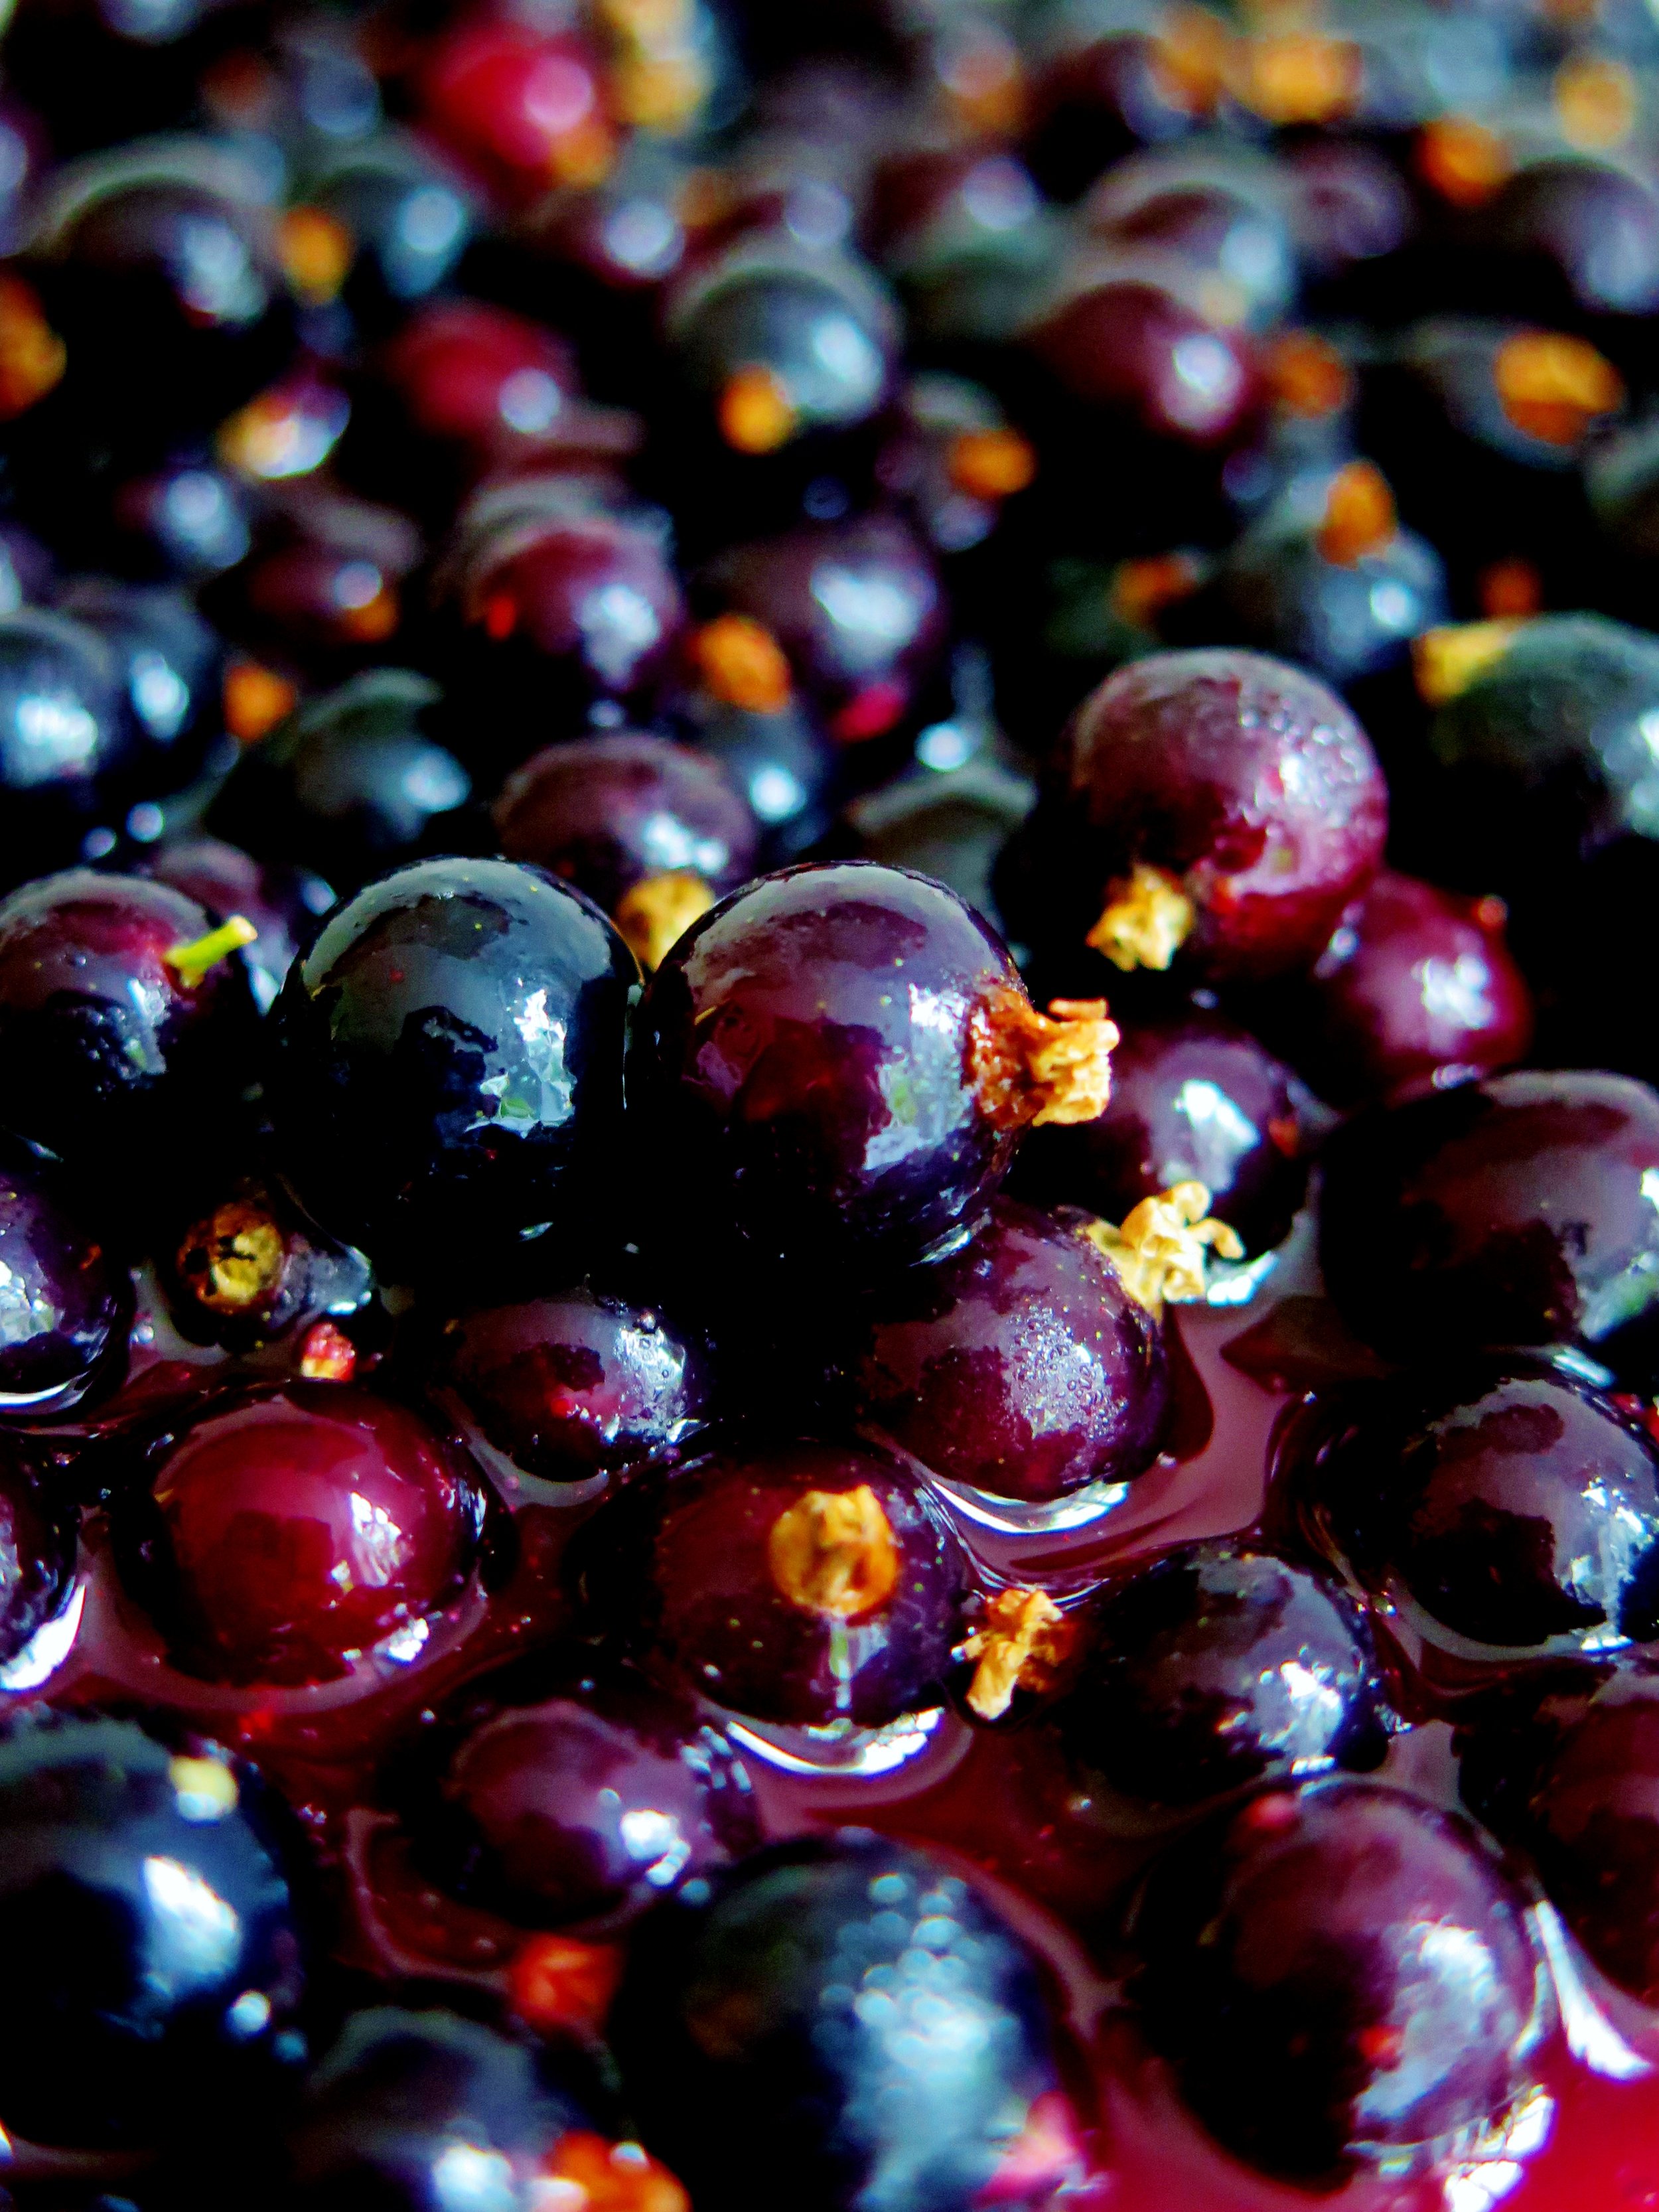
If you can’t get hold of any blackcurrants, feel free to use fresh or frozen raspberries or redcurrants instead.

Caramelised White Chocolate Cheesecake

This is best made the day before serving and kept in the fridge overnight.  In fact, the fridge works wonders.

Caramelised White Chocolate CheesecakeCaramelised White Chocolate Cheesecake

Ingredients

Salty-sweet, fudgy biscuit base

200g white spelt flour

60g light muscovado sugar

1 tsp bicarbonate of soda

1 tsp salt

60g unsalted butter, diced

70g clear honey

4 tsp vanilla extract

120g unsalted butter, for melting

Large baking tray, lined with baking parchment

20cm square tin (or round with similar capacity), lined with baking parchment

Caramelised white chocolate filling

300g good quality white chocolate, broken into pieces

180ml double cream

500g full fat cream cheese, at room temperature

100g caster sugar

4 eggs, at room temperature

1 tbsp vanilla bean paste (or the seeds of 1 vanilla pod)

Bone dry baking tray (preferably non-stick)

Sour cream topping

220ml sour cream

40g icing sugar, sifted

Blackcurrant glaze

200g blackcurrants

80g caster sugar

3 tbsp water

100g fresh blackcurrants to decorate (optional)

Method

Salty-sweet fudgy biscuit base

  1. Preheat the oven to 180˚C. Pour flour, sugar, bicarb, salt and diced butter into a blender and blitz until the mixture resembles damp sand. Alternatively, use your fingers to rub the butter into the other ingredients.
  2. Whisk together the honey, vanilla and milk. Stir this into the dry mixture to combine and form a paste-like dough.
  3. Spread the dough on to the baking tray in an even 0.5cm thick layer. Bake in the oven for 15-20 minutes until golden brown and cooked through.  If it doesn’t become dry and brittle after cooling, bake for a further 5 minutes.
  4. Brown the 120g of butter for melting by placing it in a pan over medium heat and allowing it to turn a golden brown before setting it aside to cool.  It should give off a wonderfully nutty aroma.
  5. Crumble the baked biscuit into a blender with the browned melted butter, and pulse until it turns to damp sand-like consistency. Tip this out into the lined cake tin and press down to form an even layer.  Place in freezer to set.

Sour cream topping

  1.    Whisk together sour cream and icing sugar until smooth. Store in the fridge until ready to use

Caramelised white chocolate filling

  1. Preheat the oven to 130˚C. Pour broken white chocolate on to the tray and place in the oven. Every 10 minutes remove the chocolate from the oven, stir with a bone dry utensil, and place back in the oven.  After about 30-40 minutes it will have taken on a beautiful honeyed caramel tone.    As ovens vary in character and different chocolate brands vary in ingredient quality, it may take longer.  The chocolate may also seize.  Don’t panic if this happens: just keep going until it turns golden (I’ll explain how to proceed with this in the next step).
  2. Increase the oven temperature to 160˚C. Place the double cream in a small pan over a high heat. Once it begins to boil, remove from the heat and pour into it the caramelised white chocolate.  Stir to combine until smooth. If the chocolate did seize in the oven, it will be lumpy.  If this is the case, pour the lumpy cream and chocolate mixture in a blender and blitz until completely smooth.  If a few recalcitrant lumps remain, simple sieve them out.
  3. Either using a stand mixer fixed with the beater or a hand held whisk, beat the cream cheese together with the caster sugar until completely soft and smooth. Beat in the cream and white chocolate caramel.  In a separate bowl, whisk together the eggs and vanilla.  Pour this into the cream cheese mixture and beat until completely smooth and glossy.
  4. Remove the cake tin with the biscuit base from the freezer, and pour into it the filling mixture. Bake in the oven for 1 ½ hours, checking after 45 minutes.  If it begins to go brown, cover with tin foil and continue to bake for the full time.
  5. Keeping the oven on, remove the cheesecake from the oven and allow it to cool for 10 minutes. Spread the sour cream topping in an even layer over the surface of the cake. Place the cheesecake back in the oven, switch off the oven and leave its door slightly ajar while the cheesecake sets inside for a further 1 ½ hours.
  6. When the cheesecake reaches room temperature, remove from the oven, cover the cake tin with cling film, and place it in the fridge to allow it to set over night, or place it in the freezer for a couple of hours.

Blackcurrant glaze

  1. Place 200g blackcurrants, caster sugar and water in a small pan over a high heat and stir until the sugar is dissolved. When it begins to boil, reduce heat slightly and allow it to simmer for 5-10 minutes or until it thickens to a viscosity like that of maple syrup.  Strain the mixture through a sieve and place the liquid back in the pan to simmer for a further 3 minutes.
  2. Allow the syrup to cool slightly then carefully pour it over the chilled cheesecake. Scatter with fresh blackcurrants and serve.

Caramelised White Chocolate Cheesecake

5 Comments

Sticky Glazed Carrot, Pomegranate, Orange, Lentil & Feta Salad

8 Comments

Sticky Glazed Carrot, Pomegranate, Orange, Lentil & Feta Salad

IMG_8334.jpg

I wandered into my favourite greengrocer yesterday in search of inspiration, and came out laden with half the store.  Amongst the wooden crates I found the most beautifully vibrant baby carrots and blushing, freckled pomegranate orb.

Sticky Glazed Carrot, Pomegranate, Orange, Lentil & Feta Salad - Recipe

Although lentils and carrots are usually associated with comfort and winter, I used fresh orange and pomegranate jewels to lift them to a lighter, more summery dish.

The carrots are poached in orange juice and maple syrup until juicy and softened and the liquid has reduced to a golden caramel.  They are then roasted until sticky, slightly charred and a little withered, but dense with succulence and depth of flavour. The caramel is turned into a citrusy dressing to drench the lentils, with the sweetness balanced with the salty kick of feta.

Sticky Glazed Carrot, Pomegranate, Orange, Lentil & Feta Salad - Recipe

Ingredients

200g puy lentils

2 tsp vegetable bouillon stock

1 litre boiling water

400g baby carrots

Juice of 3 oranges (15 tbsp)

5 tbsp maple syrup

¼ tsp salt

2 tbsp olive oil

1 ½ tsp lemon juice

1 tbsp pomegranate molasses

¼ tsp salt

2 large garlic cloves, crushed

2 oranges supremed (i.e. segmented with skin and membrane removed)

100g feta

140g pomegranate seeds (half a pomegranate)

20g fresh coriander, roughly chopped

Method

  1. Place lentils, stock and boiling water in a pan over a high heat and allow to simmer with a lid on for 30-35 minutes until fully cooked. They should be soft and no longer chalky, but definitely not mushy.  Drain them, and set aside in a bowl to cool.
  2. While the lentils are cooking, prepare the carrots: pour the orange juice into a large frying pan over a medium high heat, add the maple syrup and salt, and stir to combine. Carefully arrange the carrots in the pan and allow to simmer for about 30 minutes or until the carrots have softened and the liquid has reduced by about two thirds and become viscous and syrupy.  Remove from the heat.
  3. Preheat the grill to 230˚C. Remove the carrots from the frying pan (while preserving the syrup), arrange them on a baking tray and grill for 5 minutes (checking after 3 minutes) or until they are slightly charred.
  4. Into the pan with the remaining syrup, pour in the olive oil, pomegranate molasses, lemon juice, crushed garlic cloves and salt to make the dressing. Stir the mixture over a low heat until fully combined. Pour the warmed dressing over the bowl of lentils.
  5. To serve, carefully spoon the lentils and any non-absorbed dressing on to a platter, and scatter with pomegranate seeds and crumbled feta. Arrange the orange segments and roasted carrots over the top, and sprinkle with the chopped coriander.
Sticky Glazed Carrot, Pomegranate, Orange, Lentil & Feta Salad - Recipe

HUNGRY FOR MORE?

8 Comments

Caramelised Fig, Feta, Orange & Rocket Salad - Recipe

Comment

Caramelised Fig, Feta, Orange & Rocket Salad - Recipe

IMG_4390.jpg

Caramelised Fig, Feta, Orange & Rocket Salad - Recipe I often spend summers in Italy.  In the evenings, when the vine- ripening summer sun begins to soften and the incessant squeak and rattle of the plough eventually dies, I usually clamber up the nearby hill, meandering across the crest.   On one of my walks, I headed towards the nearby palazzo, along the path bordered by Cyprus spears.
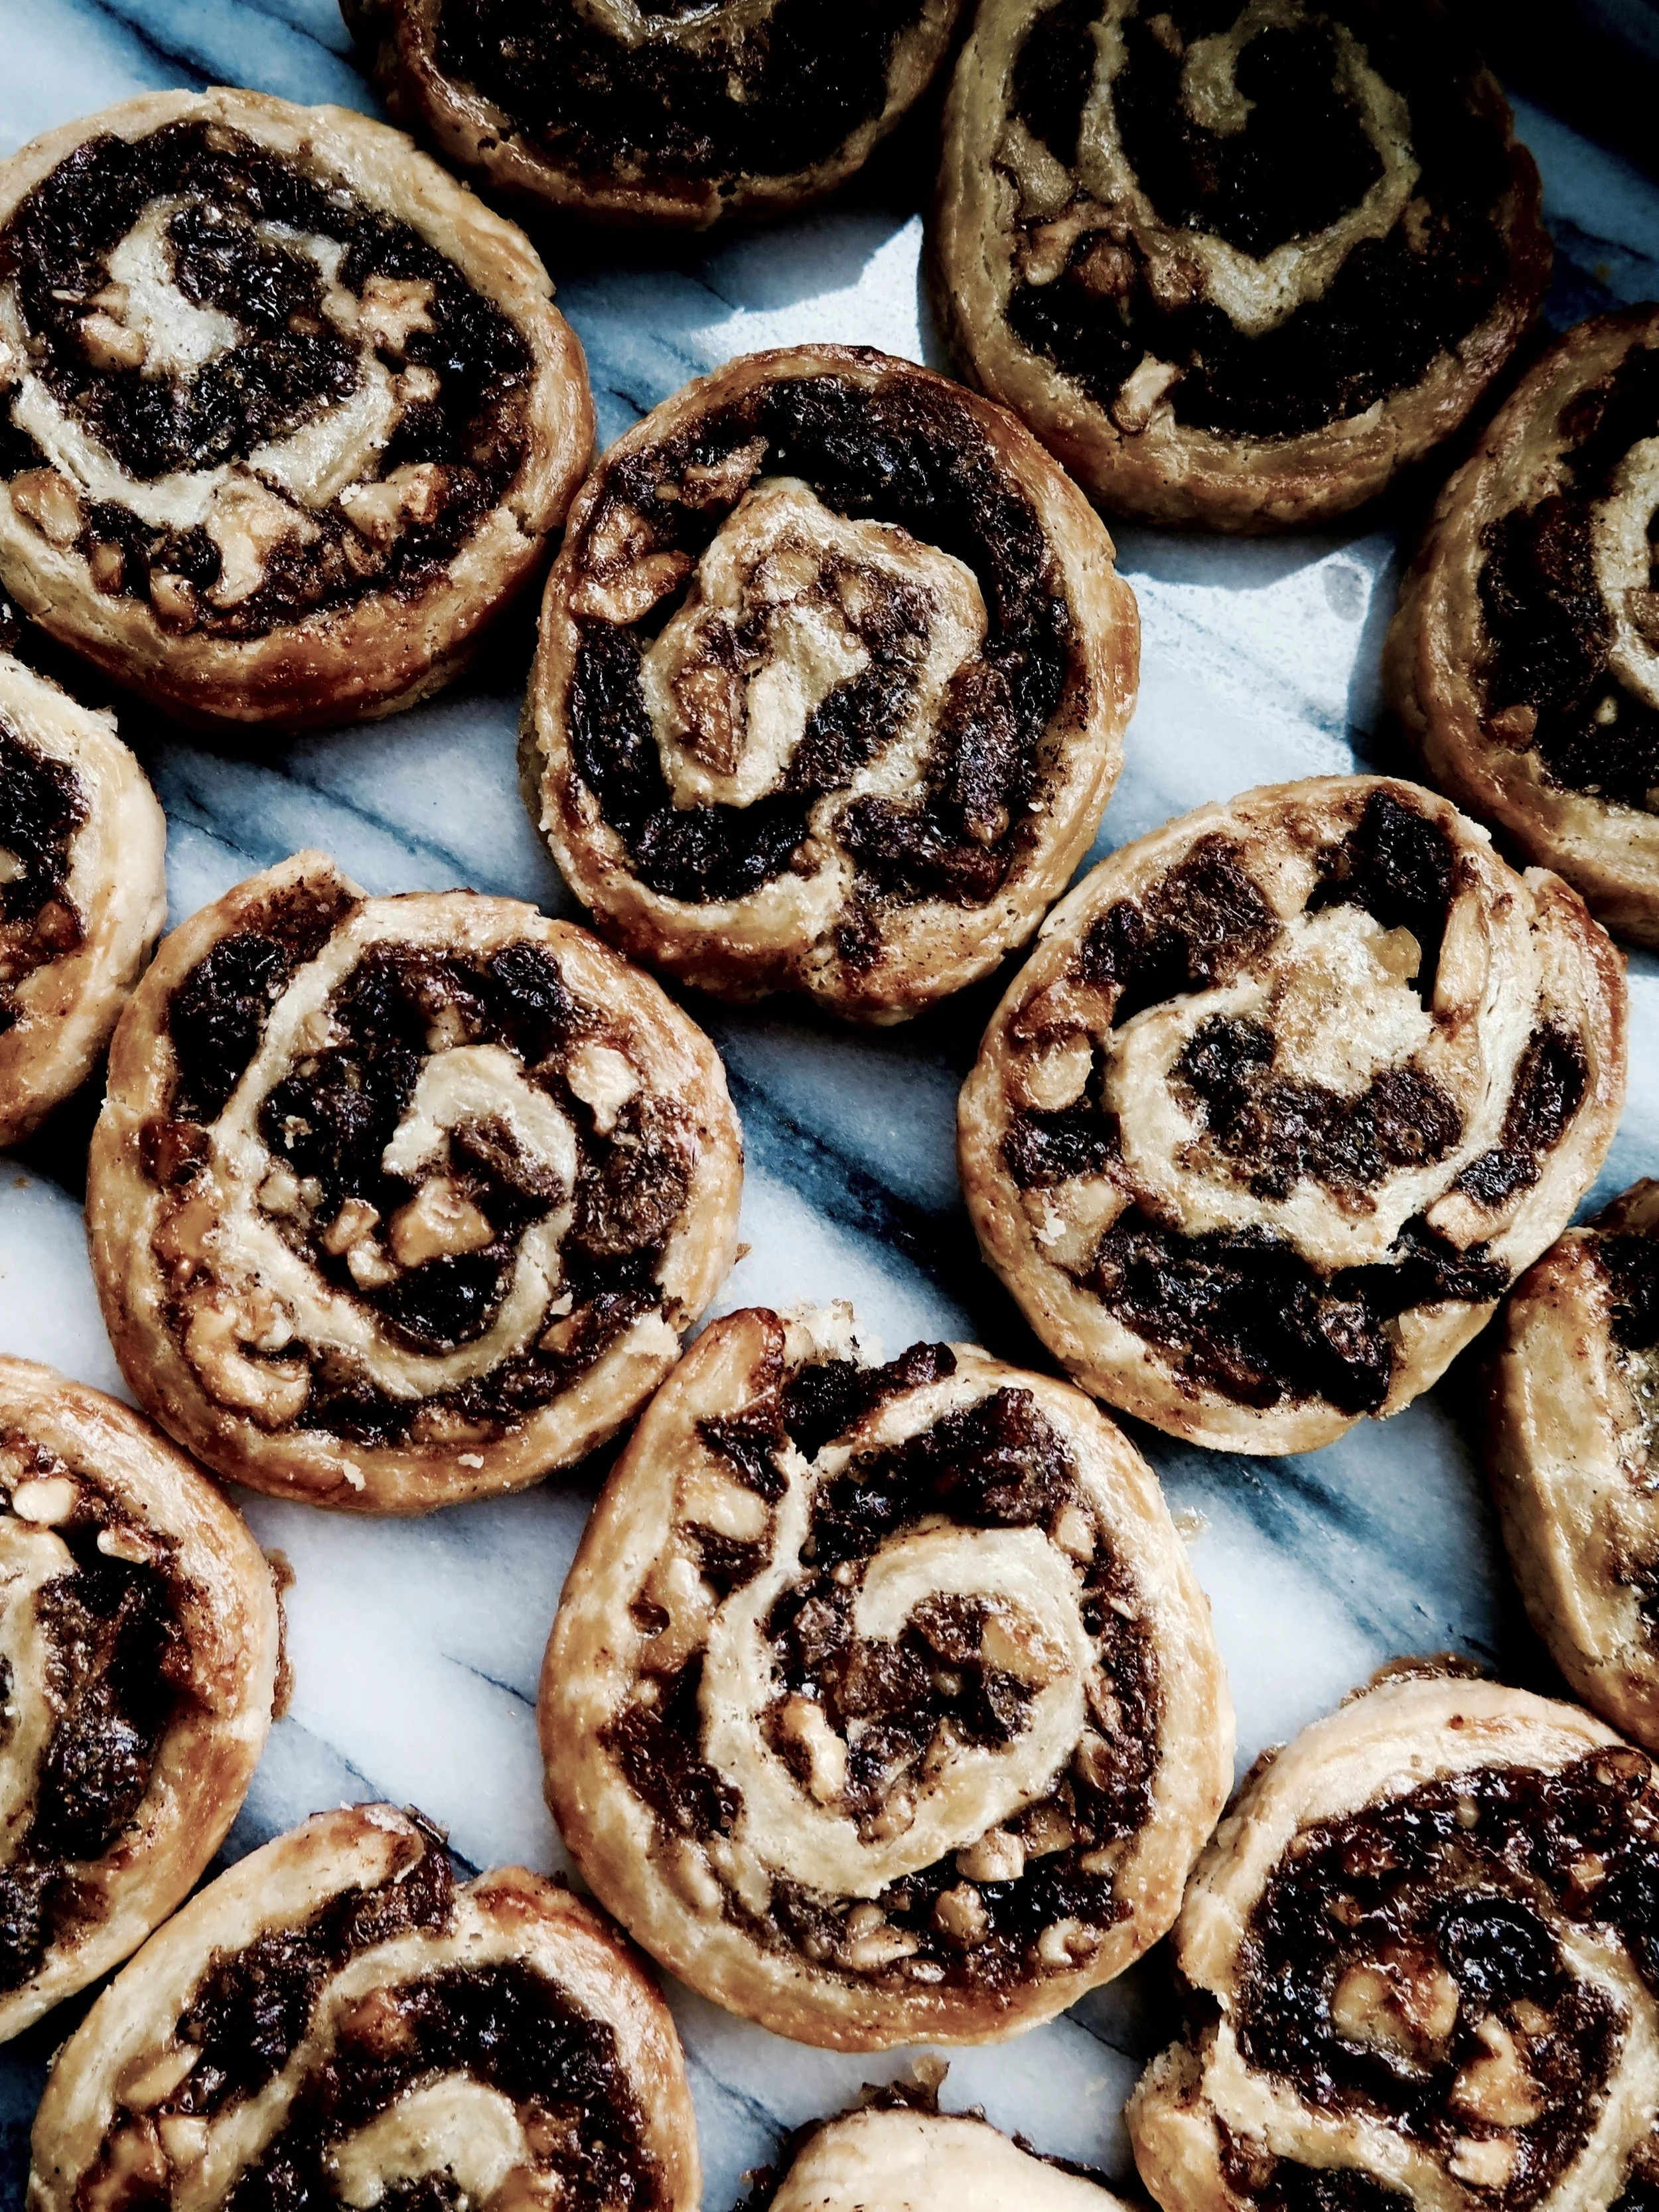
 

Caramelised Fig, Feta, Orange & Rocket Salad - Recipe

Caramelised Fig, Feta, Orange & Rocket Salad - Recipe

Lizards basking in the heat still held by the pale ochre walls scuttled away at my footsteps, and a green shutter creaked in the mild breeze.

Caramelised Fig, Feta, Orange & Rocket Salad - Recipe

The knobbed tree in front stood with its arms filled with waxy green dewdrop-like figs, nodding gently like a recently metamorphosed Ovidian nymph.   I reached to tug at a branch, and a cluster melted softly off it.  The pink juices dripping down my fingers, I gathered two handfuls and made my companion fill his pockets with the good intention of bringing some back for others to try.

Caramelised Fig, Feta, Orange & Rocket Salad - Recipe

As so often happens, the thoughtful food gift didn’t reach its destination (I ate it), but I went back the next day, and the next.  I was converted from someone with a slight aversion to figs to an obsessive.

Caramelised Fig, Feta, Orange & Rocket Salad - Recipe

This salad combines the earthy lusciousness of figs with caramel to add depth and sticky sweetness to the dish.  This contrasts with the fresh tanginess of oranges – blood oranges are currently in season so are fantastic to use – and the saltiness of the feta and peppery rocket leaves.

Caramelised Fig, Feta, Orange & Rocket Salad - Recipe

The dressing is fresh, sweet, salty and savoury, tying all the elements together.

Caramelised Fig, Feta, Orange & Rocket Salad - Recipe


Ingredients  Serves 2 (or 4, as a side)

8 figs, halved

50g caster sugar

juice of 1 orange

2 tbsp olive oil

2 tsp lemon juice

2 cloves garlic

1 tbsp pomegranate molasses (substitute with balsamic vinegar, if necessary)

¼ tsp salt

2 oranges, peeled and sliced into 1/2 cm discs

100g rocket

100g feta, sliced into ½ cm cubes


Method

  1. Place a shallow frying pan over a medium/high heat, pour in sugar and allow to melt, stirring occasionally to prevent it from burning.
  2. Place halved figs face down in the molten sugar and cook in the caramel for 2 minutes. Turn them over to cook for a further 1 minute.  Remove from pan and place on serving plate.
  3. For the dressing, pour the orange juice, olive oil, garlic, salt, and pomegranate molasses into the caramelised sugar pan and stir until the caramelised sugar has dissolved into the liquid. Remove from stove and stir in lemon juice.
  4. Scatter rocket, orange slices and feta on the serving plate with the figs and drizzle with the dressing.

Caramelised Fig, Feta, Orange & Rocket Salad - Recipe

Inspired by Ottolenghi

Caramelised Fig, Feta, Orange & Rocket Salad - Recipe

Comment

Crispy molten goat’s cheese with caramelised, thyme-infused maple balsamic and toasted hazelnuts

4 Comments

Crispy molten goat’s cheese with caramelised, thyme-infused maple balsamic and toasted hazelnuts

IMG_9628.jpg

Crispy molten goat’s cheese with caramelised, thyme-infused maple balsamic and toasted hazelnuts  

I’ve unfortunately inherited a trait from my maternal grandfather’s family.  If a type of food appealed particularly to her palate, my great aunt would go all out.  A slender and statuesque woman, she was known to devour eight-egg omelettes.  This was followed by an extended fast.  My grandfather had a particular penchant for icing: no cake was safe.

Crispy molten goat’s cheese with caramelised, thyme-infused maple balsamic and toasted hazelnuts 

My grandmother would often return home to find the once painstakingly iced cake denuded, perfectly, as if the precision of the stripping technique would make up for the action.  An entire crate of guavas went his way in one sitting, and his cupboard of chocolates had to be locked by him against himself.

Crispy molten goat’s cheese with caramelised, thyme-infused maple balsamic and toasted hazelnuts

Signs of this inherited characteristic were evident in me early on: for example, when I was seven, the target was a log of Chèvre which my mother had carelessly left unwrapped.  I gorged though the rind, through the crumbly outer ring, right to its buttery heart until the waxy wrapping lay completely bare.

Crispy molten goat’s cheese with caramelised, thyme-infused maple balsamic and toasted hazelnuts

The Erysichthon gene (see below) is a curse, and one not to be made light of.  It strikes, making foods seem so ambrosial to the cursed that consuming them becomes his or her sole focus.


Crispy molten goat’s cheese with caramelised, thyme-infused maple balsamic and toasted hazelnuts

But with the pleasure comes pain, because with the claws of the curse firmly embedded, one is forced to keep eating until what was once a source of unparalleled edible pleasure becomes one’s nemesis.  The scent, sometimes the very thought, of the offending food makes bile rise in my throat.  The only cure is time.

Crispy molten goat’s cheese with caramelised, thyme-infused maple balsamic and toasted hazelnuts

It has taken me fourteen years and one particularly outstanding meal to normalise my relationship with goat’s cheese.  I went to Rabbit (review to ensue shortly) which won me over with a beetroot crisp, topped with whipped goat’s cheese, honey comb and marjoram.  My knee-jerk reaction was to buy the recipe book of The Shed, Rabbit’s sister restaurant (on Amazon Prime - it was urgent).


Crispy molten goat’s cheese with caramelised, thyme-infused maple balsamic and toasted hazelnuts

With freshly unearthed enthusiasm for goat’s cheese, I pored over the book and found inspiration for this recipe.  It works wonderfully as a starter or cheese course.

Crispy molten goat’s cheese with caramelised, thyme-infused maple balsamic and toasted hazelnuts

Crispy molten goat’s cheese with caramelised, thyme-infused maple balsamic and toasted hazelnuts

Crispy molten goat’s cheese with caramelised, thyme-infused maple balsamic and toasted hazelnuts  

The pan frying makes the Chèvre golden and crisp on the outside, and gloriously molten on the inside.  The balsamic vinegar and maple syrup caramelise together to form a sweet and sharp treacle which cuts through the saltiness and creaminess of the Chèvre, while the toasted hazelnuts add warmth and texture, and the thyme just leaves you coming back for more…and more…and more…

Crispy molten goat’s cheese with caramelised, thyme-infused maple balsamic and toasted hazelnuts        

Crispy molten goat’s cheese with caramelised, thyme-infused maple balsamic and toasted hazelnuts


Ovid’s tale of King Erysichthon portrays him hubristically killing a nymph of Ceres, goddess of the harvest. His punishment was insatiable hunger which resulted in exhausting the wealth of his kingdom, selling his own daughter in exchange for food, and eventually devouring himself.  Maybe there’s a lesson here for me. Click here for the whole tale, one of the best in the Metamorphoses (line 741-887).

Crispy molten goat’s cheese with caramelised, thyme-infused maple balsamic and toasted hazelnuts   

Crispy molten goat’s cheese with caramelised, thyme-infused maple balsamic and toasted hazelnuts Crispy molten goat’s cheese with caramelised, thyme-infused maple balsamic and toasted hazelnuts                  

Crispy molten goat’s cheese with caramelised, thyme-infused maple balsamic and toasted hazelnuts

Crispy molten goat’s cheese with caramelised, thyme-infused maple balsamic and toasted hazelnuts

Ingredients

300g log of Chevre goat’s cheese

2/3 tbsp Rapeseed oil (or enough to coat the bottom of a medium-sized non-stick frying pan)

100g hazelnuts (blanched if possible)

180ml balsamic vinegar

120ml maple syrup

60g unsalted butter

½ tsp salt

3 sprigs fresh thyme + 3 to sprinkle + 6 to serve

Serves 6 as a starter or cheese course

Method

  1. Preheat an oven to 200˚C. Gently crush the hazelnuts into halves either in a pestle and mortar or place in a bag and whack with a rolling pin.
  2. Place crushed hazelnuts on a baking tray and allow them to toast in the oven for 5 minutes or until golden.
  3. Set a small pan over a high heat and pour in balsamic, maple syrup, butter, salt, the leaves of the 3 sprigs of thyme and the toasted hazelnuts. Once it begins to boil reduce heat to a low temperature and allow to simmer while you cook the goat’s cheese.
  4. Place a medium sized non-stick frying pan over a high heat and pour in the rapeseed oil and allow it to heat for half a minute. Cut off the rind covered ends of the goat’s cheese and slice the log into 12 discs. Place these carefully into the pan and fry on medium-high heat for 2 minutes on each side or until crisp and golden.  Remove from heat and place two slices on each plate to serve.
  5. After 5 minutes simmering, the sauce ingredients should now have emulsified and turned more viscose (it will thicken further as it begins to cool). If it hasn’t reached this stage, turn up the heat and stir until glossy.  Beware of over boiling it as it will turn to a jam like texture.  You can retrieve it from this stage by thinning it with a few drops of balsamic.
  6. Drizzle the warm sauce over the hot goat’s cheese. Sprinkle with the leaves of the other 3 sprigs of thyme and then place one whole sprig over each portion to decorate.

Crispy molten goat’s cheese with caramelised, thyme-infused maple balsamic and toasted hazelnuts


4 Comments