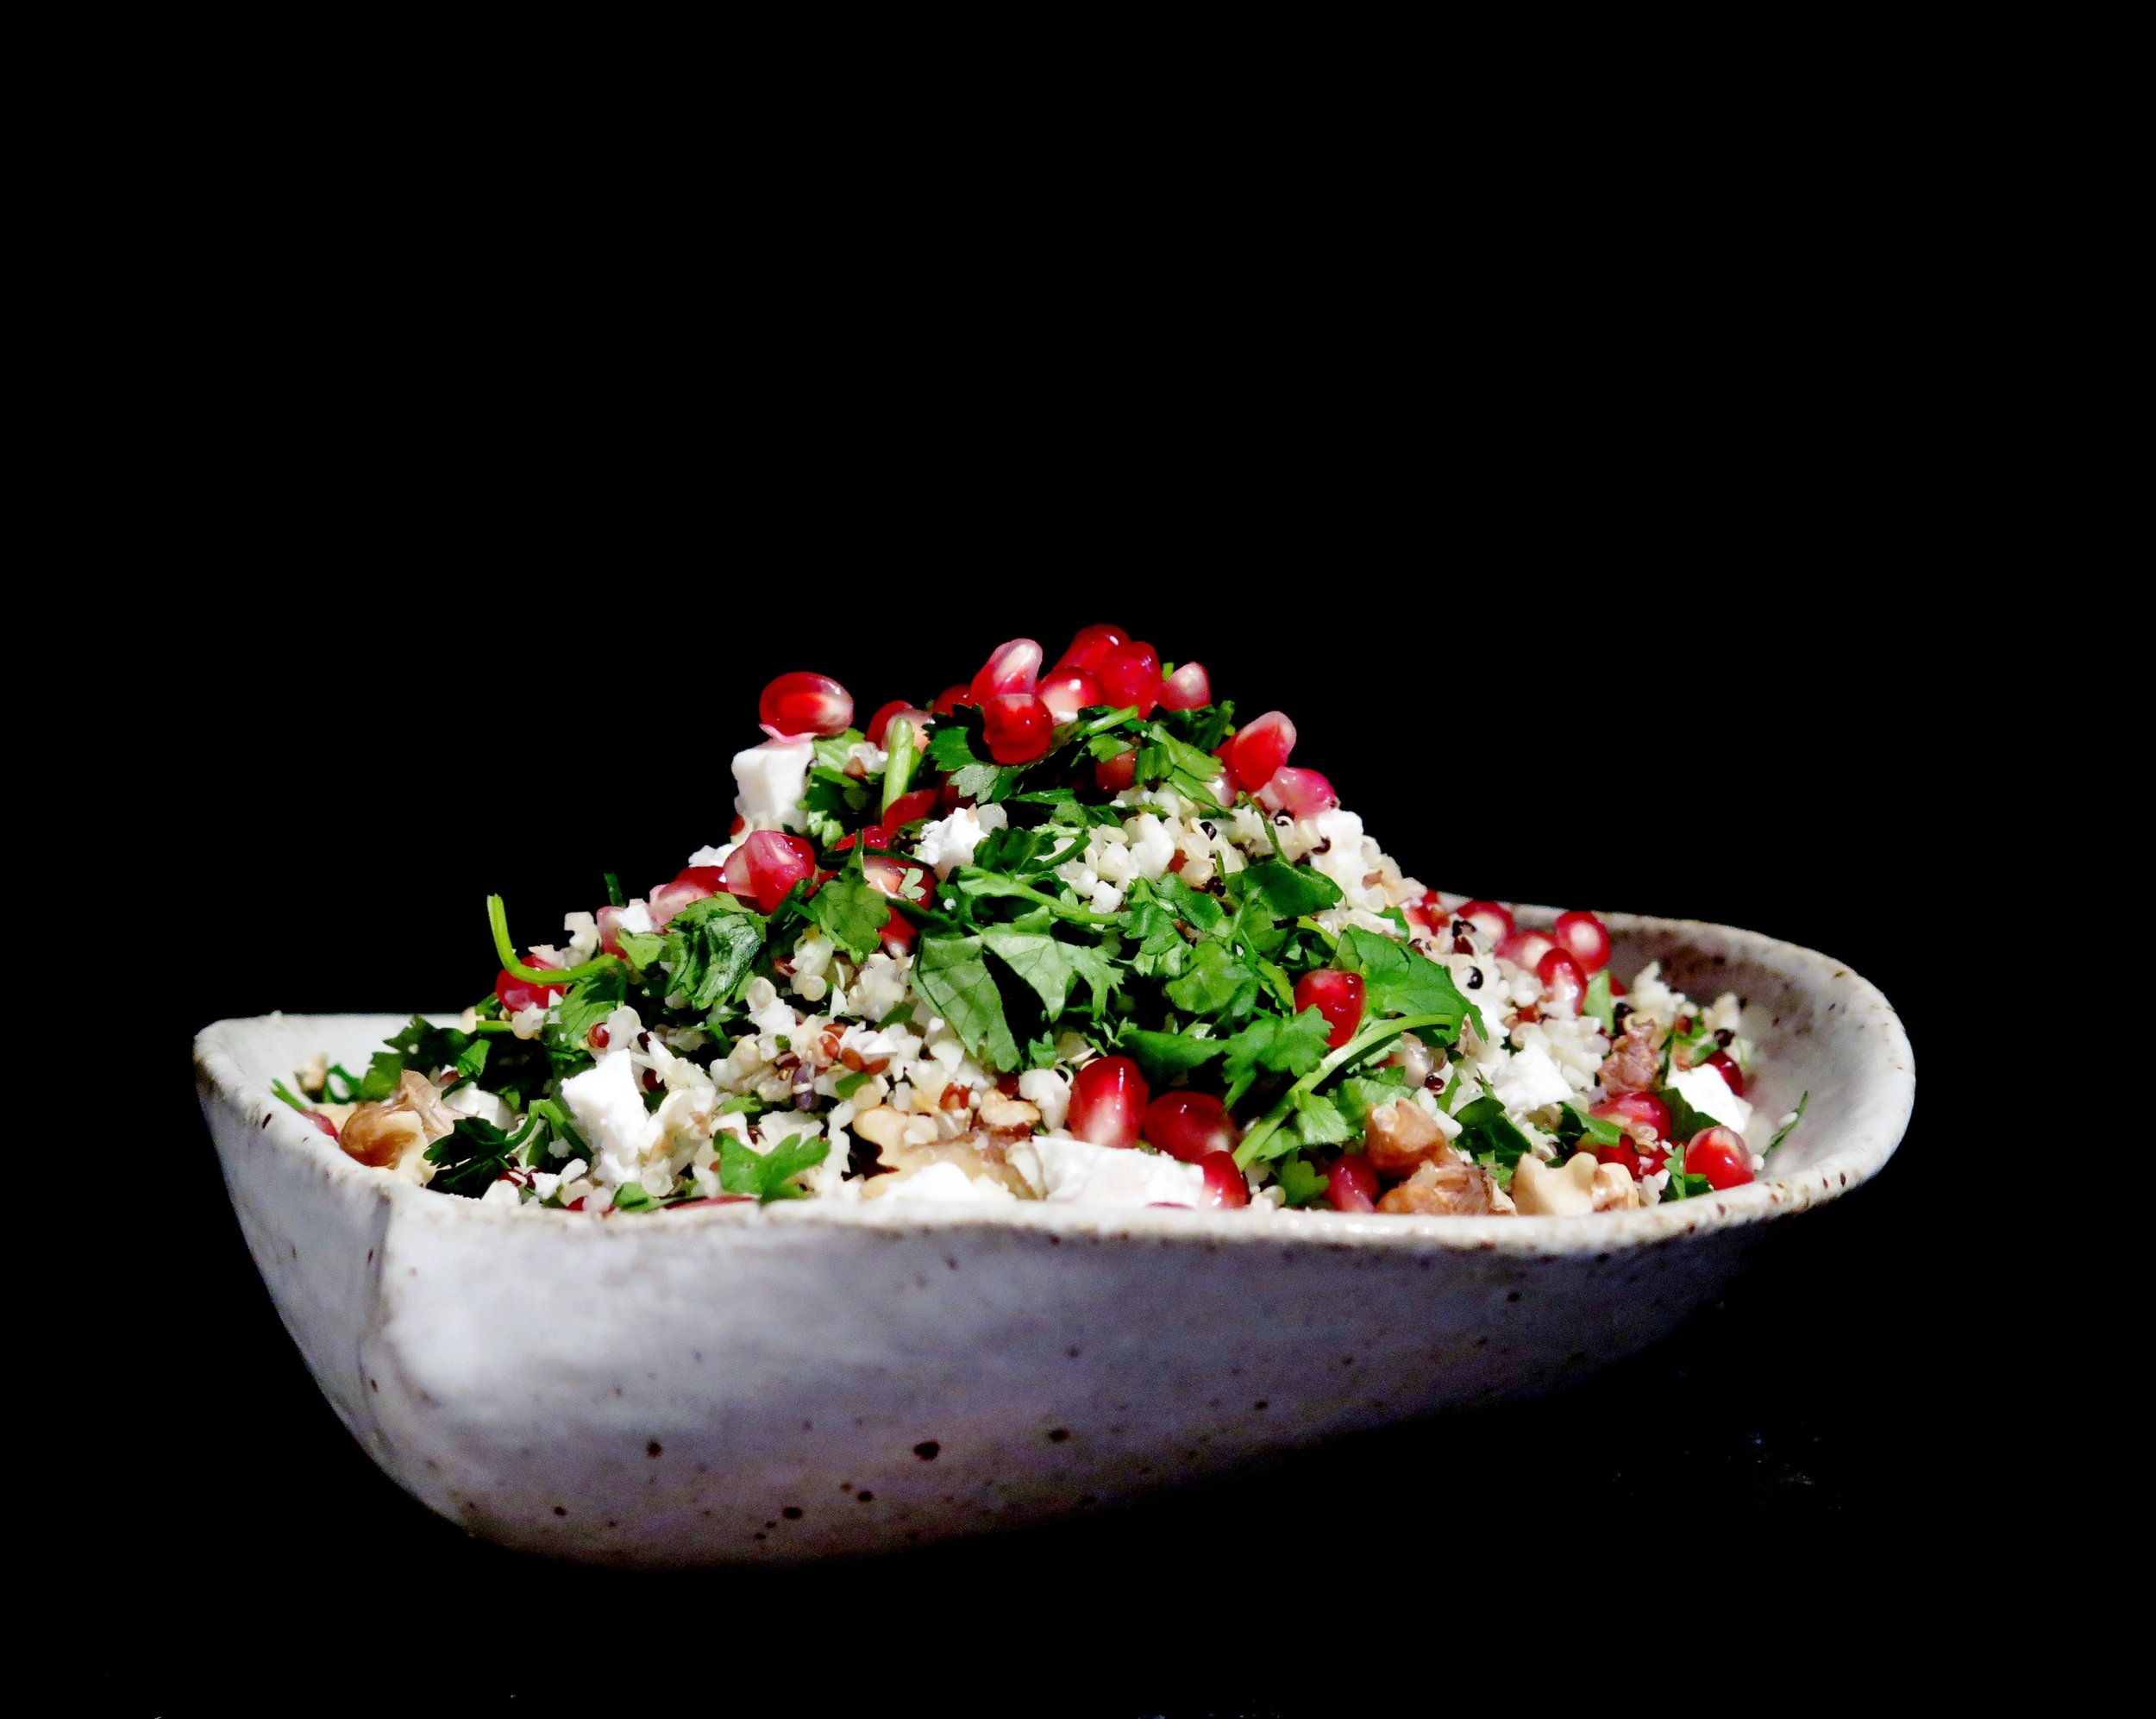
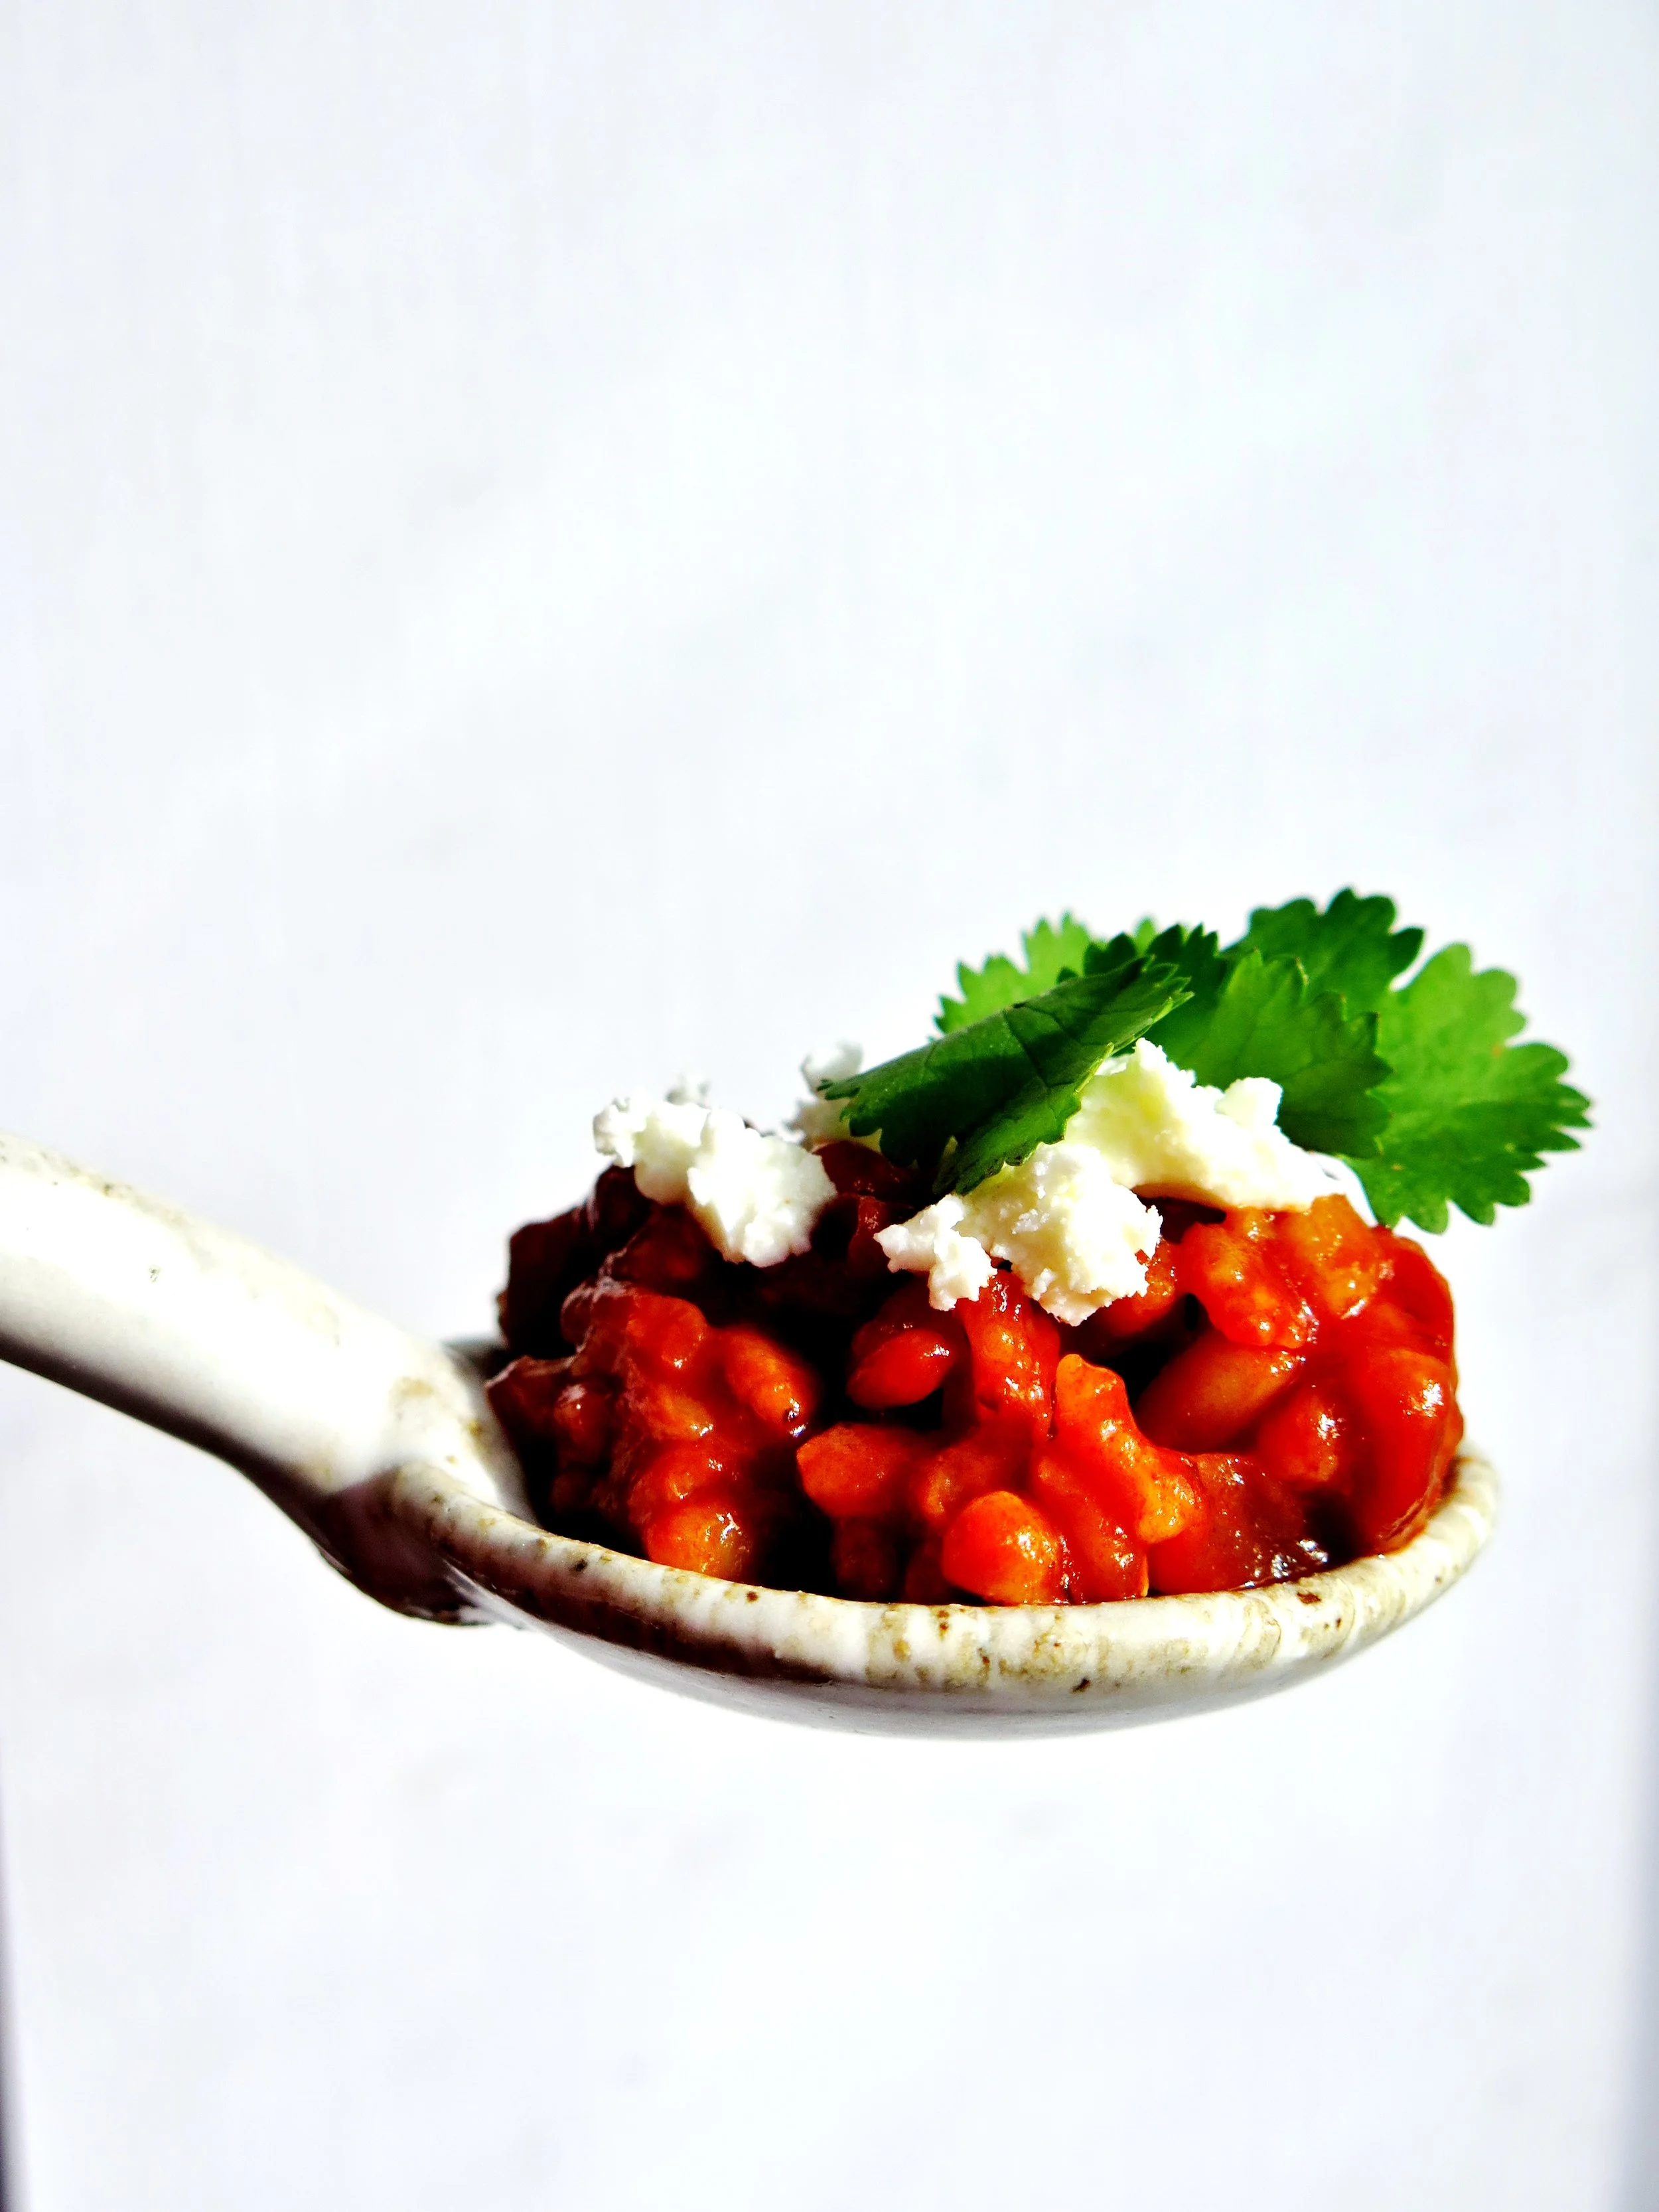
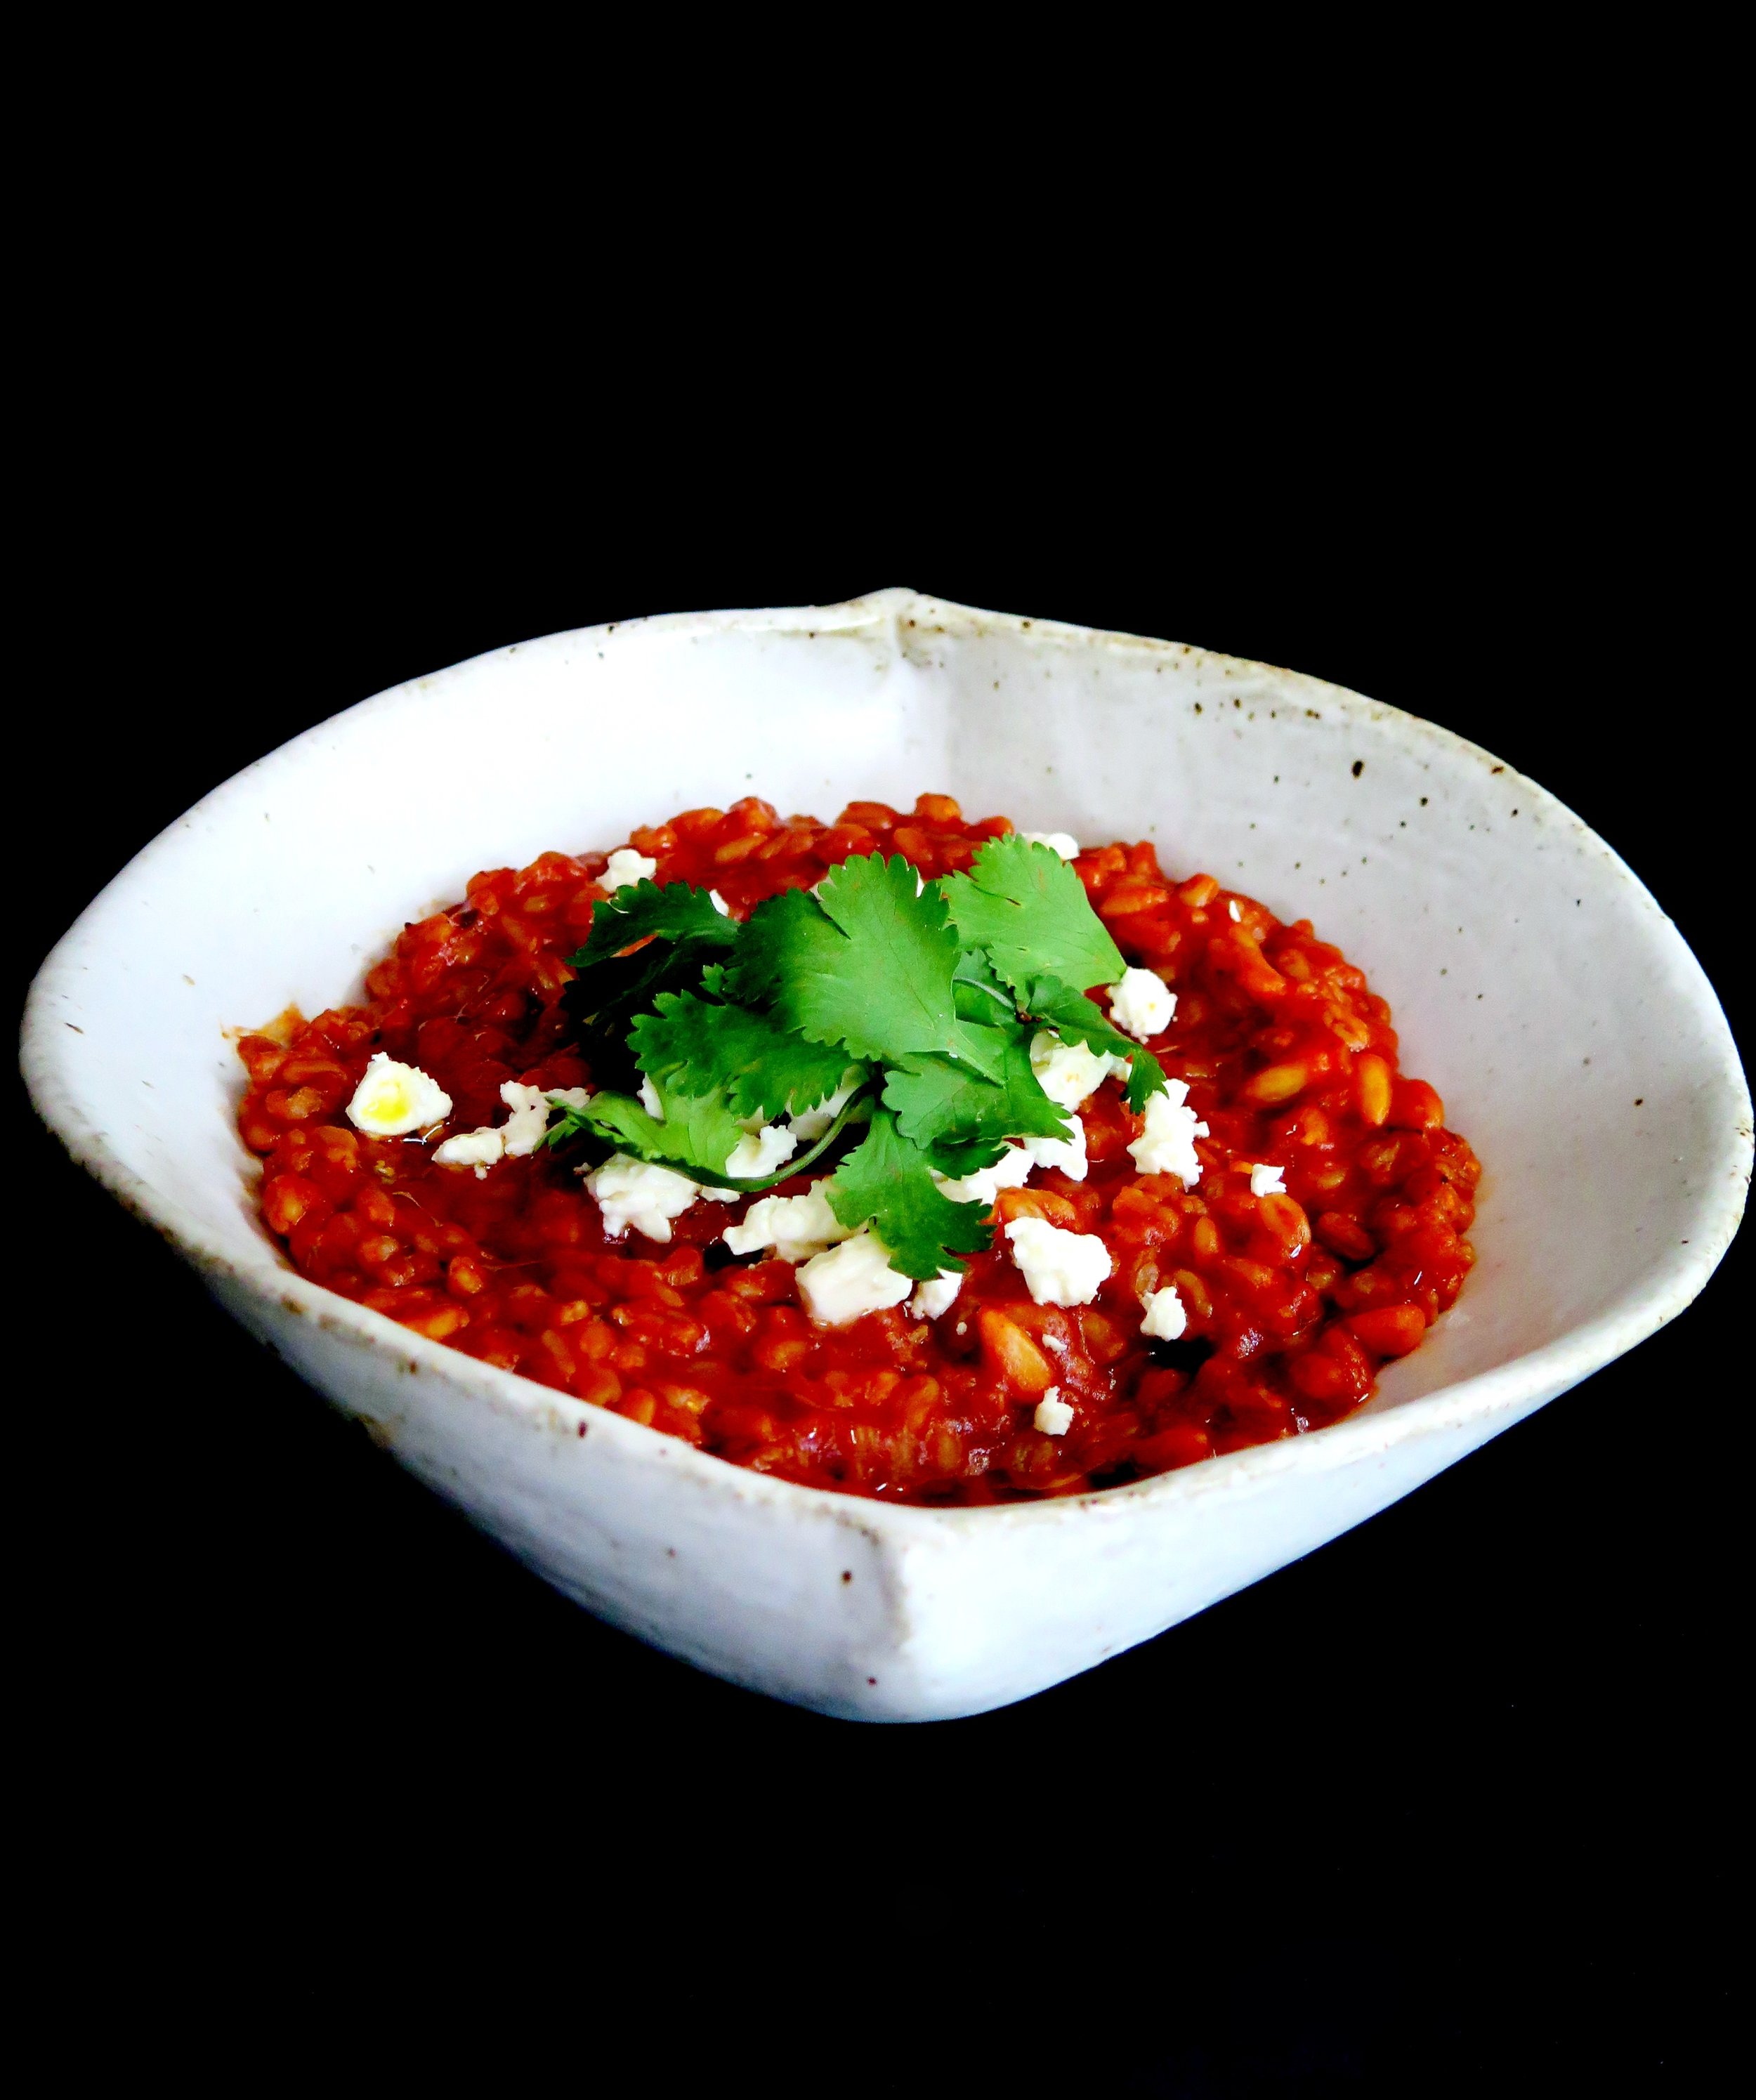
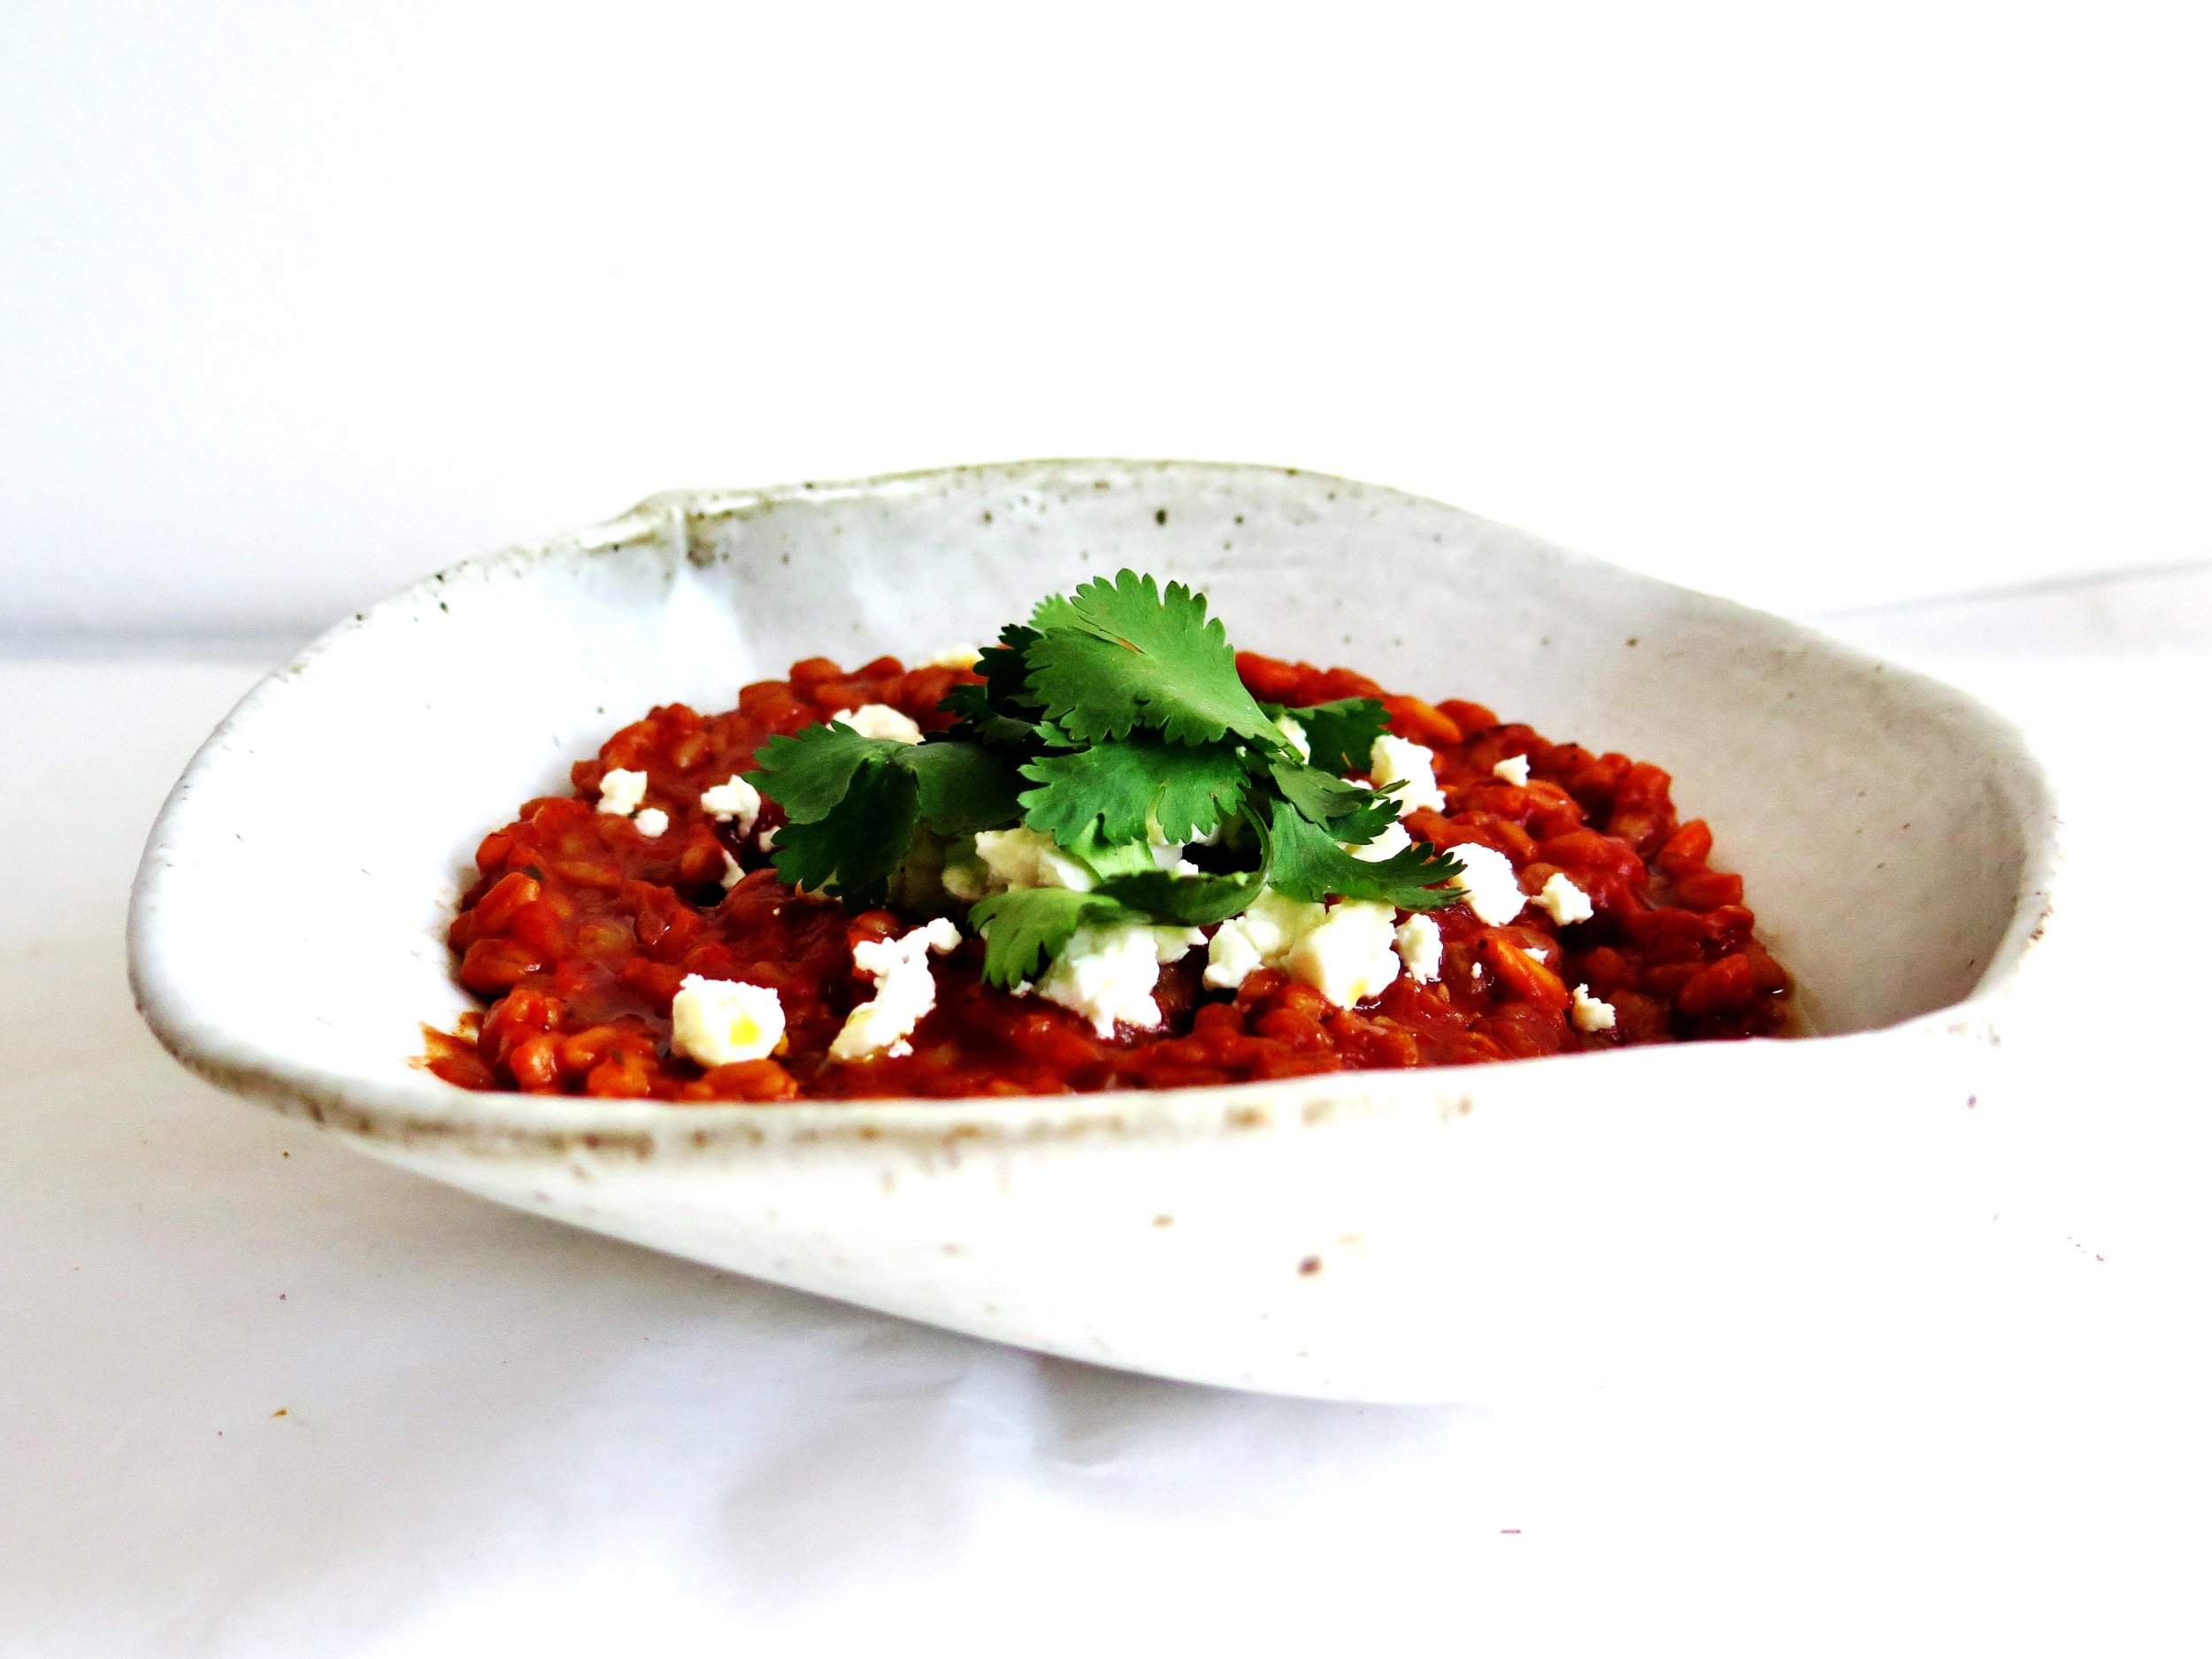
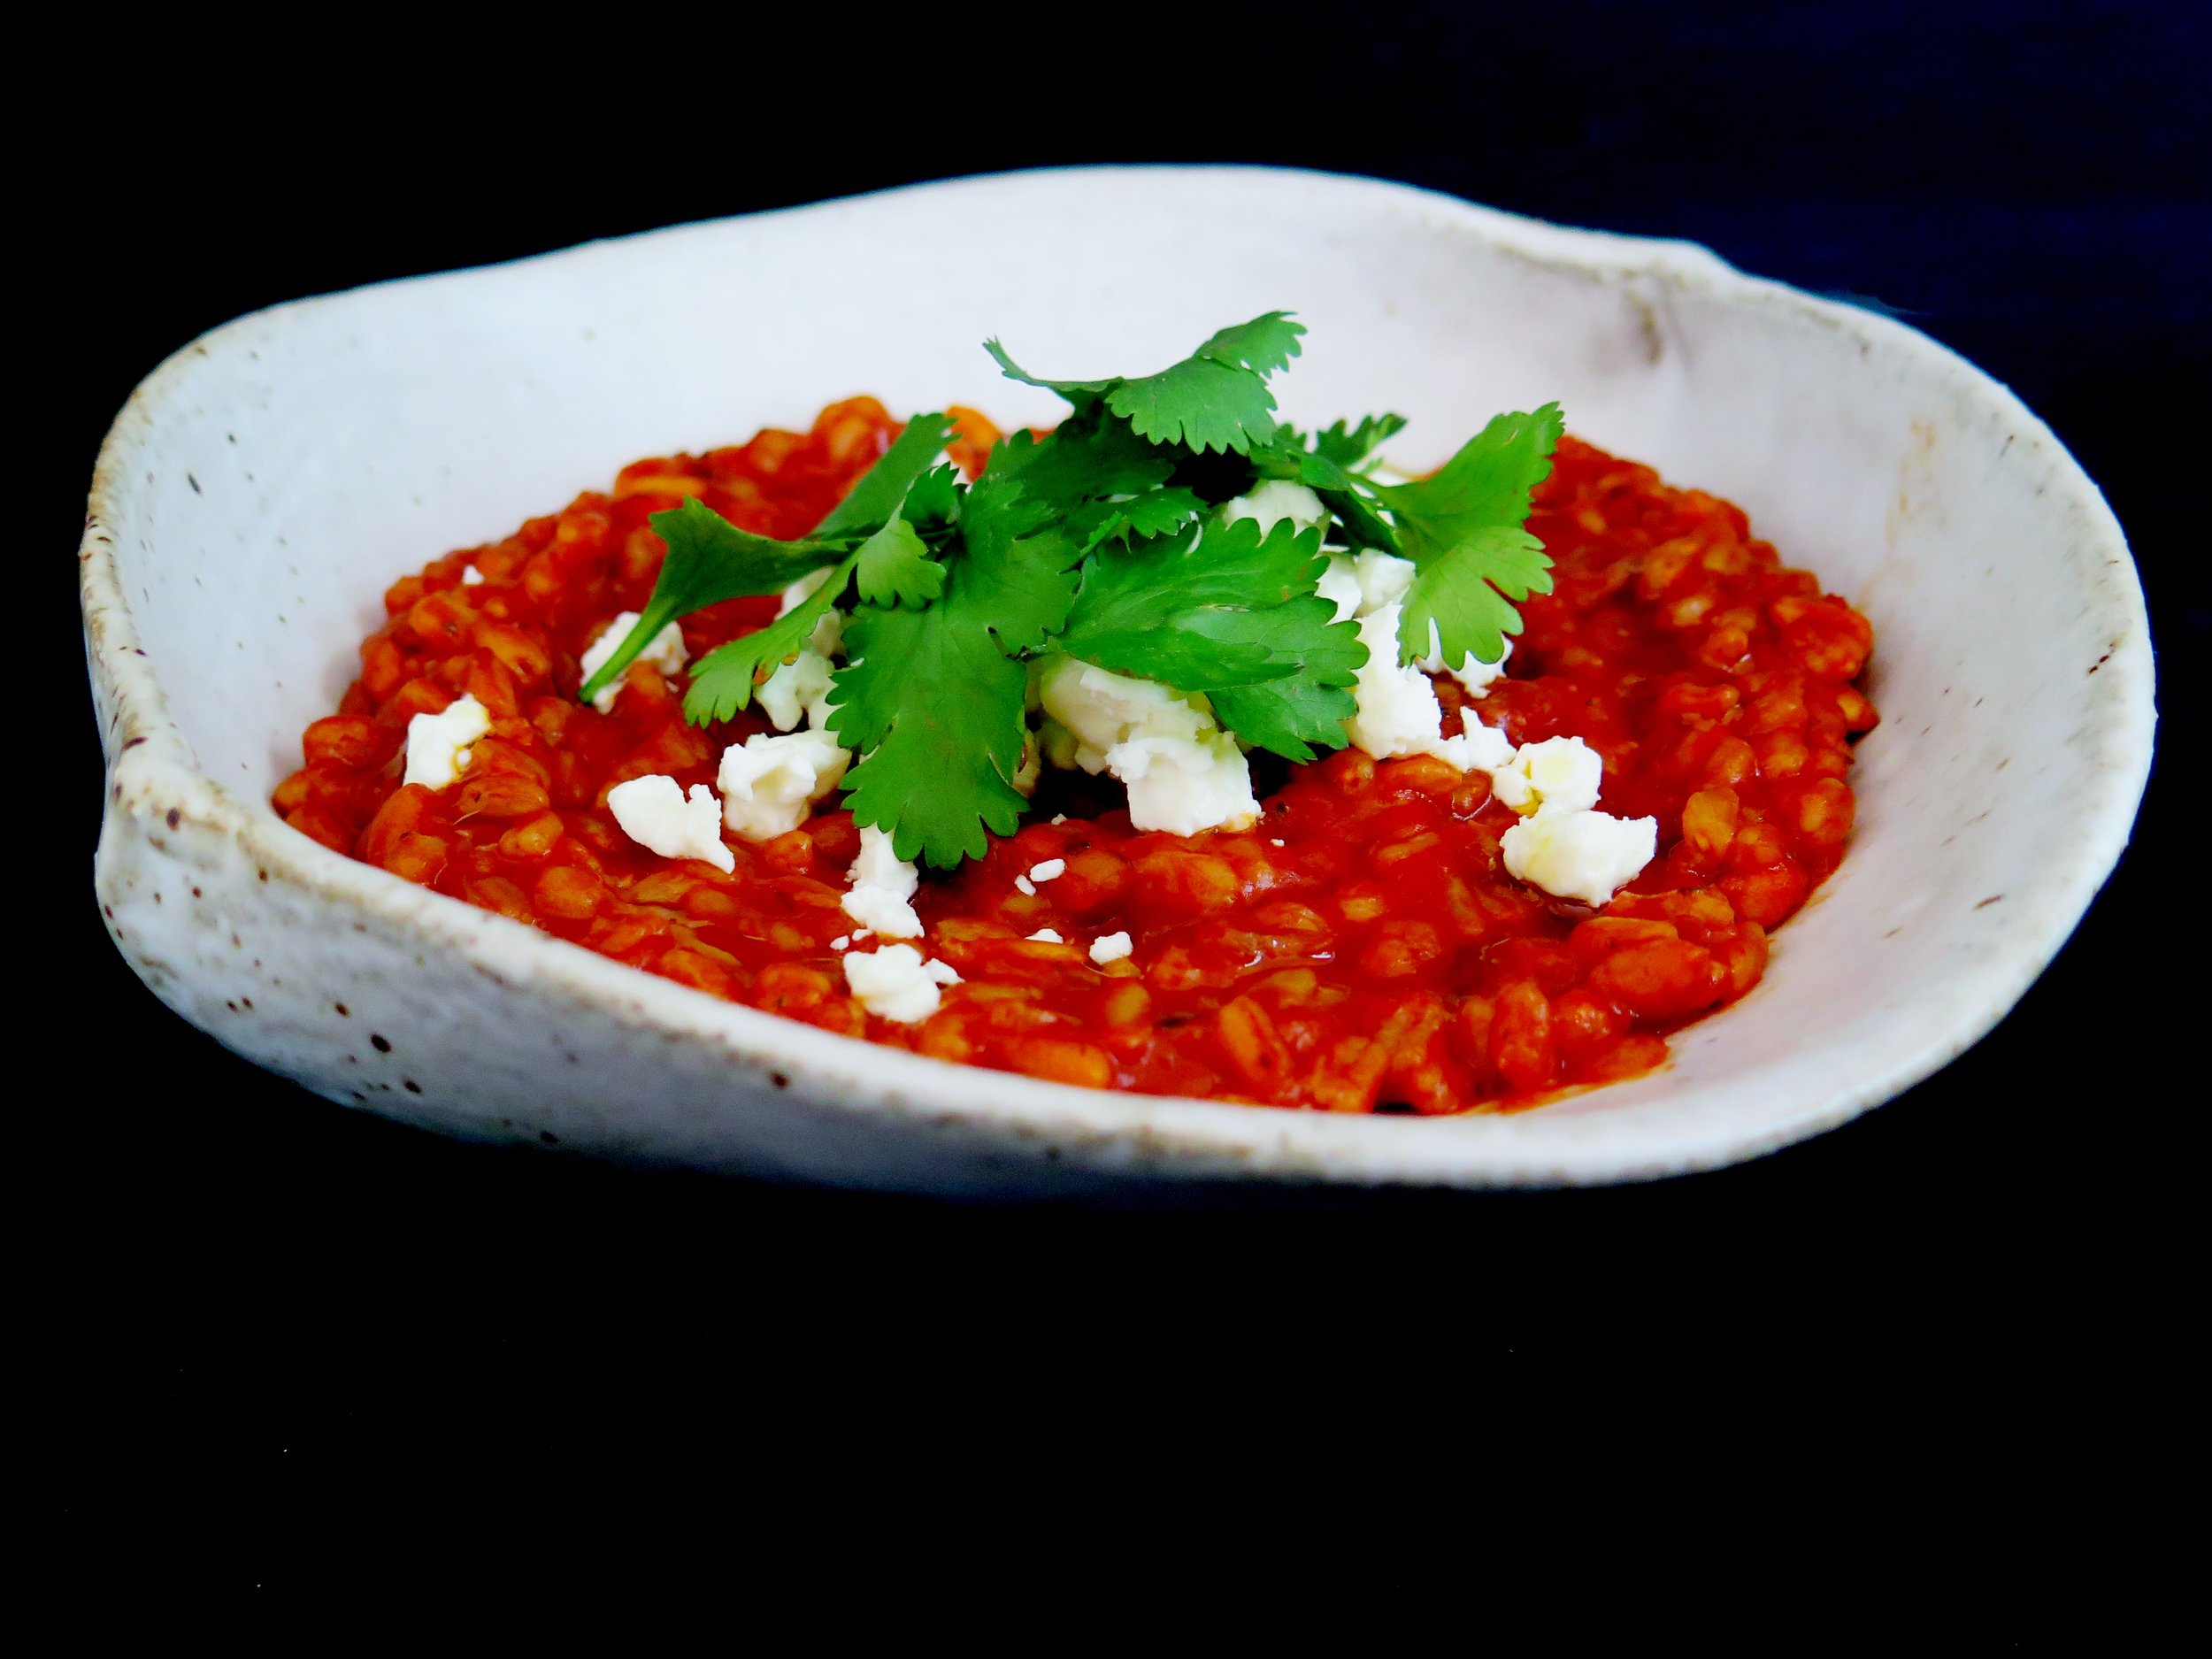
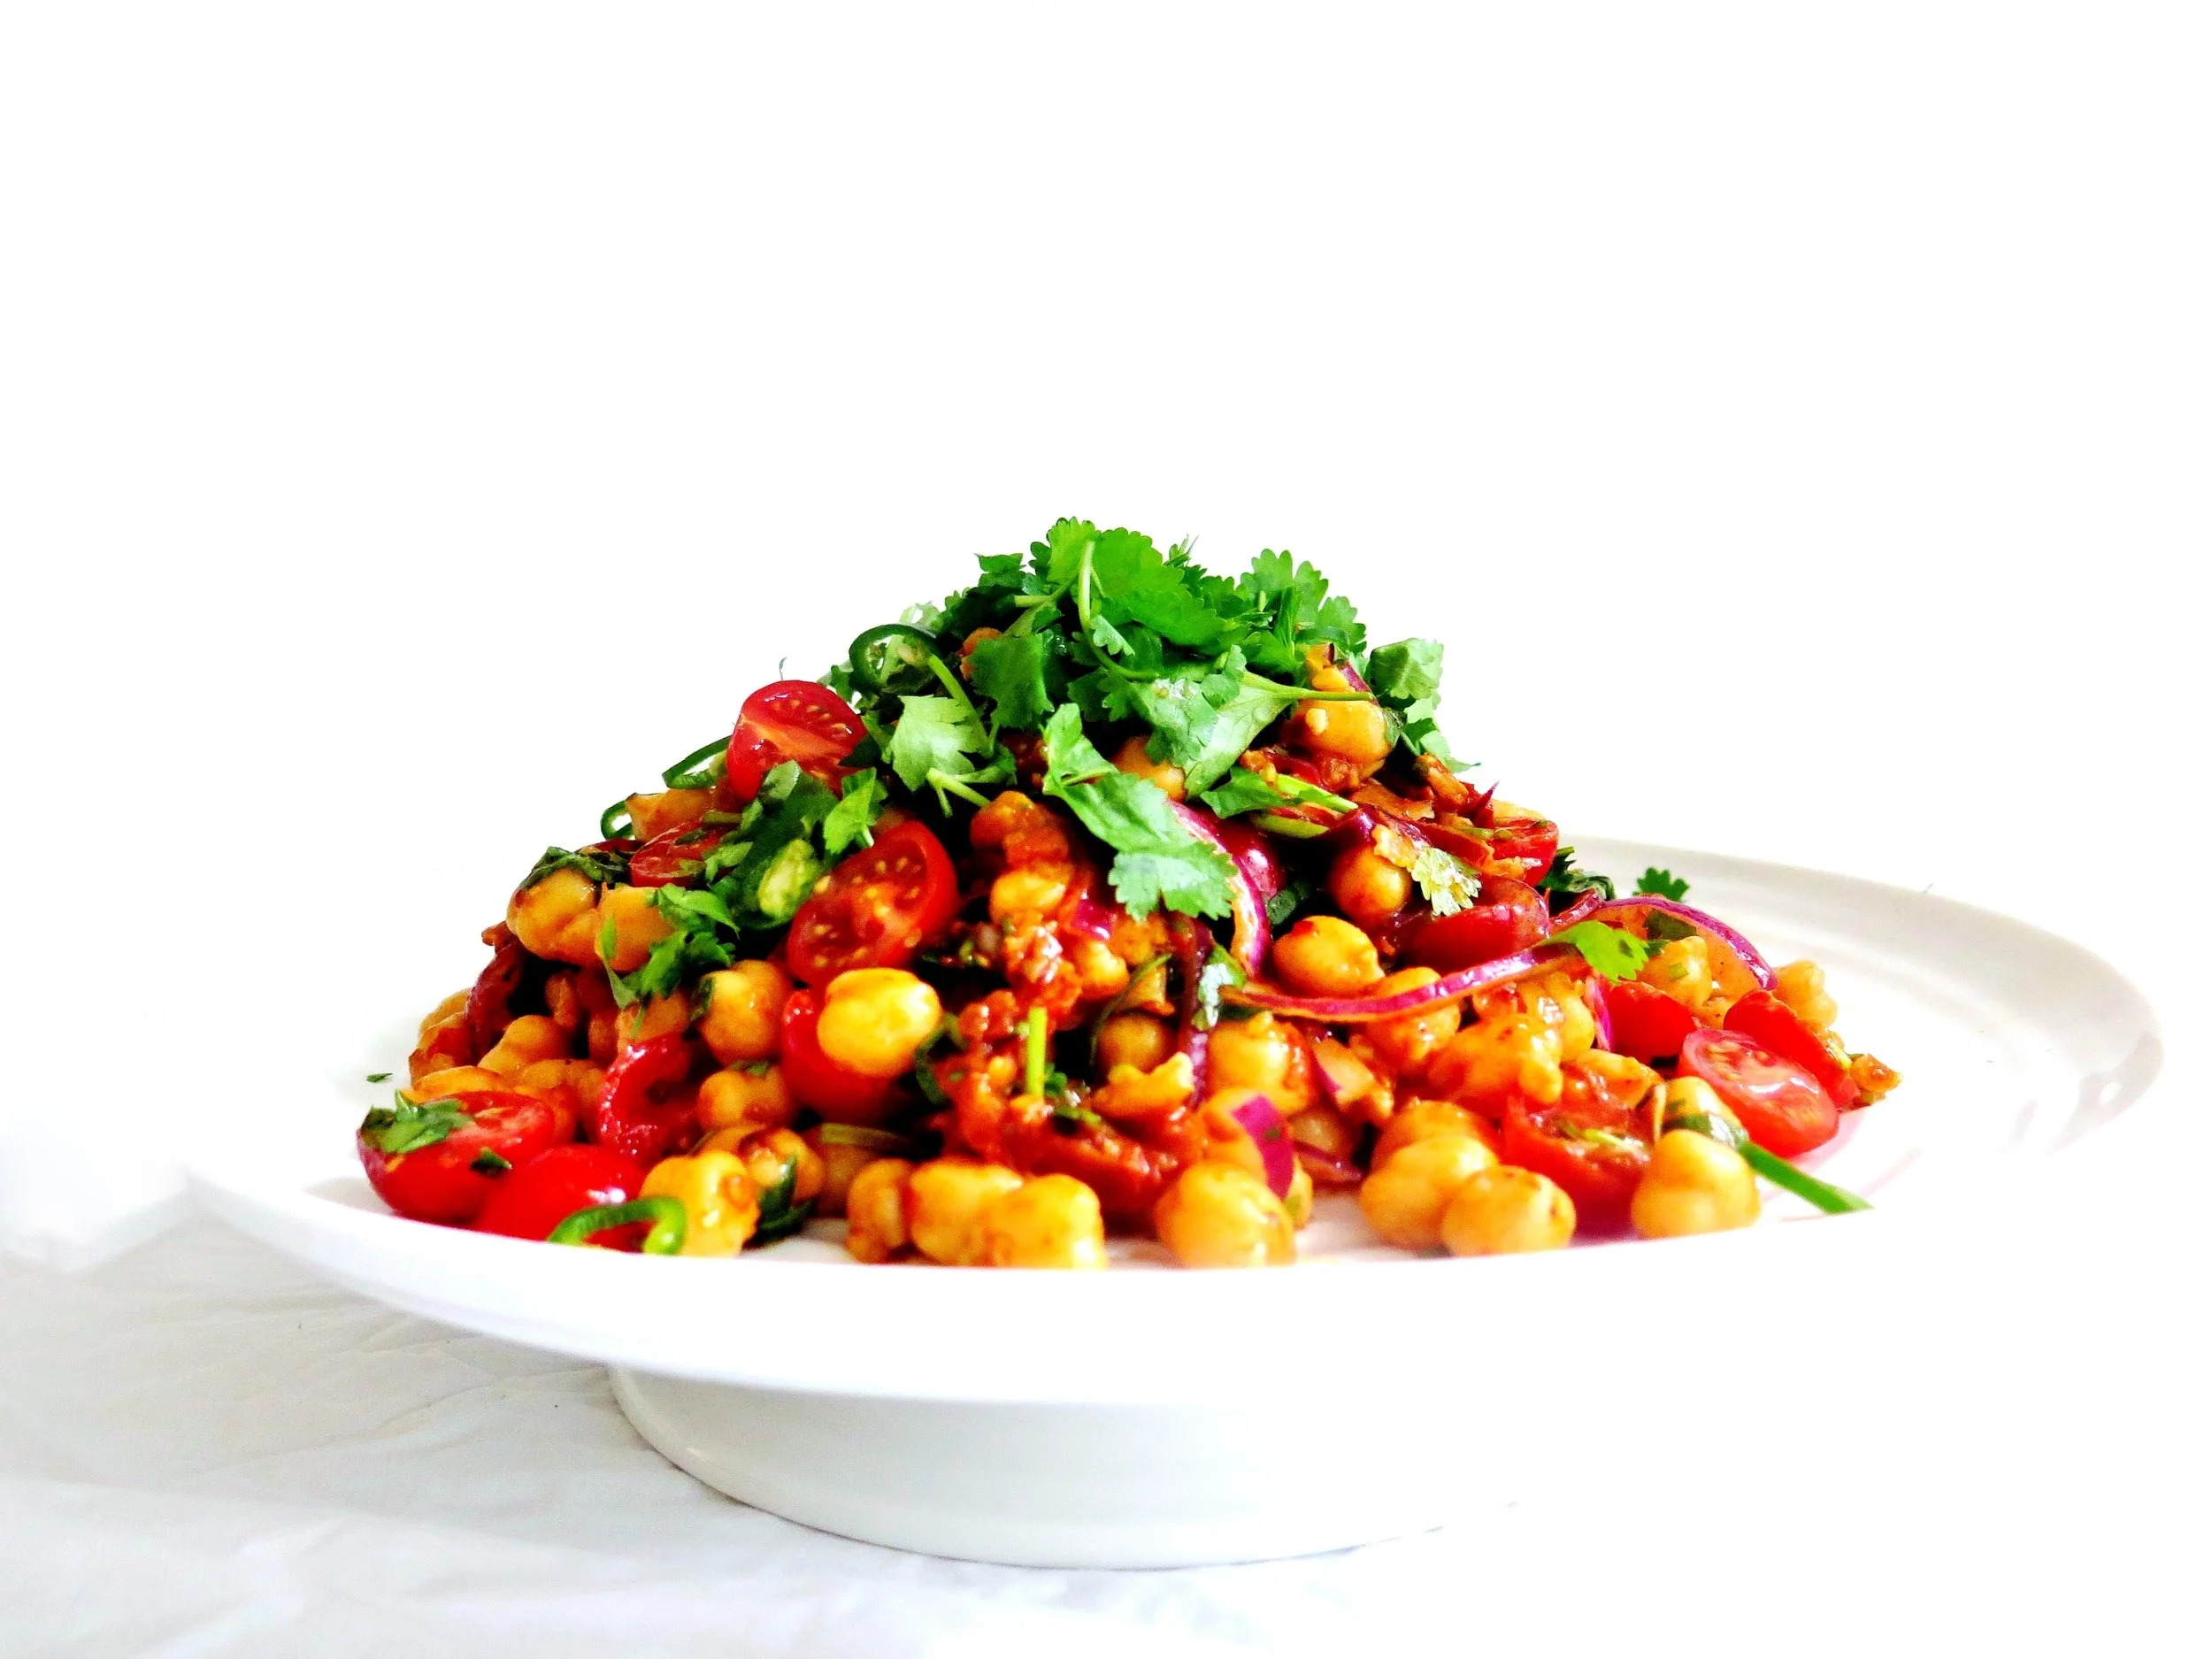
Viewing entries in
Main Courses

Feta, herb and barberry kuku

Comment

Feta, herb and barberry kuku

It’s suffused with herbs and umami spring onions, and laced with tongue-tingling sour barberries, sharp and salty feta, and warming toasted walnuts which add necessary texture. I add chilli, too, which means that every bite is an avalanche of flavour.

Kuku is high in protein, and basically carb-free (if that’s your thing), and really filling, too. I’ve adapted this one from a more traditional Persian recipe (where this dish originates).

Comment

Lemon Chilli Coriander Pesto Tagliatelle

Comment

Lemon Chilli Coriander Pesto Tagliatelle

This dish will set your palate alight: it's summery, zingy, citrusy, umami and outrageously moreish. It’s comfort food without the stodgy cheesiness or greasiness, and it’s ridiculously simple and quick to rustle up.

NB the pesto can be made a couple of days in advance and stored by placing in a bowl in the fridge and covering the surface with a thin layer of oil.

Comment

Mozzarella, Tomato & Basil Crostata

Comment

Mozzarella, Tomato & Basil Crostata

This is my favourite meal and has been since I was three – the precocious (and pretentious, no doubt) answer to my friends’ parents’ question as to my favourite food. Apart from the fact that there really isn’t anything fancy about it, it’s crazily simple to make. Despite being pastry-based and with a molten bed of mozzarella, it is very light, and perfect for a gathering.

Comment

Crunchy Spicy Tangy Thai Salad

Comment

Crunchy Spicy Tangy Thai Salad

At the centre of a party you have the brash, garishly dressed harpy in a spandex and lurex flesh-popping, bum-skirting bodycon dress. She’s swishing her long, over-straightened blonde hair in the hope that people, like magpies, will be drawn in by its glinting sheen. But she’s telling the story you’ve heard a hundred times.

The punchlines are obvious and overdone. It’s an opaque boast to show off her intellect and attractiveness. She’s hyperbolising, and the decibels are mounting, in order to suck more people in.

You draw near, but after a few superficial bites, you hit the bone. What appeared to be a sumptuous, resplendent, sticky chicken wing feast was just a scraggly bit of overhyped flesh, and you’re left with a sickly sweet taste, desperate for something more refreshing and with more interest.

That’s when you leave the centre of the room and go over to the quiet person in the corner: modestly dressed, elegant but not overstated, and initially slightly shy. But once you start talking, there’s no stopping - tantalising wit, layers of texture and depth, sweet enough but with refreshing zestiness that intrigues and keeps you going back for more. Guard this salad closely because when others' attention rapidly wanes they’ll be coming over here too. Food envy is not something to be treated lightly, so here’s the recipe:


Recipe

Ingredients (serves 4)

3 tbsp (60g) smooth peanut butter (unsalted preferably)

4 1/2 tsp (45g) honey

4 1/2 tsp sesame oil

4 1/2 tsp soy sauce 

3 tbsp lime juice

15g finely grated fresh ginger 

1 medium sized garlic clove, crushed

(optional) 1 small Thai red chilli, very finely chopped


230g red cabbage (approx 1 quarter of a cabbage)

1 red pepper

130g cucumber

3 spring onions

100g beansprouts

60g roasted and salted peanuts, crushed + 10g extra for serving

25g coriander, roughly chopped + 5g extra for serving


Method

  1. In a medium bowl, whisk together all the dressing ingredients until smooth and emulsified.
  2. Finely slice the cabbage horizontally (so the average piece is about 4cm long). Remove the stalk and deseed the red pepper, then slice finely horizontally.
  3. Slice the cucumber in half lengthways and, with a teaspoon, scoop out the seeds. Then slice finely lengthways and then in half horizontally to create matchsticks.  Finely chop the spring onions.  Then in a large bowl mix together the cabbage, pepper, cucumber, spring onions, crushed peanuts & roughly chopped coriander.
  4. Pour the dressing over, and mix through. Scatter with extra crushed peanuts and then the chopped coriander, and serve.  If you are making in advance, prepare the salad ingredients and dressing separately, and pour the dressing on just before serving.

HUNGRY FOR MORE?

Comment

Cauliflower & Quinoa Superfood Salad

2 Comments

Cauliflower & Quinoa Superfood Salad

IMG_2716.jpg

Cauliflower & Quinoa Superfood Salad  

Cauliflower & Quinoa Superfood SaladSuperfood

Line breaks: super|food

Pronunciation: /ˈsuːpəfuːd/

Culina definition: ‘superfoods’ – a marketing ploy term assigned to natural ingredients which have been neglected on shop shelves for a while and could do with a PR boost.  They have nutritional benefits similar to many other natural ingredients and have the potential to reduce the risk of disease if you consume at least your body weight in said superfood in under an hour.

Cauliflower & Quinoa Superfood Salad Cauliflower, pomegranate seeds, quinoa and walnuts have all ridden the calculated PR wave to health fame in the last few years, and indeed that is possibly why they have drifted on to my kitchen shelves.

Cauliflower & Quinoa Superfood Salad Ignoring their “superfood” status, they are particularly delicious when combined.

Cauliflower & Quinoa Superfood SaladThis salad sits at the other end of the spectrum from the straggly, limp green leaf type.

Cauliflower & Quinoa Superfood SaladIt is crunchy, sweet, umami, nutty, juicy, and looks resplendent studded with glistening pomegranate jewels.

Cauliflower & Quinoa Superfood SaladCauliflower & Quinoa Superfood Salad Cauliflower & Quinoa Superfood Salad Cauliflower & Quinoa Superfood SaladIt’s also ridiculously quick to whizz up and can be prepared up to a day in advance (sans dressing, and refrigerated).

Cauliflower & Quinoa Superfood Salad

Recipe

Ingredients

100g quinoa

220g cauliflower

180g pomegranate seeds (1 pomegranate approx.)

200g feta, crumbled

100g walnuts, toasted and roughly chopped

50g fresh coriander, finely chopped


Dressing

10g garlic, crushed

1 tsp salt

4 tbsp tahini

8 tbsp natural yogurt

6 tbsp lemon juice


Method

  1. In a medium sized pan boil 1 litre of water over a high heat. Pour in the quinoa and allow it to simmer for 10-15 minutes until the grains are translucent but still slightly al dente.  Drain the quinoa in a sieve and set it aside to cool.
  2. Chop the cauliflower roughly, and blitz in a blender, pulsing until it resembles coarse couscous. If you don’t have a blender, you can grate the cauliflower by hand to achieve a similar effect.
  3. In a large serving bowl, mix together the quinoa, cauliflower, pomegranate seeds, feta, walnuts and coriander.
  4. In a separate bowl, whisk together all the dressing ingredients to combine. Pour as much as desired of the dressing over the salad just before serving and mix it through.

Cauliflower & Quinoa Superfood Salad

2 Comments

Quick Asparagus & Parmesan Pizza

2 Comments

Quick Asparagus & Parmesan Pizza

IMG_2242.jpg

Quick Asparagus & Parmesan Pizza Pizza is in his DNA.  Five generations of golden, thin, crispiness. One recipe.

Quick Asparagus & Parmesan Pizza

The pizza oven is raging, rapidly devouring its feed of dry wood and spitting out sweet nutty smoke.

Quick Asparagus & Parmesan Pizza


He comes every summer in his Ape brimming with plump mushrooms of dough.

Quick Asparagus & Parmesan Pizza

A light sprinkle of flour on a wooden board, and he gets to work.

Quick Asparagus & Parmesan Pizza

With wrist flicks and little rotations the round becomes a disc, airborne momentarily to ensure evenness.

Quick Asparagus & Parmesan Pizza

A careful spiral of passata with the back of a spoon,

Quick Asparagus & Parmesan Pizza

a shower of mozzarella,

Quick Asparagus & Parmesan Pizza

and a scattering of whatever’s in the garden: fiori di zucchini, melanzane, pepperoncini…

Quick Asparagus & Parmesan Pizza

The flurry of flour continues into the night.

Quick Asparagus & Parmesan Pizza

The dinner table is a moderation-free zone.

Quick Asparagus & Parmesan Pizza

He only stops when even the strictest of eaters has lost count of the number of pizzas (not slices) he/she has consumed, and physical incapacity is the only limitation.

Quick Asparagus & Parmesan Pizza

He doesn’t even really stop there: a couple more are sent to the table per domani.

Quick Asparagus & Parmesan Pizza

A pizza “hangover” ensues along with the inevitable promises of “never again” “not for another year”.

Quick Asparagus & Parmesan Pizza

But as soon as I hit London soil again I want to relieve that pizza-lover’s fantasy and so I make these.

Quick Asparagus & Parmesan Pizza

They’re crisp, thin, verdant, and fresh.

Quick Asparagus & Parmesan Pizza

I don’t believe in barren crusts or meanness so the ingredients are abundant and go right up to and beyond the edge of the base.

Quick Asparagus & Parmesan Pizza

I use spelt instead of plain flour (as usual) to reduce the GI level and add a nuttier more complex flavour to the dough.

Quick Asparagus & Parmesan Pizza

The added bonus of this recipe is that it is ridiculously quick.  Kneading is kept to a minimum (5 minutes) and the rising time is the shortest you’ll ever find for pizza dough – ½ hour.

Quick Asparagus & Parmesan Pizza

The balsamic-maple reduction is optional but I include it to add extra caramelised sweetness, extra tang and a touch of drama.

Quick Asparagus & Parmesan Pizza

Quick Asparagus & Parmesan Pizza

Quick Asparagus & Parmesan Pizza


Ingredients – makes 4 pizzas

Base

250ml warm water

3 tsp dried yeast (fast active yeast)

500g white spelt flour

1 ½ tsp salt

1 tbsp olive oil


Topping

750g asparagus

30g garlic cloves, peeled and crushed

1 tbsp olive oil

1 1/4 tsp salt

Grated zest of ½ lemon

A few grinds of Pepper

400g mozzarella (4 balls), chopped finely into cubes

100g parmesan, grated

3 spring onions, thinly sliced

Small bunch of chives, finely chopped

2 red chillies (optional), finely sliced


2 large baking trays or 4 medium baking trays, greased and dusted with flour


Maple Balsamic Reduction (optional)

120ml balsamic vinegar

2 tsp maple syrup


Method

  1. Heat oven to 120˚C for 5 minutes then switch it off.
  2. In the bowl of a mixer (or large bowl if making by hand) pour in warm water and sprinkle yeast over it. Allow to stand for 5 minutes for the yeast to activate.
  3. Stir in flour, salt and oil. Knead by hand for 5 minutes on a lightly floured surface, or in a machine fitted with a dough hook for 5 minutes until the dough is smooth and when you press your thumb into it, it bounces back up.
  4. Divide dough into two and place each half in a lightly oiled bowl. Cover with cling film and place in warmed oven.  Allow to rise for 30 minutes or until doubled, then remove from oven and preheat it to its highest temperature, usually 250˚C.
  5. While the dough is rising, use a vegetable peeler to shave the asparagus: place the asparagus flat on a surface, and holding it at the woody end, shave it from above the woody end to the top of the spear. I sometimes use the ends to make a stock for asparagus risotto.
  6. Place the ribbons in a bowl and mix with garlic, oil, salt, lemon zest and pepper.
  7. Once risen, divide each half into two and roll out each quarter into a 0.5cm thick disc. Place on tray and scatter each disc with mozzarella, parmesan, and shaved asparagus.  Bake in oven for 15-20 minutes until golden and bubbling.
  8. Once baked, scatter with spring onions, chives, and chillies, if using. Drizzle with balsamic reduction, if desired, and serve immediately.


Maple Balsamic reduction

  1. Boil balsamic and maple syrup together over a high heat for about 5 minutes until it thickens slightly to consistency more like that of pure maple syrup. Allow to cool for 1 minute, and drizzle over pizzas.

Quick Asparagus & Parmesan Pizza

Adapted from The Smitten Kitchen Cookbook

2 Comments

Sticky Glazed Carrot, Pomegranate, Orange, Lentil & Feta Salad

8 Comments

Sticky Glazed Carrot, Pomegranate, Orange, Lentil & Feta Salad

IMG_8334.jpg

I wandered into my favourite greengrocer yesterday in search of inspiration, and came out laden with half the store.  Amongst the wooden crates I found the most beautifully vibrant baby carrots and blushing, freckled pomegranate orb.

Sticky Glazed Carrot, Pomegranate, Orange, Lentil & Feta Salad - Recipe

Although lentils and carrots are usually associated with comfort and winter, I used fresh orange and pomegranate jewels to lift them to a lighter, more summery dish.

The carrots are poached in orange juice and maple syrup until juicy and softened and the liquid has reduced to a golden caramel.  They are then roasted until sticky, slightly charred and a little withered, but dense with succulence and depth of flavour. The caramel is turned into a citrusy dressing to drench the lentils, with the sweetness balanced with the salty kick of feta.

Sticky Glazed Carrot, Pomegranate, Orange, Lentil & Feta Salad - Recipe

Ingredients

200g puy lentils

2 tsp vegetable bouillon stock

1 litre boiling water

400g baby carrots

Juice of 3 oranges (15 tbsp)

5 tbsp maple syrup

¼ tsp salt

2 tbsp olive oil

1 ½ tsp lemon juice

1 tbsp pomegranate molasses

¼ tsp salt

2 large garlic cloves, crushed

2 oranges supremed (i.e. segmented with skin and membrane removed)

100g feta

140g pomegranate seeds (half a pomegranate)

20g fresh coriander, roughly chopped

Method

  1. Place lentils, stock and boiling water in a pan over a high heat and allow to simmer with a lid on for 30-35 minutes until fully cooked. They should be soft and no longer chalky, but definitely not mushy.  Drain them, and set aside in a bowl to cool.
  2. While the lentils are cooking, prepare the carrots: pour the orange juice into a large frying pan over a medium high heat, add the maple syrup and salt, and stir to combine. Carefully arrange the carrots in the pan and allow to simmer for about 30 minutes or until the carrots have softened and the liquid has reduced by about two thirds and become viscous and syrupy.  Remove from the heat.
  3. Preheat the grill to 230˚C. Remove the carrots from the frying pan (while preserving the syrup), arrange them on a baking tray and grill for 5 minutes (checking after 3 minutes) or until they are slightly charred.
  4. Into the pan with the remaining syrup, pour in the olive oil, pomegranate molasses, lemon juice, crushed garlic cloves and salt to make the dressing. Stir the mixture over a low heat until fully combined. Pour the warmed dressing over the bowl of lentils.
  5. To serve, carefully spoon the lentils and any non-absorbed dressing on to a platter, and scatter with pomegranate seeds and crumbled feta. Arrange the orange segments and roasted carrots over the top, and sprinkle with the chopped coriander.
Sticky Glazed Carrot, Pomegranate, Orange, Lentil & Feta Salad - Recipe

HUNGRY FOR MORE?

8 Comments

Smoky Tomato & Garlic Spelt Risotto with Crumbled Feta - Recipe

Comment

Smoky Tomato & Garlic Spelt Risotto with Crumbled Feta - Recipe

IMG_4134.jpg

Smoky tomato and garlic spelt risotto with crumbled feta and pine nuts In MasterChef Australia (I’m not a fan of the British version) risotto is known as the “death dish”.  The judges groan whenever a contestant confesses that he/she will be serving it.  And quite rightly so, as the results are invariably sludgy, glutinous, crunchy, solid, watery, bland, or resembling something a woman in Ancient Rome might have used as a face pack.

Smoky tomato and garlic spelt risotto with crumbled feta and pine nuts


It is often also the go-to dish for restaurants under pressure to include a vegetarian dish in their repertoire, and this is often disappointing, too, for two reasons:

1.) All too often it becomes a stodgy double cream and rice porridge. In a traditional risotto recipe there is no cream – the creaminess is achieved through breaking down the starch by stirring the grains with a good quality stock.  And no, this isn’t difficult at all.  Don’t believe the hype surrounding the pitfalls; it is really a very simple dish to perfect.

Smoky tomato and garlic spelt risotto with crumbled feta and pine nuts

2.) In some unwritten chef rulebook there exists the heinous concept that risotto can only be married to butternut squash or mushrooms. It’s not that I dislike either of these, but that I’m just crying out for some more original combination.

Smoky tomato and garlic spelt risotto with crumbled feta and pine nuts

Risotto doesn’t have to be made with rice either.  I use spelt (or farro) instead for numerous reasons: it has a lower GI, has a nuttier flavour, and has a more interesting texture.  It’s also a hundred times easier to cook well. Obviously, it isn’t strictly ‘risotto’, but the idea is similar.

Smoky tomato and garlic spelt risotto with crumbled feta and pine nuts

Ingredients

1 tbsp olive oil

1 tbsp butter (15g)

2 medium onions, finely chopped

25g (about 8 cloves) garlic, crushed

2 tbsp sundried tomato paste

2 tsp sugar

2 tsp balsamic vinegar

1 tsp thyme (fresh or dried)

½ tsp chilli flakes

Grated zest of ½ lemon

¾ tsp smoked paprika

500g passata

250g pearled spelt (or farro)

750ml boiling water

3 tsp vegetable stock

80g toasted pine nuts

1 tsp lemon juice

100g feta

Handful of coriander, to serve

(Serves 4)


Method

  1. In a large pot, melt together the butter and oil. Add in the finely chopped onions and garlic, and cook over medium/high heat until the onions are soft and translucent.
  2. Stir in the sundried tomato paste, sugar, balsamic vinegar, thyme, chilli flakes, lemon zest, smoked paprika and a pinch of salt. Cook ingredients together for a couple of minutes.
  3. In a bowl, dissolve the stock in the boiling water, then pour roughly 250ml of this, together with the passata and spelt into the pot, and stir together on a medium heat.
  4. Stir every now then to prevent the spelt from sticking, and add the rest of the water, a ladleful at a time, at roughly 10 minute intervals.
  5. After 40-50 minutes, remove from the heat, stir in toasted pine nuts and lemon juice and season according to taste. The spelt grains should be soft all the way through with no chalkiness, and with some texture remaining.  Most of the water should have been absorbed or evaporated so the consistency is thicker than that of a soup, without being solid, and not thin enough to pour.
  6. To serve, crumble the feta over the top and scatter with coriander.

Smoky tomato and garlic spelt risotto with crumbled feta and pine nuts


Comment

Crispy molten goat’s cheese with caramelised, thyme-infused maple balsamic and toasted hazelnuts

4 Comments

Crispy molten goat’s cheese with caramelised, thyme-infused maple balsamic and toasted hazelnuts

IMG_9628.jpg

Crispy molten goat’s cheese with caramelised, thyme-infused maple balsamic and toasted hazelnuts  

I’ve unfortunately inherited a trait from my maternal grandfather’s family.  If a type of food appealed particularly to her palate, my great aunt would go all out.  A slender and statuesque woman, she was known to devour eight-egg omelettes.  This was followed by an extended fast.  My grandfather had a particular penchant for icing: no cake was safe.

Crispy molten goat’s cheese with caramelised, thyme-infused maple balsamic and toasted hazelnuts 

My grandmother would often return home to find the once painstakingly iced cake denuded, perfectly, as if the precision of the stripping technique would make up for the action.  An entire crate of guavas went his way in one sitting, and his cupboard of chocolates had to be locked by him against himself.

Crispy molten goat’s cheese with caramelised, thyme-infused maple balsamic and toasted hazelnuts

Signs of this inherited characteristic were evident in me early on: for example, when I was seven, the target was a log of Chèvre which my mother had carelessly left unwrapped.  I gorged though the rind, through the crumbly outer ring, right to its buttery heart until the waxy wrapping lay completely bare.

Crispy molten goat’s cheese with caramelised, thyme-infused maple balsamic and toasted hazelnuts

The Erysichthon gene (see below) is a curse, and one not to be made light of.  It strikes, making foods seem so ambrosial to the cursed that consuming them becomes his or her sole focus.


Crispy molten goat’s cheese with caramelised, thyme-infused maple balsamic and toasted hazelnuts

But with the pleasure comes pain, because with the claws of the curse firmly embedded, one is forced to keep eating until what was once a source of unparalleled edible pleasure becomes one’s nemesis.  The scent, sometimes the very thought, of the offending food makes bile rise in my throat.  The only cure is time.

Crispy molten goat’s cheese with caramelised, thyme-infused maple balsamic and toasted hazelnuts

It has taken me fourteen years and one particularly outstanding meal to normalise my relationship with goat’s cheese.  I went to Rabbit (review to ensue shortly) which won me over with a beetroot crisp, topped with whipped goat’s cheese, honey comb and marjoram.  My knee-jerk reaction was to buy the recipe book of The Shed, Rabbit’s sister restaurant (on Amazon Prime - it was urgent).


Crispy molten goat’s cheese with caramelised, thyme-infused maple balsamic and toasted hazelnuts

With freshly unearthed enthusiasm for goat’s cheese, I pored over the book and found inspiration for this recipe.  It works wonderfully as a starter or cheese course.

Crispy molten goat’s cheese with caramelised, thyme-infused maple balsamic and toasted hazelnuts

Crispy molten goat’s cheese with caramelised, thyme-infused maple balsamic and toasted hazelnuts

Crispy molten goat’s cheese with caramelised, thyme-infused maple balsamic and toasted hazelnuts  

The pan frying makes the Chèvre golden and crisp on the outside, and gloriously molten on the inside.  The balsamic vinegar and maple syrup caramelise together to form a sweet and sharp treacle which cuts through the saltiness and creaminess of the Chèvre, while the toasted hazelnuts add warmth and texture, and the thyme just leaves you coming back for more…and more…and more…

Crispy molten goat’s cheese with caramelised, thyme-infused maple balsamic and toasted hazelnuts        

Crispy molten goat’s cheese with caramelised, thyme-infused maple balsamic and toasted hazelnuts


Ovid’s tale of King Erysichthon portrays him hubristically killing a nymph of Ceres, goddess of the harvest. His punishment was insatiable hunger which resulted in exhausting the wealth of his kingdom, selling his own daughter in exchange for food, and eventually devouring himself.  Maybe there’s a lesson here for me. Click here for the whole tale, one of the best in the Metamorphoses (line 741-887).

Crispy molten goat’s cheese with caramelised, thyme-infused maple balsamic and toasted hazelnuts   

Crispy molten goat’s cheese with caramelised, thyme-infused maple balsamic and toasted hazelnuts Crispy molten goat’s cheese with caramelised, thyme-infused maple balsamic and toasted hazelnuts                  

Crispy molten goat’s cheese with caramelised, thyme-infused maple balsamic and toasted hazelnuts

Crispy molten goat’s cheese with caramelised, thyme-infused maple balsamic and toasted hazelnuts

Ingredients

300g log of Chevre goat’s cheese

2/3 tbsp Rapeseed oil (or enough to coat the bottom of a medium-sized non-stick frying pan)

100g hazelnuts (blanched if possible)

180ml balsamic vinegar

120ml maple syrup

60g unsalted butter

½ tsp salt

3 sprigs fresh thyme + 3 to sprinkle + 6 to serve

Serves 6 as a starter or cheese course

Method

  1. Preheat an oven to 200˚C. Gently crush the hazelnuts into halves either in a pestle and mortar or place in a bag and whack with a rolling pin.
  2. Place crushed hazelnuts on a baking tray and allow them to toast in the oven for 5 minutes or until golden.
  3. Set a small pan over a high heat and pour in balsamic, maple syrup, butter, salt, the leaves of the 3 sprigs of thyme and the toasted hazelnuts. Once it begins to boil reduce heat to a low temperature and allow to simmer while you cook the goat’s cheese.
  4. Place a medium sized non-stick frying pan over a high heat and pour in the rapeseed oil and allow it to heat for half a minute. Cut off the rind covered ends of the goat’s cheese and slice the log into 12 discs. Place these carefully into the pan and fry on medium-high heat for 2 minutes on each side or until crisp and golden.  Remove from heat and place two slices on each plate to serve.
  5. After 5 minutes simmering, the sauce ingredients should now have emulsified and turned more viscose (it will thicken further as it begins to cool). If it hasn’t reached this stage, turn up the heat and stir until glossy.  Beware of over boiling it as it will turn to a jam like texture.  You can retrieve it from this stage by thinning it with a few drops of balsamic.
  6. Drizzle the warm sauce over the hot goat’s cheese. Sprinkle with the leaves of the other 3 sprigs of thyme and then place one whole sprig over each portion to decorate.

Crispy molten goat’s cheese with caramelised, thyme-infused maple balsamic and toasted hazelnuts


4 Comments

Beware Gluten-free + Recipe for Moroccan Style Chickpea Salad

3 Comments

Beware Gluten-free + Recipe for Moroccan Style Chickpea Salad

IMG_65821.jpg
IMG_65821.jpg
Moroccan Chickpea Salad

Yesterday, with cupboards almost bare, I resorted to the very strange assortment of ingredients remaining & concocted this salad.  It's low GI, wholesome, healthy, super quick to make, involves minimal cooking and is addictively flavoursome.

Moroccan Chickpea Salad

Ingredients

250g halloumi cheese cut into 1 cm cubes

1 tbsp. olive oil

400g chickpeas, drained

1 red onion, finely sliced

50g drained, sundried tomatoes, cut into narrow strips

150g cherry tomatoes, halved

40g fresh coriander, including stalks, finely chopped, plus a few sprigs extra for garnish

½ green chilli, finely sliced (optional)

Dressing

3 tbsp. lemon juice

2 tbsp. harissa

3 tsp. sundried tomato paste

2 cloves garlic, crushed

Freshly ground black pepper

Method

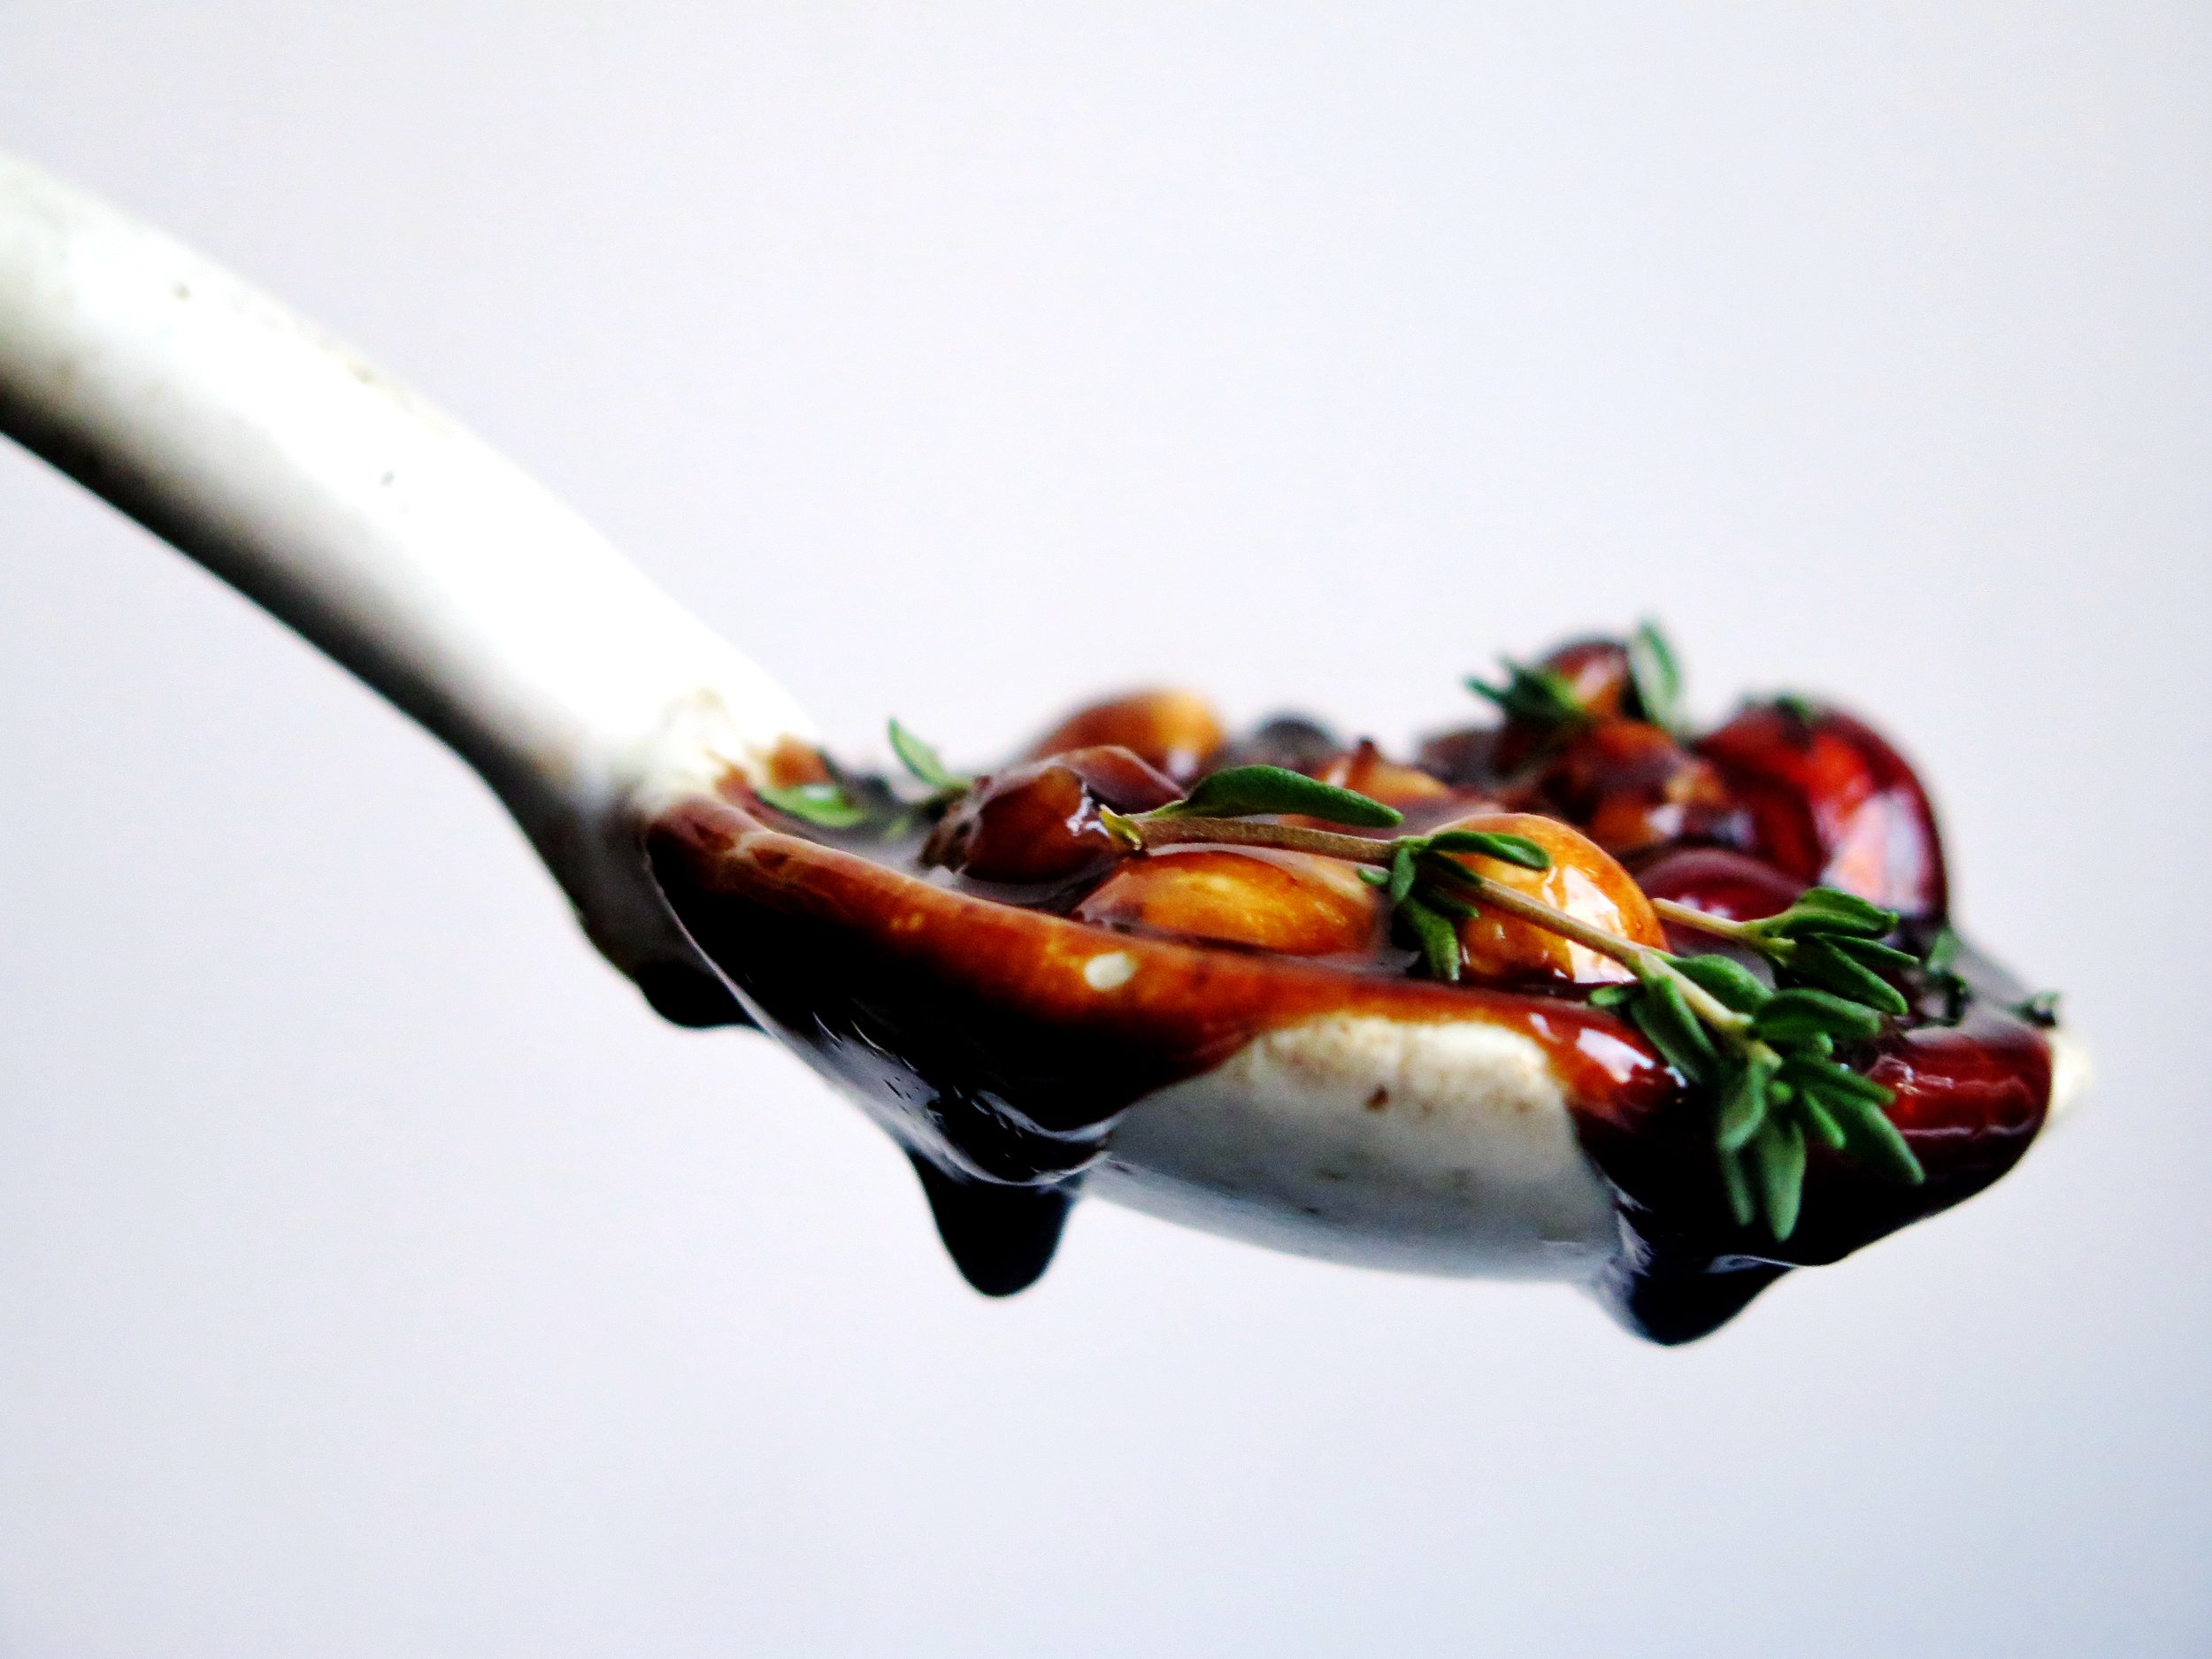
  1. Fry the cubes of halloumi in the olive oil until they are golden brown.
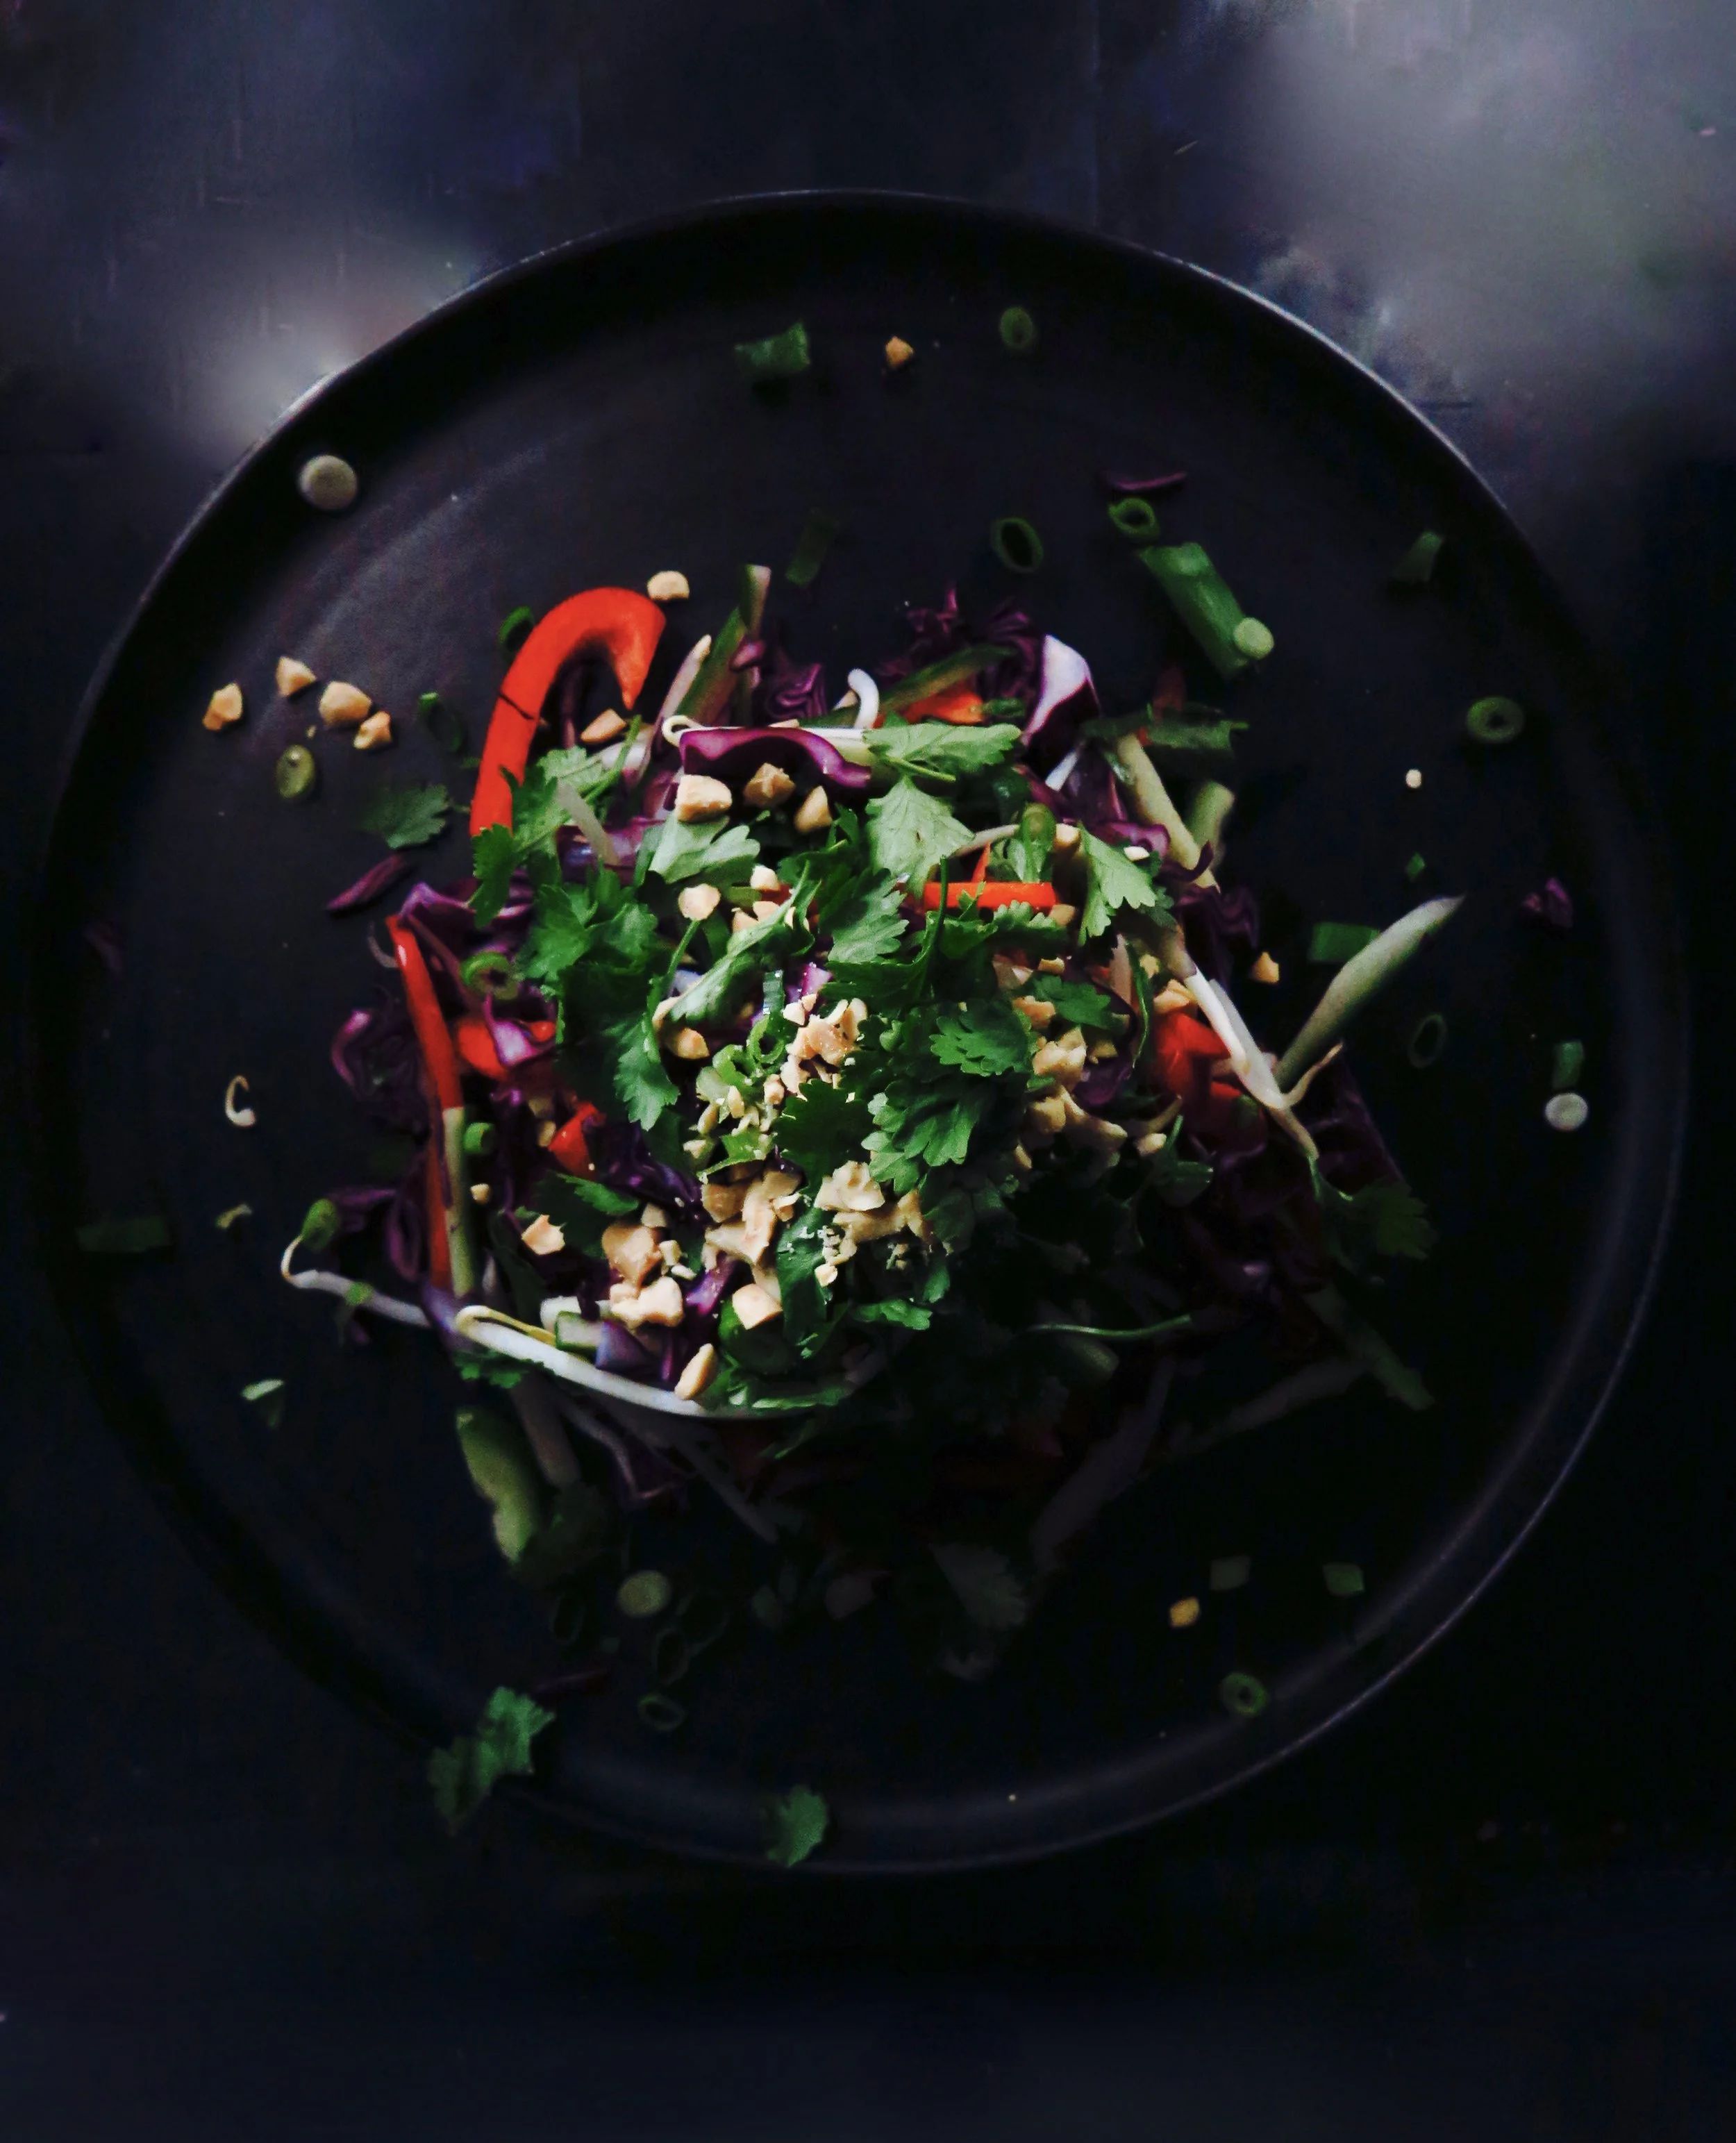
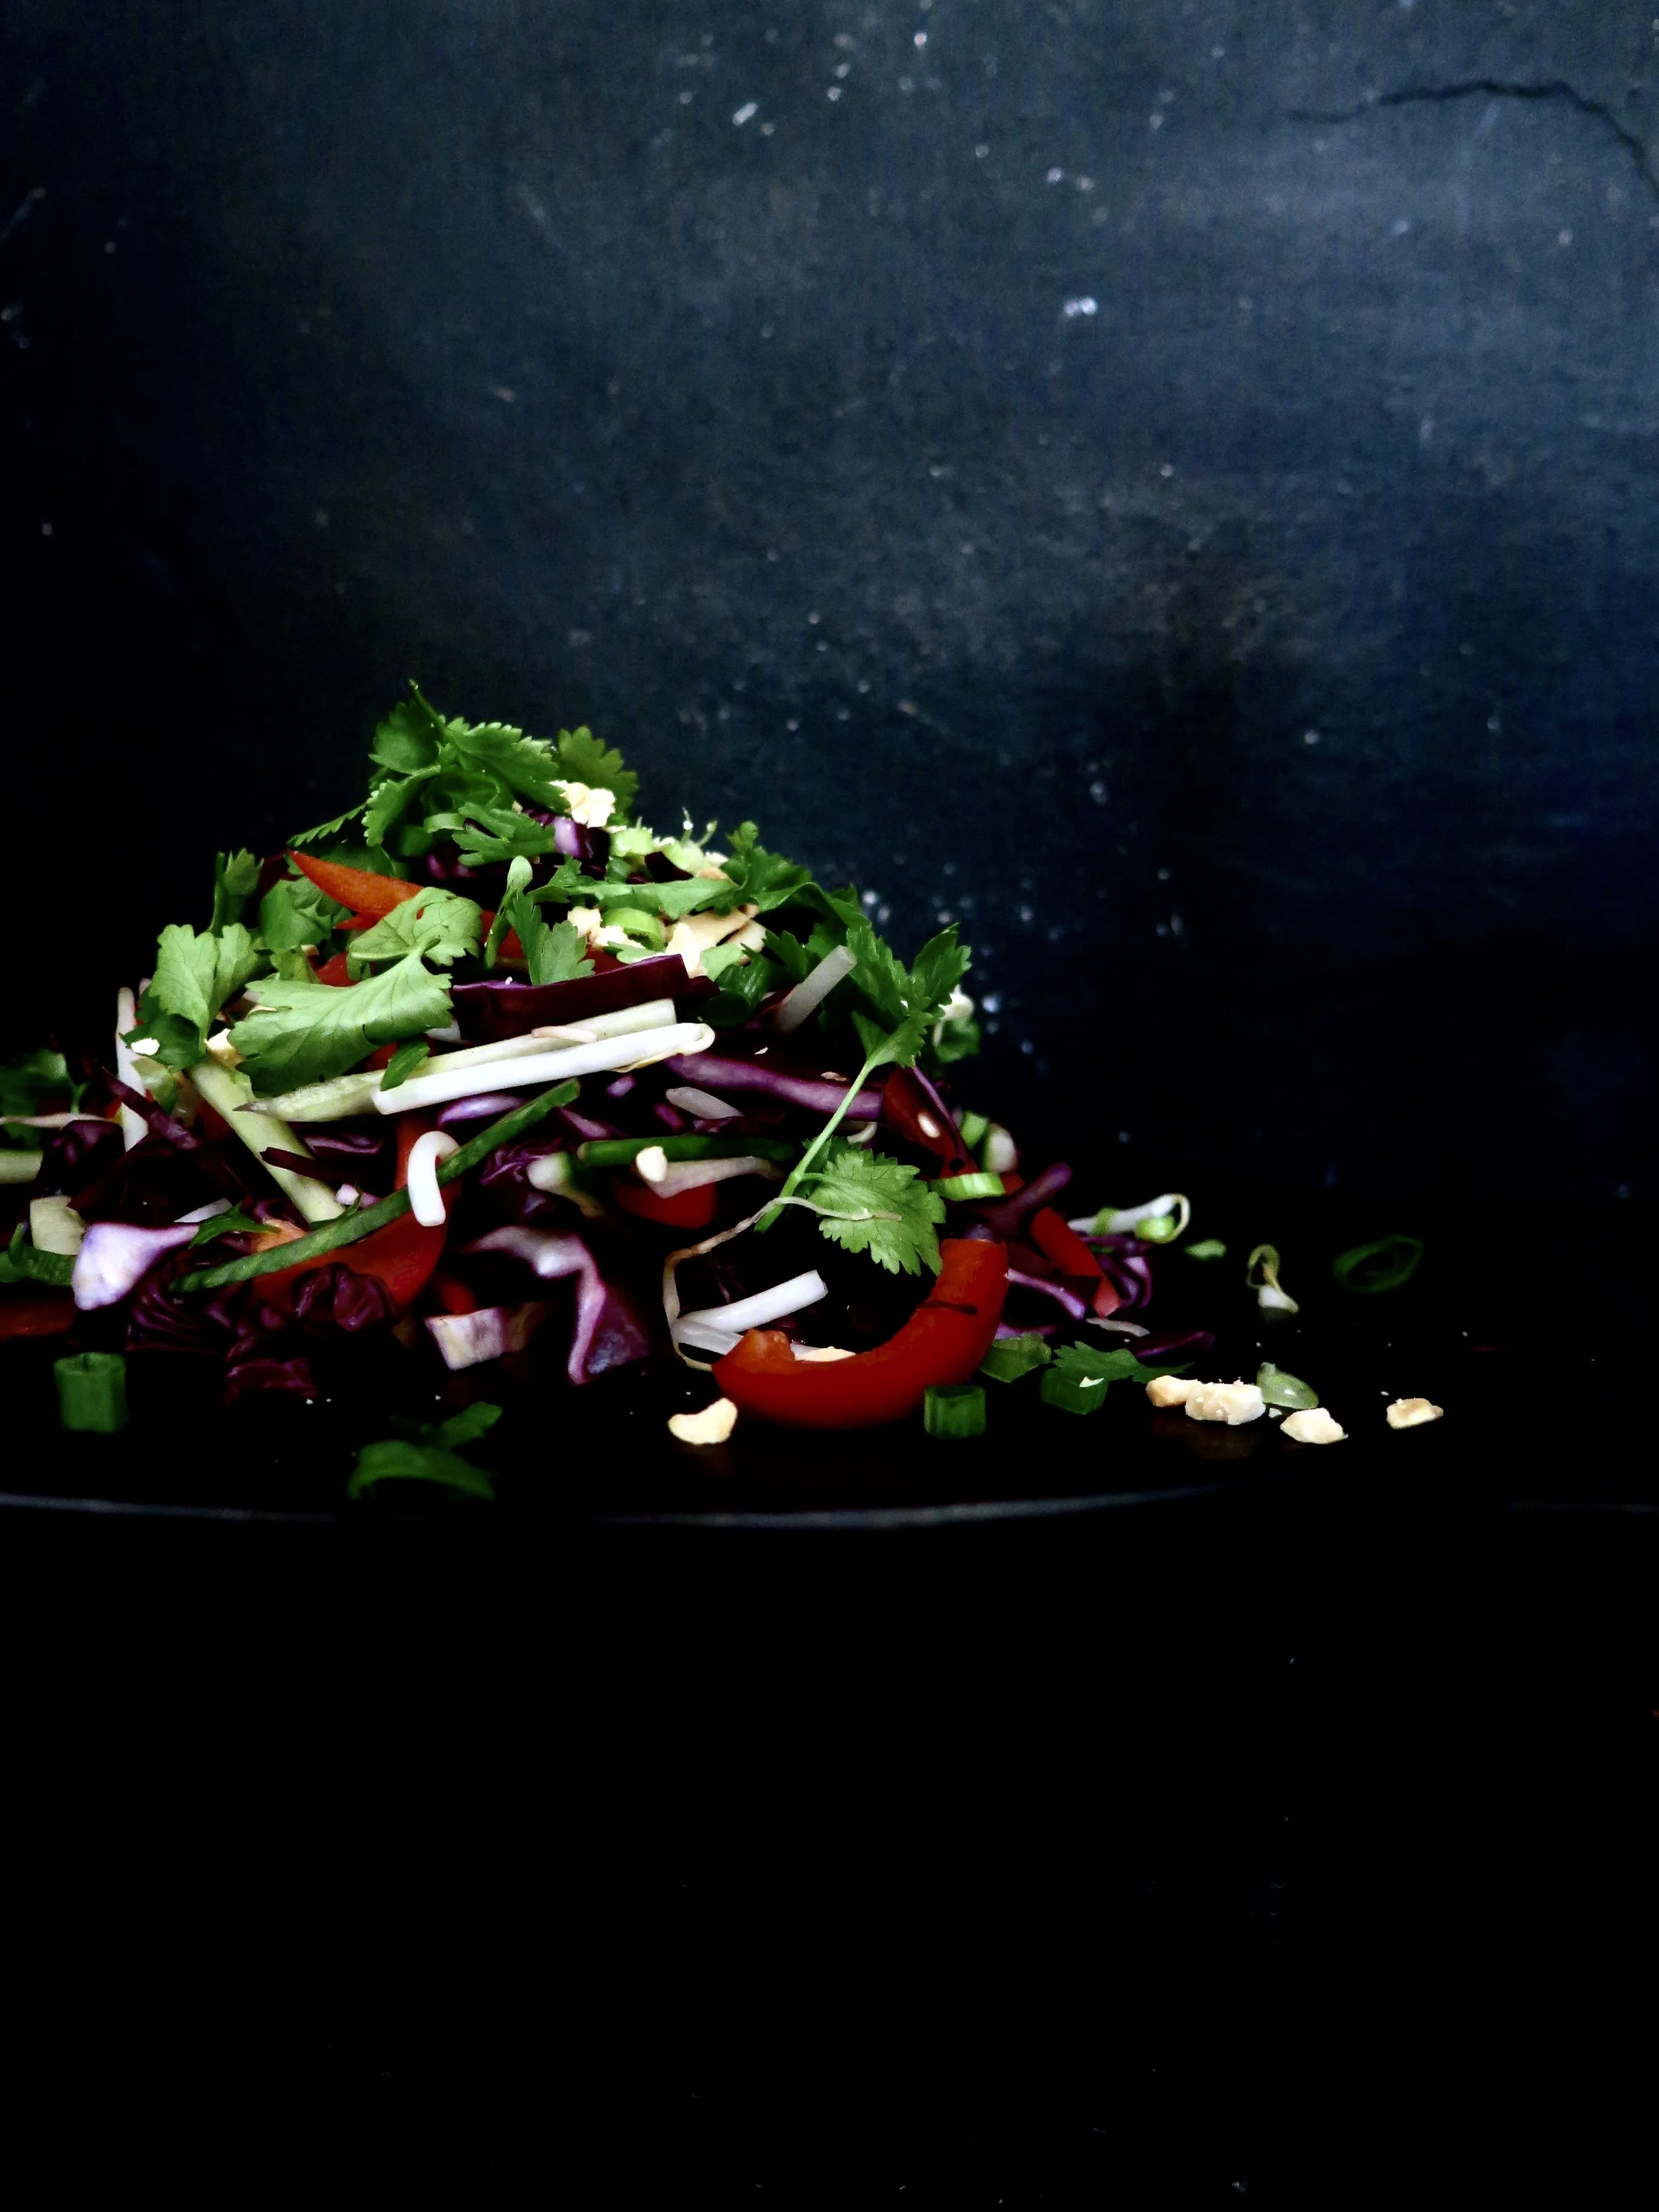
  2. Combine all the salad ingredients apart from the dressing, the chilli (if using), and the extra coriander for garnish.
  3. Mix the dressing ingredients until well combined.
  4. Shortly before serving the salad, mix the salad with the dressing, and sprinkle with the coriander and chilli.

(Serves 4 as an accompaniment)
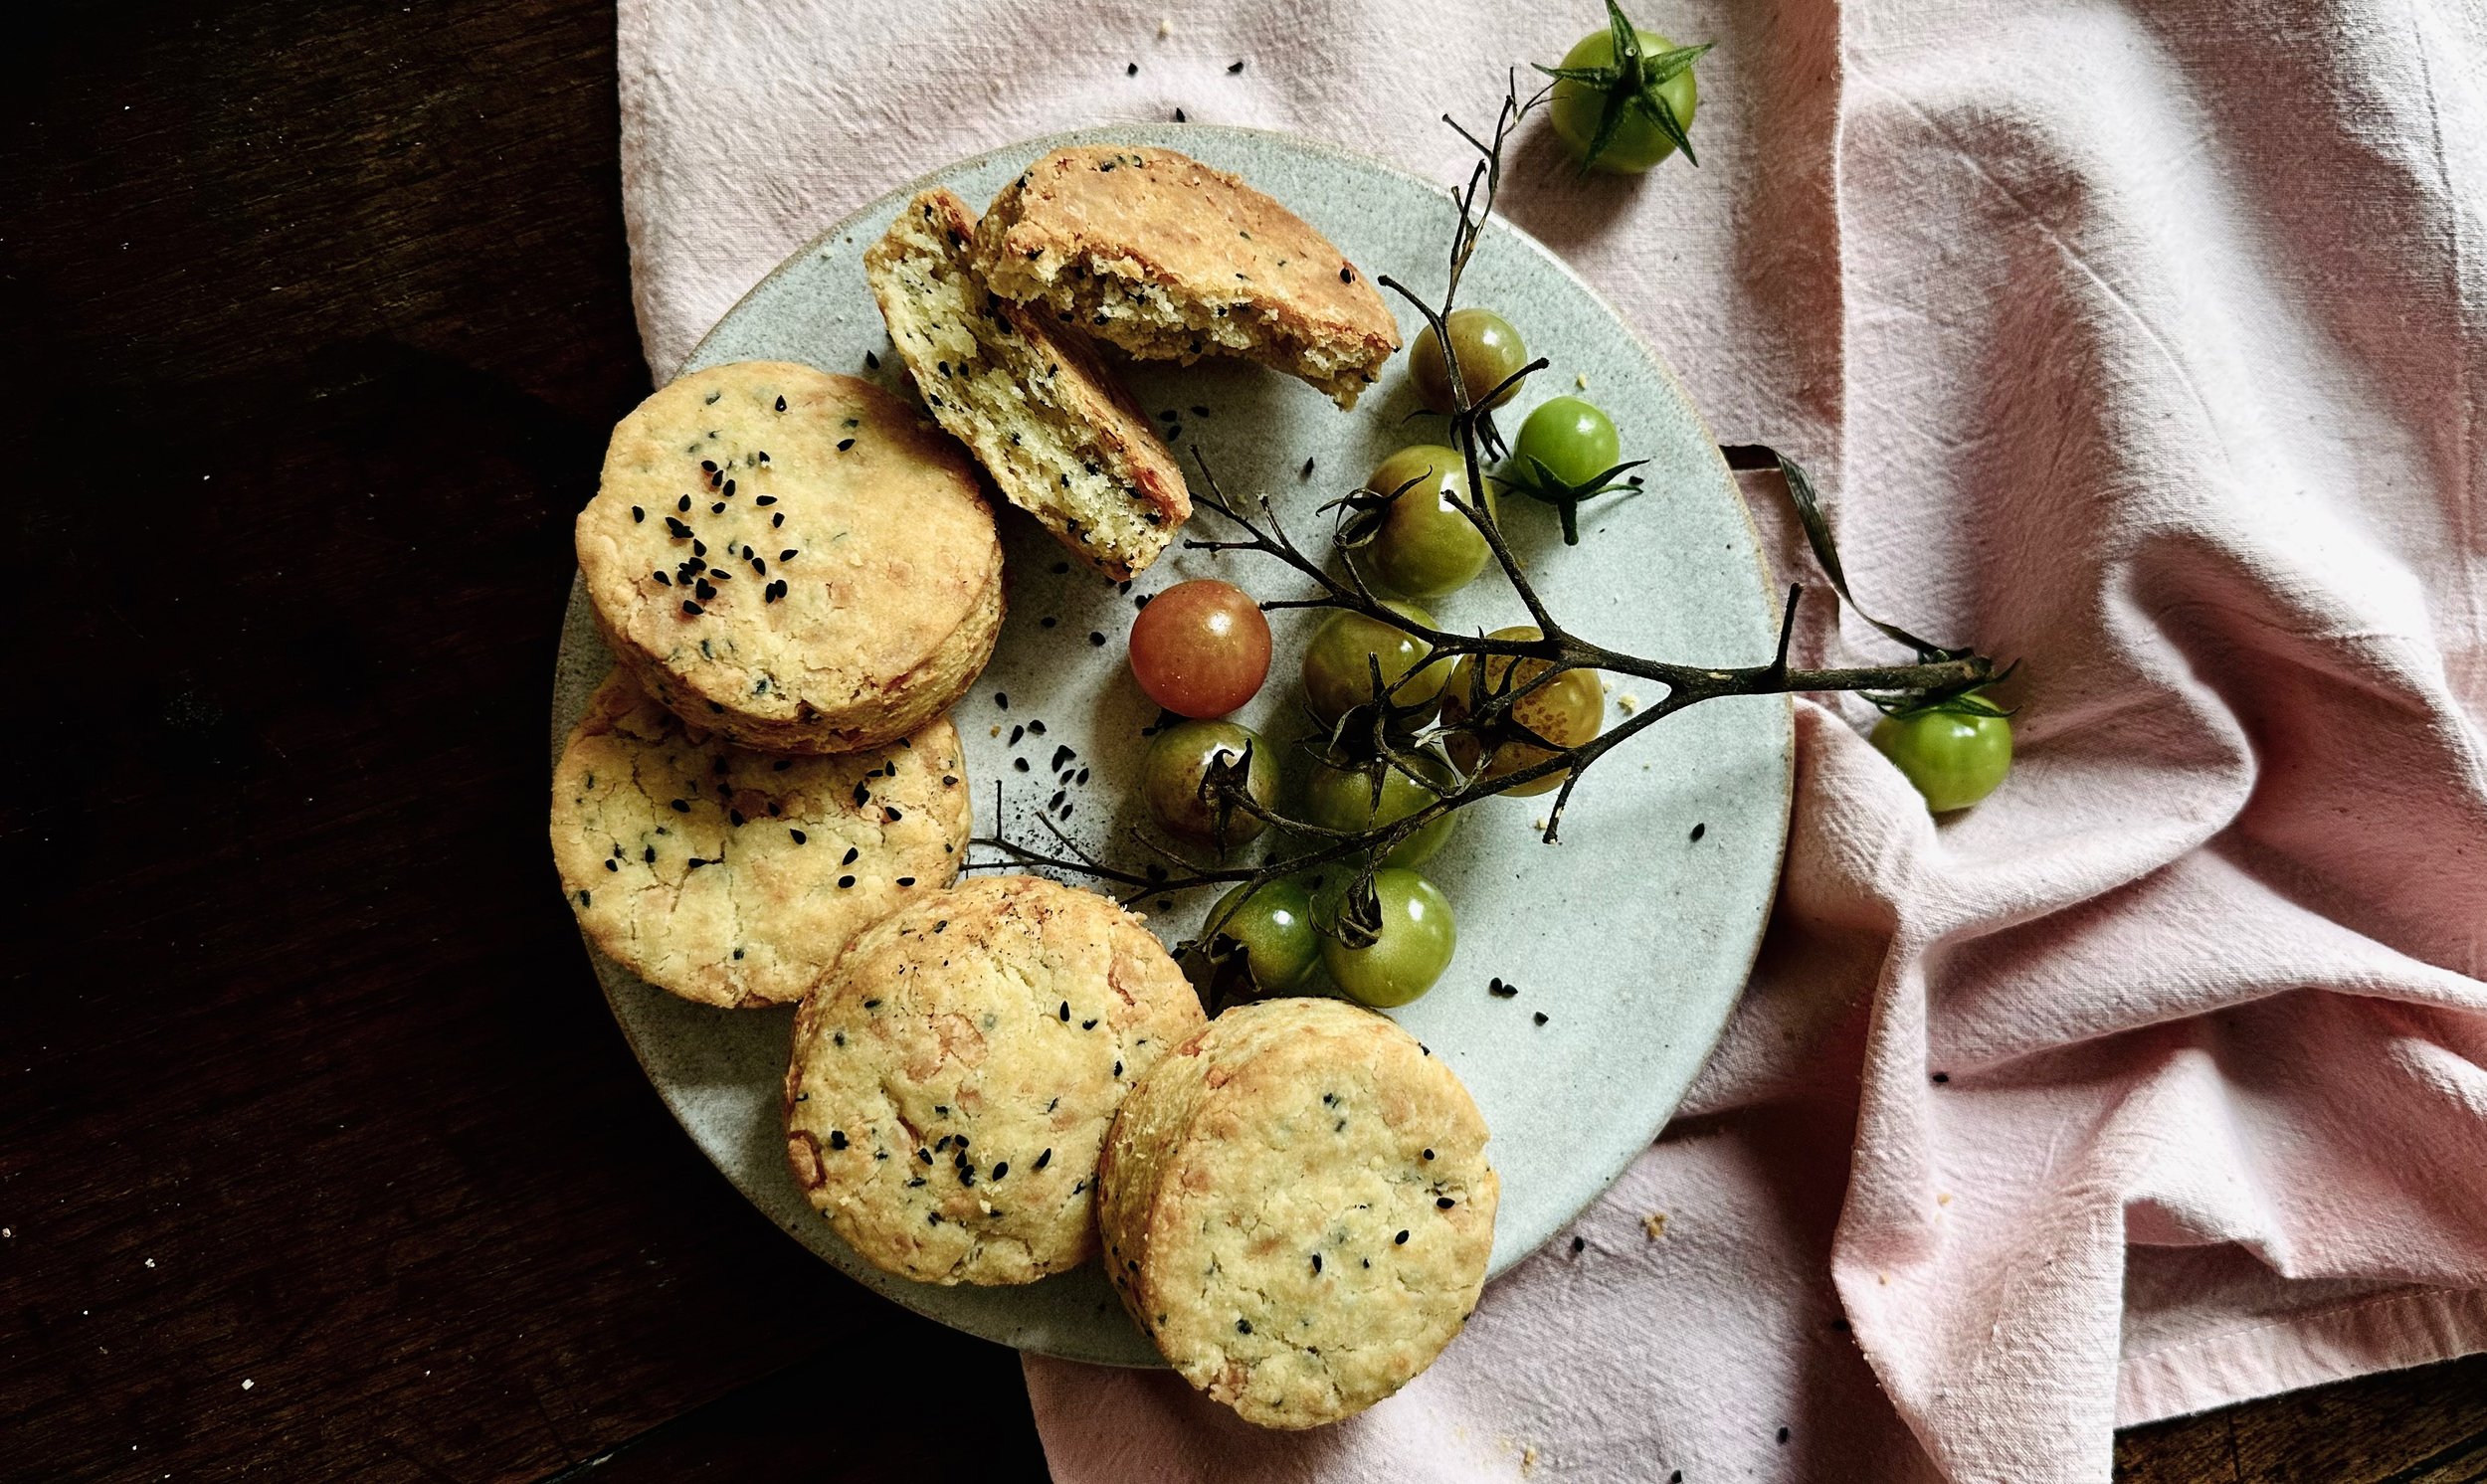
BEWARE GLUTEN-FREE!

1 in 100 people in UK is coeliac .  1 in 20 people in UK is diabetic (http://www.diabetes.org.uk/Documents/Reports/Diabetes-in-the-UK-2012.pdf).

According to the Telegraph, 1 in 5 people is buying gluten-free products, but only 5% of these are buying the products due to coeliac disease.  The most common reasons for a non-coeliac buying the gluten-free products are listed as: “digestive health”, “nutritional value” and “to help me lose weight”.  These consumers are misguided. Everyone who can is cynically taking advantage by jumping aboard the gluten-free bandwagon: the British gluten-free market is worth £238 million annually (Food Standards Agency) and grew by more than 15 per cent last year. In the US, it is worth around $2.6 billion, a growth of 36 per cent since 2006, with predictions that it may double in size in the next two years.

It’s great that the gluten-free options are increasing for those who have coeliac disease, but the products that are tailored specifically to exclude gluten (bread, biscuits, pastas etc.) and targeted at non-coeliac sufferers are actually detrimental to one’s health.

Gluten-free does not mean that a product is ‘virtuous’ or in any way superior to its glutenous counterpart.

Unless you are coeliac, your body needs the vitamin B, iron and folates that are in gluten-containing grains such as barley, spelt and kamut. That is not to say that these should be had in excess, but they should not be entirely avoided.

Gluten-free products which have been made to substitute for the real bread, pasta, biscuits etc. may be worse for you than what they purport to replace: in order to imitate the gluten contained in their counterparts, the products have to be messed around with a lot more, often resulting in a significantly higher level of fat than their “normal” equivalents. For example, the gluten in bread allows it to maintain its shape and softness; to achieve the gluten-free equivalent, manufacturers often use additives like xanthan gum and hydroxypropyl methyl cellulose or corn starch. In addition, extra sugar and fat are often also added to make products more flavoursome.

It is not just the shops that are propagating the gluten-free message, taking advantage of people’s ignorance, but food bloggers and recipe websites are doing it too. The internet is saturated with gluten-free recipes, and more and more cooks are incorporating gluten-free recipes into their books.  Clearly, not a bad thing for coeliac sufferers.  There is, however, no transparency.  The breads that are made in imitation of the glutenous equivalent use a combination of flours.  For example, the Doves Farm’s gluten-free brown flour, with muted-tone, paper bag packaging promoting a wholesome brand image – consists of potato, rice, tapioca buckwheat, carob, sugar beet fibre, and xanthan gum.  Doesn’t sound too bad, you might think.  In fact, these combined ingredients create a product much higher on the Glycaemic Index (GI) than white flour.  The GI is not a fad diet but a measure of the rise in a person's blood sugar level following consumption of a carbohydrate.  The NHS recommends diabetics to have a low GI diet as low GI foods break down more slowly and are less likely to cause a rapid increase in blood sugar levels in contrast with high GI foods.  A low GI lifestyle is not solely beneficial for diabetics but for everyone.    Carbohydrates with high GI cause glucose and insulin levels to surge.  The body releases the hormone insulin to regulate blood sugar levels. If sugar is not quickly used for energy, insulin removes it from the blood, and it is then converted into triglycerides in the liver. These triglycerides can then be stored as body fat.  Standard white bread has a high GI of 71 on average.  Gluten-free white bread has a higher GI of 79.  Clearly, GI isn’t always a measure of other benefits that are derived from a product, but the fact that shops, companies, bakeries and bloggers are promoting gluten-free products as a virtuous substitute is deeply misleading – they are, in fact, pushing a product that spikes the levels of glucose in a consumer’s blood, causing fat gain, aiding the onset of obesity and type 2 diabetes.

So the question is why is “low GI” not trending? Why is #glutenfree posted on almost 3,000,000 photos on Instagram, and #lowGI only 18,000? Gluten-free products are not necessarily beneficial for your health. Surely there should be greater focus on the GI factor as well as greater transparency in relation to gluten-free products.
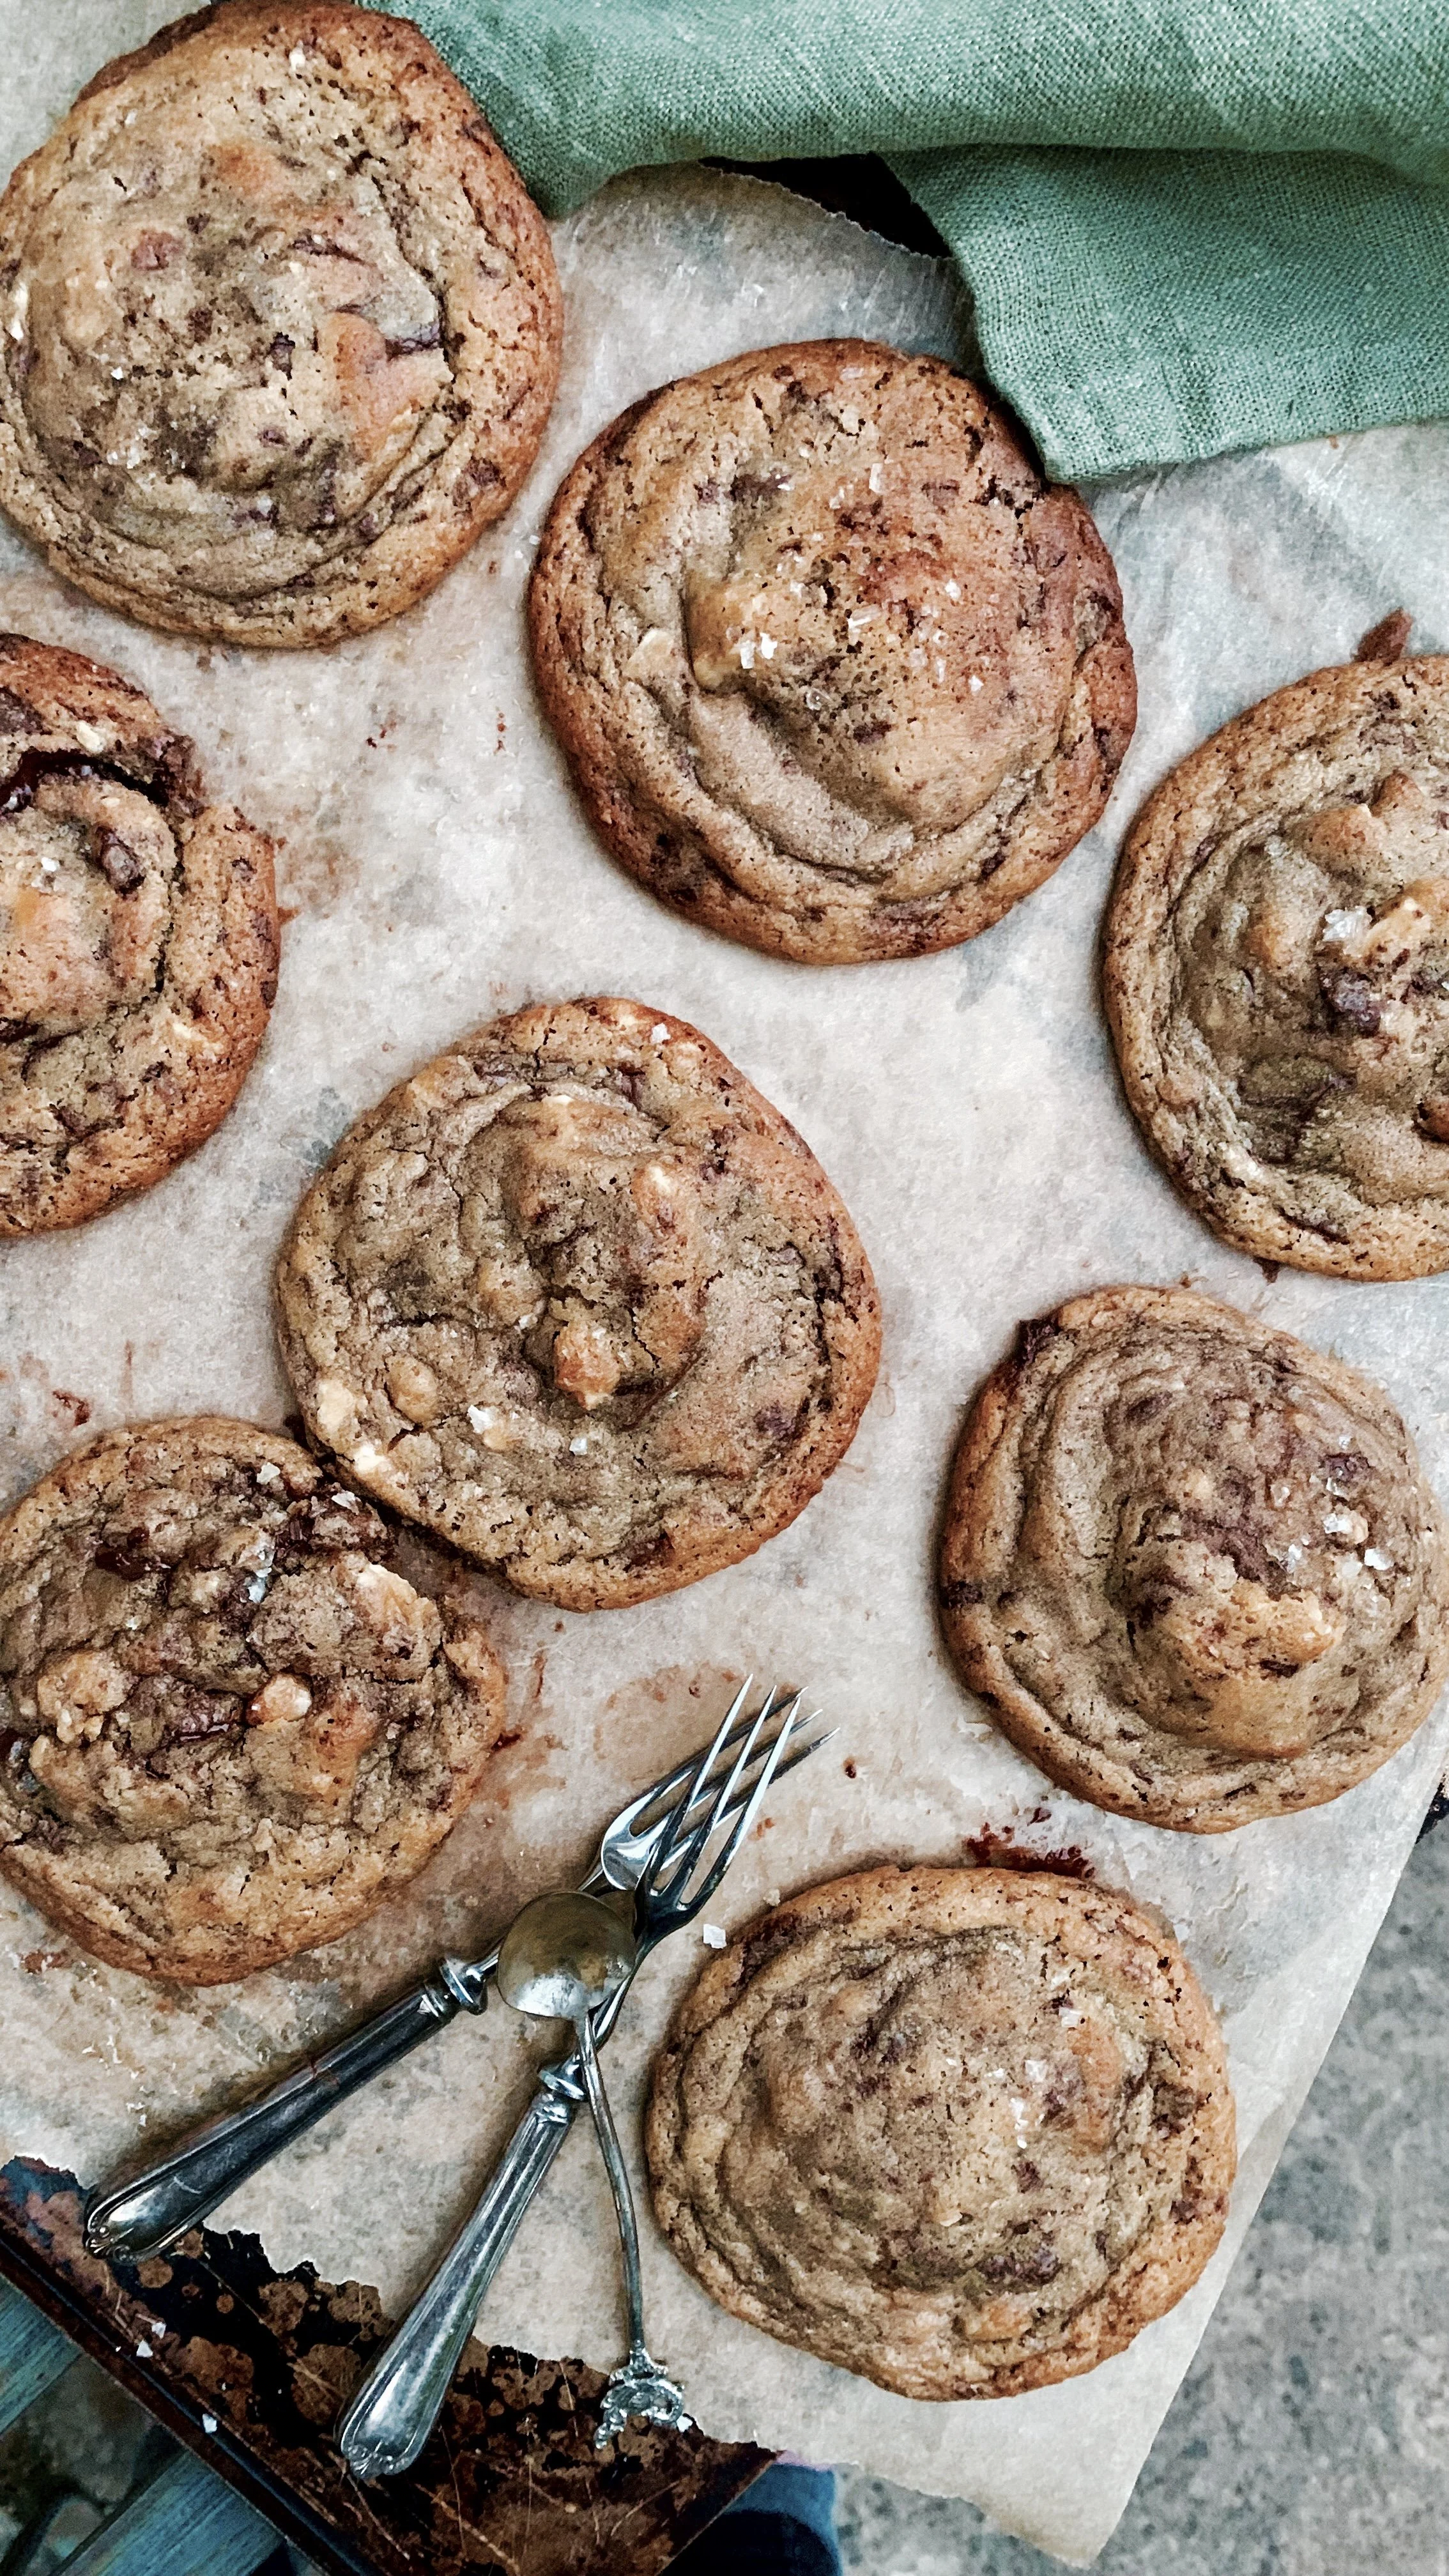
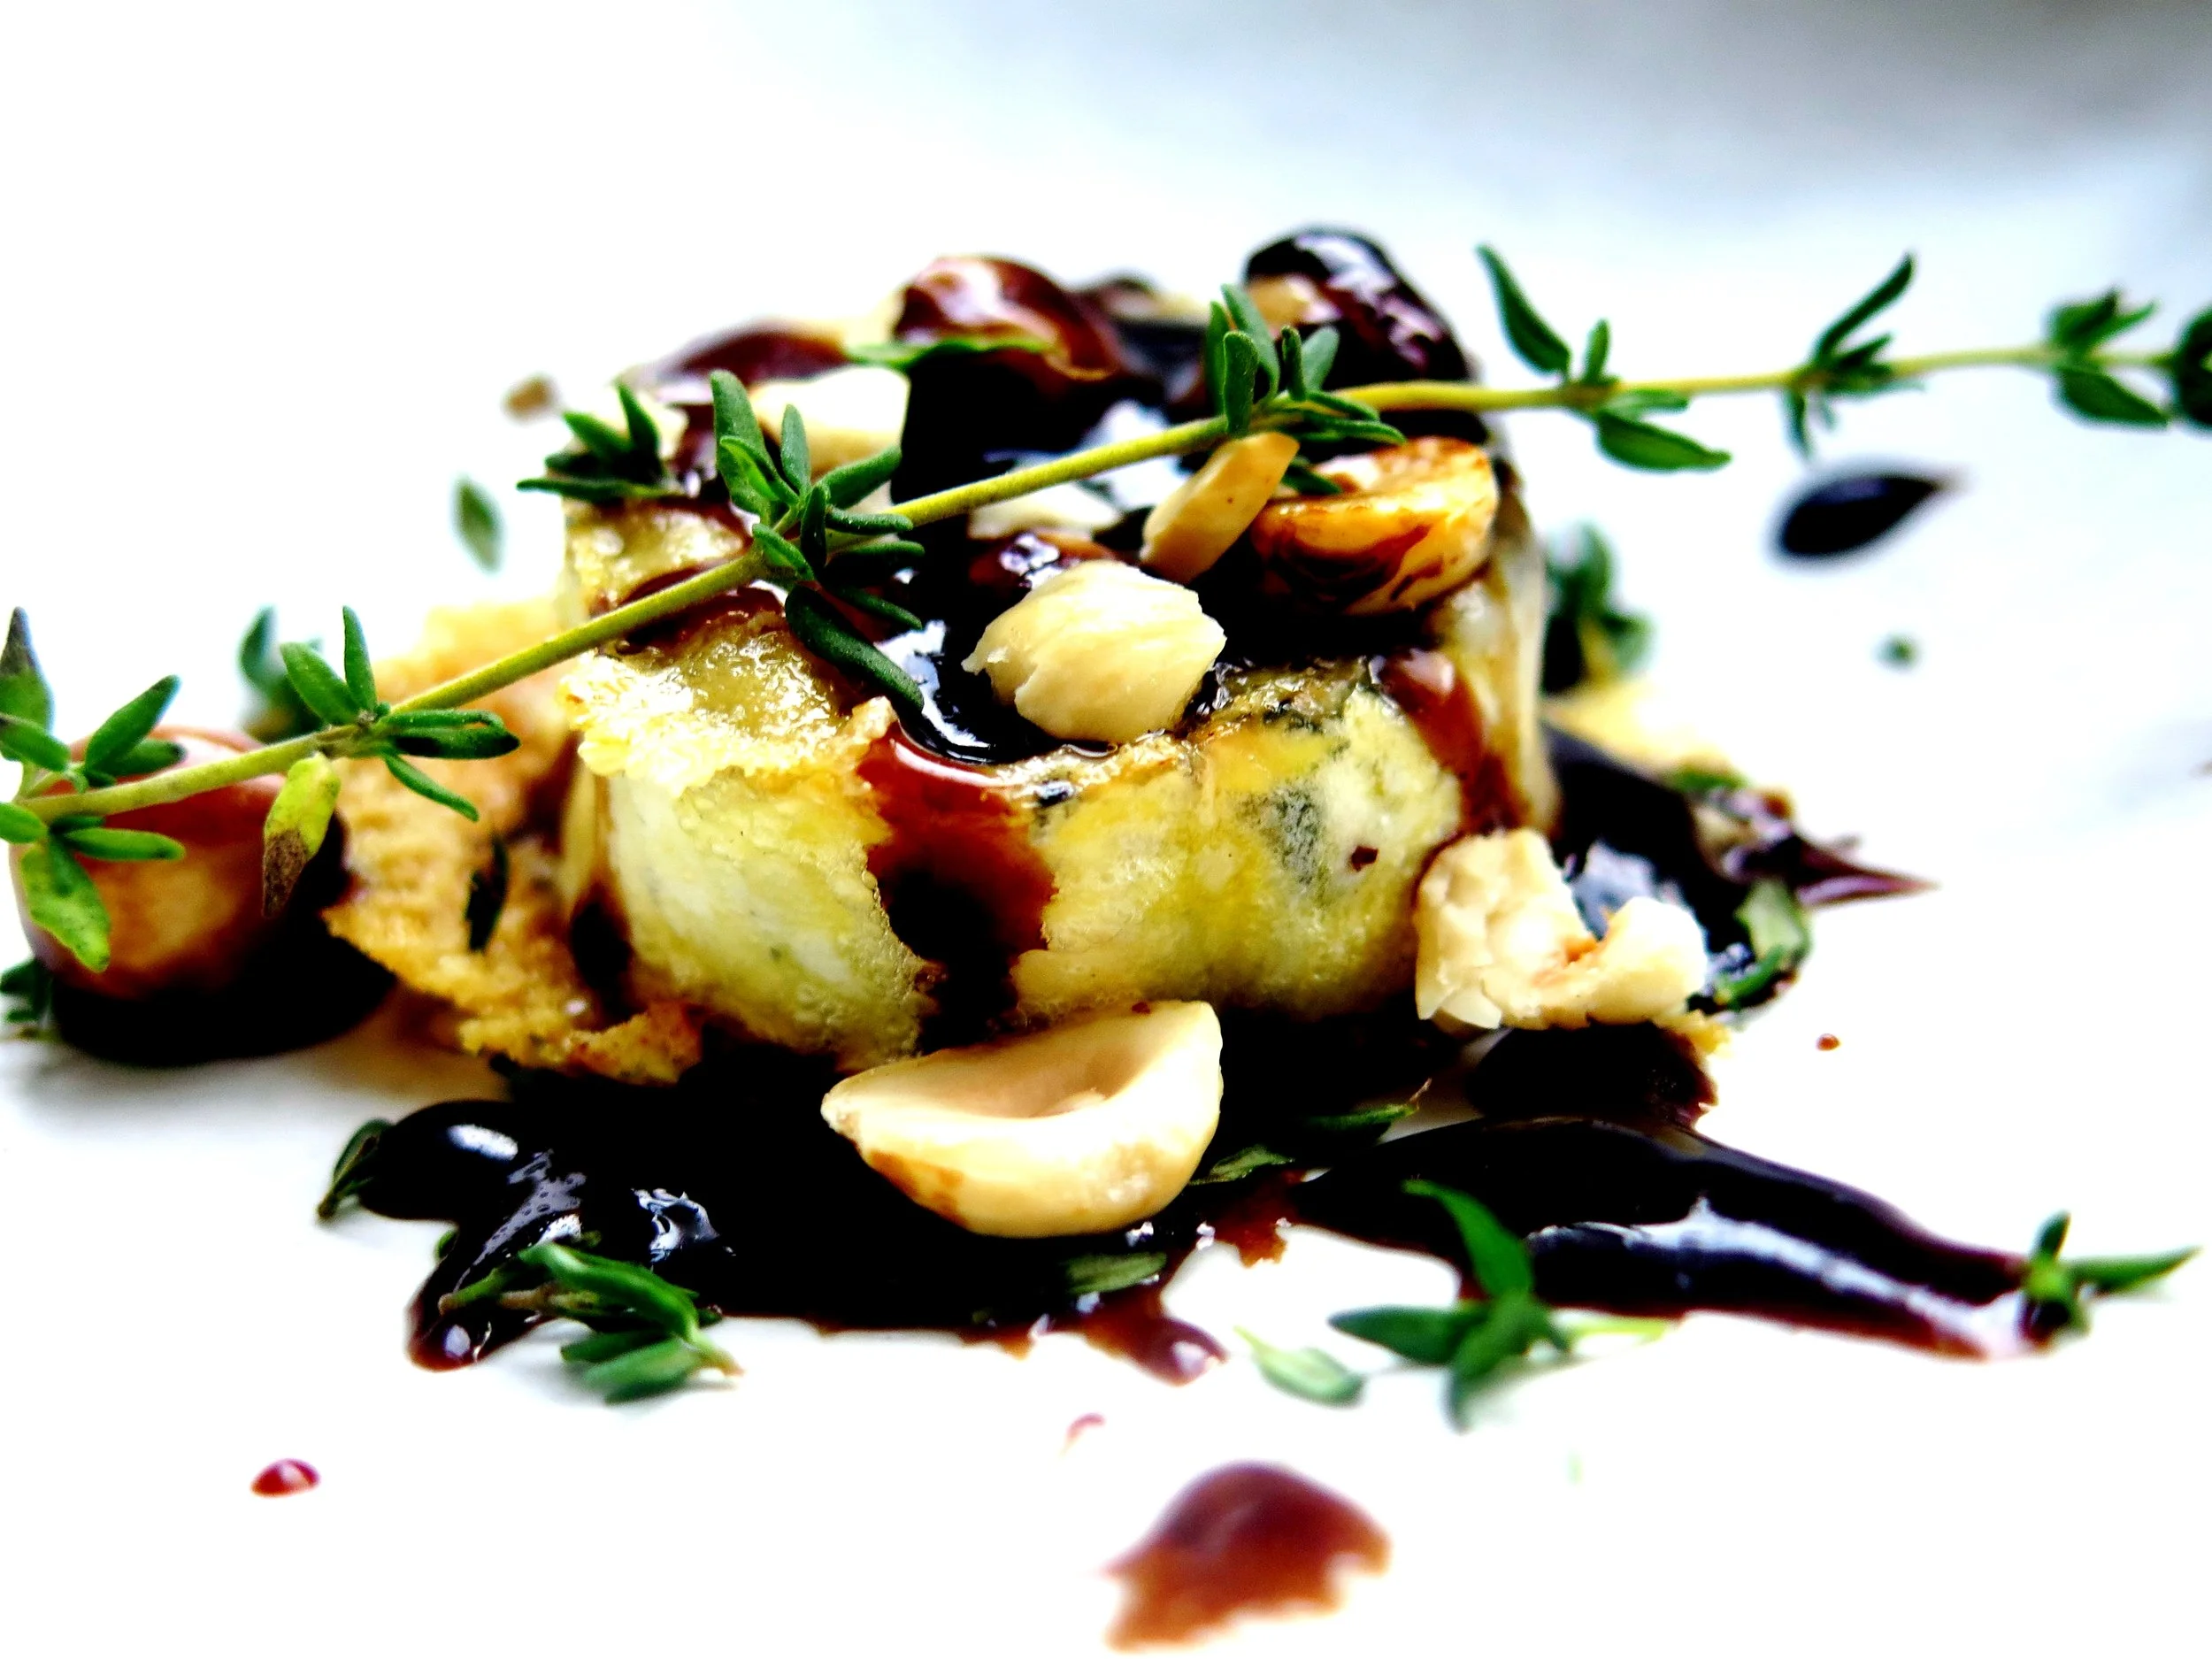
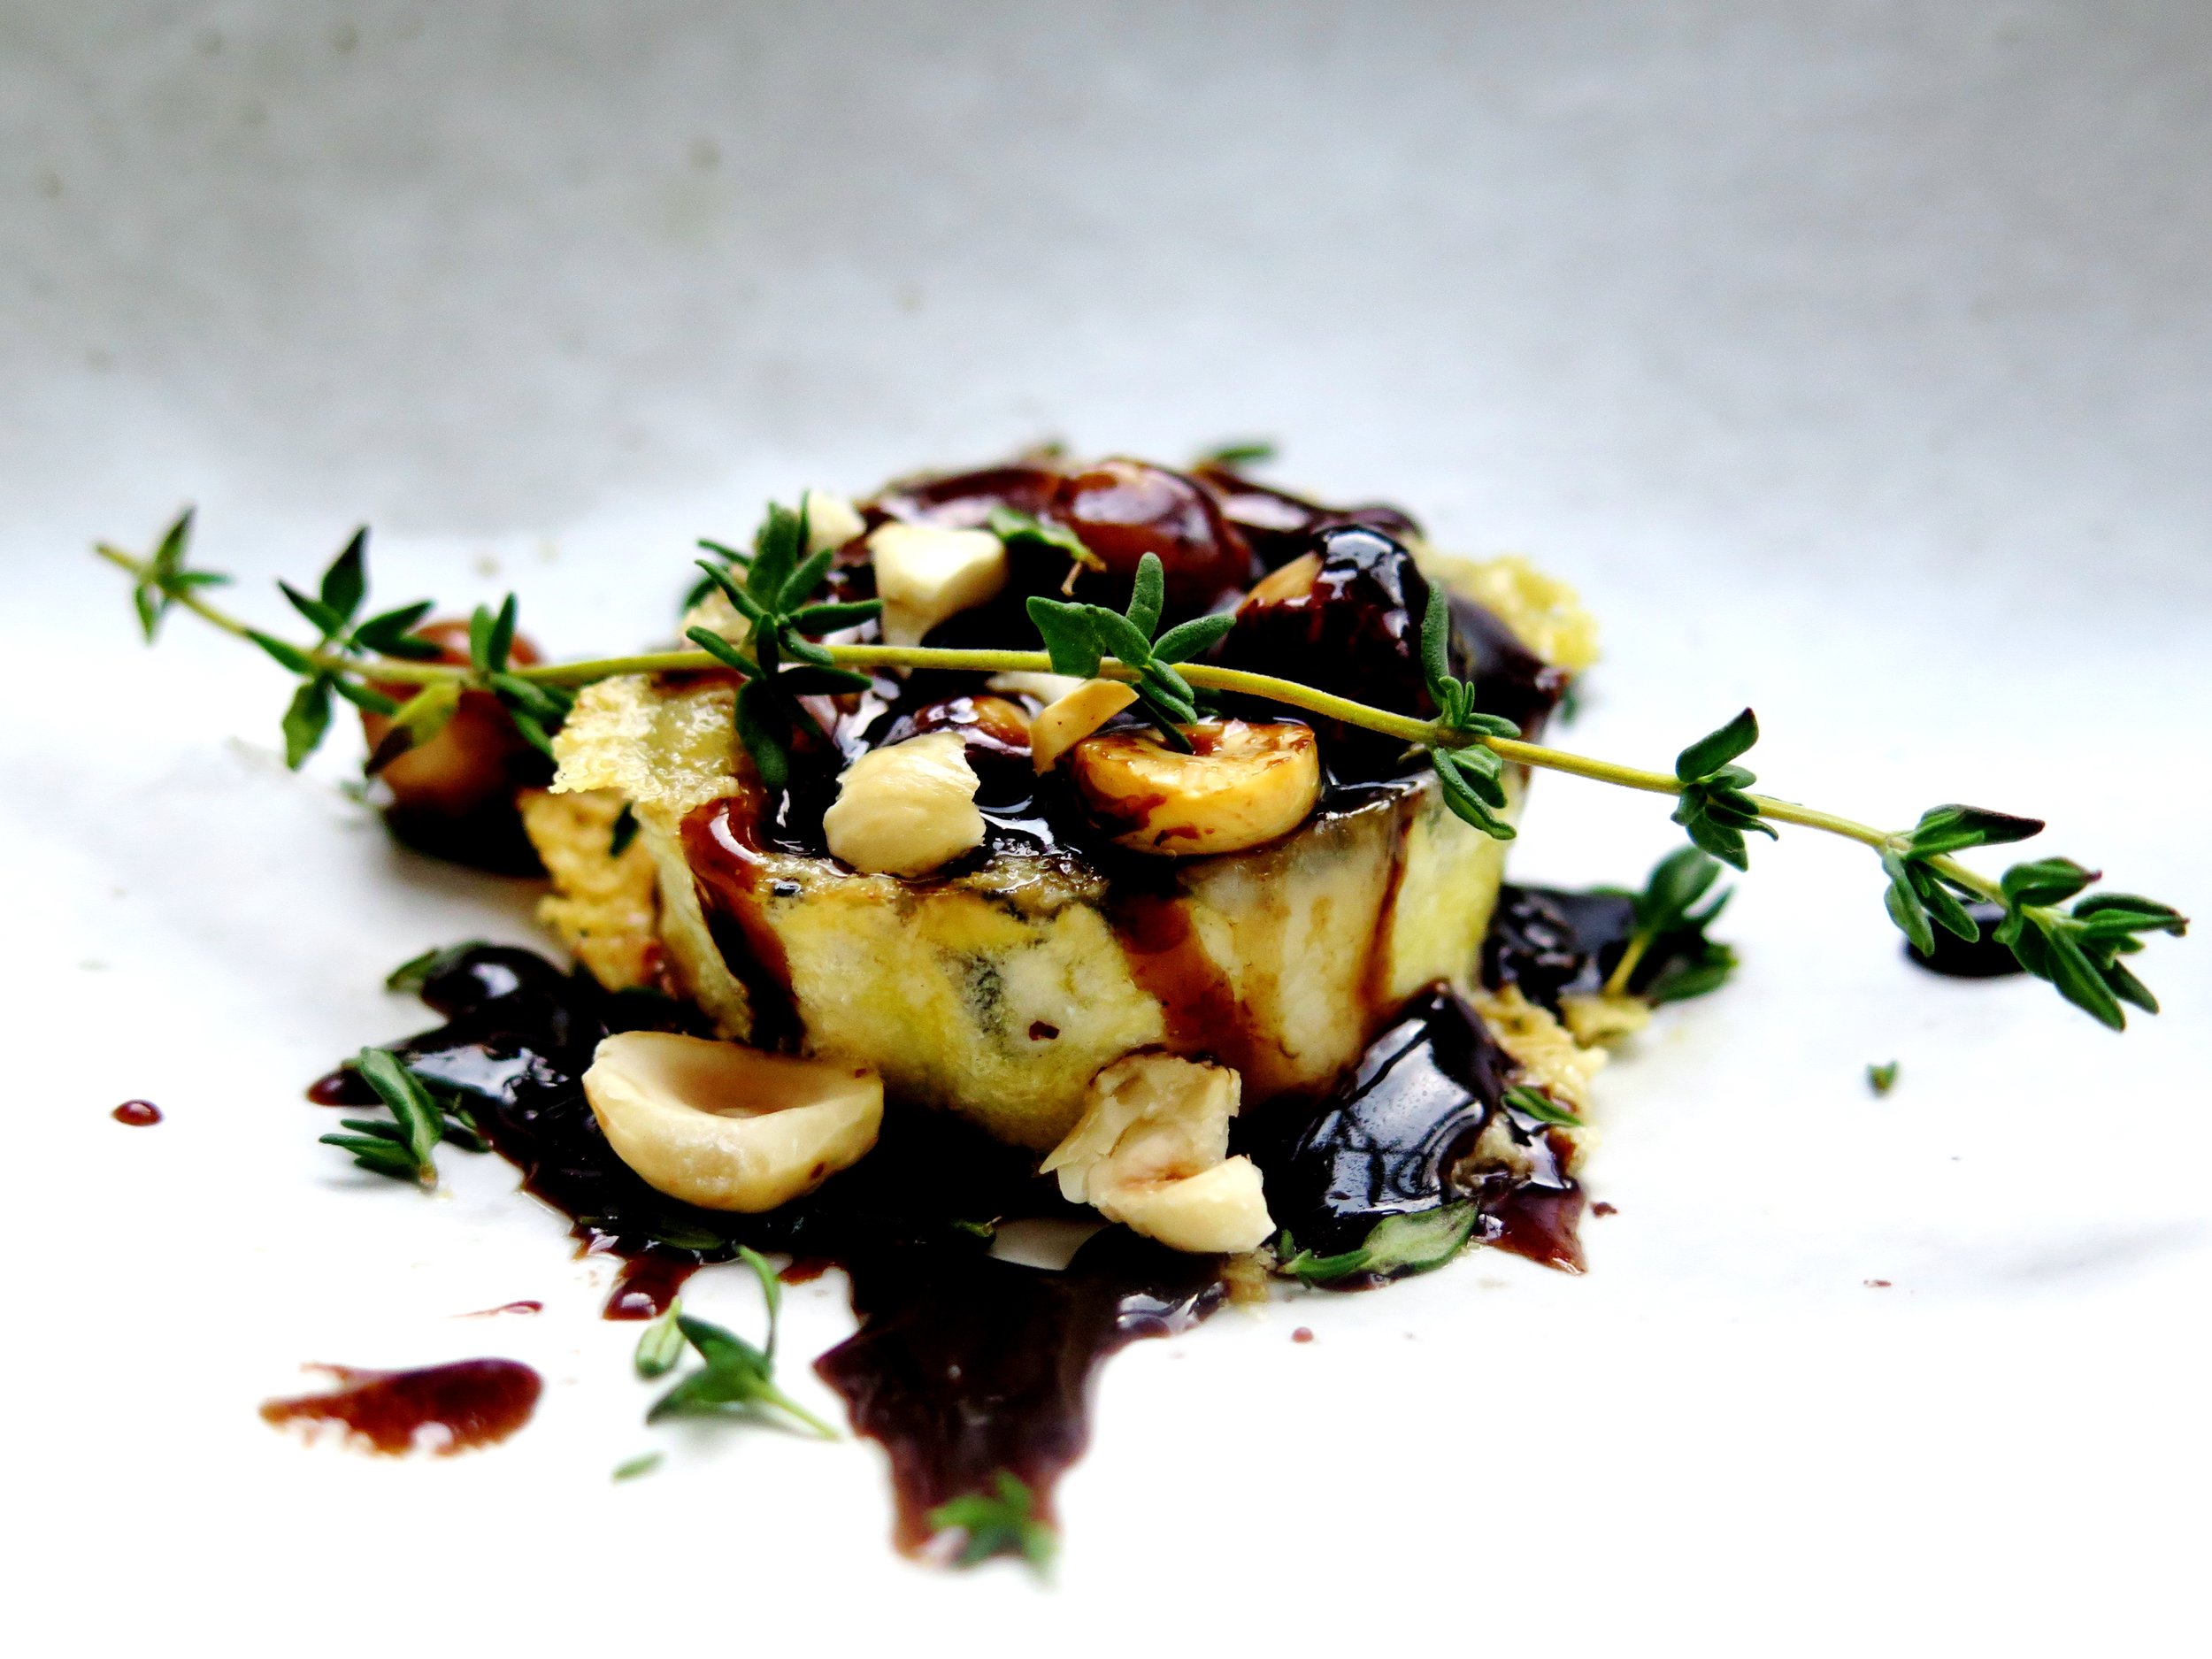
3 Comments

Red Pepper Pesto & The Ultimate Sandwich: Mediterranean style

1 Comment

Red Pepper Pesto & The Ultimate Sandwich: Mediterranean style

focaccia3-2.jpg

focaccia2 (2) It started in exam term in my first year when everyone’s eyes were bloodshot and their eyelids quivering with panic and fear. The cool, white-lit aisles of M&S became a solace – I didn’t even need to buy anything. Drawn inexorably to my oasis, my first trip one day led me to a jar of red pepper pesto. I plunged a spoon into the glistening depths as soon as I made it back to my room, and in the grip of revision lunacy, it made sense to finish the jar - straight, without any interfering bread or cracker-like vehicle, and as fast as possible. It was savoury and creamy, but when the jar was empty and I stopped to analyse what I had just consumed, it was clear to me that the pesto was way too oily. I began to experiment with my own version, and I concluded that adding oil is entirely unnecessary. I think my version tastes fresh, summery, and light, with a hint of smokiness from the char grilled peppers. You can, of course, grill your own, but there are ready-made grilled peppers in jars that are remarkably good. It is incredibly easy to make: just one step, especially if you’re not going to the trouble of grilling your own peppers. It’s also versatile, and can be swirled into soups, couscous, quinoa, salads and pasta, and can be used as a mezze dip.

red pepper pesto The Mediterranean focaccia sandwich is the perfect platform for the red pepper pesto – it expands and rounds out the flavours of the filling ingredients, adding depth to the sandwich.

focacciawhole1 (2)

Of course, freshly baked, homemade bread is a superior breed to most shop-bought equivalents, and really isn’t difficult to make. It’s not even time-consuming as it gets on with its own activities while you get on with yours. A little bit of punching down (of the dough) now and then is really not that onerous, and the smell of baking bread is well-documented.

focacciawhol3 (2)

You can fill it with whatever Mediterranean, or indeed other, ingredients you wish.

focaccia3 (2)

I loaded mine with roasted tomatoes, olives, mozzarella and torn basil, and of course the red pepper pesto. This is not just a sandwich…this is a meal.

IMG_5837

Red pepper pesto

Ingredients

10g garlic (4 cloves) peeled and crushed 40g pine nuts 40g basil (leaves & stalks) 40g parmesan, grated 3 roasted red peppers from a jar (200g) 2 tbsp sun dried tomato paste 1 tsp lemon juice ¼ tsp salt

Method

In a blender, whizz all the pesto ingredients together until combined but there is still some texture.


Focaccia (Adapted from Gail’s Artisan Bakery Cookbook)

Ingredients

Dough:

500g strong white bread flour 330ml room temperature water 50ml extra virgin olive oil 2 tsp salt 1 tsp caster sugar 10g fresh yeast or 5g dried active yeast 45g clear honey Extra oil and flour for greasing and dusting tin

Topping:

150ml olive oil 8 garlic cloves, crushed 3 sprigs fresh rosemary ½ tsp salt

1 tin 5cm x 24cm x 34cm, lined with baking parchment

Method

1. If using fresh yeast, cream it together with caster sugar in a bowl. It should turn creamy. If using dry yeast, add it in with rest of ingredients. 2. Sift flour into bowl of stand mixer fixed with dough hook attachment. Add rest of ingredients including the yeast. 3. Knead on slow speed for approximately 8 minutes, until dough is smooth, soft and springy. 4. Swirl the dough in an oiled bowl until coated. Cover with cling film and leave to rise in a warm place. 5. In the meantime, make the topping by mixing the oil with the salt and garlic, and allow it to steep. 6. After 45 minutes of rising, knock the dough down and cover it again with cling film. 7. Leave for another 45 minutes. Knock down, and leave for another 45 minutes. Knock down again. 8. Leave it to rise for a further 45 minutes, then stretch the dough to fit the tin and make dimples in the dough with your forefinger. Paint the dough with the garlic-infused oil, and sprinkle with rosemary needles. 9. Preheat the oven to 200°C. Leave the dough to rise for 20 minutes. 10. Bake for ten minutes, then reduce the heat to 180°C and bake for a further 10-15 minutes until golden and the bread is soft and springy. Remove the bread from the tin to check that the base of the bread is crisp and golden. If it isn’t, bake for a further five minutes or so. 11. Once the bread is baked, paint it again with the remainder of the garlic-infused olive oil and sprinkle with salt. 12. Place on wire rack to cool, or serve immediately.

IMG_5819

1 Comment